
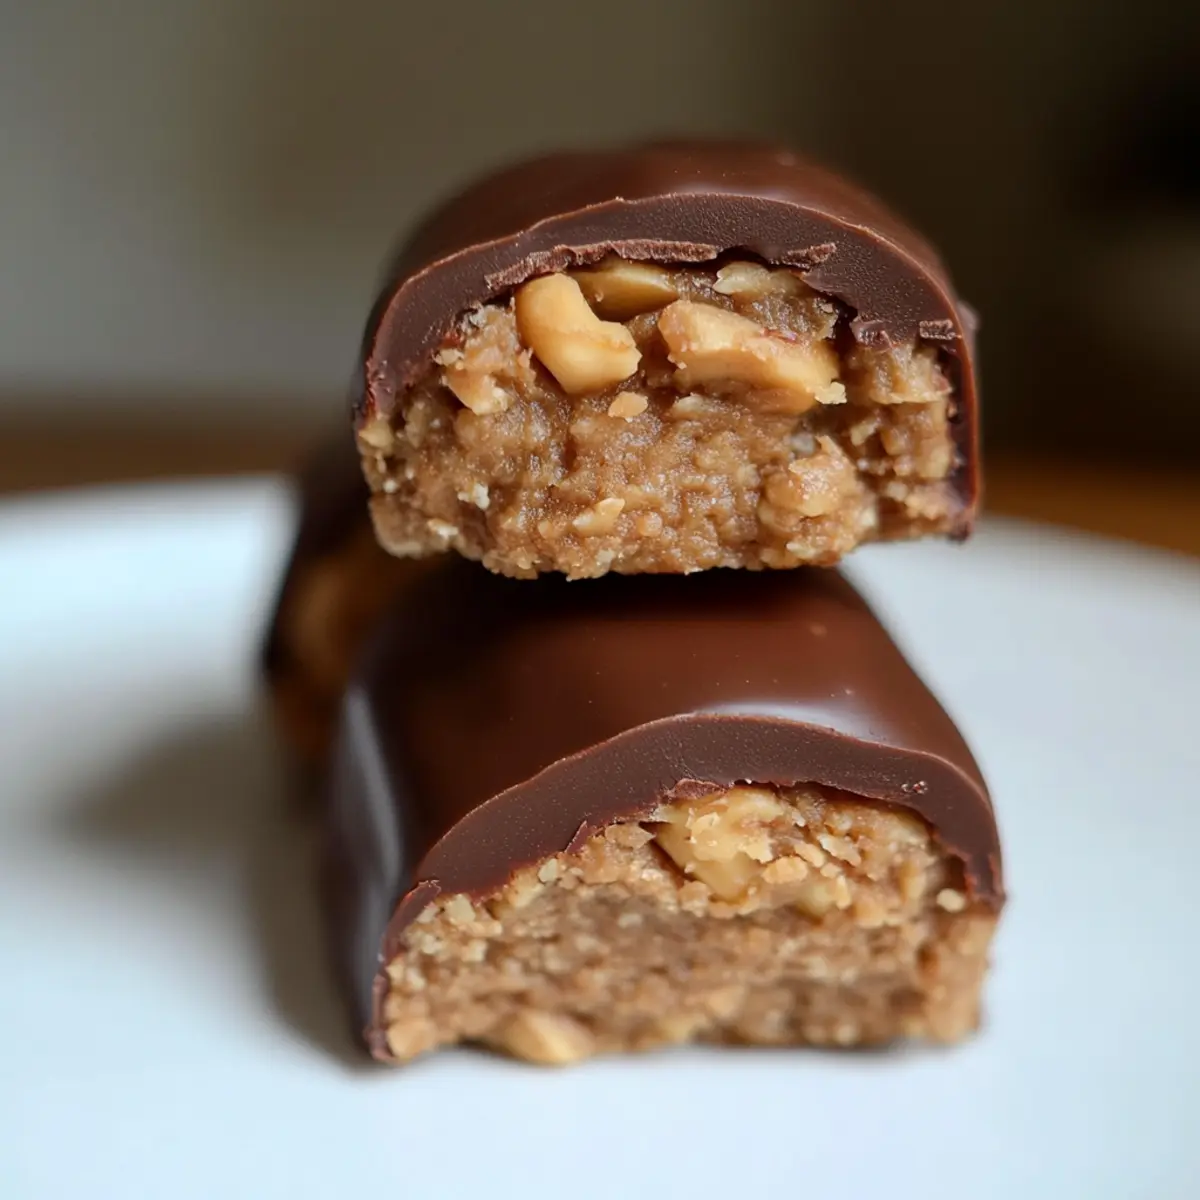
There’s nothing quite like the aroma of peanut butter swirling through the kitchen, a comforting scent that promises something special. I recently whipped up a batch of No-Bake Peanut Butter Protein Bars, and let me tell you, it’s a game-changer for weeknight snacking! These bars are not only quick to prepare but also offer a healthy, satisfying option to keep your energy levels high. Made with rich chocolate and wholesome ingredients, they deliver a chewy texture that’s utterly delightful while packing a protein punch. Plus, they’re completely customizable — perfect for whatever mood you’re in or ingredients you have on hand. Ready to discover how easy it is to indulge in this deliciousness? Let’s dive in!
Why Are These Bars a Must-Make?
Quick and Simple: You’ll love how these no-bake peanut butter protein bars come together in minutes! Perfect for a busy lifestyle.
Flavor-Packed Delight: The rich combination of creamy peanut butter and chocolate makes each bite utterly satisfying — who can resist that?
Customizable Perfection: Want to switch it up? Add chocolate chips or colorful sprinkles for a fun twist. They’re suited for any taste!
Nutrient Dense: High in protein and fiber while low in sugar, these bars are a guilt-free indulgence. Try them as a healthy dessert or a quick breakfast.
Crowd Favorite: Impress friends and family with this homemade treat, and watch them disappear faster than fast food!
Peanut Butter Protein Bars Ingredients
For the Base
• Oat Flour – Provides structure and chewiness; substitute by blending whole oats for a similar texture.
• Nut/Seed Butter – A source of healthy fats and protein; almond or sunflower seed butter works well for allergies.
• Protein Powder – Adds a punch of protein; use vanilla-flavored for a subtly sweet taste.
For Sweetness
• Granulated Sweetener – Sweetens the bars naturally; consider monk fruit or erythritol for a low-calorie option.
For Coating
• Chocolate (for coating) – Enhances the richness; choose dark or milk chocolate based on your preference.
For Liquid
• Almond Milk – Keeps the dough moist; feel free to swap for any milk of choice, including oat or soy.
These peanut butter protein bars are a delightful, nutritious treat that brings joy to snacking while keeping things healthy!
Step‑by‑Step Instructions for Peanut Butter Protein Bars
Step 1: Mix Dry Ingredients
In a large mixing bowl, combine 1 cup of oat flour, 1 cup of your choice of nut or seed butter, 1 scoop of protein powder, and ¼ cup of your selected granulated sweetener. Using a sturdy spoon or spatula, mix thoroughly for about 1-2 minutes until all dry ingredients are well-blended and there are no clumps.
Step 2: Add Liquid
Gradually pour in ¼ cup of almond milk while continuously stirring the mixture. This helps to create a firm dough—aim for the texture of playdough. If the mixture feels too crumbly, add an additional tablespoon of almond milk at a time until it holds together well, which should take about 2-3 minutes.
Step 3: Shape Bars
Once the mixture is well-combined, scoop tablespoon-sized portions and roll them into balls or flatten them into bars according to your preference. Place each shaped bar or ball onto a parchment-lined tray, making sure they are spaced apart. This process should take around 5 minutes to ensure even sizes for the peanut butter protein bars.
Step 4: Prepare Chocolate Coating
In a microwave-safe bowl or using a double boiler, melt 1 cup of chocolate until smooth. If using a microwave, heat in 30-second intervals, stirring in between to prevent burning. The melted chocolate should have a glossy appearance and a fluid consistency, which typically takes about 1-2 minutes of total heating time.
Step 5: Coat Bars
Using a fork, dip each molded bar into the melted chocolate, ensuring it is well-coated, and shake off any excess. Place the coated bars back onto the lined tray. Continue this process until all the bars are covered in chocolate, making sure they are spread out to avoid sticking together. This step may take about 5-7 minutes.
Step 6: Chill
Refrigerate the coated peanut butter protein bars for 10-15 minutes, or until the chocolate has completely hardened and feels firm to the touch. This cooling will help the chocolate set properly, creating a delightful texture. You can check after 10 minutes to see how it’s firming up.
Step 7: Serve and Enjoy
Once the chocolates have set, remove the bars from the fridge and gently peel them off the parchment paper. These no-bake peanut butter protein bars are now ready to be enjoyed as a nutritious snack or dessert. Store any leftovers in an airtight container in the fridge for up to a week!
Make Ahead Options
These No-Bake Peanut Butter Protein Bars are fantastic for meal prep! You can make the base mixture up to 24 hours in advance, storing it tightly covered in the fridge to maintain its freshness. Simply shape the bars and allow them to chill for 10-15 minutes until the chocolate sets before serving. If you’re looking to enjoy these bars later in the week, you can coat and slice them, then refrigerate them in an airtight container for up to 3 days. To serve, simply pull them out of the fridge and enjoy a delicious, nutritious snack without any extra work! They’ll be just as delightful and satisfying!
Peanut Butter Protein Bars Variations
Let your creativity run wild with these scrumptious twists on peanut butter protein bars. Your taste buds will thank you!
- Dairy-Free: Substitute the chocolate coating with dairy-free dark chocolate chips for a vegan-friendly treat.
- Nut-Free: Replace peanut butter with sunflower seed butter for a nut-free option without sacrificing flavor.
- Chocolate Chip: Stir in ½ cup of chocolate chips to the mixture before shaping for extra gooeyness and sweetness.
- Birthday Cake Flavor: Add colorful sprinkles in the dough for a festive touch that adds joy to your snacking experience.
- High-Protein Boost: Mix in an additional scoop of protein powder for an extra protein punch, perfect for post-workout fuel. Consider pairing these with a delicious High Protein Beef for a complete meal!
- Fruit Flavors: Fold in chopped dried fruits like cranberries or apricots for a burst of fruity goodness in every bite.
- Cocoa Bliss: Substitute a portion of oat flour with cocoa powder for a chocolatey version that will satisfy any chocolate lover’s craving.
- Soft & Chewy: For an even chewier texture, add a tablespoon of chia seeds into the mix — they’ll plump up and give a delightful pop in every bite!
These options make it easy to tailor your bars to what you love or have on hand. Enjoy exploring and creating your ideal treat!
What to Serve with No-Bake Peanut Butter Protein Bars
Craving a complete meal to accompany your delightful no-bake peanut butter protein bars?
-
Fresh Fruit Salad: A vibrant mix of seasonal fruits adds a refreshing sweetness that contrasts beautifully with the rich flavors of the bars. This pairing offers a light, juicy complement to your snacking adventure.
-
Creamy Yogurt: Serve these bars with a dollop of Greek yogurt for extra protein and creaminess. The tangy notes brighten the palate and create a satisfying balance.
-
Nutty Granola: Crumble some granola on top for added crunch. The nuttiness enhances the peanut butter flavor while adding a delightful texture that is both chewy and crunchy.
-
Nut Butter Drizzle: Elevate your bars by drizzling a bit of melted almond or cashew butter on top. This not only enhances the flavor but also adds a creamy richness that takes your snack to the next level.
-
Herbal Tea: Pair your bars with a warm cup of chamomile or peppermint tea for a soothing experience. The fragrant herbs create a comforting atmosphere, perfect for winding down any time of the day.
-
Dark Chocolate Dipped Strawberries: For a sweet dessert treat, serve alongside dark chocolate dipped strawberries. The fruity freshness pairs elegantly with the creamy bars and offers a touch of indulgence.
These simple yet delightful pairings can transform snacking into an exciting culinary experience!
Expert Tips for Peanut Butter Protein Bars
-
Protein Powder Choice: Select a protein powder you love; it’s a primary flavor in these bars. Test flavors beforehand to find your perfect match.
-
Dough Consistency: Avoid adding too much almond milk at once. Gradually incorporate it until the dough holds together but isn’t too sticky.
-
Easy Clean-Up: Line your tray with parchment paper for hassle-free removal and cleaning. It keeps the bars intact without mess!
-
Chill Time Matters: Allow sufficient chilling time for the chocolate to harden completely. Rushing this step can result in a gooey coating.
-
Mix-Ins Galore: Get creative! Stir in ingredients like seeds, dried fruit, or spices to make your peanut butter protein bars truly unique.
How to Store and Freeze Peanut Butter Protein Bars
Fridge: Keep your peanut butter protein bars in an airtight container in the refrigerator for up to 1 week. This will maintain their chewy texture and flavor.
Freezer: For longer storage, freeze the bars in a single layer on a parchment-lined tray for about 1-2 hours. Once solid, transfer them to a freezer-safe bag or container for up to 3 months.
Thawing: To enjoy a frozen bar, simply remove it from the freezer and let it sit at room temperature for 10-15 minutes or microwave for 10-15 seconds for a quick treat.
Reheating: If you prefer them warm, microwave the thawed bars for a few seconds to enhance the gooeyness, making them even more indulgent!
No-Bake Peanut Butter Protein Bars Recipe FAQs
How do I choose the right nut or seed butter?
Absolutely! When selecting nut or seed butter for your peanut butter protein bars, look for ones that are natural and free of added sugars or oils. Creamy varieties will blend smoothly, while chunky options add a delightful texture. Almond, cashew, or sunflower seed butter are great alternatives if allergies are a concern, and they provide similar flavor profiles and health benefits.
How long can I store my peanut butter protein bars?
You can keep your peanut butter protein bars in an airtight container in the refrigerator for up to 1 week. This keeps them fresh and chewy! For longer storage, consider freezing them, which not only maintains their quality but can also extend their shelf life to up to 3 months.
Can I freeze no-bake peanut butter protein bars?
Very much! To freeze your peanut butter protein bars, first, lay them out on a parchment-lined tray in a single layer. Freeze for about 1-2 hours until they are solid. Then, transfer them to a freezer-safe bag or container to prevent freezer burn. When you’re ready to enjoy, simply let them thaw at room temperature for 10-15 minutes or microwave for a quick warm treat.
What if my mixture is too dry or crumbly?
No worries! If your mixture feels too dry, this can often happen when using different types of protein powder or flour. Start by adding an extra tablespoon of almond milk at a time until it holds together nicely – aim for a dough-like consistency. Remember, the dough should be firm but not overly sticky! This rectifying process usually takes just a few minutes.
Are these bars suitable for my dietary needs?
Absolutely! These no-bake peanut butter protein bars can easily cater to various dietary requirements. They can be made vegan by ensuring your protein powder and sweetener are plant-based. For gluten-free diets, check that your granulated sweetener meets gluten-free standards. Plus, the customizable nature of the recipe means you can adapt it further to fit your preferences!
How do I make the bars softer or firmer?
To adjust the texture of your peanut butter protein bars, you can modify the amount of nut/seed butter or protein powder used in the recipe. For softer bars, incorporate a bit more nut butter or almond milk. Alternatively, if you prefer them firmer, add an additional scoop of protein powder or allow your bars to chill a bit longer in the fridge before serving. This allows them to set up beautifully!
Peanut Butter Protein Bars for a Healthy Sweet Craving
Ingredients
Equipment
Method
- In a large mixing bowl, combine 1 cup of oat flour, 1 cup of your choice of nut or seed butter, 1 scoop of protein powder, and ¼ cup of your selected granulated sweetener.
- Gradually pour in ¼ cup of almond milk while continuously stirring the mixture to create a firm dough.
- Scoop tablespoon-sized portions and shape them into bars or balls, placing them onto a parchment-lined tray.
- Melt 1 cup of chocolate in a microwave-safe bowl until smooth, stirring every 30 seconds.
- Dip each shaped bar into the melted chocolate, ensuring it is well-coated, then place them back onto the tray.
- Refrigerate the coated bars for 10-15 minutes until the chocolate has completely hardened.
- Once set, remove the bars from the fridge and enjoy as a nutritious snack or dessert.
Leave a Reply