
Stepping into my kitchen often feels like entering a joyful time capsule, where the sweet scent of nostalgia meets the thrill of creativity. Today, I’m excited to share a simple yet delectable recipe: No Bake Cake Batter Protein Balls. These little gems bring the fun and flavor of cake batter right to your snacking routine without the guilt! Perfect for a quick low-calorie fix or a post-workout treat, they pack a protein punch while giving you that satisfying bite you crave. Plus, you can easily customize them to fit any dietary need—from vegan to nut-free. Are you ready to indulge your sweet tooth while fueling your body? Let’s dive into this delightful recipe!
Why Choose No Bake Protein Balls?
Convenience at Its Finest: You only need a few ingredients and no baking skills to whip up this delightful snack in minutes!
Nostalgic Flavor: Enjoy the classic taste of cake batter, making every bite a treat that sparks joy.
Customizable Options: Easily swap ingredients to meet dietary needs—try them vegan or nut-free!
Protein-Packed Snack: Boost your energy with a healthy dose of protein, perfect for those mid-afternoon slumps or post-workout refueling.
Kid-Friendly Activity: Get the little ones involved by letting them help roll the balls and choose their favorite sprinkles—fun for everyone!
Make these High Protein Beef protein balls your new go-to snack for a satisfying, guilt-free indulgence.
No Bake Cake Batter Protein Balls Ingredients
• Gather the following ingredients to create these deliciously indulgent snacks!
For the Base
- Almond Flour – Provides structure and healthy fats; substitute with oat flour if nut-free.
- Old-Fashioned Oats – Adds texture and fiber; pulse oats finer for a smoother consistency.
- Protein Powder – Boosts protein content; opt for plant-based for vegan options.
For the Binding Mix
- Almond Butter – Acts as a binding agent while adding creaminess; replace with sunflower seed butter for nut-free.
- Maple Syrup – Sweetens the mixture naturally; reduce for less sweetness or substitute with agave syrup.
- Vanilla Extract – Enhances flavor depth; ensure it’s pure for the best results.
- Milk – Helps to moisten the dough; use any milk of choice and adjust based on dough consistency.
For the Fun Touch
- Sprinkles – Adds aesthetic appeal and texture; choose sugar-free or natural alternatives if desired.
Dive into these No Bake Cake Batter Protein Balls and enjoy every guilt-free bite!
Step‑by‑Step Instructions for No Bake Cake Batter Protein Balls
Step 1: Prep Your Space
Begin by lining a small baking tray with parchment paper to prevent sticking. Gather all your ingredients: almond flour, old-fashioned oats, protein powder, almond butter, maple syrup, vanilla extract, milk, and sprinkles. This preparation will ensure a smooth process while making your No Bake Cake Batter Protein Balls.
Step 2: Mix Dry Ingredients
In a large mixing bowl, combine the almond flour, old-fashioned oats, and protein powder. Stir gently with a spatula or wooden spoon, ensuring all the dry ingredients are well incorporated. The mixture should have a uniform look before moving on to the wet ingredients, setting the foundation for your protein balls.
Step 3: Combine Wet Ingredients
Add almond butter, maple syrup, vanilla extract, and a splash of milk to the bowl with the dry mixture. Mix thoroughly until a pliable dough forms; it should be sticky yet manageable. If the mixture feels too dry, gradually add more milk, one teaspoon at a time, for the perfect consistency to create your No Bake Cake Batter Protein Balls.
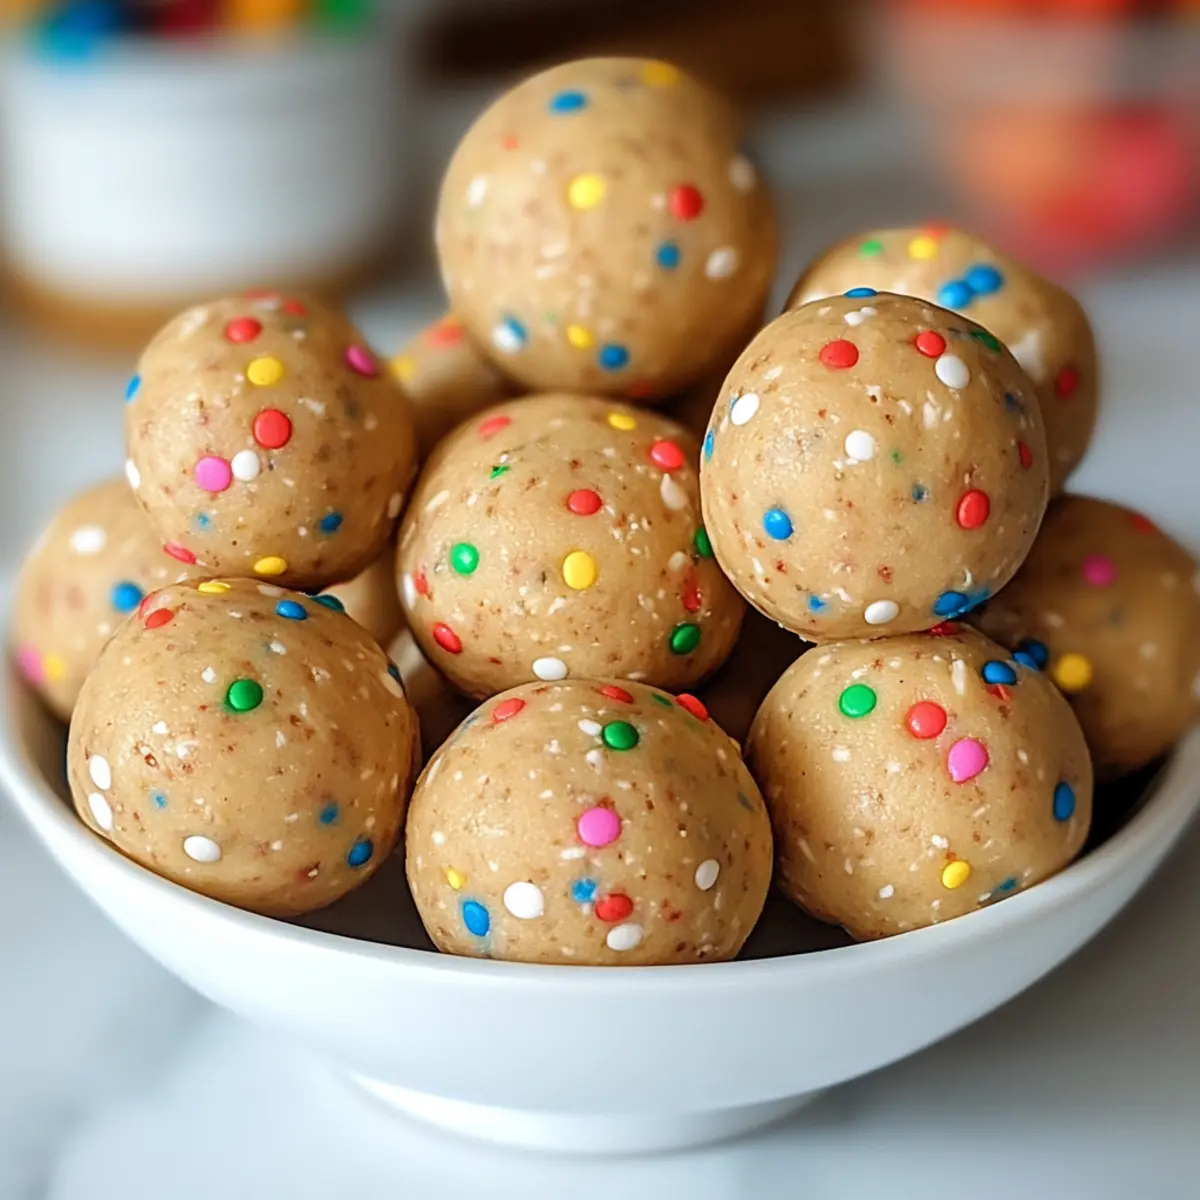
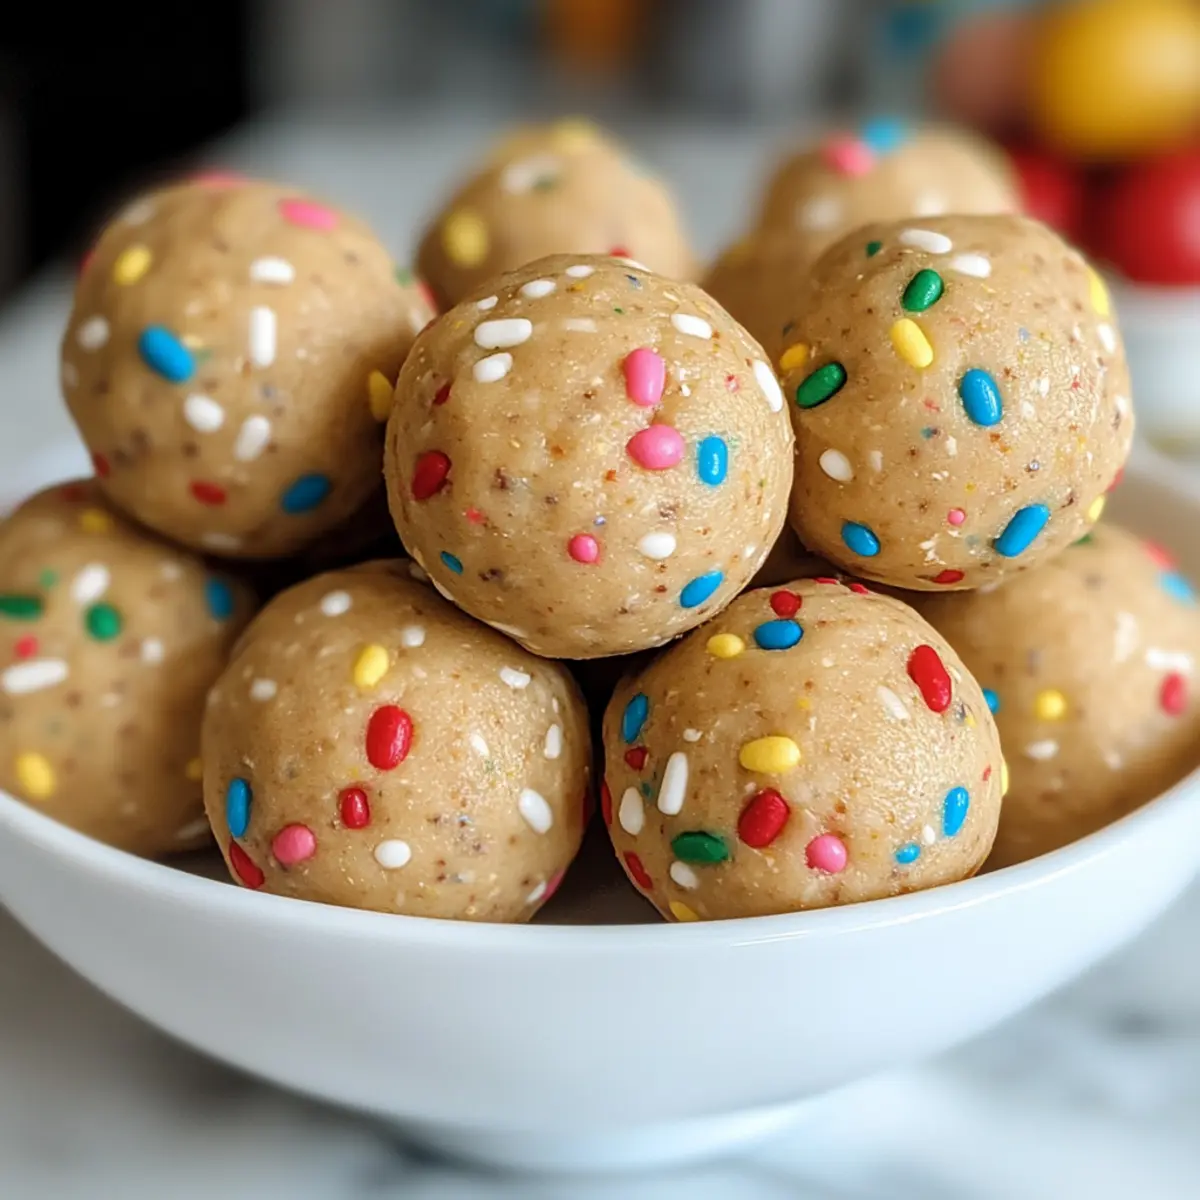
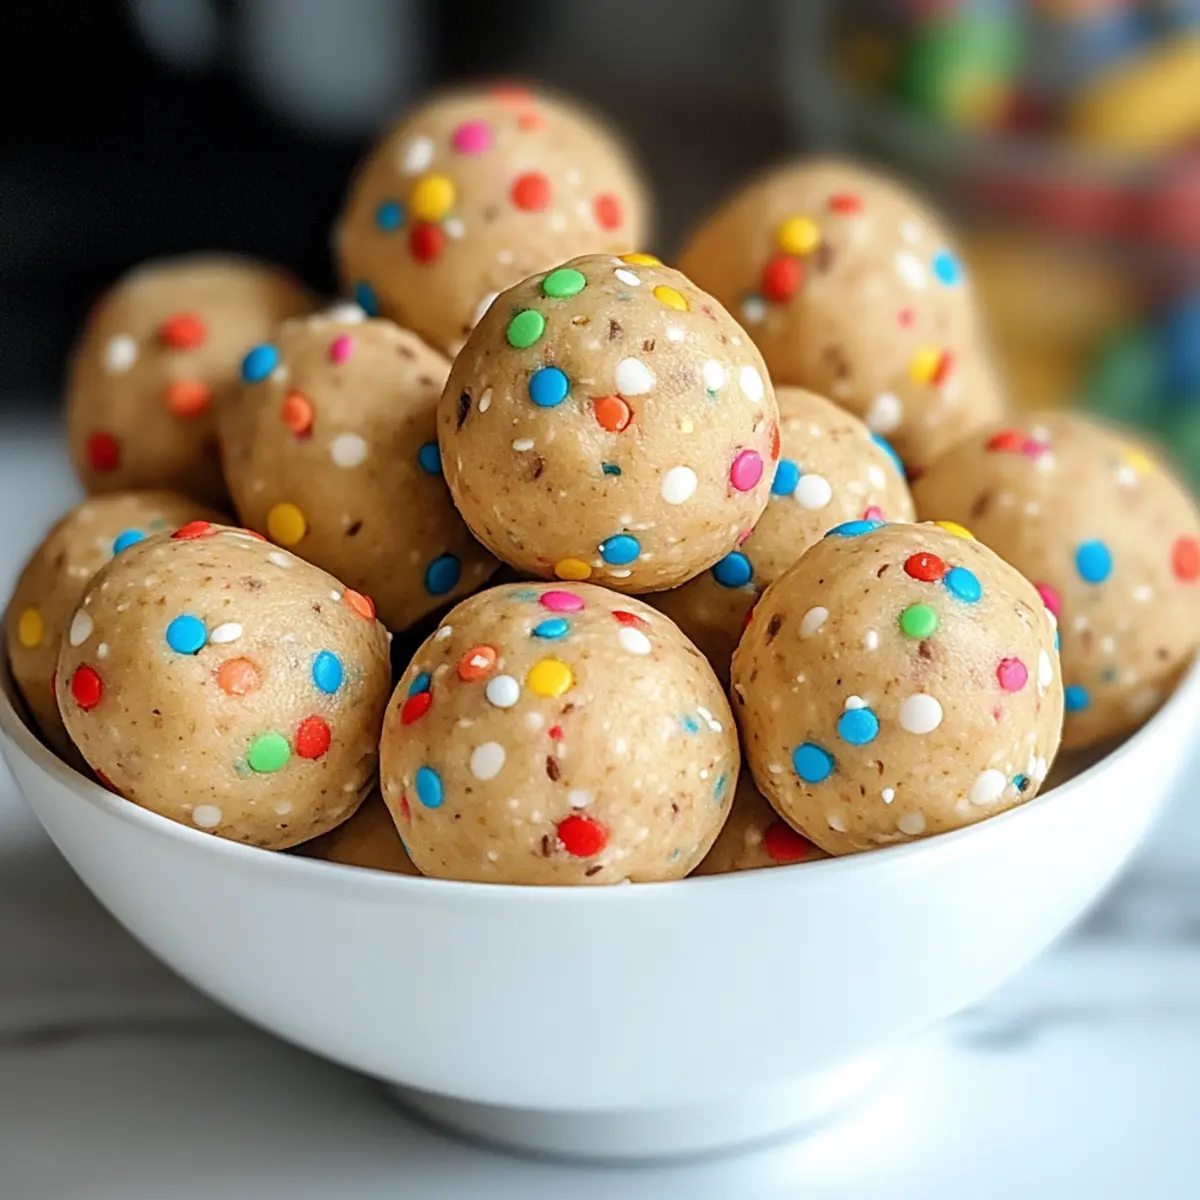
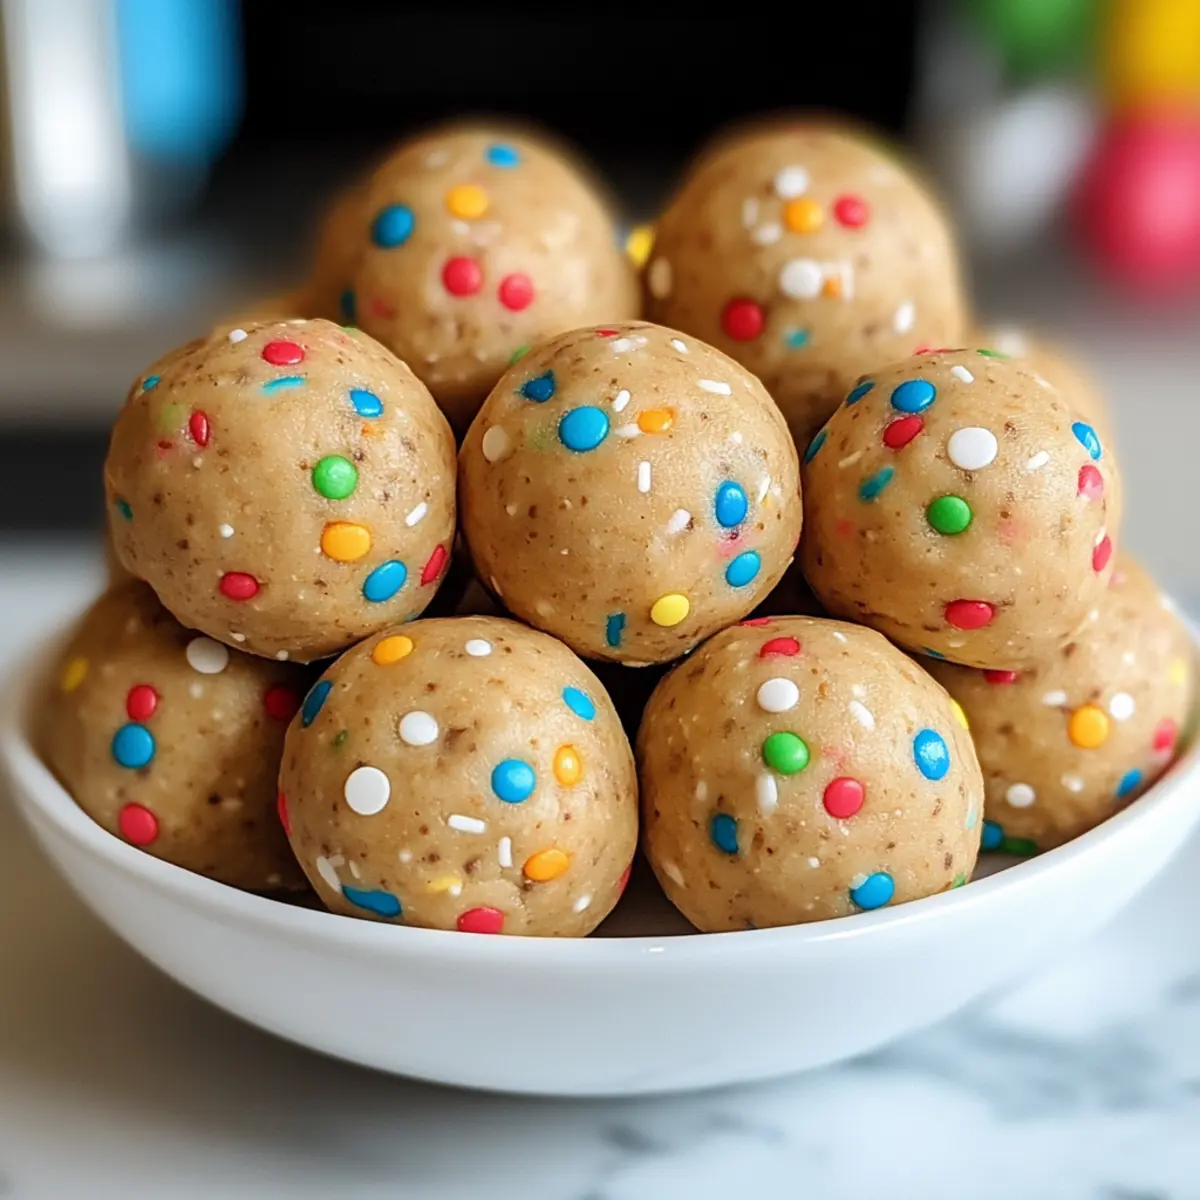
Step 4: Add Sprinkles
Once your dough is ready, fold in the sprinkles gently, ensuring they are evenly distributed without bleeding their colors into the dough. This step will add a fun, vibrant touch to your protein balls, making each bite even more delightful.
Step 5: Shape the Balls
Using a tablespoon or cookie scoop, take portions of the dough and roll them into balls about 1 to 1.25 inches in diameter. Aim for uniform sizes to ensure even chilling and enjoyment. This process will yield approximately 20 No Bake Cake Batter Protein Balls, perfect for snacking.
Step 6: Chill the Protein Balls
Place the shaped protein balls on the lined baking tray and refrigerate for at least 20 minutes. This chilling time will help them firm up and hold their shape better. Once chilled, they are ready to be enjoyed as a nutritious snack, satisfying your sweet cravings without guilt.
Expert Tips for No Bake Cake Batter Protein Balls
-
Adjust Sweetness: If you’re sensitive to sugar, start with less maple syrup and gradually add more to reach your preferred sweetness level.
-
Choose the Right Protein Powder: Some protein powders can be chalky. Opt for a high-quality, smooth blend that enhances the texture of your No Bake Cake Batter Protein Balls.
-
Customize for Kids: Get creative and involve your children! Let them choose their favorite sprinkles or mix in mini chocolate chips for added fun and flavor.
-
Test Consistency: If your dough is too sticky, add a tablespoon of extra oats or almond flour. Conversely, if it feels dry, incorporate milk one teaspoon at a time until it’s manageable.
-
Experiment with Flavor: Feel free to swap out almond butter for peanut or sunflower seed butter, accommodating different allergies and taste preferences while keeping the protein content high.
How to Store and Freeze No Bake Cake Batter Protein Balls
Fridge: Store your protein balls in an airtight container lined with parchment paper for up to 10 days. This keeps them fresh and delicious!
Freezer: For longer storage, freeze the balls in a single layer on a baking sheet, then transfer them to a freezer-safe container. They can last up to 2 months, making them a great grab-and-go snack!
Reheating: These No Bake Cake Batter Protein Balls are best enjoyed cold straight from the fridge or freezer. Simply let them sit at room temperature for about 5-10 minutes before indulging for the best texture.
Portion Control: Consider pre-portioning them into snack-sized bags. It’s a perfect way to keep your serving sizes in check and have an easy snack at your fingertips!
No Bake Cake Batter Protein Balls Variations
Feel free to unleash your creativity and customize these protein balls to fit your taste and dietary preferences!
-
Nut-Free Delight: Replace almond butter with sunflower seed butter to make these snacks safe for nut allergies without sacrificing texture.
-
Vegan Option: Use plant-based protein powder and almond milk for a completely vegan-friendly treat that’s packed with nourishment.
-
Gluten-Free Alternative: Swap almond flour for a gluten-free flour blend to make these protein balls perfect for those avoiding gluten.
-
Chocolate Lovers: Add mini chocolate chips or a tablespoon of cocoa powder to infuse a rich, chocolatey flavor that pairs beautifully with the sweet cake batter notes.
-
Sweetness Level: Reduce maple syrup for a lower-sugar version or use agave syrup to keep it naturally sweet and guilt-free.
-
Mix It Up: Experiment with flavors by adding a tablespoon of peanut butter or a pinch of cinnamon to elevate the taste profile and keep things exciting.
-
Texture Twist: For a fun texture, toss in some chopped dried fruit or seeds like chia or flax for added crunch and nutritional benefits.
Once you’ve perfected your No Bake Cake Batter Protein Balls, consider pairing them with fresh fruit or yogurt as a delightful sidekick. And if you’re in the mood for more tasty alternatives, try these recipes: Salisbury Steak Meatballs or indulge in something sweet like the Pumpkin Spice Latte Cake. Enjoy the journey of delicious snacking!
What to Serve with No Bake Cake Batter Protein Balls
Imagine a sunny afternoon, where the delightful sweetness of your protein balls pairs harmoniously with vibrant sides and drinks, creating a beautiful, balanced spread.
- Fresh Fruit Salad: A medley of seasonal fruits adds brightness and a refreshing contrast to the rich, sweet flavors of the protein balls.
- Creamy Yogurt Dip: Serve with a side of Greek yogurt, drizzled with honey for a protein-packed, creamy accompaniment that balances the sweetness beautifully.
- Nutty Granola: A crunchy granola can enhance the texture while complementing the protein content, providing an extra layer of flavor and satisfaction.
- Smoothie Bowl: A thick smoothie topped with nuts and seeds can serve as a colorful, nutritious base that pairs perfectly with the sweet, chewy bites.
- Herbal Iced Tea: A refreshing herbal iced tea can cleanse the palate and add a soothing element to your snacking experience, especially during warm days.
- Chocolate Dipped Dates: For an extra indulgence, pair them with chocolate-dipped dates to enhance that dessert-like feel, making for a perfect sweet pairing.
Combining these elements creates a truly memorable snacking experience that will leave you feeling satisfied and joyfully indulged!
Make Ahead Options
These No Bake Cake Batter Protein Balls are perfect for busy home cooks looking to save time in their meal planning! You can mix the dry ingredients—almond flour, oats, and protein powder—up to 24 hours in advance, storing them in an airtight container to maintain freshness. The wet ingredients can also be prepped and stored separately, ensuring the mixture stays pliable without drying out. When ready to enjoy, simply combine the wet and dry ingredients, fold in the sprinkles, and shape the balls before chilling them in the fridge for about 20 minutes. This way, you’ll have delicious, protein-packed snacks ready to go whenever you need them, making your snacking routine effortlessly delightful!
No Bake Cake Batter Protein Balls Recipe FAQs
What type of almond flour should I use for the No Bake Cake Batter Protein Balls?
You can use finely ground almond flour, which provides a great texture and healthy fats. If you’re looking for a nut-free option, oat flour works wonderfully as a substitute without compromising flavor.
How long can I store No Bake Cake Batter Protein Balls in the fridge?
Absolutely! Store your protein balls in an airtight container lined with parchment paper in the fridge for up to 10 days. This helps keep them fresh and ready for snacking anytime!
Can I freeze No Bake Cake Batter Protein Balls? What’s the best way to do it?
Yes, you can freeze them for later enjoyment! First, place the balls in a single layer on a baking sheet and freeze them for about 2 hours. Once they’re firm, transfer them to a freezer-safe container or bag. These can be stored for up to 2 months. When you’re ready to enjoy, simply let them sit at room temperature for 5-10 minutes for the best texture.
What should I do if my dough is too dry or too sticky?
If your dough seems too dry, add milk one teaspoon at a time until it achieves the right consistency for molding your No Bake Cake Batter Protein Balls. On the flip side, if it’s too sticky, incorporating a tablespoon of oats or almond flour should help you work with the mixture more easily.
Are there any common allergens in this recipe I should consider?
Definitely! This recipe contains nuts, specifically almond flour and almond butter. If you’re preparing them for someone with nut allergies, feel free to substitute with sunflower seed butter and oat flour. Also, ensure that the protein powder you choose fits within any dietary restrictions.
Is this recipe suitable for pets?
While the ingredients in the No Bake Cake Batter Protein Balls are safe for human consumption, it’s important to avoid sharing them with pets, especially due to the presence of sweeteners like maple syrup and nut-based products which might not sit well with them. Always stick to pet-friendly treats when pampering your furry friends!
No Bake Cake Batter Protein Balls for Guilt-Free Indulgence
Ingredients
Equipment
Method
- Begin by lining a small baking tray with parchment paper to prevent sticking. Gather all your ingredients: almond flour, old-fashioned oats, protein powder, almond butter, maple syrup, vanilla extract, milk, and sprinkles.
- In a large mixing bowl, combine the almond flour, old-fashioned oats, and protein powder. Stir gently with a spatula, ensuring all the dry ingredients are well incorporated.
- Add almond butter, maple syrup, vanilla extract, and a splash of milk to the bowl with the dry mixture. Mix thoroughly until a pliable dough forms.
- Fold in the sprinkles gently, ensuring they are evenly distributed without bleeding their colors into the dough.
- Using a tablespoon or cookie scoop, take portions of the dough and roll them into balls about 1 to 1.25 inches in diameter.
- Place the shaped protein balls on the lined baking tray and refrigerate for at least 20 minutes.
Leave a Reply