
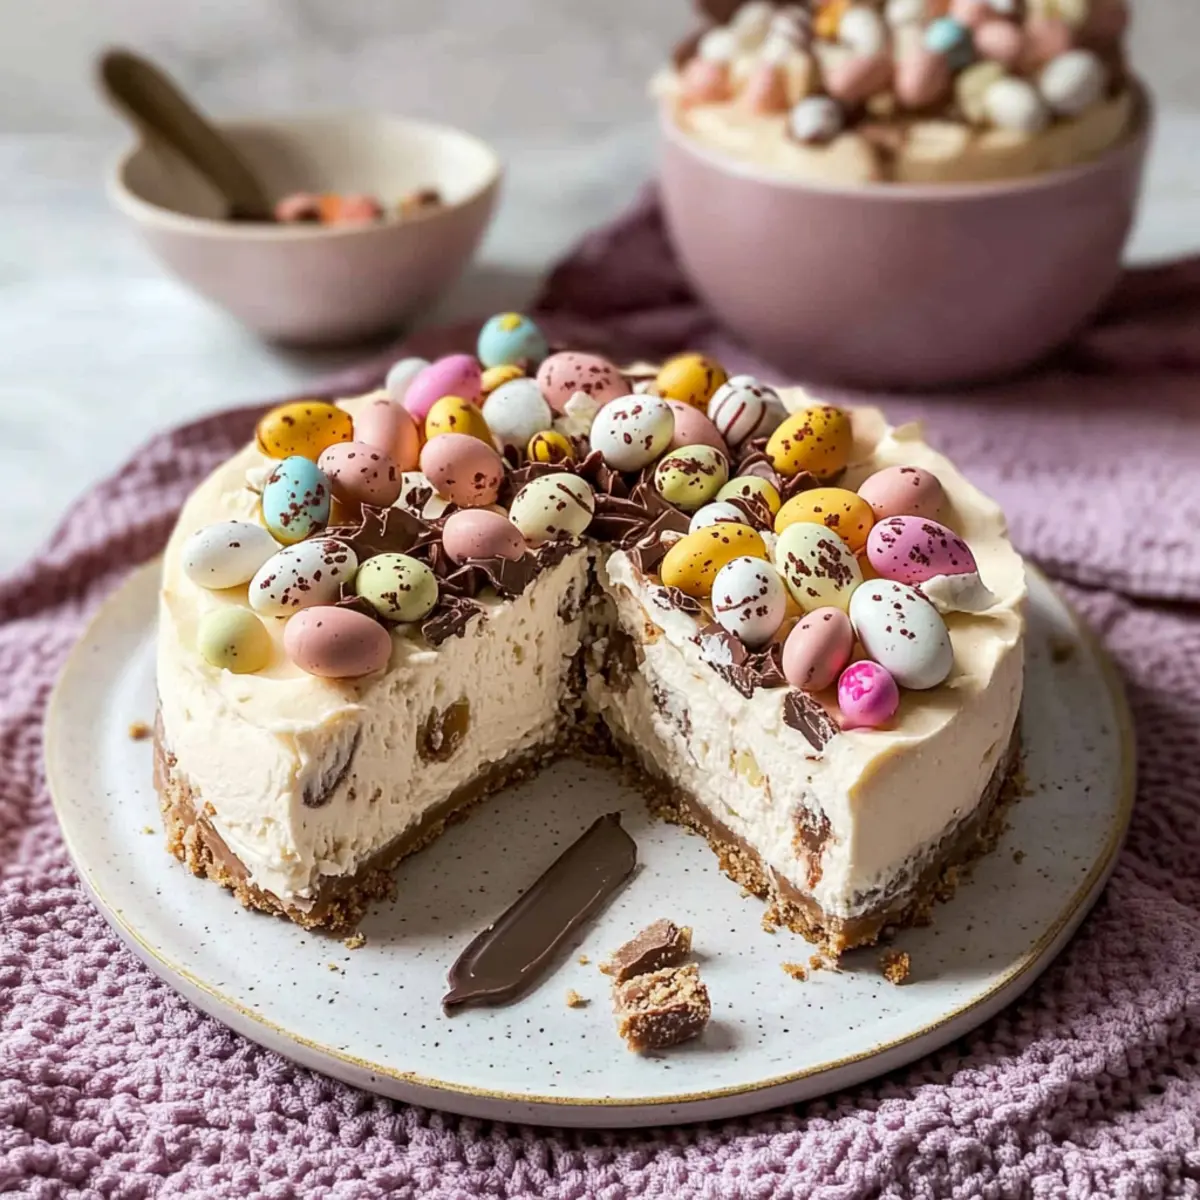
As I opened the fridge, a sweet surprise awaited me—a slice of my Easter No-Bake Mini Egg Cheesecake, glistening like a treasure among the usual fare. This dessert isn’t just another cheesecake; it’s a delightful homage to spring, combining a creamy vanilla bean filling with the irresistible crunch of Cadbury Mini Eggs. Whether you’re looking for a quick and simple dessert or aiming to impress your guests at Easter celebrations, this recipe fits the bill perfectly. It’s audience-friendly, appealing to both kids and adults alike, ensuring happy faces all around the table. Best of all? You can whip it up in a flash without any baking required! So, are you ready to dive into creating this creamy, indulgent masterpiece that’ll steal the show?
Why is This Cheesecake a Must-Try?
Simplicity at Its Best: This Easter No-Bake Mini Egg Cheesecake requires minimal effort, making it perfect for both novice and experienced bakers. Indulgent Creaminess: The velvety cream cheese filling harmonizes with crunchy Mini Eggs, creating a delightful contrast in every bite. No Bake, No Hassle: With zero baking involved, you can save time and focus on enjoying your gathering. Crowd-Pleasing Delight: Ideal for Easter celebrations, this dessert is sure to impress both kids and adults alike. Make-Ahead Friendliness: Prepare it a day in advance for a stress-free experience, letting it chill while you get ready to host. Enjoy it with a scoop of fresh berries for an extra touch—this Easter No-Bake Mini Egg Cheesecake will be the highlight of your dessert table!
Easter No-Bake Mini Egg Cheesecake Ingredients
• Discover the magical flavors in this luscious treat!
For the Biscuit Base
- Digestive Biscuits – Provides the buttery, crunchy base; graham crackers can be used if you prefer.
- Unsalted Butter (melted) – Binds the biscuit crumbs together for a compact crust; ensure it’s fully melted for optimal mixing.
For the Cheesecake Filling
- Philadelphia Cream Cheese – Main ingredient for a rich, creamy filling; brick-style is preferable for lower moisture content.
- Double Cream – Adds lightness and helps stabilize the filling when whipped; choose a heavy cream for best results.
- Powdered Icing Sugar – Sweetens and stabilizes the filling; regular sugar can be used but may yield a grainier texture.
- Vanilla Bean Paste – Infuses a rich vanilla flavor throughout; vanilla extract can be a substitute, though the flavor might be less intense.
- Fine Salt – Balances sweetness and enhances the overall flavors in the cheesecake.
For Decoration
- Cadbury Mini Eggs – Provides scrumptious crunchy chocolate pieces; chocolate chips can also work as an alternative.
This Easter No-Bake Mini Egg Cheesecake combines these delightful ingredients into a dreamy dessert you won’t want to miss!
Step‑by‑Step Instructions for Easter No-Bake Mini Egg Cheesecake
Step 1: Prepare the Pan
Start by lining the base of a 23cm (9-inch) springform pan with parchment paper. This will make it easier to remove your Easter No-Bake Mini Egg Cheesecake later. There’s no need to line the sides; just focus on the base. Set the pan aside so it’s ready for the biscuit base.
Step 2: Make the Biscuit Base
Crush the digestive biscuits until they resemble fine crumbs, using a food processor or a rolling pin inside a sealed bag. In a mixing bowl, combine the biscuit crumbs with melted unsalted butter, ensuring it’s completely melted for better binding. Press this mixture firmly into the base and slightly up the sides of the springform pan. Refrigerate for 30 minutes or freeze for 15 minutes to help it set.
Step 3: Beat the Cream Cheese
In a mixing bowl, beat 250g of Philadelphia cream cheese with an electric mixer until it’s smooth and creamy. This vital step ensures your filling for the Easter No-Bake Mini Egg Cheesecake is lump-free and velvety. Take your time, about 2-3 minutes should suffice. Scrape down the sides of the bowl to ensure everything is well combined.
Step 4: Whip the Double Cream
In a separate bowl, pour in 300ml of double cream and whip it with an electric mixer until stiff peaks form. This will take approximately 3-5 minutes. You want the cream to be airy, which will create that light texture in your cheesecake filling. Keep an eye on it to prevent over-whipping, which can lead to a grainy texture.
Step 5: Combine Ingredients
Sift powdered icing sugar, vanilla bean paste, and a pinch of fine salt into the beaten cream cheese. Mix these ingredients together until just combined for your cheesecake filling. This part ensures that the flavors meld beautifully, setting the stage for the luscious filling. Make sure to avoid over-mixing; a few gentle folds will do.
Step 6: Fold in Whipped Cream
Carefully fold the whipped double cream into the cream cheese mixture, using a spatula. Take your time to gently incorporate it without deflating the air you’ve just whipped in. This process is crucial for achieving that light and creamy consistency in your Easter No-Bake Mini Egg Cheesecake. Aim for a uniform mixture while maintaining airiness.
Step 7: Add Crushed Mini Eggs
Gently fold in about ⅔ of the crushed Cadbury Mini Eggs into the cream mixture. This step adds delightful crunch and sweetness throughout your cheesecake. Use a spatula to mix them in evenly, ensuring that every mouthful of the cheesecake is filled with the deliciousness of Mini Eggs.
Step 8: Fill and Refrigerate
Pour the cheesecake filling on top of the chilled biscuit crust, smoothing it out with a spatula for an even surface. Cover the springform pan tightly with plastic wrap to prevent any fridge odors from mingling with your cheesecake. Refrigerate for a minimum of 6 hours, although letting it chill overnight would yield the best texture.
Step 9: Decorate and Serve
Once chilled and set, carefully release the cheesecake from the springform pan. Garnish the top with the remaining crushed Cadbury Mini Eggs for a beautiful presentation. Slice into portions and serve this indulgent Easter No-Bake Mini Egg Cheesecake to your guests, who will surely be impressed by this delightful, no-bake dessert.

How to Store and Freeze Easter No-Bake Mini Egg Cheesecake
- Fridge: Store leftover cheesecake in an airtight container in the refrigerator for up to 3 days. This helps maintain its creamy texture and prevents drying out.
- Freezer: For longer storage, freeze the undecorated cheesecake for up to 2 months. Wrap it tightly in plastic wrap and then in aluminum foil to prevent freezer burn.
- Thawing: When ready to enjoy, remove the cheesecake from the freezer and thaw it in the fridge overnight. Decorate with fresh Mini Eggs before serving for that delightful Easter touch.
- Serving Tip: If the cheesecake has been frozen, ensure to allow proper chilling time in the fridge for the best flavor and texture before indulging in this delicious Easter No-Bake Mini Egg Cheesecake!
Easter No-Bake Mini Egg Cheesecake Variations
Feel free to get creative with this recipe and make it uniquely yours, enhancing each bite with flavors you love!
-
Oreo Twist: Substitute Cadbury Mini Eggs with crushed Oreo cookies for a deliciously chocolatey flavor. The contrast with the cream cheese filling is simply divine.
-
Mini Size: For a perfect individual treat, prepare in muffin tins instead of a springform pan, using cupcake liners to contain the cheesecake. These mini delights are ideal for sharing!
-
Fruit Fusion: Add a handful of chopped strawberries or raspberries to the cheesecake filling for a burst of fruity freshness. The berries beautifully complement the creamy texture.
-
Nutty Addition: Stir in chopped hazelnuts or walnuts into the mixture for an added crunch. The nuttiness creates a lovely contrast and adds depth to the flavor.
-
Zesty Lemon: A touch of lemon zest in the filling can brighten the cheesecake with a refreshing tang that pairs beautifully with the sweetness of the Cadbury Mini Eggs.
-
Caramel Drizzle: After chilling, serve each slice of cheesecake with a drizzle of caramel sauce for an indulgent finish. It elevates the dessert to a whole new level of sweetness!
-
Chocolate Ganache Layer: For a rich twist, pour a layer of chocolate ganache over the top before chilling. It adds a luxurious finish that is simply irresistible.
-
Spicy Kick: Add a dash of cayenne pepper or chili powder to the filling for a surprising hint of heat. This twist might just become your new favorite!
Now that you’re fueled with inspiration, why not check out our delightful Sausage Egg Cream for another fabulous recipe that your family will love? And if you have a sweet tooth, don’t forget to explore the tempting Caramel Brownie Cheesecake. Happy baking!
Make Ahead Options
These Easter No-Bake Mini Egg Cheesecakes are ideal for meal prep, allowing you to enjoy stress-free hosting during the celebrations! You can prepare the cheesecake filling up to 24 hours in advance and store it in the refrigerator until you’re ready to assemble. Additionally, the biscuit crust can be made and refrigerated for up to 3 days; simply cover it tightly with plastic wrap to prevent it from becoming soggy. When it’s time to serve, just pour the filling over the crust, let it chill for the recommended time, and garnish with the remaining Mini Eggs before serving. This way, you’ll achieve the same deliciously creamy results with minimal last-minute effort!
Expert Tips for Easter No-Bake Mini Egg Cheesecake
- Cream Cheese Selection: Use brick-style cream cheese for the best texture. Tub-style may lead to a runny filling; pat it dry with paper towels if necessary.
- Biscuit Base Perfection: Ensure your biscuit crumbs are finely crushed and pressed firmly into the pan. A well-compacted base prevents crumbling when slicing the cheesecake.
- Refrigeration is Key: Don’t overlook the chilling time. Allow at least 6 hours for the Easter No-Bake Mini Egg Cheesecake to set properly, ideally overnight for the best consistency.
- Whipping Technique: When whipping the double cream, watch for stiff peaks. Over-whipping can create a grainy mix, so stay attentive to the texture.
- Hot Knife Slicing: For clean, beautiful slices, dip your knife in hot water and wipe it dry between cuts. This method keeps your cheesecake looking its best when serving.
What to Serve with Easter No-Bake Mini Egg Cheesecake
Elevate your dessert experience with delightful pairings that enhance the creamy, indulgent nature of this cheesecake.
-
Fresh Berries: A mix of strawberries, blueberries, and raspberries adds a vibrant, tart contrast that brightens every slice.
-
Chocolate Ganache: Drizzling warm chocolate ganache over each portion deepens the dessert’s richness and creates a lavish touch.
-
Whipped Cream: Light, fluffy whipped cream on the side brings an airy texture that complements the creamy cheesecake beautifully.
-
Coffee or Espresso: The bold flavors of coffee elevate the sweetness, creating a delightful balance for indulgent dessert lovers.
-
Mint Leaves: A simple garnish of fresh mint adds a refreshing pop of flavor that cuts through the cheesecake’s richness.
-
Almond Biscotti: The crunchy texture of almond biscotti pairs perfectly as a delightful dipper alongside your cheesecake.
-
Sparkling Wine: A glass of bubbly provides a celebratory fizz, enhancing the festive spirit of your Easter dessert table.
Easter No-Bake Mini Egg Cheesecake Recipe FAQs
What type of digestive biscuits are best for the base?
For the perfect buttery and crunchy base, I always recommend using traditional digestive biscuits. However, if you prefer a sweeter touch, graham crackers can be a delightful substitute. Just make sure to crush them finely for better binding with the melted butter!
How should I store leftover cheesecake?
Store your leftover Easter No-Bake Mini Egg Cheesecake in an airtight container in the refrigerator, and it will stay delicious for up to 3 days. This helps maintain the creamy texture and prevents it from drying out.
Can I freeze the Easter No-Bake Mini Egg Cheesecake?
Absolutely! You can freeze the undecorated cheesecake for up to 2 months. To do this, wrap it tightly in plastic wrap followed by aluminum foil to prevent freezer burn. When you’re ready to enjoy, thaw it in the refrigerator overnight before decorating and serving.
What if my cheesecake turns out too runny?
If your cheesecake filling is too runny, it could be due to using tub-style cream cheese which can have more moisture. To fix this, you can try patting it dry with paper towels before mixing. Additionally, ensure that your double cream is whipped to stiff peaks for better stability in the filling. If these steps are followed and it’s still too soft, consider adding a little more powdered icing sugar to help thicken the mixture.
Are there any allergy considerations?
Yes, this Easter No-Bake Mini Egg Cheesecake contains dairy and gluten. If serving to guests with allergies, consider substituting with gluten-free biscuits and making sure the chocolate used is free from any potential allergens. Always check labels for dairy or nut content if necessary.
How long should I chill the cheesecake before serving?
Chill the cheesecake for at least 6 hours, but for the best results, letting it sit overnight in the fridge is ideal. This chilling time allows the flavors to meld beautifully, ensuring a perfect texture when you slice into this indulgent treat.
Easter No-Bake Mini Egg Cheesecake That's Irresistibly Creamy
Ingredients
Equipment
Method
- Line the base of a 23cm (9-inch) springform pan with parchment paper.
- Crush the digestive biscuits into fine crumbs and mix with melted butter. Press firmly into the base of the pan and refrigerate for 30 minutes.
- Beat the cream cheese until smooth and creamy, about 2-3 minutes.
- Whip the double cream until stiff peaks form, approximately 3-5 minutes.
- Sift in the powdered icing sugar, vanilla paste, and salt into cream cheese, and mix until just combined.
- Gently fold in the whipped cream until fully mixed.
- Fold in ⅔ of the crushed Mini Eggs into the mixture.
- Pour the mixture over the biscuit base and smooth the top. Cover and refrigerate for at least 6 hours.
- Once set, release from the springform pan and garnish with remaining Mini Eggs before serving.
Leave a Reply