
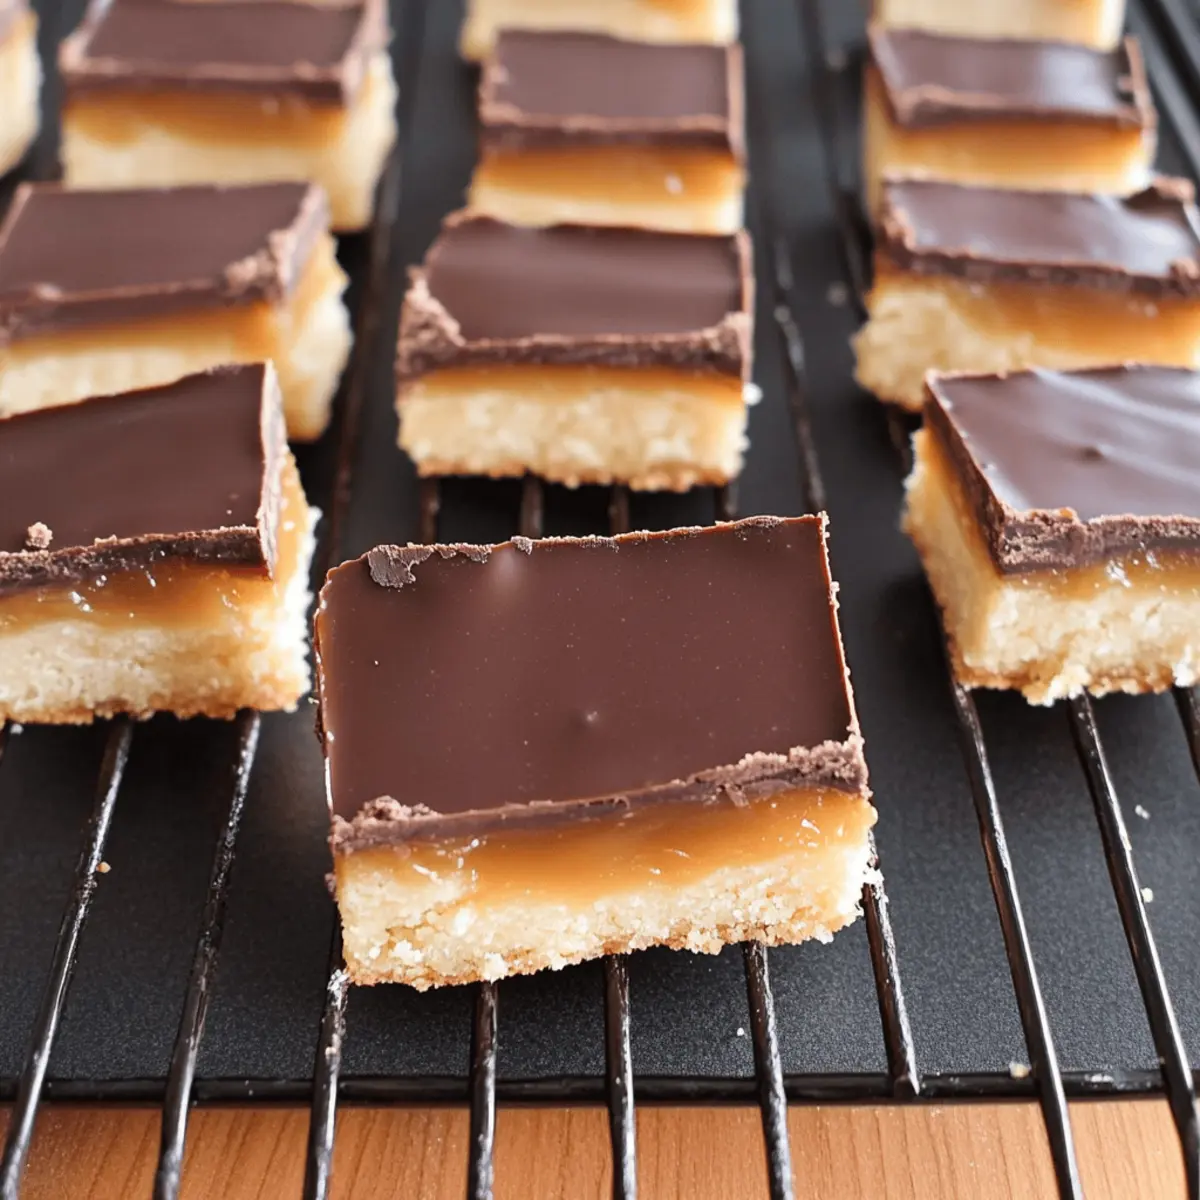
“Did you hear about the homemade Twix Cookie Bars that are taking kitchens by storm?” It wasn’t long before I dove into recreating this beloved candy bar in my own oven, and let me tell you, the results are nothing short of magical. With a buttery shortbread crust, a chewy caramel center, and a glossy chocolate topping, these dessert bars are the epitome of a crowd-pleaser that’ll impress anyone who takes a bite. Plus, they’re easy to whip up with simple pantry staples, making them perfect for spontaneous sweet cravings or as a delightful addition to your next gathering. Are you ready to discover the secret to these mouthwatering Twix Cookie Bars? Let’s bake some memories together!
Why are Twix Cookie Bars a must-try?
Indulgence at Your Fingertips: These Twix Cookie Bars offer a heavenly mix of textures, featuring a soft, buttery shortbread crust and a gooey caramel center that melts in your mouth.
Crowd-Pleasing Delight: Perfect for gatherings, they’re sure to impress friends and family alike.
Simplicity Made Sweet: With easy ingredients and straightforward steps, you’ll have these treats ready without fuss.
Versatile Twists: Don’t hesitate to experiment! Try adding a pinch of espresso to the chocolate layer or switching to dark chocolate for a twist.
Pair these treats with a glass of milk or coffee for an unforgettable experience—just like with Pumpkin Sugar Cookies or Chocolate Chip Bars. Get ready to savor each layer of flavor!
Twix Cookie Bars Ingredients
Get ready to discover what makes these bars truly irresistible!
For the Crust
• Salted Butter – Provides richness and structure in the crust; make sure it’s at room temperature for easy mixing.
• Powdered Sugar – Adds the perfect sweetness and smooth texture to the crust.
• All-Purpose Flour – Forms the base of the crust; be sure to measure it accurately for the best results.
• Pure Vanilla Extract – Enhances the overall flavor; high-quality extract will yield better results.
For the Caramel Layer
• Salted Butter – Essential for a deep, buttery flavor in the caramel.
• Salt – Balances sweetness and brings out flavor in the caramel.
• Light Corn Syrup – Prevents crystallization and contributes to a silky caramel texture.
• Granulated Sugar – Provides sweetness, making up the bulk of the caramel.
• Heavy Whipping Cream – Adds creaminess and rich flavor; divided to help control cooking temperature.
• Pure Vanilla Extract – Boosts the overall flavor of the caramel layer for that delicious depth.
For the Chocolate Layer
• Milk or Dark Chocolate – Melts to create a smooth topping; your chocolate choice can vary the sweetness.
• Heavy Whipping Cream – Adjusts the chocolate’s consistency; add carefully to avoid a soft layer.
Dive into these Twix Cookie Bars, and bring a touch of sweetness to your kitchen today!
Step‑by‑Step Instructions for Twix Cookie Bars
Step 1: Prepare the Crust
Preheat your oven to 300°F (150°C). In a large mixing bowl, blend together 1 cup of softened salted butter, 1/2 cup of powdered sugar, 2 cups of all-purpose flour, and 1 teaspoon of pure vanilla extract until the mixture is crumbly yet holds together. Press the dough firmly into the bottom of a lined 9×13” baking pan, ensuring an even layer. Bake for 40 minutes or until the crust turns a lovely golden brown.
Step 2: Make the Caramel
While the crust bakes, prepare the caramel layer. In a medium saucepan, combine 1/2 cup of salted butter, 1/4 cup of light corn syrup, 1 cup of granulated sugar, and a pinch of salt. Pour in 1/2 cup of heavy whipping cream and cook over low heat, stirring until melted. Increase the heat and let it simmer without stirring until the mixture reaches 235°F (113°C) on a candy thermometer.
Step 3: Add Vanilla and Cool Caramel
Once your caramel reaches the desired temperature, carefully remove it from the heat. Stir in 1/2 teaspoon of pure vanilla extract and allow the caramel to cool slightly for about 5-10 minutes. This cooling time is crucial because it helps thicken the caramel, making it easier to pour over your crust later.
Step 4: Layer the Caramel
After your crust has baked and cooled for a few minutes, pour the warm caramel over the cooled crust while smoothing it out evenly. Use a spatula to ensure the caramel reaches every corner of the crust. Place the pan in the refrigerator for 45-60 minutes, allowing the caramel layer to set firmly.
Step 5: Prepare the Chocolate Layer
While the caramel sets, melt 1 1/2 cups of milk or dark chocolate with 1/2 cup of heavy whipping cream. You can do this in a microwave-safe bowl or using a double boiler. If using the microwave, heat in 30-second intervals, stirring frequently, until the mixture is silky smooth.
Step 6: Top with Chocolate
Once the chocolate mixture is ready, carefully pour it over the chilled caramel layer, using a spatula to spread it evenly across the top. Make sure the chocolate layer covers the caramel completely for that satisfying bite.
Step 7: Final Setting
Return the pan to the refrigerator and let the Twix Cookie Bars set for 3-4 hours, or until the chocolate layer is firm to the touch. This waiting time allows all the layers to meld together beautifully, resulting in a delightful treat.
Step 8: Cut and Serve
Once the bars are fully set, take them out of the refrigerator. Use a sharp knife to cut them into 32 squares, cleaning the knife between cuts for perfect edges. Indulge in these homemade Twix Cookie Bars that are sure to impress everyone!
What to Serve with Homemade Twix Cookie Bars
Satisfying your sweet tooth is just the beginning—let’s craft a complete meal that tantalizes every taste bud.
-
Ice Cream Sundae: Top a scoop of vanilla or chocolate ice cream with hot fudge and crushed nuts for a delightful contrast to the cookie bars.
-
Fresh Berries: The tartness of strawberries or raspberries offers a refreshing balance to the rich sweetness of the Twix Cookie Bars. Serve them on the side for a burst of flavor.
-
Mint Tea: A warm cup of mint tea soothes the senses and cleanses the palate, making it the perfect companion for such a rich dessert.
-
Chocolate Milk: Treat yourself to a childhood classic—chocolate milk adds a creamy element that complements the flavors of the Twix Cookie Bars beautifully.
-
Cheesecake Bites: These mini treats are perfect for a little extra indulgence. Their creamy texture pairs wonderfully with the layers of the cookie bars.
-
Espresso: A shot of bold espresso accentuates the dessert’s sweetness, creating a lovely balance while enhancing your after-dinner experience.
-
Pecan Pie: For a truly decadent dessert spread, offer slices of pecan pie alongside your Twix Cookie Bars—a rich combination that will have everyone coming back for more!
-
Caramel Latte: Coffee lovers rejoice! Pairing the bars with a velvety caramel latte brings out the caramel flavors in the dessert while adding warmth to your meal.
How to Store and Freeze Twix Cookie Bars
Refrigerator: Keep your Twix Cookie Bars in an airtight container in the fridge for up to 2 weeks. This helps maintain their freshness and seductive taste.
Freezer: For longer storage, freeze the bars in an airtight container or wrapped tightly in plastic wrap for up to 2 months. Let them come to room temperature before enjoying.
Serving Tip: When ready to serve, allow the frozen Twix Cookie Bars to thaw for about 15-20 minutes at room temperature for the best taste and texture.
Avoiding Stickiness: If stacked, place parchment paper between layers to prevent the bars from sticking together, ensuring easy access to each delicious piece.
Twix Cookie Bars Variations & Substitutions
Feel free to personalize your Twix Cookie Bars with these delightful twists that add your own unique flair!
-
Dark Chocolate: Swap out milk chocolate for dark chocolate for a deeper, rich flavor. The slight bitterness pairs wonderfully with the sweetness.
-
Nutty Crunch: Add chopped nuts, like pecans or almonds, to the shortbread crust for a delightful crunch. This surprise texture will enhance every bite.
-
Gluten-Free: Substitute all-purpose flour with a gluten-free blend to enjoy these bars without compromising flavor or texture. Perfect for gluten-sensitive friends!
-
Caramel Variations: Use store-bought caramel sauce for a quicker option; just warm it up slightly before pouring it over the crust. Easy and just as delicious!
-
Seasonal Spices: Incorporate a dash of cinnamon or a hint of nutmeg in the caramel for a warm, comforting flavor. Your kitchen will smell heavenly!
-
Salted Caramel: Sprinkle a touch of flaky sea salt on top of the chocolate layer for a balanced sweet-savory contrast that elevates these bars.
-
Flavor Infusion: Experiment with flavored extracts, like almond or hazelnut, in the chocolate layer for an exciting twist that’s sure to tantalize taste buds.
-
Caramel Apple: Add bits of dried apples to the caramel layer; it creates a delightful fruitiness and pairs beautifully with the other flavors.
Enjoy your baking adventure, and if you’re looking for more delicious ideas, try these Chocolate Brownie Cookies or perhaps some scrumptious Pumpkin Sugar Cookies for your next sweet moment!
Make Ahead Options
These delightful Twix Cookie Bars are perfect for meal prep, allowing you to enjoy homemade treats without the last-minute rush! You can prepare the crust and caramel layers up to 24 hours in advance. Simply bake the crust, let it cool completely, and store it in an airtight container at room temperature. For the caramel, once cooled, transfer it to an airtight container and refrigerate it until ready to assemble. When it’s time to finish, simply rewarm the caramel slightly if it has thickened before pouring it over the crust, then complete with the chocolate layer and refrigerate until set. This way, your Twix Cookie Bars will be just as delicious, and you’ll save precious time during busy weeknights!
Expert Tips for Twix Cookie Bars
• Room Temperature Ingredients: Ensure your butter is at room temperature to create a creamy, cohesive crust. Cold butter can lead to uneven texture.
• Accurate Measurements: Using a kitchen scale for your flour ensures the perfect crust density. Too much flour can lead to a crumbly bar instead of a buttery base.
• Candy Thermometer Check: Double-check your candy thermometer’s accuracy; incorrect readings can cause your caramel to turn sugary or too runny.
• Cooling Time: Allow the caramel to cool slightly before layering it on the crust. Too hot, and it can melt the base; too cool, and it won’t spread smoothly.
• Chocolate Melting Method: When melting chocolate, opt for shorter heating intervals and frequent stirring to avoid overheating, ensuring a silky topping for your Twix Cookie Bars.
• Storing Tips: To maintain freshness, store leftovers in an airtight container in the fridge. These treats can last up to two weeks for endless indulgence!
Twix Cookie Bars Recipe FAQs
What type of butter should I use for the crust?
For the crust, I recommend using salted butter at room temperature. It provides richness and helps achieve a perfect crumbly texture when mixed with the sugars and flour. Room temperature butter blends easily with the dry ingredients, ensuring a smooth crust.
How should I store my Twix Cookie Bars?
Store your Twix Cookie Bars in an airtight container in the refrigerator for up to 2 weeks. This keeps them fresh and maintains their delightful texture. If you plan to enjoy them later, you can also freeze them for up to 2 months. Wrap them tightly in plastic wrap or aluminum foil before placing them in a freezer-safe container, and allow them to thaw at room temperature for about 15-20 minutes before serving for the best flavor.
Can I freeze Twix Cookie Bars?
Absolutely! To freeze your Twix Cookie Bars, cut them into squares and layer them in an airtight container. For added protection against sticking, place parchment paper between the layers. They can be frozen for up to 2 months, so you can enjoy this delectable treat whenever you need a sweet pick-me-up. Just thaw them at room temperature before enjoying!
What if my caramel doesn’t set properly?
If your caramel doesn’t set properly, don’t worry! First, ensure that you reached 235°F while cooking; this is crucial for the right texture. If it’s too runny, you can try gently reheating it and cooking a bit longer until it thickens, monitoring the temperature closely. You can also refrigerate the bars longer; sometimes, more time is needed for the caramel to firm up after layering.
Are there any dietary considerations I should keep in mind for Twix Cookie Bars?
Yes, if you’re making these bars for someone with food allergies, be mindful of ingredient substitutes. For individuals with dairy allergies, opt for dairy-free butter and chocolate. Also, if you’re considering making these for a pet, please avoid chocolate, as it’s toxic to dogs and cats. Always ensure that all ingredients align with any dietary restrictions for your guests!
How do I know when my chocolate layer is melted perfectly?
To melt the chocolate layer, either use a microwave or a double boiler. For the microwave, heat the chocolate in 30-second intervals, stirring well between each interval until it’s silky smooth. If using a double boiler, make sure the bowl does not touch the water below; stir frequently for an even consistency. The goal is to have a glossy, pourable chocolate—too much heat will cause it to seize!
Indulge in Irresistible Homemade Twix Cookie Bars
Ingredients
Equipment
Method
- Preheat your oven to 300°F (150°C). In a large mixing bowl, blend together salted butter, powdered sugar, all-purpose flour, and vanilla extract until crumbly. Press into a lined baking pan and bake for 40 minutes until golden brown.
- In a saucepan, combine salted butter, light corn syrup, granulated sugar, and salt. Stir in heavy whipping cream and cook over low heat until melted. Increase heat until it simmers without stirring until reaching 235°F on a candy thermometer.
- Remove caramel from heat, stir in vanilla extract, and let cool for 5-10 minutes to thicken.
- Pour warm caramel over the cooled crust and smooth it out. Refrigerate for 45-60 minutes until the caramel sets.
- Melt chocolate with heavy whipping cream using a microwave or double boiler until smooth.
- Pour the melted chocolate over the chilled caramel layer and spread evenly.
- Refrigerate the bars for 3-4 hours until the chocolate layer is firm.
- Cut into 32 squares and enjoy your homemade Twix Cookie Bars!
Leave a Reply