
The aroma of freshly baked apples wafting through my kitchen is an “ahh” moment that instantly transports me to cozy autumn afternoons. This year, I’m excited to share my recipe for The Ultimate Bloomin’ Apples, an enchanting dessert that not only looks stunning but also delights the senses. These tender, caramel-stuffed apples bloom beautifully in the oven, creating a warm centerpiece perfect for any gathering. What’s even better? This interactive treat is surprisingly simple to whip up, making it an ideal choice for those who want to impress without spending all day in the kitchen. Plus, the gooey caramel center paired with a scoop of creamy vanilla ice cream is a combination that will have your guests begging for seconds. Are you ready to take your fall dessert game to the next level? Let’s dive into this delicious experience!
Why Are Bloomin’ Apples a Must-Try?
Irresistible Flavor: The sweet caramel and warm apple create a delightful harmony that dances on your palate.
Visually Stunning: Each apple blooms into a beautiful flower, making it a showstopper at gatherings.
Interactive Dessert: Digging into these chewy, caramel-filled beauties with friends and family adds a fun element to your meal.
Fall Comfort: Perfectly embodies the essence of fall, filling your home with cozy aromas.
Simple Prep: With basic cooking skills, you can create an impressive dessert in no time—just like my Chicken Alfredo Casserole or Gnocchi Soup.
These bloomin’ apples will surely steal the show at your next gathering!
The Ultimate Bloomin’ Apples Ingredients
For the Apples
• Firm Apples (e.g., Honeycrisp, Gala) – Choose a sturdy variety to prevent mushiness when baked.
• Cooking Spray – Prevents sticking during baking; butter or oil can also be used.
For the Caramel Filling
• Chewy Caramel Squares – The secret to that gooey center; opt for soft, individually wrapped caramels for best results.
For the Coating
• Melted Butter – Adds richness and helps caramelize the apples for an irresistible flavor.
• Brown Sugar – Provides moisture and depth, enhancing the overall caramel flavor.
• Granulated Sugar – A sweetness booster; can be reduced for a less sweet taste.
• Ground Cinnamon – Aromatic spice that complements the apples beautifully; adjust to your liking.
For Serving
• Vanilla Ice Cream – A creamy topping that balances the warmth of the apples; consider high-quality brands for best flavor.
• Caramel Sauce – Drizzle over the top for an extra layer of sweetness and visual appeal; use homemade or store-bought.
These ingredients come together to create The Ultimate Bloomin’ Apples, ensuring a delightful fall dessert experience!
Step‑by‑Step Instructions for The Ultimate Bloomin’ Apples
Step 1: Preheat the Oven
Begin by preheating your oven to 375°F. If you prefer an air fryer, set it to 350°F. This temperature ensures that your bloomin’ apples cook evenly, achieving that perfect tender texture. While the oven heats up, gather all your ingredients and equipment, including a baking dish and cooking spray to prevent sticking.
Step 2: Create the Butter Mixture
In a mixing bowl, whisk together the melted butter, brown sugar, granulated sugar, and ground cinnamon until well combined, creating a rich, sweet coating. The mixture will have a lovely brown hue and aromatic scent, signifying that it’s ready to enhance your apples. Set the bowl aside as you prepare to handle the apples.
Step 3: Core and Slice the Apples
Carefully core your firm apples using a corer or a knife, leaving the bottom intact. Slice the apples into thin sections, approximately halfway down, resembling petals of a flower. Be gentle—this technique allows them to bloom beautifully while baking, showcasing the inviting caramel inside of your blossoming creation.
Step 4: Stuff the Apples
Take your sliced apples and place two chewy caramel squares inside each fruit’s center. Make sure they fit snugly so that as they bake, the caramels will melt perfectly and ooze out, creating that gooey, sweet core. This step is essential for ensuring The Ultimate Bloomin’ Apples have that mouthwatering melted caramel filling.
Step 5: Coat the Apples
Generously brush each apple with the butter-sugar mixture you prepared earlier, ensuring every crevice gets coated. This mixture will achieve a lovely caramelization as the apples bake, making them golden brown and adding a delightful sweetness. Place the apples upright in a greased baking dish, ensuring they’re snugly arranged.
Step 6: Bake to Perfection
Slide the baking dish filled with your bloomin’ apples into the preheated oven. Bake them for about 30 minutes or until the apples are tender but still hold their shape. If you’re using an air fryer, set the timer for about 20 minutes. Keep an eye on them until they’re beautifully golden and fragrant.
Step 7: Serve with Delight
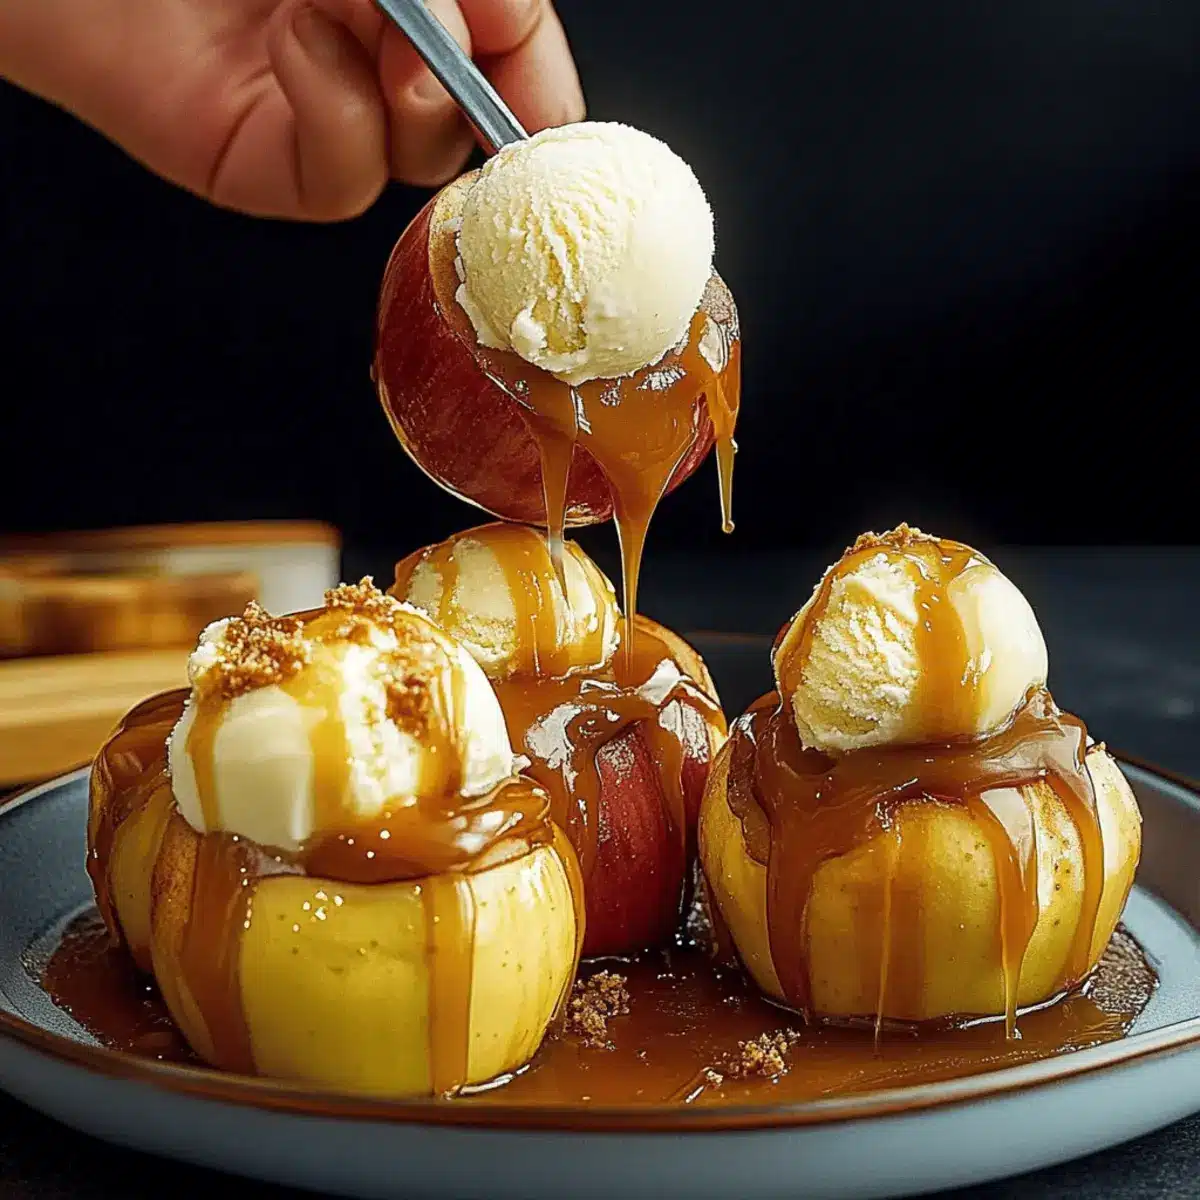
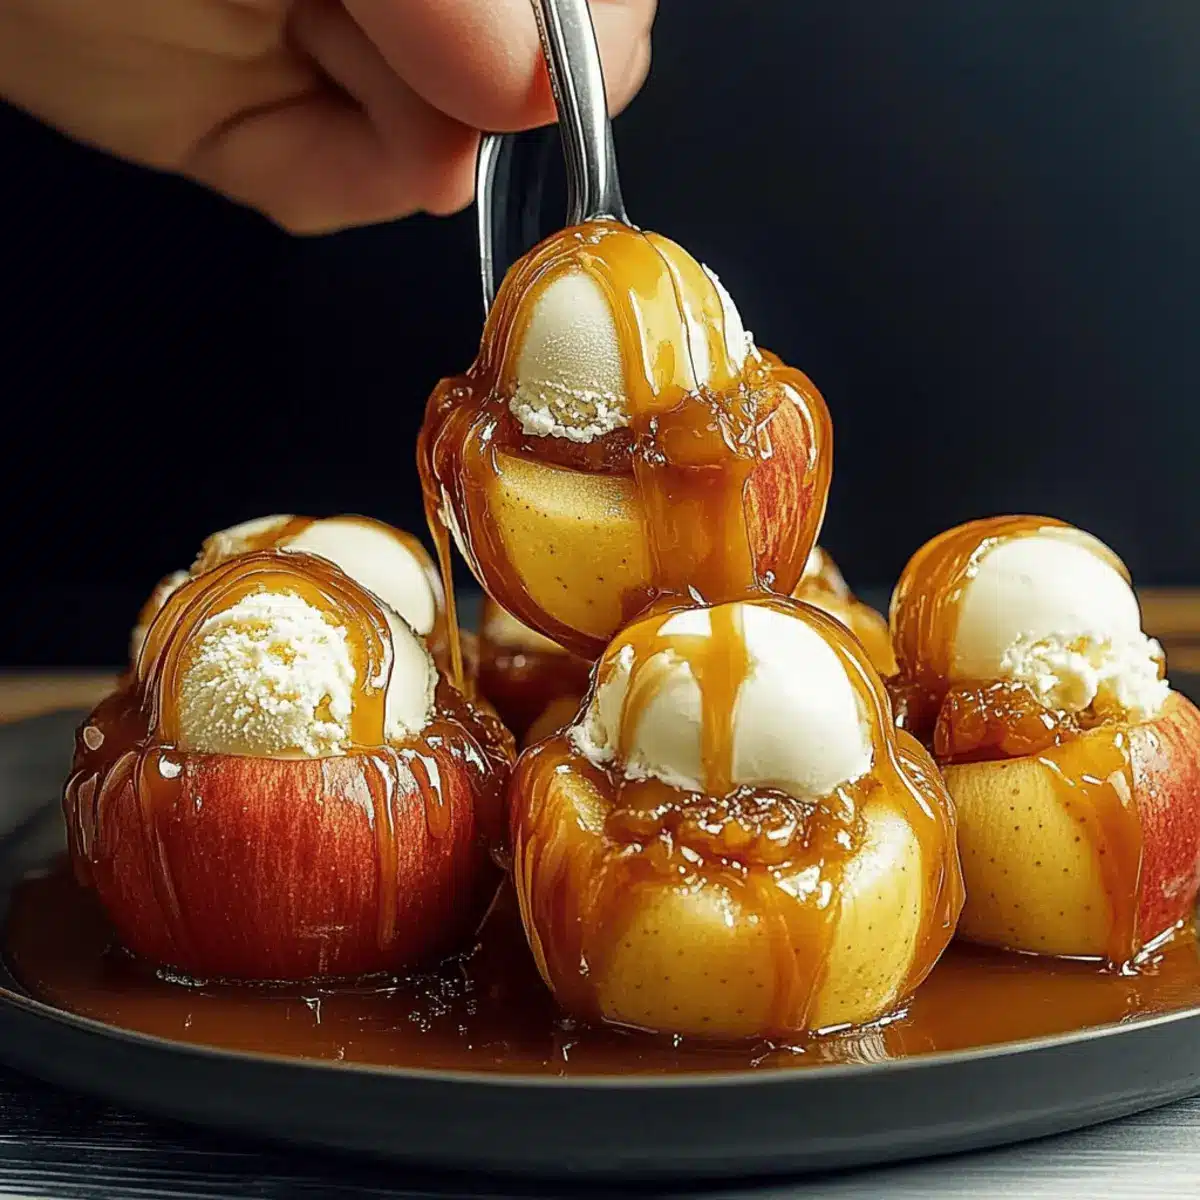
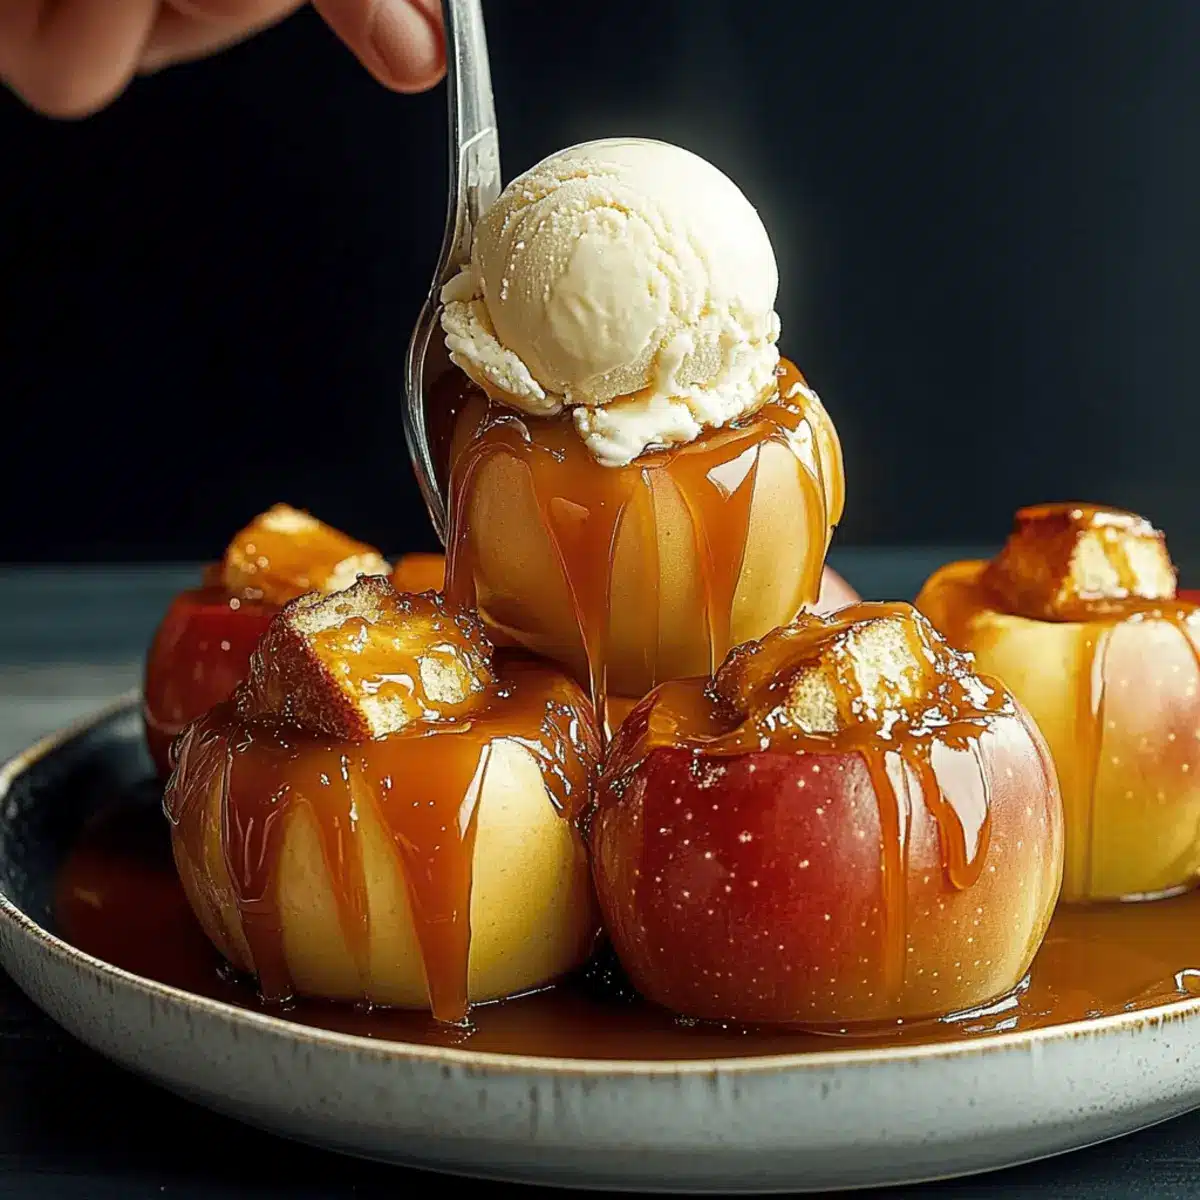
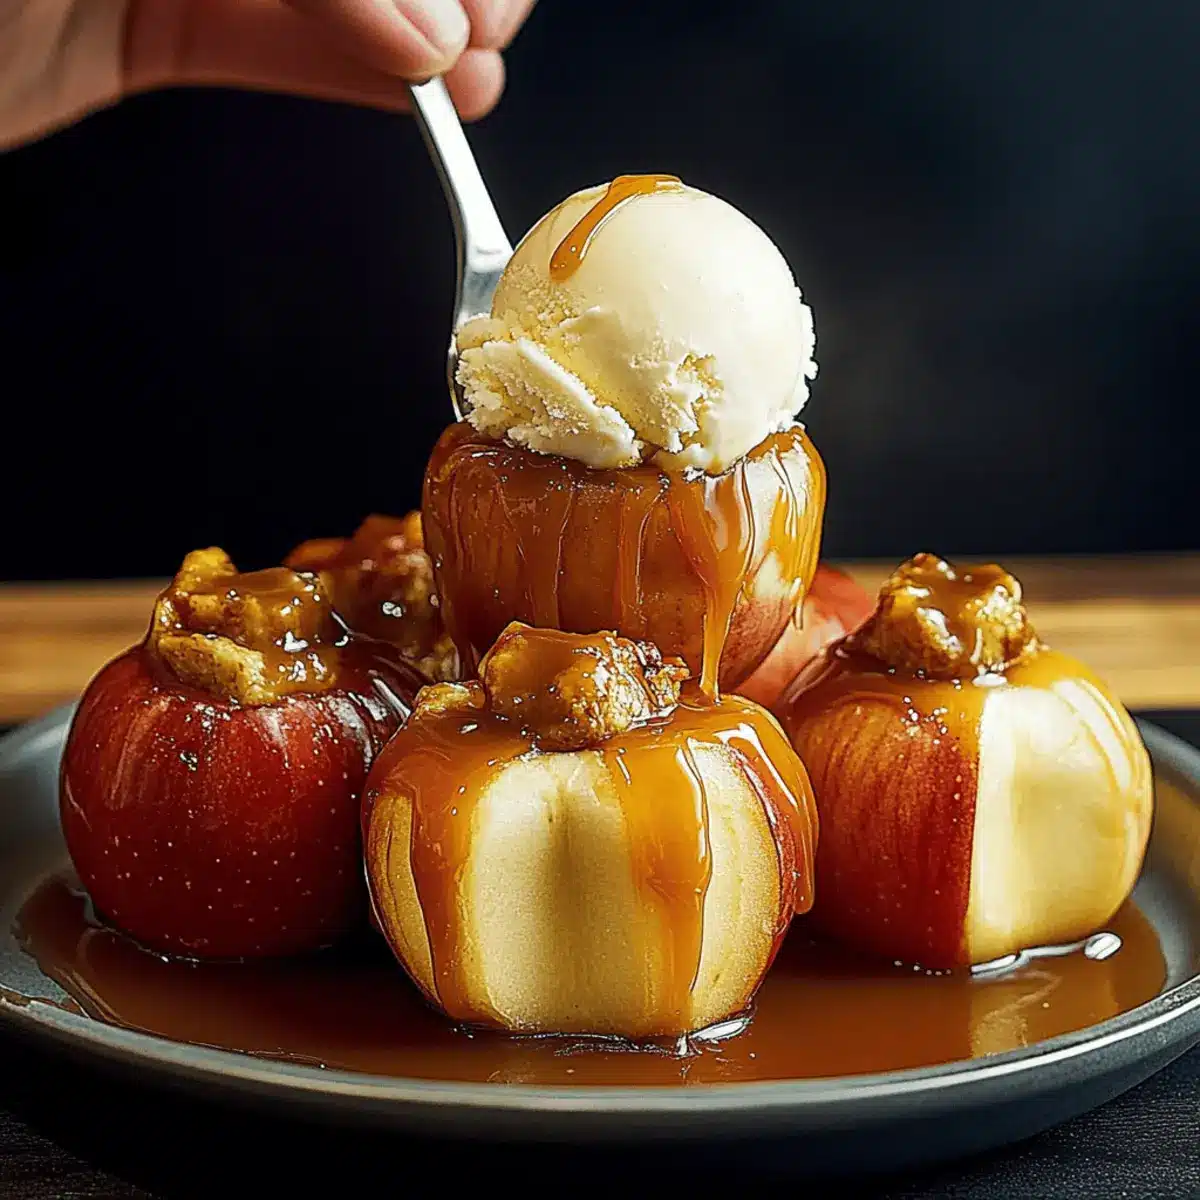
Once your bloomin’ apples are baked and slightly cooled, serve them warm. Place each apple on a dessert plate alongside a generous scoop of creamy vanilla ice cream. Drizzle with caramel sauce for that extra sweetness, making The Ultimate Bloomin’ Apples a truly delightful fall dessert experience that will impress everyone at your table!
Expert Tips for The Ultimate Bloomin’ Apples
Choose the Right Apples: Select firm varieties like Honeycrisp or Gala to prevent mushiness during baking.
Avoid Overbaking: Keep a close eye on your apples; they should be tender but still hold their shape for the perfect texture.
Mind the Caramel: Place the caramel squares snugly inside to ensure they melt evenly, creating that gooey center everyone loves.
Brush Generously: Don’t skimp on the butter-sugar mixture when coating your apples; it enhances flavor and promotes beautiful caramelization.
Serve Warm: For the best experience, serve the bloomin’ apples warm with ice cream right after baking to enjoy the delightful contrast of temperatures.
These tips will help you create The Ultimate Bloomin’ Apples that will be the star of your fall dessert table!
The Ultimate Bloomin’ Apples Variations
Feel free to get creative and customize The Ultimate Bloomin’ Apples to suit your taste buds or dietary preferences!
- Gluten-Free: Use gluten-free oats and ensure your caramel is gluten-free to keep this dessert safe and satisfying for everyone.
- Nutty Surprise: Add chopped walnuts or pecans inside the apples for a delightful crunch and nutty flavor that complements the sweet caramel beautifully. They’ll add an unexpected texture that will impress your guests!
- Spice It Up: Introduce a hint of nutmeg or allspice along with the cinnamon for a warm, spiced twist that’s perfect for fall.
- Chocolate Delight: Swap out caramel for chocolate chips or chunks for a different flavor experience that’s irresistibly gooey. Imagine melted chocolate oozing from the center—simply divine!
- Dairy-Free: Use coconut or almond ice cream as a creamy topping, providing both a delicious taste and accommodating dairy-free diets.
- Flavorful Ice Cream: Try serving with pumpkin spice or apple pie flavored ice cream for an exciting twist that enhances the fall flavor profile of your dessert.
- Savory Touch: For a unique take, sprinkle some sea salt over the finished apples to enhance the sweetness and create an exquisite flavor balance.
- Fruit Variations: Trade apples for pears for a tender and juicy alternative that offers a different texture while maintaining that lovely bloomed appearance.
With each variation, your bloomin’ experience will be elevated, inviting delightful conversations around the table. Want more inspiration? Check out my Cajun Salmon Avocado or indulge in a comforting bowl of Gnocchi Soup. Enjoy your sweet adventures!
Make Ahead Options
These Caramel-Stuffed Bloomin’ Apples are perfect for busy weeknights, allowing you to prep components in advance for a seamless dessert experience. You can core and slice the apples up to 24 hours ahead; just toss them in lemon juice to prevent browning. Additionally, mix the butter, brown sugar, and cinnamon, storing it in an airtight container in the fridge for up to 3 days. When you’re ready to bake, simply stuff the apples with caramel, coat them, and bake as directed. This way, you’ll have a stunning, warm dessert that tastes just as delicious with minimal effort, delighting your family without the last-minute rush!
What to Serve with The Ultimate Bloomin’ Apples
Experience the joy of creating a complete meal around these fragrant, caramel-stuffed autumn treasures, making your dessert truly unforgettable.
- Creamy Vanilla Ice Cream: A classic pairing, the ice cream adds a cool contrast to the warm apples, enhancing each bite.
- Maple Pecan Tart: The rich, nutty flavors compliment the sweetness of the apples, adding a delightful crunch.
Imagine serving these two favorites together on your fall dessert table; the ice cream melts into the soft apple textures, while the tart introduces an exciting textural balance.
-
Spiced Apple Cider: Warm and fragrant, this beverage will harmonize beautifully with The Ultimate Bloomin’ Apples, wrapping you in comfort.
-
Candied Nuts: The crunchy, sweet bite of pecans or walnuts provides a perfect textural contrast to the tender apples.
-
Pumpkin Spice Muffins: These seasonal delights elevate the autumn experience, providing a spiced treat that matches the apples’ flavors.
When shared with loved ones, each element creates a gathering filled with warmth and nostalgia, perfect for those cozy evenings.
How to Store and Freeze The Ultimate Bloomin’ Apples
Fridge: Store any leftovers in an airtight container in the fridge for up to 3 days. The apples may lose some texture but will still taste delightful.
Freezer: If you want to freeze, wrap each cooled bloomin’ apple tightly in plastic wrap and then place them in a freezer-safe bag. They can be stored for up to 2 months.
Reheating: To enjoy your frozen bloomin’ apples, thaw in the fridge overnight, then reheat in the oven at 350°F for about 15-20 minutes until warmed through.
Serving Suggestion: After reheating, serve the previously frozen apples with a fresh scoop of ice cream and a drizzle of caramel sauce for that fresh, warm dessert experience!
The Ultimate Bloomin’ Apples Recipe FAQs
What type of apples should I use for The Ultimate Bloomin’ Apples?
Select firm varieties like Honeycrisp or Gala. These apples hold their shape during baking, preventing them from becoming mushy and ensuring your lovely blooms maintain their beautiful form. A sturdy apple will also enhance the overall texture of the dessert, making each bite delightful.
How can I store leftover bloomin’ apples?
Store any leftovers in an airtight container in the fridge for up to 3 days. While the apples may lose some of their initial texture, they will still be delicious and make for a great treat when reheated. Enjoy them warm for the best experience!
Can I freeze The Ultimate Bloomin’ Apples?
Absolutely! To freeze, wrap each cooled bloomin’ apple tightly in plastic wrap, then place them into a freezer-safe bag. They can last for up to 2 months. When you’re ready to enjoy, simply thaw them in the fridge overnight and reheat in the oven at 350°F for about 15-20 minutes until warmed through.
What should I do if my apples don’t bloom well while baking?
If your apples don’t bloom as much as you’d like, try adjusting your cutting technique next time. Ensure you’re slicing the apples deeply but not all the way through, as this allows them to open beautifully while baking. Also, be careful not to overbake them; the sweet spot is achieving a tender yet intact apple.
Is this recipe suitable for those with dietary restrictions?
For those with nut allergies, this recipe is nut-free. If you’re looking for dietary options like gluten-free or dairy-free, you can use dairy-free butter and ensure the caramel used does not contain gluten. Always check labels to ensure safe ingredients for your specific dietary needs.
How long does it take to prepare and bake the bloomin’ apples?
The entire process takes about 45-60 minutes, including preparation and baking time. You’ll need approximately 15-20 minutes for prep, followed by 30 minutes of baking in the oven. It’s an easy and enjoyable activity that adds a splendid touch to your fall dessert lineup!
These FAQs aim to clarify common concerns and enhance your experience with The Ultimate Bloomin’ Apples Recipe FAQs.
The Ultimate Bloomin’ Apples: Cozy Fall Delights to Savor
Ingredients
Equipment
Method
- Preheat your oven to 375°F (350°F for air fryer) and gather all your ingredients and equipment.
- In a mixing bowl, whisk together melted butter, brown sugar, granulated sugar, and ground cinnamon until well combined.
- Core the apples, leaving the bottom intact, and slice them into thin sections resembling flower petals.
- Place two chewy caramel squares inside the center of each apple, ensuring they fit snugly.
- Brush each apple generously with the butter-sugar mixture, then place them upright in a greased baking dish.
- Bake for 30 minutes (20 minutes in air fryer) until the apples are tender but hold their shape.
- Serve warm, with a scoop of vanilla ice cream and a drizzle of caramel sauce.
Leave a Reply