
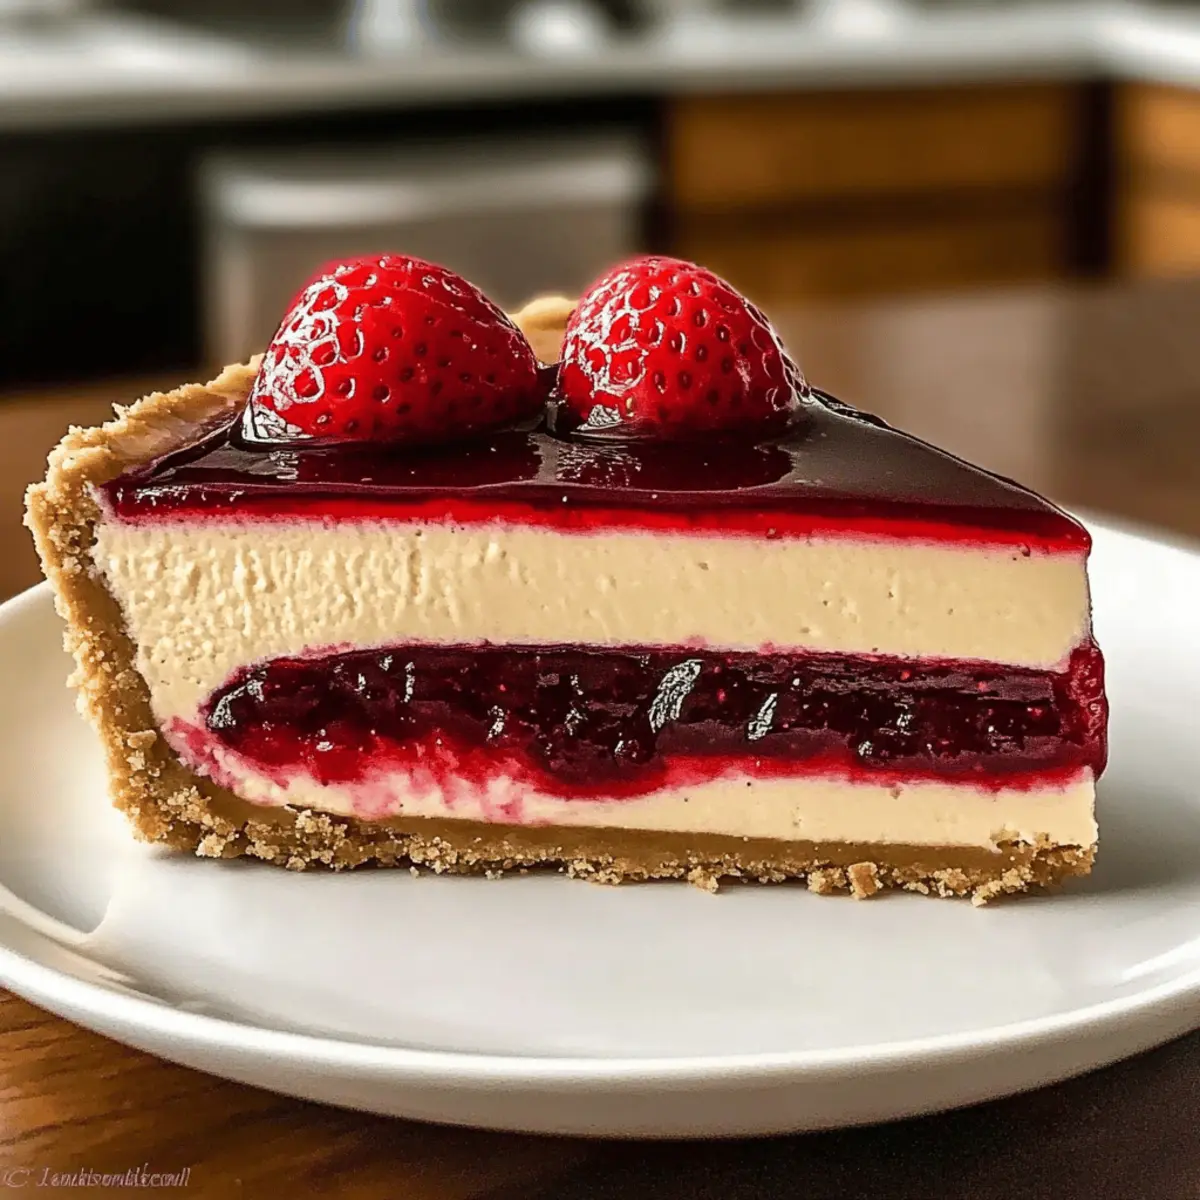
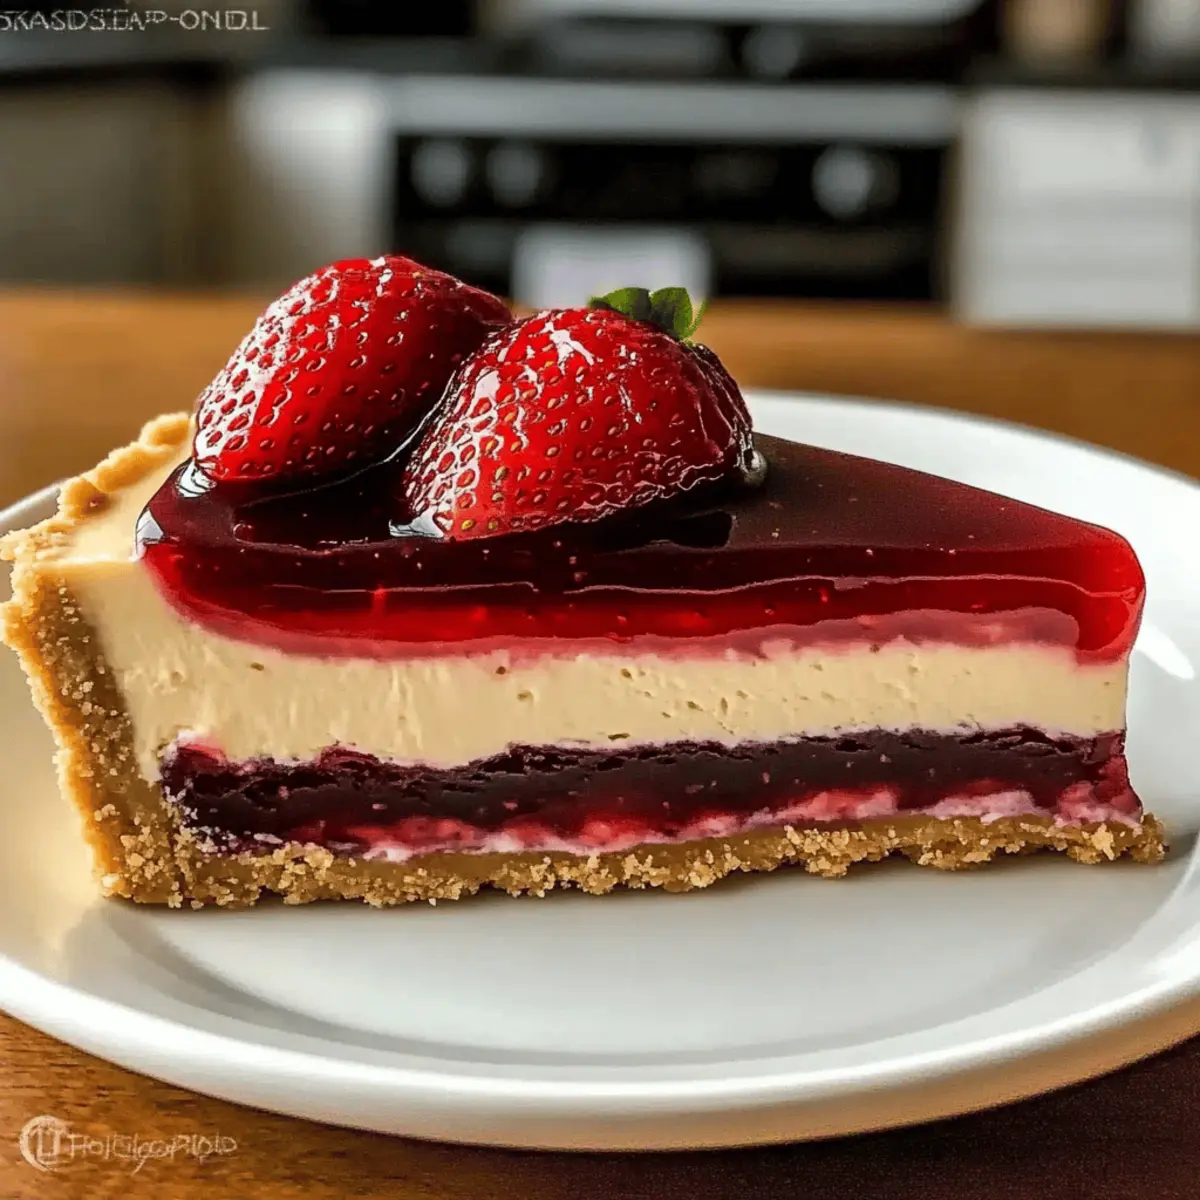
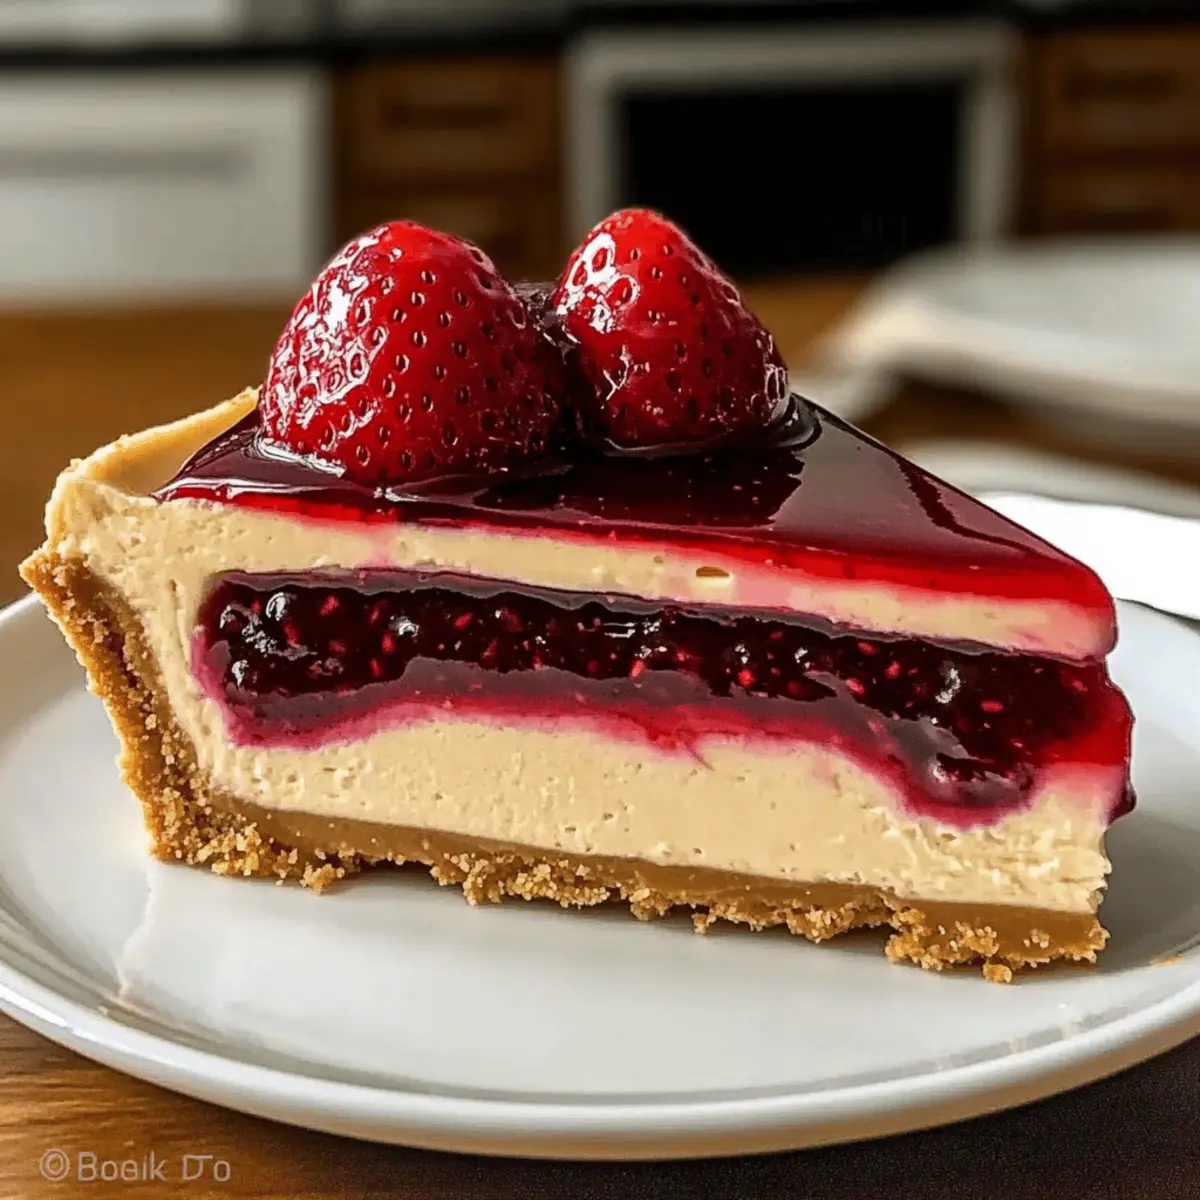
As I stood in the kitchen, the aroma of peanut butter wafted through the air, instantly bringing back childhood memories of gooey sandwiches on lazy Sundays. That’s the beauty of this Peanut Butter and Jelly Cheesecake; it’s a nostalgic twist on a classic that combines the rich creaminess of peanut butter with the sweetness of strawberry topping. This dessert is not only a showstopper at family gatherings but also surprisingly simple to prepare. With a crunchy graham cracker crust and a velvety filling, it’s the perfect way to satisfy your sweet tooth without the hassle of overly complicated recipes. Are you ready to whip up a slice of nostalgia that’ll leave everyone asking for seconds?

Why is this cheesecake a must-try?
Indulgent, the rich creaminess of peanut butter paired with a sweet strawberry topping creates a flavor explosion that will take you back to childhood.
Simplicity, no complicated steps here! This recipe is straightforward, letting you enjoy the process without any culinary stress.
Versatile, swap the strawberry topping for any berry preserves to suit your taste or dietary needs.
Crowd-Pleaser, guaranteed to impress family and friends at gatherings, it’s the dessert everyone will rave about.
Nostalgic, enjoy a delightful spin on a classic PB&J that combines all the comfort of home with a modern twist – it’s sure to be a hit!
Peanut Butter and Jelly Cheesecake Ingredients
• For the Crust
- Graham Cracker Crumbs – Provide the crust; you can substitute with digestive biscuits for a unique flavor.
- Butter (melted) – Binds the crust together; use coconut oil for a dairy-free option if needed.
• For the Filling
- Cream Cheese (softened) – Gives the cheesecake its creamy texture; ensure it’s at room temperature for smooth mixing.
- Smooth Peanut Butter – Adds that rich, comforting flavor; you can use almond butter to achieve a nut-free cheesecake.
- Sugar – Sweetens the filling; brown sugar can deepen the sweetness for a more complex flavor.
- Flour – Helps stabilize the filling; try cornstarch for a gluten-free alternative.
- Vanilla Extract – Enhances the overall flavor; opt for pure vanilla for the best results.
- Heavy Whipping Cream – Adds richness and lightness; substitute with coconut cream for a dairy-free treat.
- Eggs – Provide structure to the cheesecake; ensure they’re at room temperature for easier emulsification.
• For the Topping
- Strawberry Topping or Preserves – A sweet finishing touch; feel free to use any berry preserves for different flavor profiles.
This Peanut Butter and Jelly Cheesecake recipe is a labor of love, perfect for using simple ingredients to create a memorable dessert!
Step‑by‑Step Instructions for Peanut Butter and Jelly Cheesecake
Step 1: Preheat and Prepare Your Pan
Begin by preheating your oven to 325°F (165°C). While it warms up, grab a 9-inch springform pan and grease it well with butter or cooking spray to prevent sticking. This sturdy pan will help your Peanut Butter and Jelly Cheesecake maintain its shape, so make sure you cover the bottom and sides evenly.
Step 2: Make the Graham Cracker Crust
In a mixing bowl, combine graham cracker crumbs with melted butter. Stir them together until fully combined with a sandy texture, then transfer the mixture to the prepared springform pan. Press it evenly into the bottom with your fingers or a flat-bottomed glass to create a firm crust. Bake this in your preheated oven for 10 minutes, then remove it to cool completely.
Step 3: Blend the Creamy Filling
In a large mixing bowl, beat the softened cream cheese and smooth peanut butter together with an electric mixer on medium speed until creamy and free of lumps, which should take about 2 minutes. Gradually add in the sugar and flour, continuing to mix until everything is well blended and smooth. Keep an eye out for that silky texture—a key to your delectable cheesecake!
Step 4: Add Flavor Enhancements
Once your peanut butter mixture is smooth, pour in the vanilla extract. Mix on low speed just until combined, ensuring that all the flavors are integrated. This sweet vanilla note will elevate your Peanut Butter and Jelly Cheesecake, harmonizing beautifully with the rich filling you’re creating. Set this mixture aside for the next steps.
Step 5: Incorporate the Eggs
Add the eggs one at a time into your peanut butter filling, mixing well after each addition. This step is crucial for structure, so allow each egg to fully incorporate before adding the next. The mixture should remain fluffy and smooth, creating a delightful rich base for your cheesecake.
Step 6: Whip in the Heavy Cream
Slowly pour the heavy whipping cream into the batter while mixing on a low speed. Blend until just combined and avoid overmixing; you want to maintain that airy texture. This addition makes your Peanut Butter and Jelly Cheesecake luscious and creamy, adding delightful lightness as well.
Step 7: Bake the Cheesecake
Carefully pour the creamy filling over your cooled crust in the springform pan. Smooth the top gently with a spatula. Bake in the oven for 50–60 minutes, keeping an eye on it. The center should look slightly jiggly when done; it will firm up during cooling.
Step 8: Cool Gradually
Once baked, turn off the oven and leave the cheesecake inside with the door slightly ajar for about 1 hour. This gradual cooling helps prevent cracks in your cheesecake. After an hour, remove it from the oven and allow it to cool completely at room temperature.
Step 9: Refrigerate to Set
Transfer your cooled Peanut Butter and Jelly Cheesecake to the refrigerator and cover it lightly with plastic wrap. Let it chill for at least 4 hours, but overnight is even better for it to solidify properly. This waiting time builds the flavors and ensures a perfect slice when you cut into it.
Step 10: Add the Sweet Topping
Just before serving, warm the strawberry topping or preserves gently in a small saucepan over low heat. Pour this sweet, luscious layer over the top of your cheesecake, spreading it evenly to cover the surface. This will elevate your dessert to mouthwatering heights and add that perfect finishing touch!
Expert Tips for Peanut Butter and Jelly Cheesecake
-
Cream Cheese Warmth: Make sure your cream cheese is at room temperature before mixing. This avoids lumps in your Peanut Butter and Jelly Cheesecake and creates a smooth, creamy filling.
-
Egg Incorporation: Add the eggs one at a time, making sure each is fully mixed in. This ensures a well-emulsified batter, which helps achieve a perfect texture.
-
Cooling Technique: Allow the cheesecake to cool gradually in the oven with the door ajar to prevent cracks. This step is crucial for achieving a flawless finish.
-
Bake Time Watch: Keep an eye on the baking time; the cheesecake should remain slightly jiggly in the center when you take it out. It will set as it cools.
-
Flavor Flexibility: Don’t hesitate to experiment with different berry preserves if you’re feeling adventurous. This allows you to customize your Peanut Butter and Jelly Cheesecake to your liking!
Peanut Butter and Jelly Cheesecake Variations
Feel free to add your personal touch to this delightful cheesecake, making it uniquely yours!
-
Berry Swap: Substitute strawberry preserves with raspberry or blueberry for a fresh flavor twist. Each berry brings its own unique sweetness, giving the classic dessert a delightful makeover.
-
Crunchy Texture: Use crunchy peanut butter instead of smooth for an added layer of texture. This variation adds delightful little bites in each creamy slice, allowing nostalgia to meet a new experience.
-
Lower-Sugar Option: For a healthier take, consider using sugar alternatives like honey or maple syrup. This keeps the sweetness while catering to dietary needs.
-
Flavor Boost: Mix in a tablespoon of chocolate chips into the filling for a rich chocolate-peanut butter blend. Imagine the decadent flavors swirling in each slice!
-
Dairy-Free Delight: Opt for vegan cream cheese and coconut cream to create a luscious dairy-free cheesecake. Everyone deserves a slice, regardless of their dietary restrictions!
-
Nut-Free Version: Replace peanut butter with sunflower seed butter for a nut-free alternative that doesn’t skimp on flavor. It’s comforting and perfect for school-friendly treats.
-
Savory Touch: Add a pinch of sea salt or swirl in caramel sauce into the filling for a sophisticated flavor contrast. This sweet and savory combination is simply divine!
-
Mousse Layer: Top your cheesecake with a layer of whipped cream cheese mousse instead of preserves for an ultra-rich, airy finish. A silky topping elevates your dessert to an irresistible indulgence.
Happy baking! Whether you stick with the classic recipe or break the mold with these variations, don’t forget to enjoy every moment of creating this delicious Peanut Butter and Jelly Cheesecake. And if you need inspiration for more delightful desserts, consider trying out Yogurt Peanut Butter for a quick snack or Thai Peanut Chicken for dinner!
What to Serve with Peanut Butter and Jelly Cheesecake
Delight in creating a memorable meal with these perfect pairings that enhance the comforting flavors of your dessert.
- Fresh Berries: A medley of strawberries, blueberries, and raspberries adds a pop of freshness, complementing the rich cheesecake beautifully.
- Vanilla Ice Cream: The creamy sweetness of vanilla ice cream balances out the richness of the cheesecake, creating an indulgent pairing that is simply irresistible.
- Chocolate Sauce: Drizzle warm chocolate sauce over each slice for a decadent twist; the contrasting flavors of chocolate and peanut butter are divine.
- Whipped Cream: Light and airy, a dollop of freshly whipped cream adds an extra touch of sweetness and creaminess, enhancing the overall dessert experience.
- Coffee: A warm cup of coffee serves as a delightful contrast to the sweetness of the cheesecake, providing a comforting end to your meal.
- Milk: A classic pairing, a tall glass of cold milk complements the flavors while creating a nostalgic feel reminiscent of childhood treats.
- Nutty Granola: Sprinkle some crunchy granola on top or serve on the side for a delightful texture contrast that enhances the flavor profile of your cheesecake.
- Homemade Berry Sauce: Pour some homemade sauce made from your favorite berries over slices for a touch of tartness; it’ll elevate each bite beautifully.
- Sparkling Lemonade: A refreshing drink, sparkling lemonade will cut through the rich creaminess of the cheesecake, offering a bright and zesty contrast.
Make Ahead Options
These Peanut Butter and Jelly Cheesecakes are perfect for meal prep enthusiasts! You can make the graham cracker crust up to 24 hours ahead of time, just store it in an airtight container at room temperature to maintain its crunch. The filling can also be prepared a day in advance; simply mix all the ingredients and refrigerate it, covered, until you’re ready to bake. For best results, pour the filling into the cooled crust right before baking to retain that luscious creaminess. After baking, allow the cheesecake to cool gradually in the oven to prevent cracking, then refrigerate for at least 4 hours or overnight to set. When ready to serve, just warm the strawberry topping and spread it on for an effortless, delicious finish!
How to Store and Freeze Peanut Butter and Jelly Cheesecake
Fridge: Store your cheesecake covered in the refrigerator for up to 1 week to keep it fresh and delicious.
Freezer: For longer storage, freeze the cheesecake for up to 3 months. Wrap it tightly in plastic wrap and aluminum foil to prevent freezer burn.
Reheating: Thaw the frozen cheesecake in the refrigerator overnight before serving. Enjoy it cold or allow it to reach room temperature for optimal flavor and texture.
Serving Tip: Always add the strawberry topping just before serving for that fresh, vibrant flavor boost!
Peanut Butter and Jelly Cheesecake Recipe FAQs
How do I choose ripe strawberries for the topping?
When selecting strawberries, look for ones that have a bright red color and are firm to the touch. Avoid any with dull spots or wilted leaves, as these may signify overripeness. Ripe strawberries should be fragrant and can be stored in the refrigerator for up to 3 days before using.
How should I store the cheesecake after baking?
To keep your Peanut Butter and Jelly Cheesecake fresh, store it in the refrigerator covered with plastic wrap or in an airtight container for up to 1 week. If you’re slicing it, you may want to place parchment paper between layers to avoid sticking.
Can I freeze leftover cheesecake?
Absolutely! To freeze your cheesecake, wrap it tightly in plastic wrap, then cover it with aluminum foil to prevent freezer burn. It can be frozen for up to 3 months. To thaw, simply transfer it to the refrigerator for about 24 hours before serving.
What if my cheesecake cracks during baking?
If you notice cracking in your cheesecake, it might be due to the oven temperature being too high or baking it for too long. Monitor the baking time closely, and remember that the center should still have a slight jiggle when removed from the oven. Additionally, letting the cheesecake cool gradually in the oven can help prevent cracks.
Is this cheesecake suitable for those with nut allergies?
For those with nut allergies, you can substitute the smooth peanut butter with sunflower seed butter or omit it entirely and use silken tofu for a similar creamy texture. Always check your preserves to ensure they are free from cross-contamination if you’re serving individuals with food allergies.
What can I do if my cream cheese mixture has lumps?
If your cream cheese mixture has lumps, it’s likely because the cream cheese wasn’t softened enough. To fix this, try mixing it for a longer time with an electric mixer until it’s smooth. If you encounter stubborn lumps, consider passing the mixture through a sieve to remove any clumps.
Irresistible Peanut Butter and Jelly Cheesecake to Savor
Ingredients
Equipment
Method
- Preheat your oven to 325°F (165°C) and grease a 9-inch springform pan.
- Combine graham cracker crumbs with melted butter in a mixing bowl. Press the mixture into the prepared pan and bake for 10 minutes.
- Beat cream cheese and peanut butter together until creamy. Gradually add sugar and flour, mixing until smooth.
- Add vanilla extract and mix on low speed until combined.
- Incorporate eggs one at a time, mixing well after each addition.
- Slowly mix in the heavy whipping cream until combined.
- Pour the filling over the cooled crust and bake for 50-60 minutes until the center is slightly jiggly.
- Turn off the oven and leave the cheesecake inside with the door ajar for about 1 hour to cool gradually.
- Transfer the cheesecake to the refrigerator and chill for at least 4 hours before serving.
- Warm the strawberry topping and pour it over the cheesecake just before serving.
Leave a Reply