
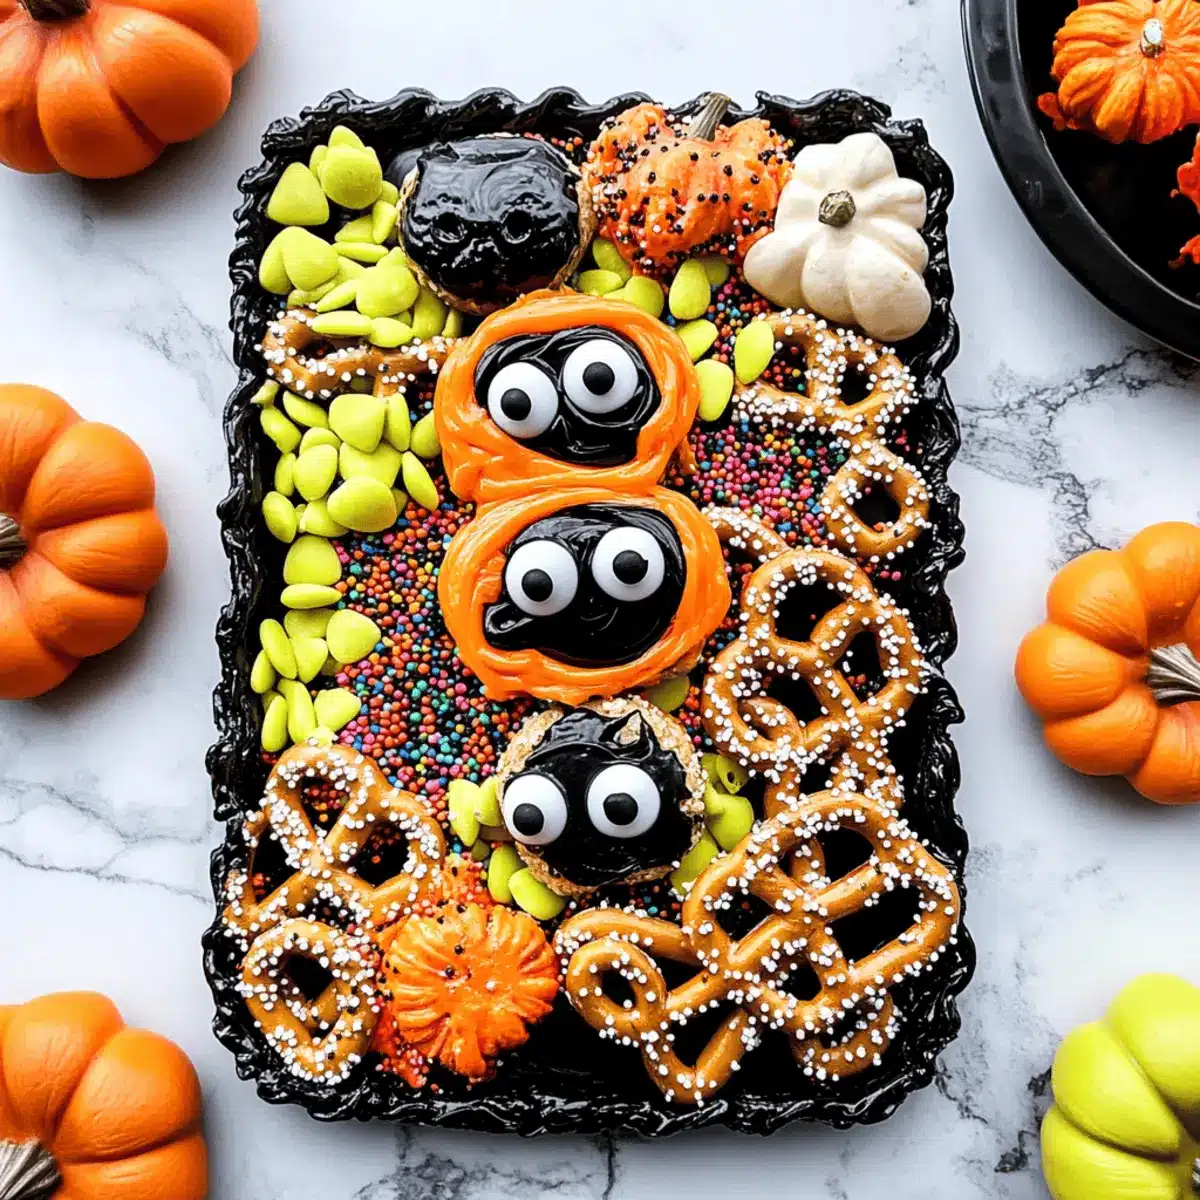
As I walked through the bustling aisles of my local grocery store, I was greeted by colorful Halloween decorations and the unmistakable smell of autumn spices. It sparked a burst of nostalgia that made me crave a simple yet delightful treat: No-Bake Halloween Pretzels! These charming snacks combine the satisfying crunch of pretzels with festive candy coating, making them an ideal project for a cozy afternoon in the kitchen. Preparing these Halloween Pretzels is a breeze, taking just around 20 minutes, and they’re a fantastic way to involve kids in the fun—customizing each one to their heart’s content. Whether you’re planning for a Halloween party or simply craving a spooky snack, these treats will be the highlight of your festivities. Are you ready to dive into this sweet and salty adventure?
Why Are Halloween Pretzels So Fun?
Irresistibly Crunchy: The base of mini pretzels brings a satisfying crunch that perfectly complements their sweet candy coating.
Kid-Friendly Fun: These no-bake treats are a delightful activity to engage your little ones, allowing them to unleash their creativity with sprinkles and toppings.
Quick & Easy: Ready in just 20 minutes, you can whip these up when a sweet craving strikes or for any spooky celebration.
Endlessly Customizable: Mix and match candy melts and toppings to create unique designs; your imagination is the limit!
Perfect for Sharing: Whether for a Halloween party platter or trick-or-treat bags, these pretzels are sure to please both kids and adults. Add a splash of festivity with delightful Butter Toffee Pretzels alongside your Halloween goodies!
Halloween Pretzel Ingredients
• Whip up a batch of these delightful Halloween Pretzels with ease using the following ingredients!
For the Base
- Mini Pretzels – The crunchy foundation for each treat; for a gluten-free option, use gluten-free mini pretzels.
For the Candy Coating
- Candy Melts (white, orange, black) – These sweet melts not only enhance flavor but also bring vibrant colors; feel free to substitute with melted chocolate chips mixed with coconut oil for extra shine.
For Decoration
- Halloween Sprinkles – Add some festive pizzazz; while these are perfect, you can also explore other themed sprinkles to suit your style.
- Candy Eyes – These whimsical additions give your pretzels a spooky flair; they are optional but oh-so-fun!
- Crushed Oreos – Use as an optional topping to introduce a delightful crunch and add flavor complexity.
Step‑by‑Step Instructions for No-Bake Halloween Pretzels
Step 1: Prepare the Baking Sheet
Begin by lining a large baking sheet with parchment paper to prevent sticking and ensure an easy cleanup. This will be the setting for your Halloween Pretzels, where they will cool and set. Make sure the parchment is smooth and flat, allowing ample space for your treats to spread out.
Step 2: Melt the Candy Melts
In a microwave-safe bowl, add your choice of candy melts—white, orange, and black are all perfect for Halloween. Heat them in increments of 30 seconds at medium power, stirring between each interval, until completely melted and smooth. This should take about 1–2 minutes. Ensure there are no lumps for a flawless coating on your pretzels.
Step 3: Dip the Pretzels
Once your candy melts are ready, pick up each mini pretzel using a fork or a dipping tool. Submerge it fully into the melted candy, allowing any excess to drip off. Place the dipped pretzel back on the prepared baking sheet. Continue this process until all pretzels are coated, making sure to keep them spaced apart for easy decorating.
Step 4: Add Toppings
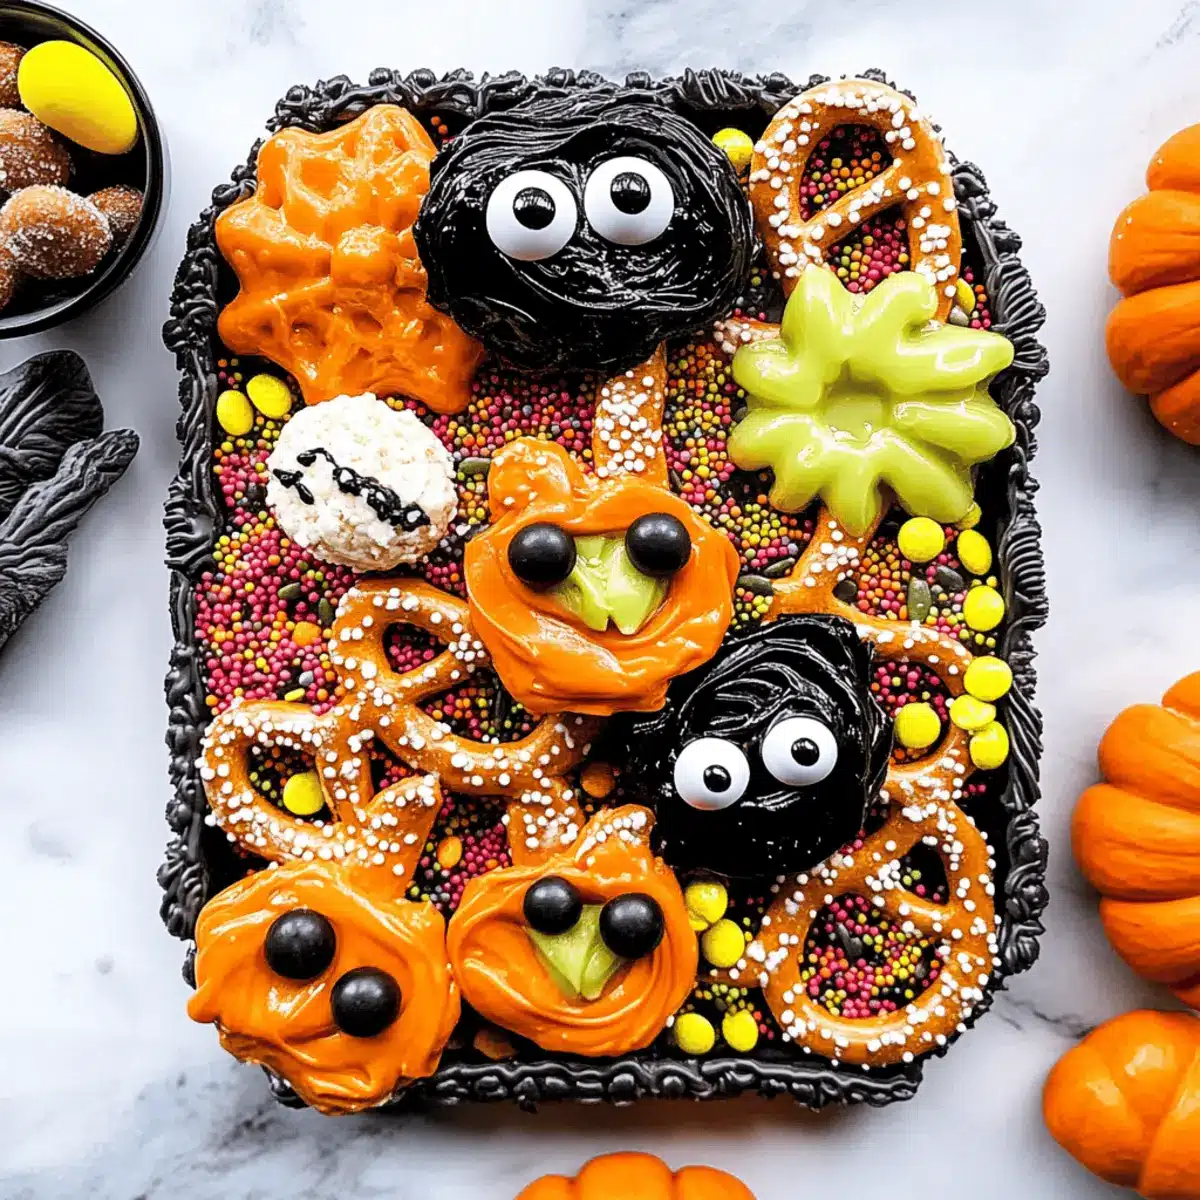
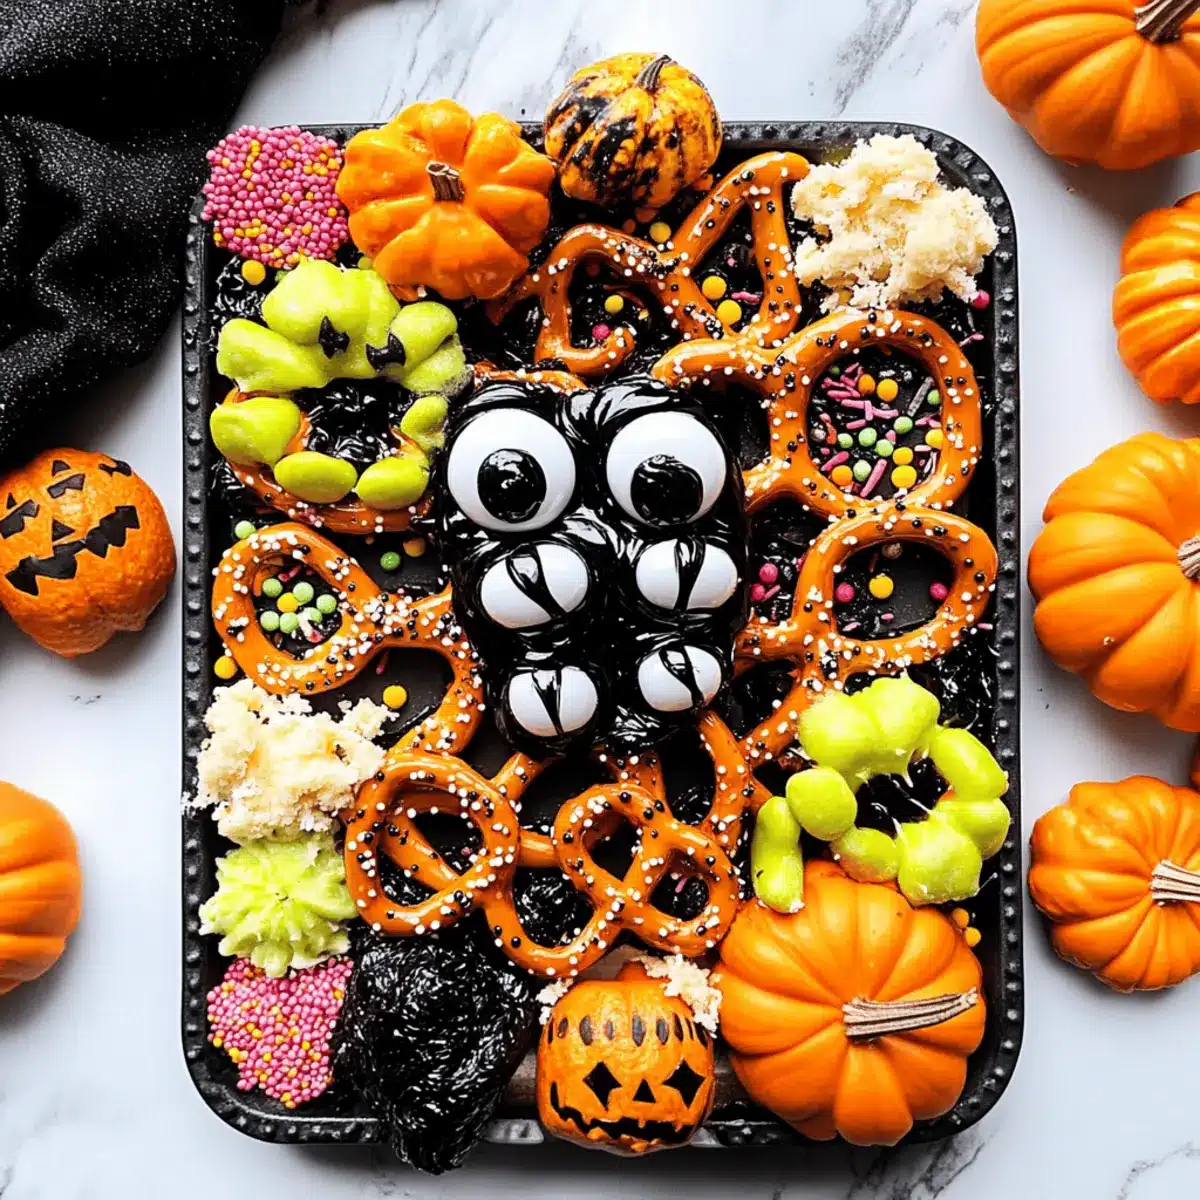
Before the candy coating sets, sprinkle your favorite Halloween sprinkles generously over each pretzel. You can also place candy eyes or crushed Oreos for a spooky effect. This step allows your creativity to shine as you decorate your Halloween Pretzels just the way you like.
Step 5: Let Them Harden
Allow the pretzels to sit at room temperature for about 15 minutes or until the candy coating has fully hardened. You’ll know they’re ready when the coating feels firm to the touch. This patience pays off, as you’ll achieve a delightful crunch with every bite of your Halloween Pretzels.
Step 6: Store the Treats
After the Halloween Pretzels have set perfectly, carefully transfer them to an airtight container. They can be stored at room temperature for up to 7 days, making them perfect for sharing at parties or keeping for snacking. Enjoy the sweet and salty flavors all week long!
What to Serve with No-Bake Halloween Pretzels
Get ready to create the ultimate festive feast that will enchant both young and old with its sweet and salty splendor.
-
Crispy Apple Slices: Their refreshing crunch and natural sweetness provide a lovely contrast to the sugary pretzels. Serve with a sprinkle of cinnamon for extra flavor!
-
Halloween Fruit Kabobs: Stack grapes, melon, and pineapple on skewers. These colorful treats bring a burst of freshness and are fun to eat, balancing out the richness of the pretzels.
-
Warm Cinnamon Cider: The cozy, spiced notes of hot apple cider enhance the fall flavors, making it a delightful drink choice that complements the sweetness of the pretzels.
-
Chocolate-Dipped Strawberries: These sweet delights pair beautifully with the pretzels, adding a touch of elegance and further chocolate bliss. Their brightness cuts through the richness of candy-coated treats.
-
Popcorn Mix: A mix of popcorn, candy corn, and nuts serves as a light, airy companion, offering a variety of textures and savory balance to the sweet pretzels.
-
Pumpkin Spice Cookies: These soft, spicy cookies echo the autumnal vibes, making for a delightful dessert pairing that echoes the flavors of the season.
-
Vanilla Ice Cream: The creamy, cool ice cream is an indulgent counterpart to the crunchy Halloween Pretzels. You can even drizzle some melted candy coating over the ice cream for an extra seasonal treat.
Expert Tips for Halloween Pretzels
- Perfect Melting: Make sure to melt candy melts slowly to avoid scorching. Stirring between intervals helps achieve a smooth consistency for these Halloween Pretzels.
- Spacing Matters: Leave space between dipped pretzels on the baking sheet. This prevents them from sticking together as the candy coating sets.
- Creative Toppings: Don’t hesitate to mix and match decorations. Using fun shapes or different colored sprinkles can add more excitement to your Halloween Pretzels.
- Set Time: Be patient! Allow enough time for the candy coating to harden completely before moving them. This ensures they maintain their beautiful appearance.
- Involve Kids: Encourage your little ones to join in the decorating fun; it’s a great way to make memories and create spooky treats together!
Halloween Pretzels: Customization Ideas
Feel free to explore your creativity and make these Halloween Pretzels uniquely your own!
- Gluten-Free: Use gluten-free mini pretzels to ensure everyone can enjoy these delightful treats.
- Flavor Twist: Try different types of candy melts like butterscotch or mint for unexpected flavors.
- Nutty Crunch: Sprinkle crushed nuts like peanuts or almonds on top for an added crunch and flavor depth.
- Spicy Kick: Drizzle a little cayenne pepper-infused chocolate for a fun sweet-and-spicy contrast.
- Chocolate-Covered: Dip your pretzels in melted milk or dark chocolate for a richer taste.
- Pumpkin Spice: Mix pumpkin spice into the melted candy for a delightful autumn twist.
- Seasonal Toppings: Use themed sprinkles for other holidays, like festive shapes for Thanksgiving or Christmas.
- Oreo Delight: Adding crushed Oreo cookies on top adds both flavor and a fun texture. Not sure how to incorporate Oreos into sweet snacks? Check out my Butter Toffee Pretzels for more inspiration!
How to Store and Freeze Halloween Pretzels
Room Temperature: Store your Halloween Pretzels in an airtight container at room temperature for up to 7 days to keep them fresh and crunchy.
Fridge: If you prefer, you can store the pretzels in the fridge; however, be aware that they may lose some crispness due to humidity.
Freezer: For longer storage, place them in a freezer-safe container with layers of parchment paper. They can be frozen for up to 2 months—just thaw before enjoying!
Reheating: To restore some crunch, if desired, place thawed pretzels in a warm oven for 5 minutes before serving. Enjoy your Halloween Pretzels anytime you crave a spooky snack!
Make Ahead Options
These No-Bake Halloween Pretzels are perfect for meal prep, allowing you to save time during the busy holiday season! You can prepare the pretzels up to 3 days in advance by melting the candy melts and dipping the pretzels, and then storing them in an airtight container at room temperature. For maximum freshness, consider adding sprinkles and toppings just before serving, as this will keep them from getting soggy. If you do decide to layer the toppings ahead of time, ensure that the candy coating is completely hardened before stacking them to maintain their crunch. Enjoy these delightful treats without the last-minute rush!

Halloween Pretzels Recipe FAQs
What type of pretzels should I use for Halloween Pretzels?
Absolutely! Mini pretzels are the best choice, as they provide the perfect crunchy base for your treats. If you’re seeking a gluten-free option, simply opt for gluten-free mini pretzels to satisfy everyone at your gathering.
How should I store my Halloween Pretzels?
To keep your Halloween Pretzels fresh, store them in an airtight container at room temperature for up to 7 days. If you plan to save them longer, you can refrigerate them, but keep in mind that this might slightly affect their crunch due to humidity.
Can I freeze Halloween Pretzels?
Yes, you can! To freeze your Halloween Pretzels, layer them in a freezer-safe container separated by parchment paper to prevent sticking. They’ll stay fresh for up to 2 months in the freezer. When you’re ready to enjoy them, just thaw at room temperature or reheat them in a warm oven for about 5 minutes to restore some crunch.
What if my candy coating is too thick?
Very common! If your candy melts are too thick for dipping, you can easily thin them out. Add a little coconut oil to the melted candy and stir well until smooth. This will give you a nice consistency for dipping your pretzels effortlessly.
Can I customize the toppings for the pretzels?
Absolutely! The more the merrier with toppings! Get creative by using different types of Halloween-themed sprinkles, such as ghost or pumpkin shapes, or adding crushed nuts or candy bits for an extra crunch and flavor. The customization makes them especially fun for kids!
Is it safe for kids to help make these Halloween Pretzels?
Yes, it’s a fantastic activity that I often do with my kids! Just ensure you supervise them around the melted candy. Encourage them to get involved in the decorating process; it’s a great way to spend quality time together while creating spooky treats!
Halloween Pretzels That Kids Will Love: Sweet & Spooky Fun
Ingredients
Equipment
Method
- Prepare the Baking Sheet: Line a large baking sheet with parchment paper to prevent sticking.
- Melt the Candy Melts: In a microwave-safe bowl, heat candy melts in increments of 30 seconds, stirring between each interval until smooth.
- Dip the Pretzels: Submerge mini pretzels in the melted candy, allowing excess to drip off, and place on the prepared baking sheet.
- Add Toppings: Sprinkle Halloween sprinkles over each pretzel before the candy coating sets. Add candy eyes or crushed Oreos for decoration.
- Let Them Harden: Allow pretzels to sit at room temperature for about 15 minutes until the coating has hardened.
- Store the Treats: Transfer hardened pretzels to an airtight container. They can be stored at room temperature for up to 7 days.
Leave a Reply