
At a bustling summer barbecue, I caught a whiff of something irresistibly exciting, and my taste buds were instantly intrigued. These Glazed Kielbasa Pineapple Bites are more than just an appetizer; they’re a delicious adventure combining smoky-sweet flavors that will not only tantalize your palate but also earn you rave reviews from your friends and family. With their easy preparation and strikingly vibrant presentation, these bites bring a delightful twist to any gathering, transforming ordinary moments into celebrations. Combining the rich, savory goodness of tender kielbasa with the juicy brightness of pineapple, all draped in a luscious glaze, makes this dish a crowd-pleaser that’s quick to whip up. Ready to elevate your snack game? Let’s dive into this recipe that will leave you craving more!
Why Are These Bites a Must-Try?
Bold Flavors: The Glazed Kielbasa Pineapple Bites offer an exciting mix of sweet and savory, making them an absolute crowd-pleaser.
Quick Preparation: You can whip these up in just 20 minutes, perfect for sudden get-togethers or as a last-minute appetizer.
Versatile Ingredients: Swap out kielbasa for chicken or tofu for a tailored twist; it’s all about your flavor preferences!
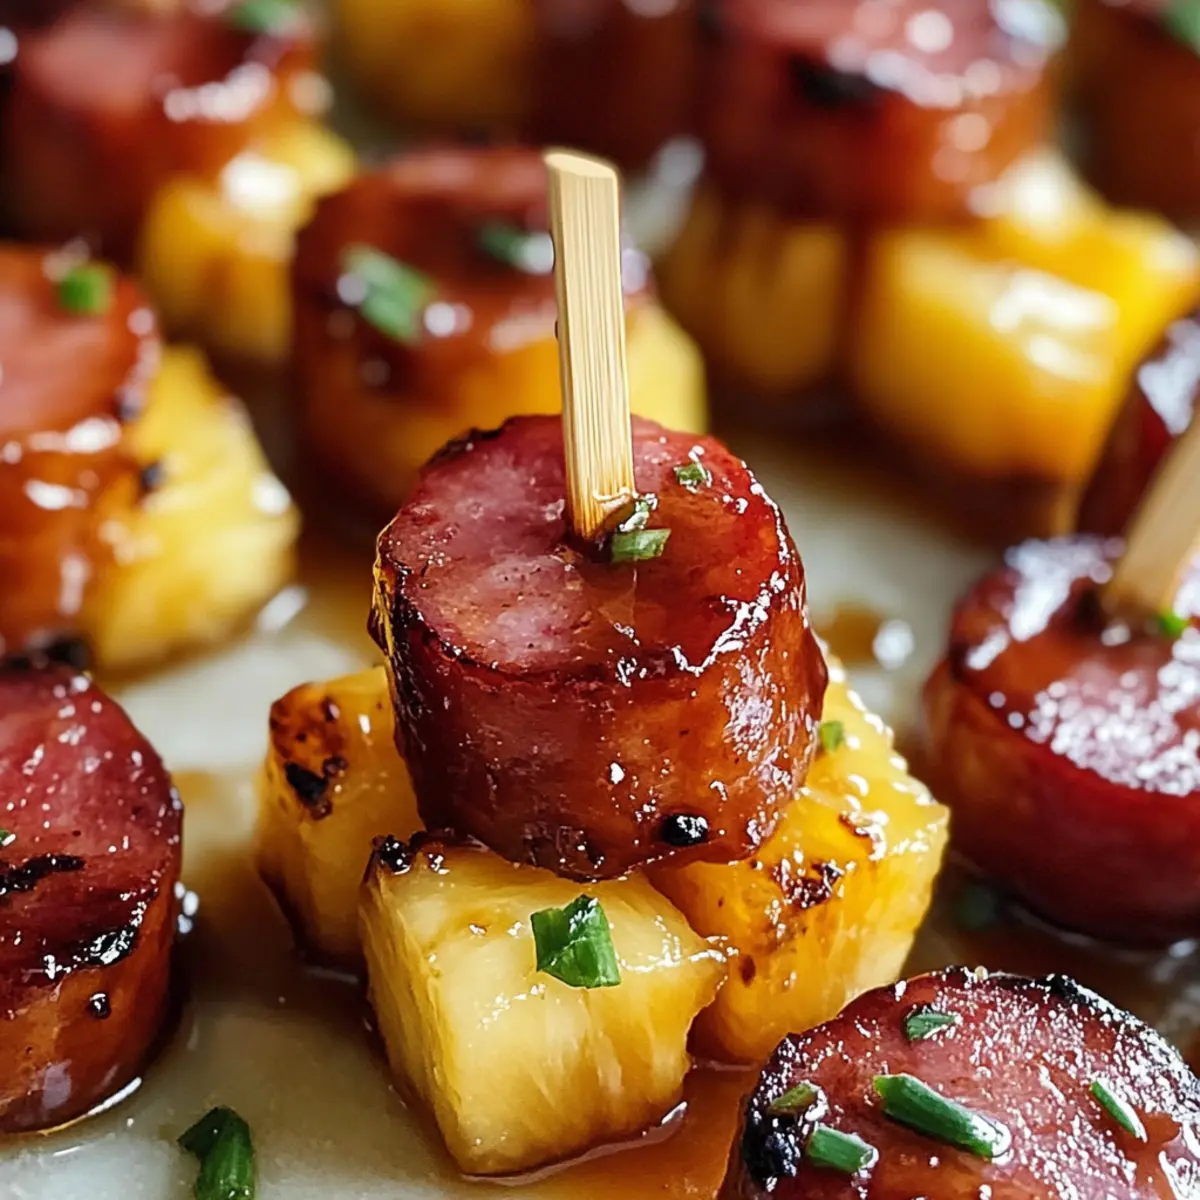
Visual Appeal: The vibrant colors of pineapple and glaze make these bites not just tasty but eye-catching on any platter.
Perfect for Sharing: Whether at barbecues or holiday parties, they’re a hit that will keep everyone coming back for more. Pair them with a fresh salad or some sweet chili dipping sauce for an unforgettable presentation!
Glazed Kielbasa Pineapple Bites Ingredients
• Dive into this delightful recipe that features Glazed Kielbasa Pineapple Bites bursting with flavor!
For the Bites
- Kielbasa – Provides a rich, smoky base; feel free to swap for chicken or pork sausage for a different taste.
- Pineapple Chunks – Adds a refreshing sweetness; use canned pineapple in juice for best moisture.
- Green Onions – Adds a fresh crunch and vibrant color for a beautiful garnish.
- Sesame Seeds – Optional to sprinkle on top for added texture and an appealing look.
For the Glaze
- Teriyaki Sauce – Infuses the bites with a delicious umami flavor; can be homemade or store-bought for convenience.
- Sweet Chili Sauce – Brings a sweet and spicy kick; for a homemade version, mix honey with crushed red pepper flakes.
- Honey – Enhances the sweetness of the glaze; you can substitute with maple syrup if desired.
- Pineapple Juice – Deepens the flavor of the glaze; fresh or canned juice works beautifully.
Step‑by‑Step Instructions for Glazed Kielbasa Pineapple Bites
Step 1: Soak Toothpicks
Begin by soaking toothpicks in water for about 20 minutes. This simple step is crucial to prevent burning during baking. While the toothpicks soak, you can gather the rest of your ingredients and prepare your workspace for making the delicious Glazed Kielbasa Pineapple Bites.
Step 2: Preheat Oven
Preheat your oven to 425°F (220°C) and line a baking sheet with parchment paper. This will help to achieve that perfect, caramelized glaze while ensuring easy cleanup after baking. As the oven heats up, take a moment to admire how your ingredients are coming together, ready to create something delightful.
Step 3: Arrange Ingredients
Place the sliced kielbasa on the prepared baking sheet, ensuring they’re spaced evenly apart. Top each kielbasa slice with a juicy chunk of pineapple, creating a delightful pairing that showcases the essence of these Glazed Kielbasa Pineapple Bites. The vibrant colors will start to shine as you layer them in preparation for the glaze!
Step 4: Make Glaze
In a medium mixing bowl, whisk together teriyaki sauce, sweet chili sauce, honey, and pineapple juice until smooth. This glaze will give your bites that signature sweet and savory flavor profile. As the ingredients meld, take in the delicious aroma, setting the stage for the incredible taste that’s about to come.
Step 5: Glaze Bites
Using a pastry brush, generously coat each kielbasa and pineapple stack with your homemade glaze. Make sure to cover every bit, as this is what gives the Glazed Kielbasa Pineapple Bites their irresistible, sticky finish. Once brushed, carefully insert the soaked toothpicks into each bite to hold them together during baking.
Step 6: Bake
Slide the baking sheet into your preheated oven and bake for 15-20 minutes, until the glaze is bubbling and caramelized. Keep an eye on them, as you’ll want a lovely golden-brown color without burning. The enticing smell wafting from the oven will make it hard to wait for your scrumptious bites!
Step 7: Cool
Once out of the oven, allow the Glazed Kielbasa Pineapple Bites to cool slightly for about 5 minutes. This resting period helps set the glaze, allowing for easier handling and ensuring each bite maintains its structure. Enjoy the aroma as it fills your kitchen with anticipation for the first taste.
Step 8: Garnish
For an extra touch of flavor and visual appeal, sprinkle the bites with chopped green onions and toasted sesame seeds, if desired. This garnish not only enhances the aroma but also adds a pop of color, making your appetizer irresistible. Now, your delightful Glazed Kielbasa Pineapple Bites are ready to be served!

Expert Tips for Glazed Kielbasa Pineapple Bites
Pre-Cooked Kielbasa: Ensure you use pre-cooked kielbasa for the best results; this guarantees a tender, flavorful bite without overcooking.
Moisture Matters: Opt for canned pineapple in juice, as fresh pineapple can dry out during baking. Keep it juicy for that perfect sweet-salty balance.
Watch the Glaze: The high sugar content in the glaze means it can burn quickly in the oven. Keep a close eye on your bites during the final baking minutes.
Make Ahead: For a deeper flavor, prepare your glaze a day in advance. Letting it sit allows the ingredients to meld beautifully, elevating the dish.
Garnish Wisely: Sprinkle with chopped green onions and sesame seeds right before serving for added flavor and eye-catching freshness on your plated Glazed Kielbasa Pineapple Bites.
Glazed Kielbasa Pineapple Bites Variations
Get ready to unleash your creativity and make these bites uniquely yours with delightful twists!
- Spicy Kick: Add a sprinkle of cayenne pepper or crushed red pepper flakes to the glaze for an extra kick.
- ** sweet and savory contrast:** Substitute maple syrup for honey in the glaze for a delightful warmth.
- Fruit Fusion: Swap pineapple for diced mango or peach for a vibrant, tropical flair.
- Vegetarian Alternative: Try diced, marinated tofu in place of kielbasa for a fantastic meat-free option.
- Zesty Note: Add a splash of lime juice to the glaze; it will brighten up the flavors beautifully!
- Herb Infusion: Stir in some fresh minced herbs like cilantro or basil into the glaze for added freshness.
- Smoke Flavor Boost: Use smoked paprika in the glaze to intensify the smoky flavor of your bites.
- Sweet Chili Twist: Replace sweet chili sauce with apricot preserves mixed with red pepper flakes for a fruity zing.
Feel free to experiment as you prepare your dish! Pair these Glazed Kielbasa Pineapple Bites with some homemade Glazed Gingerbread Muffins for a touching finish at your next gathering. Dive into creativity, and enjoy every bite!
Make Ahead Options
These Glazed Kielbasa Pineapple Bites are perfect for meal prep lovers! You can assemble the bites up to 24 hours in advance by placing the uncooked kielbasa and pineapple on the baking sheet, then covering it tightly with plastic wrap and refrigerating. To maintain flavor and prevent the glaze from getting sticky, prepare the glaze a day ahead and store it separately in the refrigerator. When you’re ready to serve, simply brush the chilled glaze on the assembled bites and bake as instructed, adding a few extra minutes to the cooking time to ensure they’re heated through and bubbly. This way, you can enjoy quick and delightful appetizers with minimal effort!
What to Serve with Glazed Kielbasa Pineapple Bites
Elevate your dining experience by pairing these sweet and savory morsels with delightful sides that complement their incredible flavors.
- Crispy Green Salad: A fresh, crunchy salad with mixed greens and a light vinaigrette balances the richness of the bites.
- Steamed Jasmine Rice: Soft, fluffy rice absorbs the glaze’s sweetness, creating a perfect contrast for the savory kielbasa.
- Sweet Chili Dipping Sauce: A side of sweet chili sauce brings additional layers of flavor, making each bite even more irresistible.
- Vegetable Spring Rolls: Crunchy rolls filled with fresh veggies add a refreshing texture and complement the sweet-salty profile of the main dish.
- Grilled Corn on the Cob: The smoky flavor of grilled corn harmonizes beautifully with the bold taste of kielbasa, enhancing the summer vibe.
- Pineapple Salsa: Bright and zesty, this salsa made with diced pineapple and herbs echoes the main dish’s flavors, tying the meal together.
- Mango Lassi: This creamy, yogurt-based drink provides a refreshing, cool contrast to the warm, savory bites.
- Chocolate Dipped Fruit: Finish your meal on a sweet note with a platter of chocolate-dipped strawberries or bananas to satisfy your sweet tooth.
Storage Tips for Glazed Kielbasa Pineapple Bites
Fridge: Store leftovers in an airtight container for up to 3 days. Ensure they’re cooled before sealing to avoid condensation.
Freezer: Freeze individual bites on a baking sheet first, then transfer to a storage bag for up to 1 month. This helps maintain their shape and texture.
Reheating: To restore the delightful flavors of your Glazed Kielbasa Pineapple Bites, reheat in a 350°F (175°C) oven for about 10 minutes until warmed through.
Enjoy Freshness: For the best taste, consume within the recommended timeframes; flavors are most vibrant when enjoyed soon after cooking.

Glazed Kielbasa Pineapple Bites Recipe FAQs
What kind of kielbasa should I use?
I recommend using pre-cooked kielbasa to ensure the bites remain juicy and flavorful. If you prefer a variation, chicken or pork sausage can also provide a delicious twist while maintaining that smoky essence.
How do I store leftover Glazed Kielbasa Pineapple Bites?
Store your leftover bites in an airtight container in the refrigerator for up to 3 days. Make sure they’re fully cooled before sealing to avoid condensation, which can make them soggy.
Can I freeze Glazed Kielbasa Pineapple Bites?
Absolutely! For freezing, place individual bites on a baking sheet and freeze them until firm. Then, transfer them to a freezer-safe bag for up to 1 month. When you’re ready to enjoy them, simply reheat in a 350°F (175°C) oven for about 10 minutes to restore their delightful texture.
What should I watch out for when baking?
Keep a close eye on your bites while they’re baking! The high sugar content in the glaze can cause it to burn quickly. Aim for a lovely golden-brown color, and once the glaze is bubbly, they’re ready to come out.
Can I use fresh pineapple instead of canned?
While fresh pineapple can be delicious, I advise using canned pineapple in juice for this recipe. Fresh pieces can dry out during baking, which might not give you that juicy sweetness that complements the kielbasa beautifully. If you do use fresh, consider marinating it in juice or a bit of the glaze beforehand to keep it moist.
Are these bites suitable for pets or allergies?
As they contain kielbasa and various sauces, these bites aren’t suitable for pets. Additionally, given the presence of potential allergens like soy in teriyaki sauce or gluten in various sauces, it’s best to check labels if you’re serving anyone with allergies.

Sweet and Savory Glazed Kielbasa Pineapple Bites Delight
Ingredients
Equipment
Method
- Soak toothpicks in water for about 20 minutes to prevent burning during baking.
- Preheat your oven to 425°F (220°C) and line a baking sheet with parchment paper.
- Place the sliced kielbasa on the prepared baking sheet and top each slice with a chunk of pineapple.
- Whisk together teriyaki sauce, sweet chili sauce, honey, and pineapple juice in a medium bowl.
- Brush each kielbasa and pineapple stack generously with the glaze and insert soaked toothpicks.
- Bake for 15-20 minutes until the glaze is bubbling and caramelized.
- Allow to cool for about 5 minutes before serving.
- Sprinkle with chopped green onions and sesame seeds, if desired.
Leave a Reply