
There’s something truly enchanting about the smell of homemade bread wafting through the kitchen, isn’t there? It’s not just a recipe; it’s a tangible piece of comfort and nostalgia that connects us to our roots. With this Easy Dutch Oven No Knead Bread recipe, you can capture that magic with minimal effort. Imagine serving an artisan-quality loaf created right within your own home, all without the hassle of kneading! Using only four simple ingredients, this no-knead wonder is perfect for those busy evenings when you want to impress family and friends with a freshly baked treat. Not only does this method save time, but it also yields a beautifully crusty exterior paired with a soft, airy interior that’s hard to resist. Ready to dive into the world of baking and elevate your meals? Let’s get started!
Why is No Knead Bread so special?
Simplicity makes it a breeze for any home cook—no special skills required! Bursting with flavor, the crusty exterior and airy inside will have your taste buds cheering. Time-efficient, you can prep it today and bake it fresh tomorrow! Versatile enough for sandwiches or as a side, it’s perfect for any occasion. If you’re a fan of hearty, homemade goodness, this Cuban Garlic Bread pairs wonderfully alongside your Dutch Oven No Knead Bread!
Dutch Oven No Knead Bread Ingredients
For the Dough
- All-Purpose Flour – This is the backbone, providing structure and texture; bread flour can be used for a chewier bite.
- Active Dry Yeast – A key player for rising; make sure your yeast is fresh for optimal results.
- Sea Salt – Not just a seasoning; it enhances flavor and helps control fermentation; kosher salt works in a pinch.
- Warm Water (around 105°F) – Activates the yeast and hydrates the flour; using lukewarm water ensures successful activation.
With these ingredients, you’re well on your way to crafting that delightful Dutch Oven No Knead Bread!
Step‑by‑Step Instructions for Dutch Oven No Knead Bread
Step 1: Mix the Dough
In a large mixing bowl, combine 3 cups of all-purpose flour, 1 teaspoon of active dry yeast, and 1.5 teaspoons of sea salt. Gradually add in 1.5 cups of warm water (around 105°F) and stir until a rough, sticky dough forms. The mixture should look shaggy but well combined, signaling it’s ready for the next step.
Step 2: Let It Rise
Transfer the dough to a greased bowl, cover it loosely with plastic wrap and a moistened towel. Allow the dough to rise in a warm area for 18-24 hours, or until it has doubled in size and is bubbly on the surface. This slow fermentation process develops flavor and texture, making it perfect for your Dutch Oven No Knead Bread.
Step 3: Preheat Dutch Oven
About 30 minutes before you’re ready to bake, preheat your oven to 450°F (230°C), placing your Dutch oven inside to heat up as well. This step is crucial to achieving that beautifully crusty loaf, so make sure the Dutch oven is piping hot when you put the dough in.
Step 4: Shape the Dough
Once the dough has risen, turn it out onto a floured surface. Gently shape it into a loose ball, being careful not to overwork it. You want to maintain its airy texture, so a light touch is essential. The dough should be slightly tacky but hold its form well.
Step 5: Bake
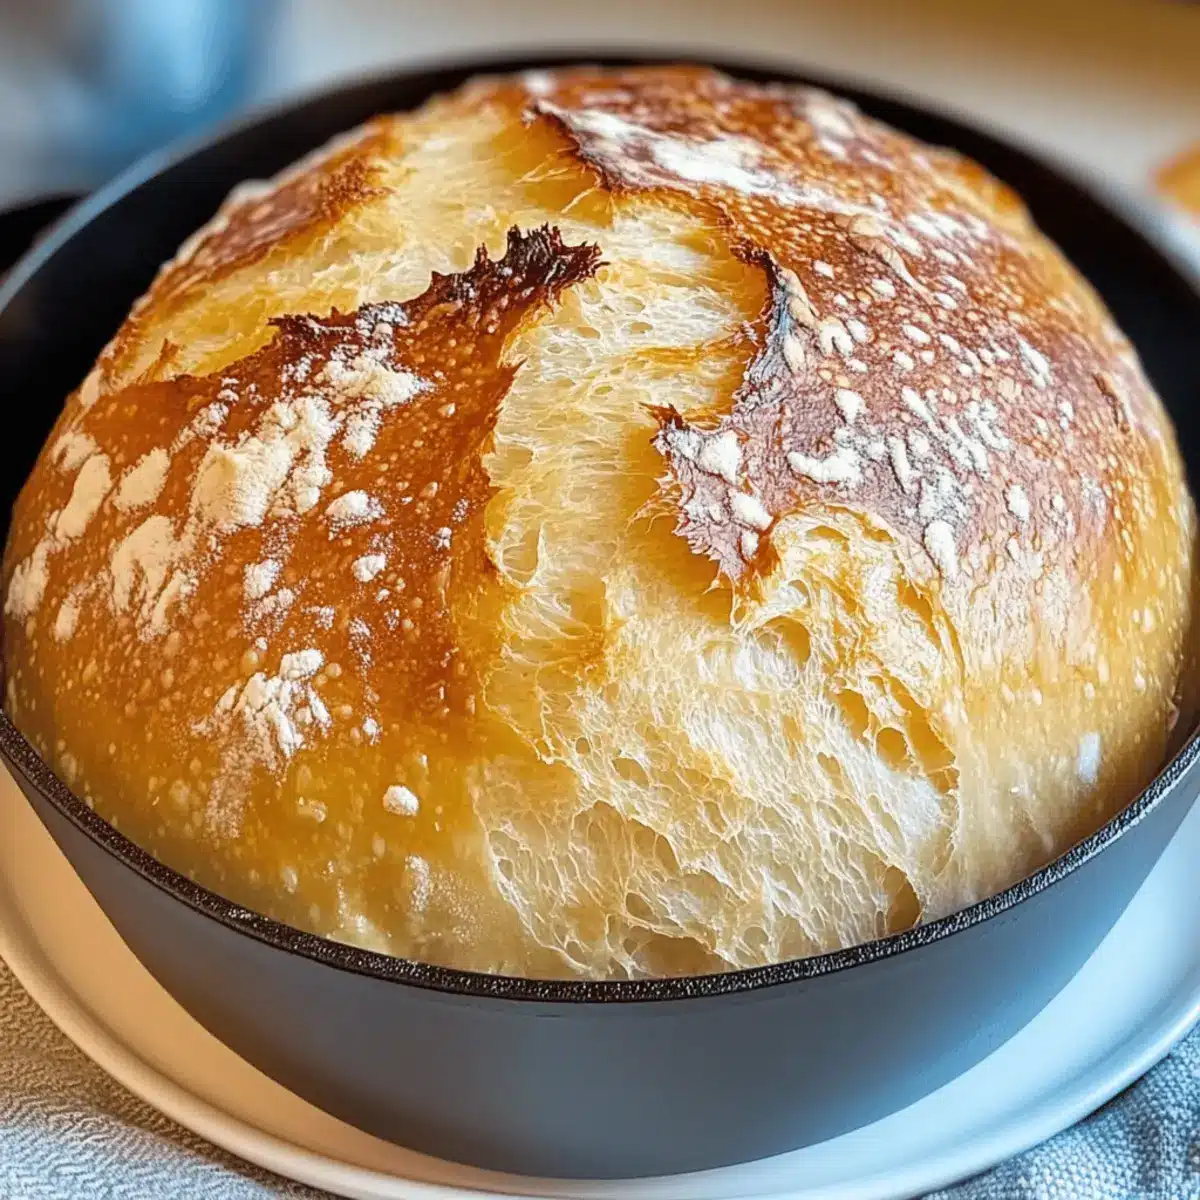
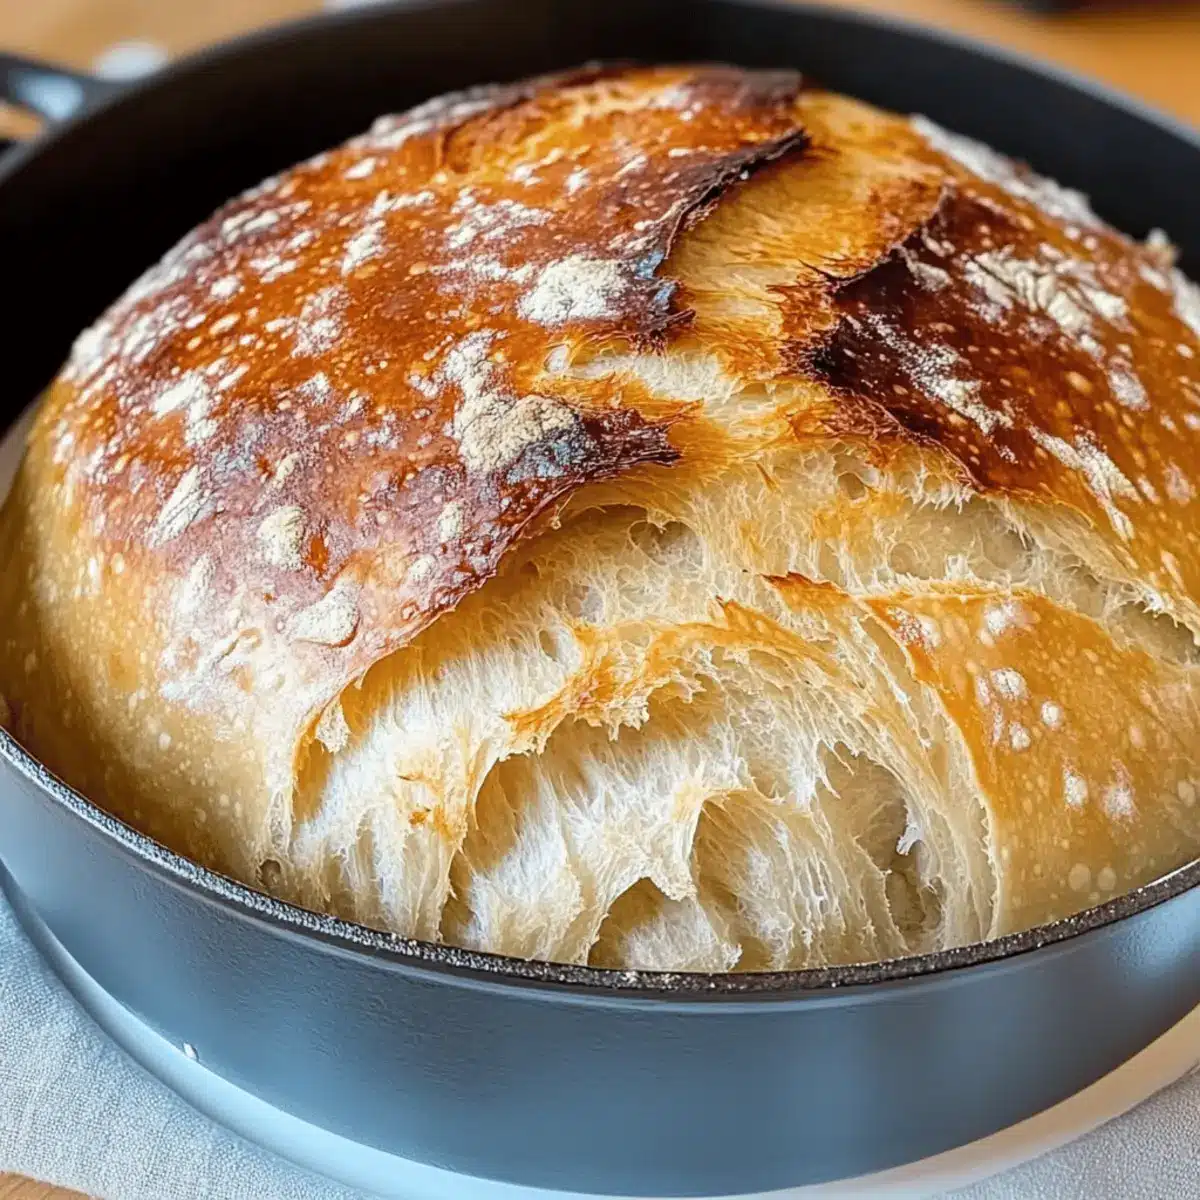
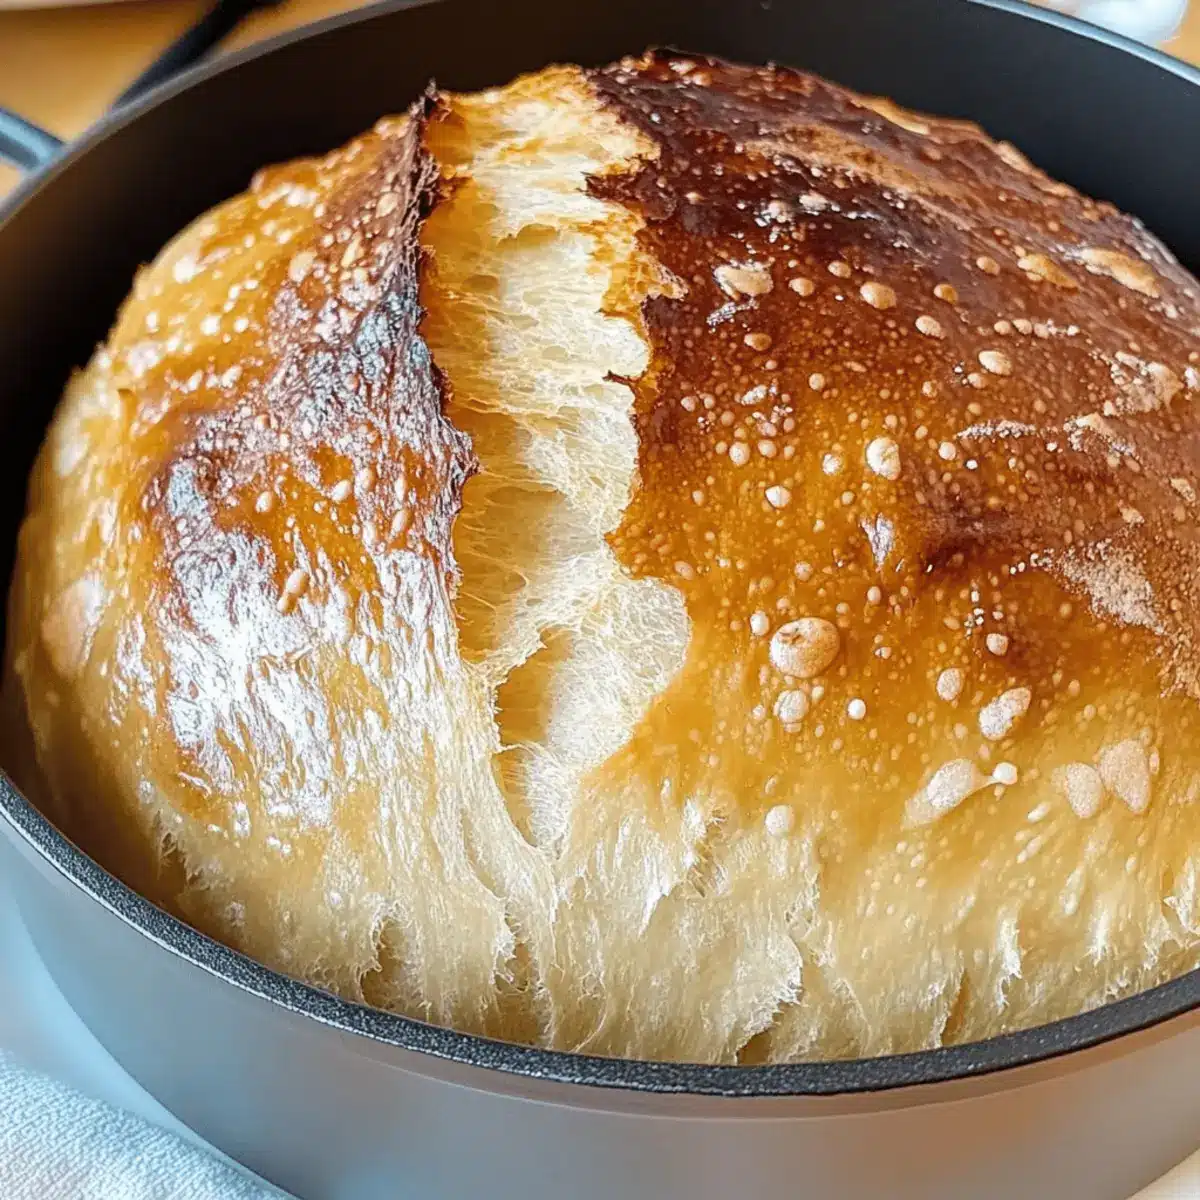
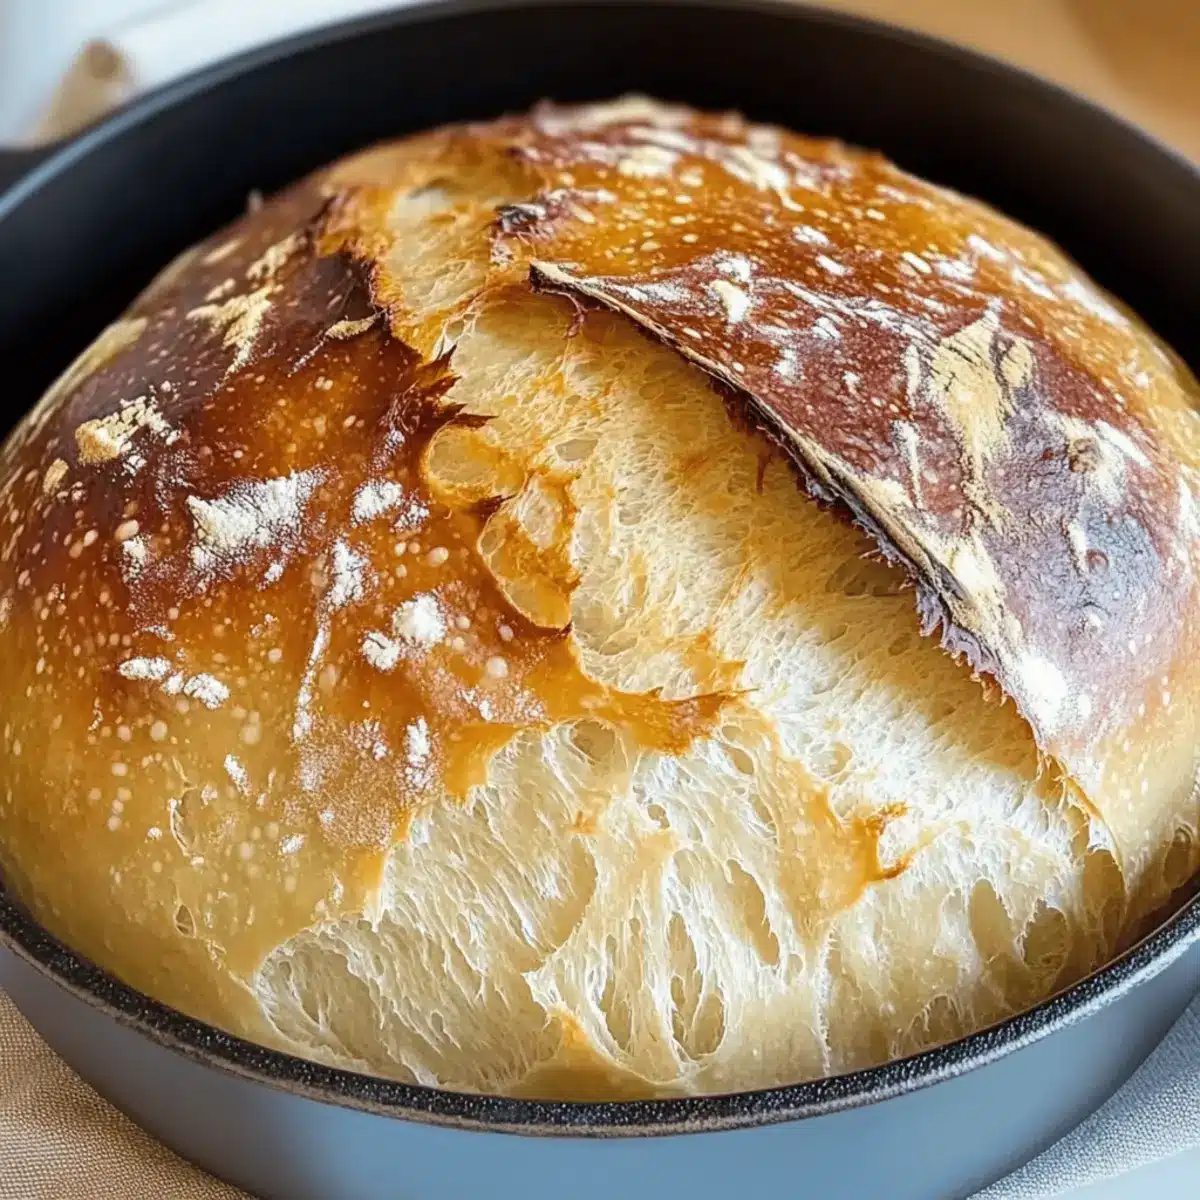
Carefully remove the hot Dutch oven from the oven and place the shaped dough inside. Cover it with the lid and bake for 30 minutes. This initial covered baking helps create steam and yields a crusty exterior. After 30 minutes, remove the lid and continue baking for an additional 10-15 minutes until the crust is golden brown and sounds hollow when tapped.
Step 6: Cool and Enjoy
Once baked, transfer the bread to a wire rack and let it cool for at least 30 minutes before slicing. This allows the interior to set and enhances the flavor of your Dutch Oven No Knead Bread. The irresistible aroma will fill your kitchen, making it hard to resist that warm, crusty slice!
Expert Tips for Dutch Oven No Knead Bread
- Perfect Rise Time: Allow your dough to rise for a full 18-24 hours. Skipping this step can lead to a dense loaf, so be patient!
- Check Water Temperature: Ensure the warm water is around 105°F; too hot can kill the yeast, while too cold will prevent it from activating.
- Gentle Handling: When shaping your dough, handle it with care to maintain its airy texture; overworking can lead to a tough loaf.
- Inspect Your Ingredients: Use fresh active dry yeast for the best rise. Expired yeast won’t give you that fluffy result you’re aiming for!
- Heat the Dutch Oven: Preheat your Dutch oven for at least 30 minutes. This step is critical for creating that irresistible crust on your Dutch Oven No Knead Bread!
Dutch Oven No Knead Bread Variations
Feel free to experiment and make this delightful bread even more your own with these fun variations!
-
Herb-Infused: Add 1 tablespoon of dried herbs like rosemary or thyme to the dry ingredients for a fragrant twist. This addition gives the bread an aromatic quality that’s simply irresistible.
-
Garlic Lovers: Incorporate 2-3 minced garlic cloves into the dough for a savory flavor explosion. Imagine breaking into a warm slice and savoring that rich garlic aroma wafting through your kitchen!
-
Whole Wheat: Substitute half of the all-purpose flour with whole wheat flour for a nuttier taste and added nutrition. This swap not only enhances the flavor but also gives your bread a hearty texture that pairs beautifully with soups.
-
Cheddar-Loaded: Mix in 1 cup of shredded sharp cheddar cheese to the dough for a cheesy delight. Melted cheese creates delicious pockets of flavor that will have everyone coming back for seconds!
-
Sweeten It Up: Add 2 tablespoons of honey or maple syrup to the warm water for a hint of sweetness. You can also sprinkle in some cinnamon for a warm, cozy flavor perfect for breakfast.
-
Spicy Kick: Incorporate 1 teaspoon of crushed red pepper flakes to the dry ingredients for a delightful heat. This option will surely awaken your taste buds and add a fun twist to your bread!
-
Fruit and Nut Medley: Toss in 1 cup of your favorite dried fruit and nuts, like cranberries and walnuts, for a delightful sweet-and-savory bread. Slices of this medley are perfect alongside cheese or a hearty salad.
Baking is all about love and creativity—just like with my Peach Bread Summer, each variation serves to fill your home with warmth and joy! Try them all and find your favorite version!
Storage Tips for Dutch Oven No Knead Bread
- Room Temperature: Store your bread in a paper bag at room temperature for up to 2 days. This keeps the crust crispy while retaining the bread’s soft interior.
- Freezer: For longer storage, wrap the cooled bread tightly in plastic wrap or aluminum foil and place it in an airtight freezer bag. It can be frozen for up to 3 months.
- Reheating: To revive frozen bread, thaw overnight in the fridge, then reheat in a preheated oven at 350°F (175°C) for about 10-15 minutes for a fresh-baked taste.
- Avoiding Staleness: To maintain optimal freshness, make sure to seal the bread properly when storing; exposure to air can lead to a dry Dutch Oven No Knead Bread.
What to Serve with Easy Dutch Oven No Knead Bread
Imagine cozy meals enhanced by a warm, crusty loaf—your culinary adventures just got a delicious upgrade!
-
Creamy Tomato Soup: The tangy warmth of tomato soup perfectly complements the bread’s chewy texture, making every bite a comforting experience. Dunk or spoon, either way, you won’t want to miss this pairing!
-
Garlic Herb Butter: This rich, aromatic spread takes your bread to the next level. The savory aroma of garlic mingles beautifully with freshly baked bread, transforming a simple slice into a gourmet treat.
-
Garden Salad: Crisp greens provide a refreshing contrast to the dense, hearty loaf. Toss in vibrant veggies and a zesty dressing to balance the bread’s rich flavors beautifully.
-
Bruschetta Toppings: Top slices with fresh tomatoes, basil, and a drizzle of balsamic glaze. This adds a fresh burst of flavor, enhancing the rustic simplicity of your Dutch Oven No Knead Bread.
-
Charcuterie Board: Serve it alongside cured meats, cheeses, and olives for a festive gathering. The bread’s versatility makes it a fantastic canvas for showcasing a variety of flavors.
-
Savory Stews: Pair with a hearty beef or vegetable stew to soak up every drop of delicious broth. The bread’s crust holds up well, ensuring a delightful texture with every mouthful.
-
Red Wine: A glass of your favorite red wine beautifully complements the bread’s earthy notes. Think of it as the perfect companion to elevate your mealtime experience!
-
Fruit Jam: Spread of seasonal fruit jam offers a sweet contrast that’s absolutely delightful. Pairing the savory loaf with sweetness creates a balanced flavor profile that pleases the palate.
Let your imagination roam as you enjoy this delightful bread; it’s not just a side dish, but a culinary adventure!
Make Ahead Options
These Easy Dutch Oven No Knead Bread loaves are perfect for busy home cooks looking to save time! You can prepare the dough up to 24 hours in advance, letting it rise in the refrigerator instead of at room temperature; this not only slows fermentation but also enhances the flavors. Once it has risen, shape the dough and place it in a floured bowl, covering it tightly with plastic wrap. When you’re ready to bake, preheat your oven and Dutch oven, then follow the same baking instructions, ensuring the dough is at room temperature when it hits the heat for that perfect crust. This method allows you to pull off bakery-quality bread with minimal effort and time on the day you want to enjoy it!
Dutch Oven No Knead Bread Recipe FAQs
What kind of flour works best for Dutch Oven No Knead Bread?
All-purpose flour is perfect for this recipe, but if you prefer a chewier texture, you can easily substitute it with bread flour. It’s a great way to experiment with different flavors and textures!
How should I store the Dutch Oven No Knead Bread?
Keep your bread in a paper bag at room temperature for up to 2 days to maintain the delicious crust. If you want to save it longer, wrap the cooled bread tightly in plastic wrap or aluminum foil and place it in an airtight bag before freezing it for up to 3 months.
Can I freeze Dutch Oven No Knead Bread? How?
Absolutely! After the bread has cooled completely, wrap it tightly in plastic wrap or aluminum foil to prevent freezer burn. Then, place it in an airtight freezer bag. When you’re ready to enjoy it, thaw it in the fridge overnight and reheat it in a preheated oven at 350°F (175°C) for about 10-15 minutes. This will make it taste fresh and warm!
What if my dough doesn’t rise properly?
There are a few reasons why this might happen. First, ensure that your yeast is fresh and activated with warm water (around 105°F). If it’s expired or not stored correctly, it won’t work well. Second, make sure your dough is kept in a warm spot while rising; cold temperatures can hinder the growth. If you notice your dough hasn’t doubled in size after 24 hours, you might need to give it a little extra time.
Is Dutch Oven No Knead Bread suitable for people with dietary restrictions?
Yes, this recipe can be vegan-friendly! Just ensure you don’t use any dairy-based toppings or dips. Additionally, it’s free from common allergens like nuts and eggs. Always double-check labels on your ingredients to avoid cross-contamination, especially if someone has specific allergies.
How can I enhance the flavor of my Dutch Oven No Knead Bread?
You can amp up the flavor by adding herbs like rosemary or thyme to the dry ingredients. Alternatively, incorporating garlic powder or even a bit of honey can give a lovely depth. Experiment with whole wheat flour for a nuttier taste as well!
Dutch Oven No Knead Bread for Effortless Bakery Goodness
Ingredients
Equipment
Method
- In a large mixing bowl, combine the flour, yeast, and sea salt. Gradually add warm water and stir until a rough, sticky dough forms.
- Transfer the dough to a greased bowl, cover it loosely, and let it rise in a warm area for 18-24 hours.
- Preheat your oven to 450°F (230°C) with the Dutch oven inside for about 30 minutes.
- Turn the risen dough onto a floured surface, shape it gently into a loose ball.
- Remove the hot Dutch oven, place the shaped dough inside, cover it with the lid, and bake for 30 minutes.
- After 30 minutes, remove the lid and bake for an additional 10-15 minutes until golden brown.
- Transfer the bread to a wire rack and let it cool for at least 30 minutes before slicing.
Leave a Reply