
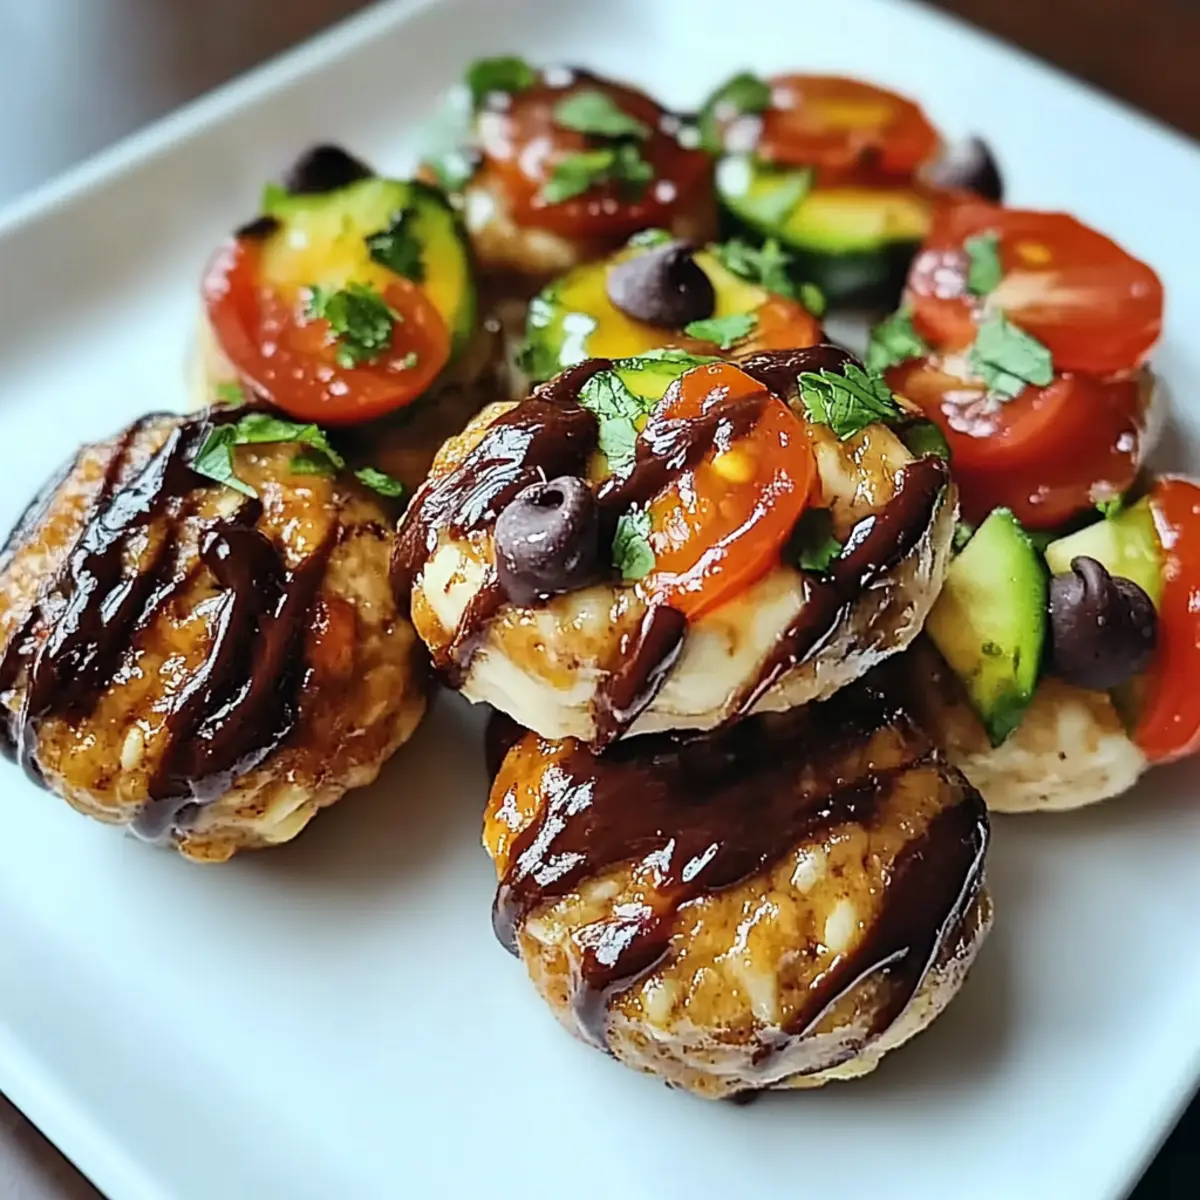
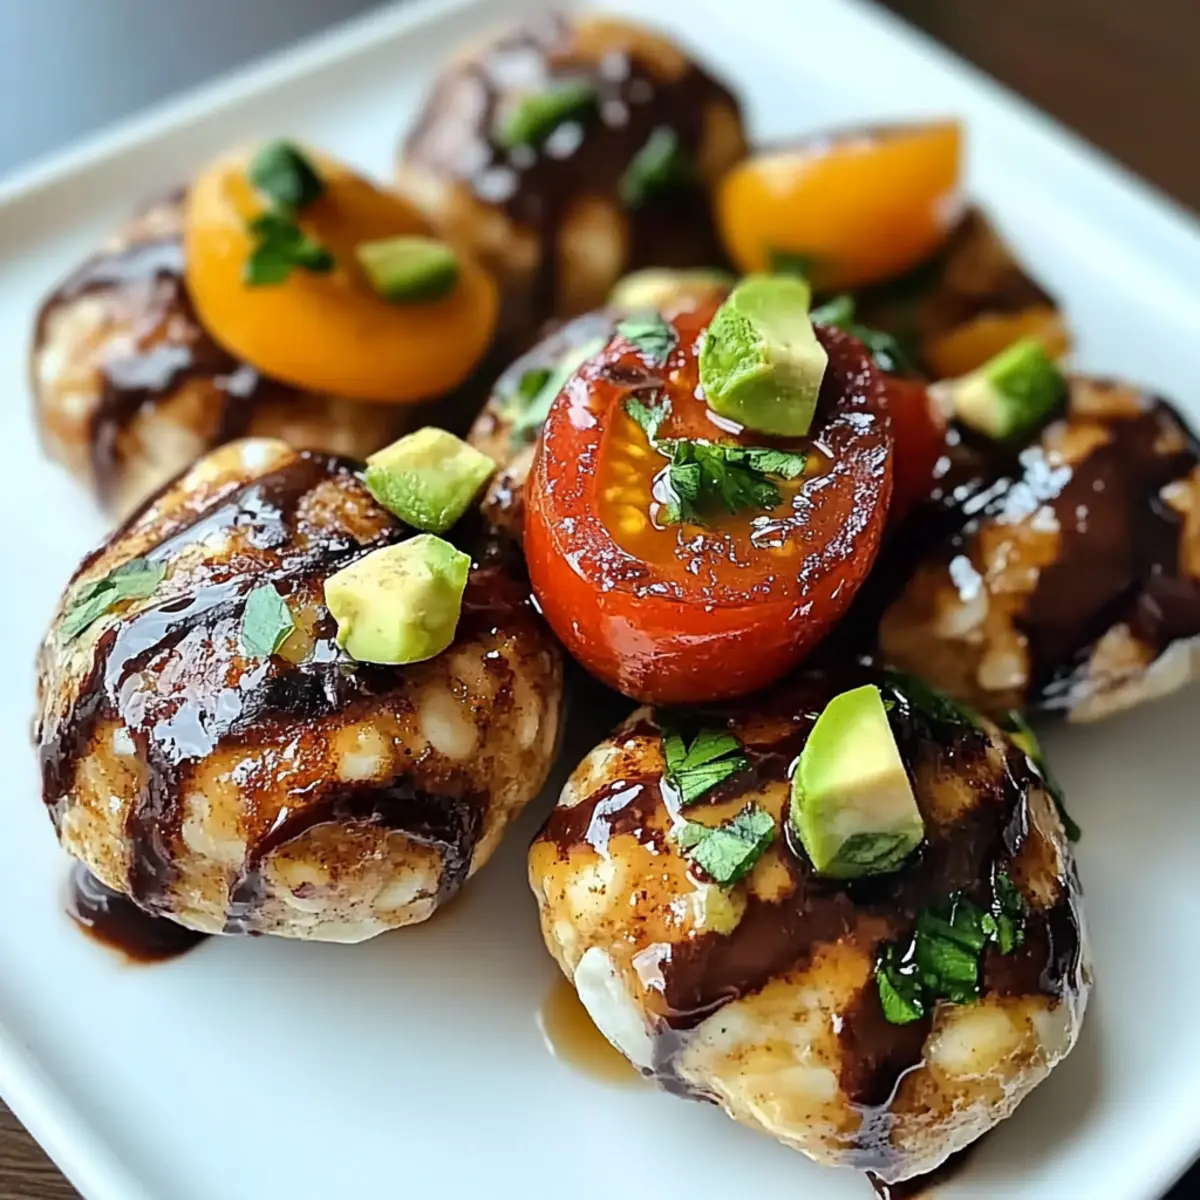
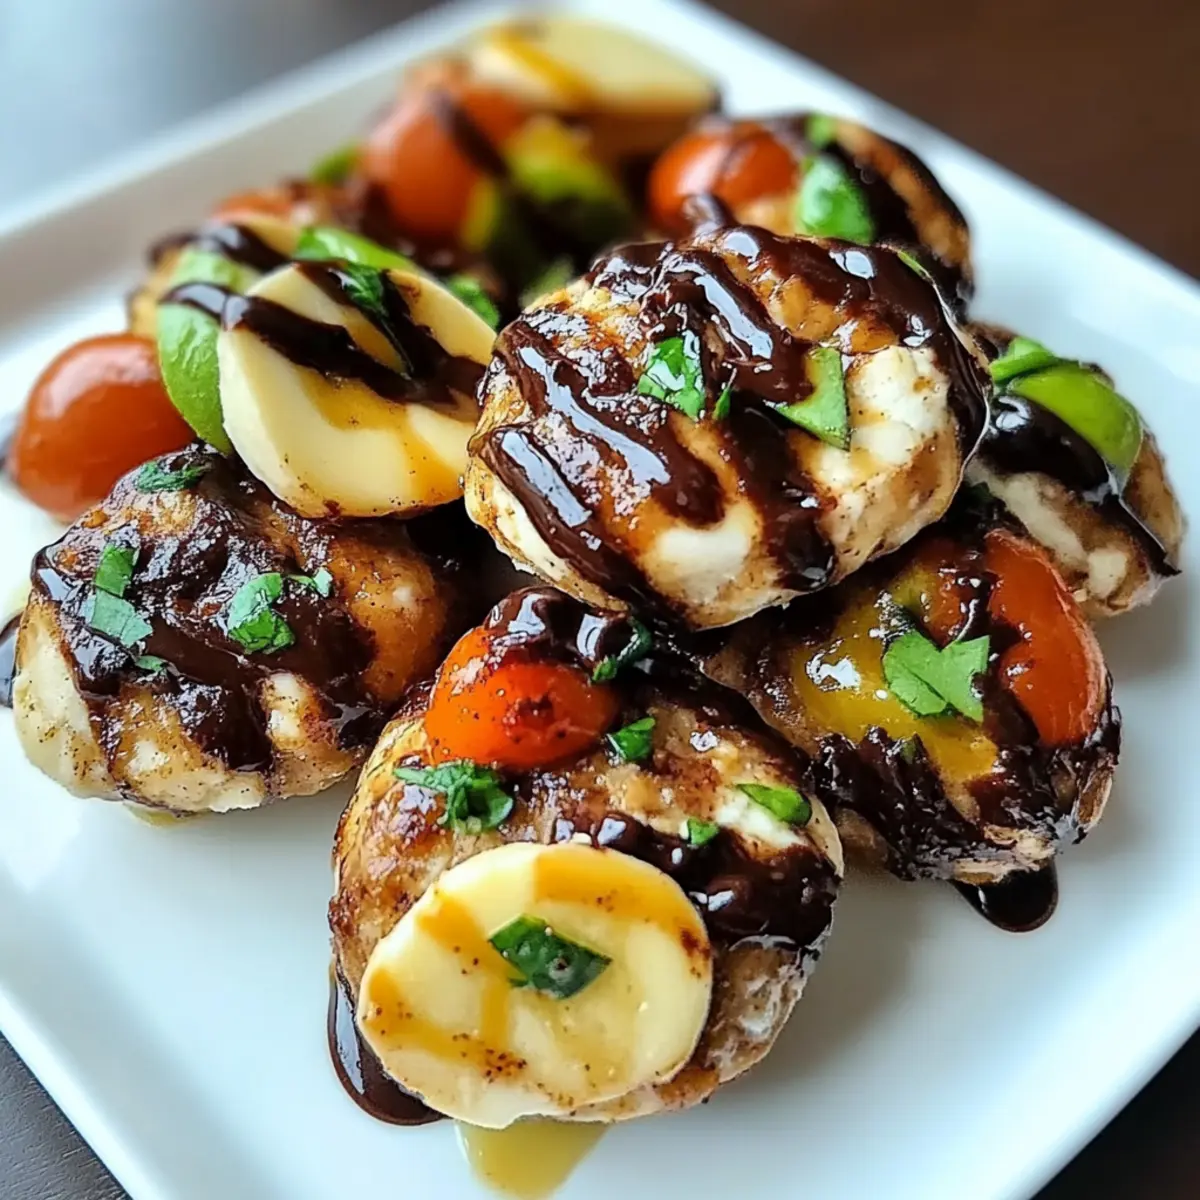
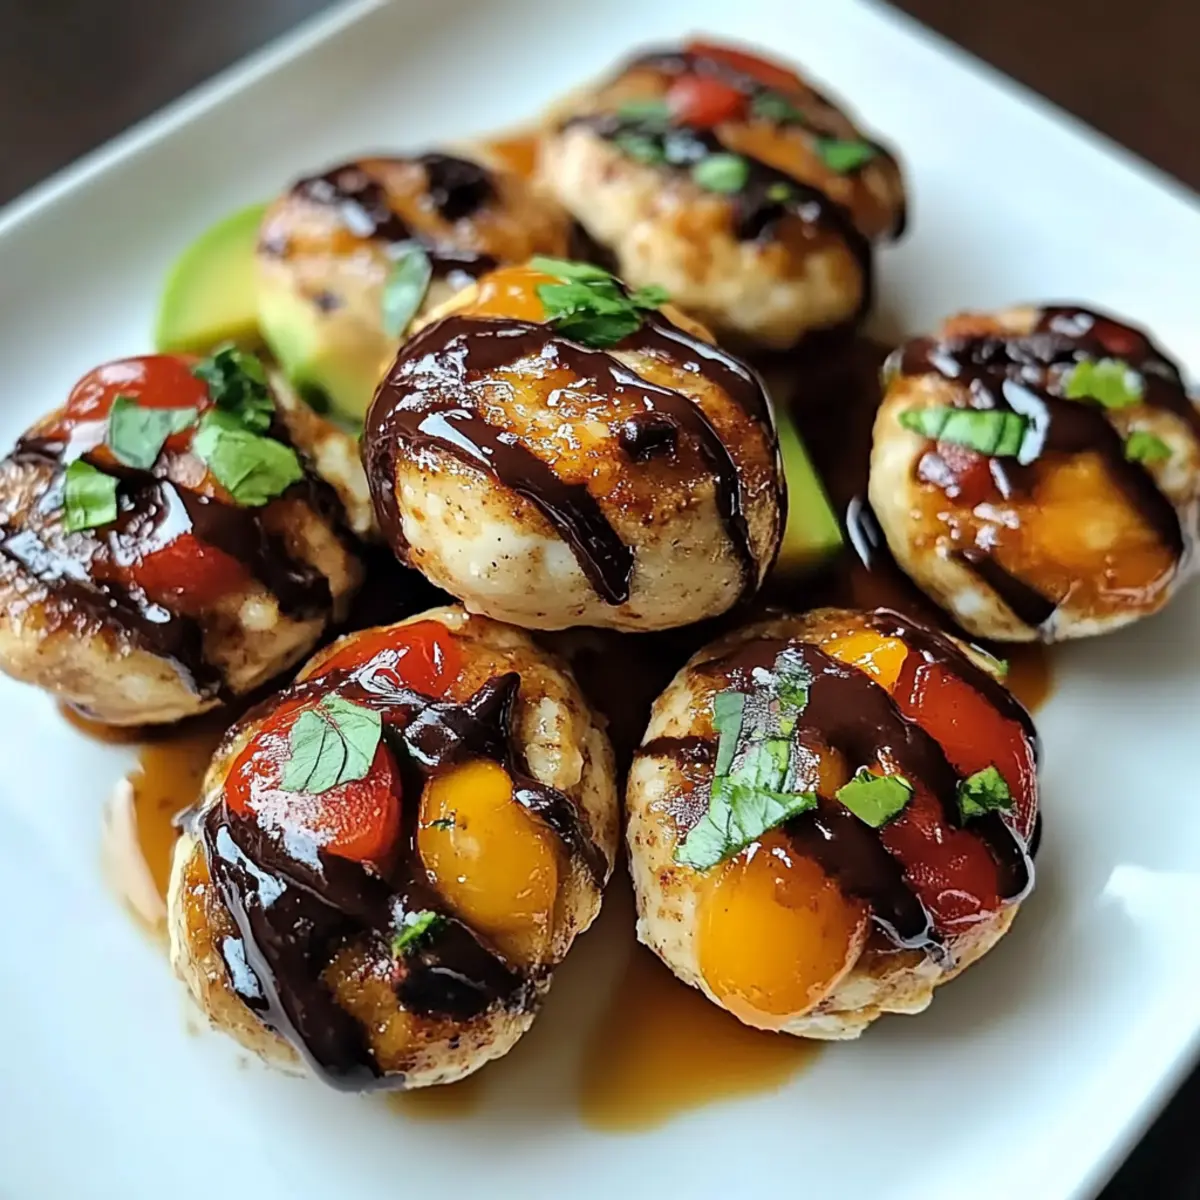
As I stood in my kitchen, the aroma of grilled chicken mingling with the buttery scent of ripe avocados transported me straight to sunny California. This Grilled California Avocado Chicken recipe is a delightful fusion of flavors that celebrates the best of wholesome ingredients. Not only is this dish incredibly delicious, but it also comes together in less than 30 minutes, making it a perfect option for busy weeknights. Plus, it’s a crowd-pleaser that’s sure to impress your family or friends. Imagine juicy, marinated chicken topped with creamy avocado, combined with a fresh squeeze of lime for that extra zing. Ready to elevate your dinner game with a dish that’s both satisfying and healthy? Let’s dive into making this culinary masterpiece!
Why will you love these energy balls?
Quick and Easy: These no-bake energy balls are ready in just 10 minutes, making them a lifesaver for those busy days when you need a nutritious snack fast.
Healthy Ingredients: Made with wholesome oats and natural sweeteners like honey or maple syrup, you can indulge without the guilt.
Customizable: Feel free to experiment with different nut butters or add-ins, like dark chocolate chips or dried fruit, to suit your taste buds—try my variations with Cheesy Garlic Chicken or French Onion Chicken for more inspired recipes.
Perfectly Portable: These little bites are ideal for on-the-go snacking; toss them in your bag for a pre- or post-workout boost!
Crowd-Pleasing Snack: Whether for yourself or a gathering, they’re bound to be a hit with family and friends!
Crunchy Peanut Butter Energy Balls Ingredients
• Perfect for a healthy snack!
For the Base
- Peanut Butter – Provides richness and binding; choose creamy for smoothness or crunchy for extra texture.
- Oats – Adds structure and fiber; rolled oats are ideal for the best texture, while quick oats make for softer balls.
- Honey (or Maple Syrup) – Natural sweetener that binds the ingredients; use maple syrup for a delightful vegan swap.
For the Flavor
- Chocolate Chips or Dried Fruit – Optional add-ins for a flavor twist; dark chocolate offers a rich taste, while dried cranberries bring a tart zing.
These Crunchy Peanut Butter Energy Balls are not only easy to make but also serve as a delicious, no-bake, gluten-free healthy snack!
Step‑by‑Step Instructions for Grilled California Avocado Chicken
Step 1: Prepare the Marinade
In a mixing bowl, whisk together olive oil, lime juice, minced garlic, salt, and pepper to create a zesty marinade for the Grilled California Avocado Chicken. This blend adds flavor and helps keep the chicken moist. Let the marinade sit for about 5 minutes, allowing the garlic to infuse its aromatic scent into the mixture.
Step 2: Marinate the Chicken
Place the chicken breasts in a resealable plastic bag or a shallow dish, and pour the marinade over the top. Seal the bag or cover the dish with plastic wrap, ensuring the chicken is fully coated. Allow it to marinate in the refrigerator for at least 15–20 minutes, enhancing the flavors and tenderizing the meat.
Step 3: Preheat the Grill
While the chicken marinates, preheat your grill to medium-high heat (about 400°F). This ensures a perfect searing temperature for the chicken, giving it those delicious grill marks. If using a grill pan, heat it on the stovetop over medium-high heat, lightly greasing it with oil to prevent sticking.
Step 4: Grill the Chicken
Remove the chicken from the marinade, letting any excess drip off, and place it on the hot grill. Cook for 6–7 minutes on one side without moving it, allowing the chicken to develop a nice char. After that, flip the chicken and cook for an additional 6–7 minutes until fully cooked, reaching an internal temperature of 165°F.
Step 5: Prepare the Avocado Topping
While the chicken grills, slice ripe avocados in half, remove the pit, and scoop the flesh into a bowl. Mash the avocado lightly with a fork, then mix in lime juice, chopped cilantro, and a pinch of salt for a refreshing topping. This adds a creamy contrast to the grilled chicken, further enhancing the dish.
Step 6: Assemble and Serve
Once the chicken is fully cooked, let it rest for 5 minutes to retain its juices. Slice it into strips and top each piece generously with the creamy avocado mixture. Serve your Grilled California Avocado Chicken on a platter, optionally garnished with lime wedges and extra cilantro for a vibrant presentation that emphasizes the sunny flavors of California.
Make Ahead Options
These Crunchy Peanut Butter Energy Balls are perfect for meal prep! You can easily mix the base with peanut butter, oats, and honey (or maple syrup) up to 24 hours in advance, storing it in an airtight container in the refrigerator. The add-ins, like chocolate chips or dried fruit, can also be prepared ahead of time—just keep them separate until you’re ready to roll. When you’re set to serve, simply form the mixture into balls and refrigerate for 30 minutes to firm up. This way, you’ll enjoy fresh, delicious energy balls whenever you need a quick snack!
Variations & Substitutions for Crunchy Peanut Butter Energy Balls
Feel free to get creative with these versatile energy balls; your taste buds will thank you!
- Nut Butter Swap: Replace peanut butter with almond or cashew butter for a unique flavor twist. The creaminess will still bind beautifully while adding different nutty notes.
- Spiced Up: Add a dash of cinnamon or a splash of vanilla extract for a warmer flavor profile. These little boosts can transform the ordinary into the extraordinary!
- Dried Fruit Delight: Swap chocolate chips for dried fruit like raisins or chopped apricots for a chewy sweetness. This variation brings a fruity zing to your energy balls, making them even more satisfying.
- Crunch Factor: Toss in some chopped nuts or seeds, such as walnuts or chia seeds, for an extra layer of crunch. This elevates the texture and provides even more nutritional benefits!
- Vegan Friendly: Substitute honey with agave syrup or maple syrup to keep these energy balls completely plant-based. Enjoy the same great taste while catering to vegan diets.
- Protein Boost: For an additional protein punch, mix in a scoop of your favorite protein powder. This makes them an excellent snack for before or after a workout—like with my Chicken Alfredo Tater for a balanced meal.
- Choco-Lover’s Dream: Use dark chocolate chips instead of regular for a rich, decadent treat that feels indulgent yet remains guilt-free. The deep chocolate flavor paired with peanut butter is simply irresistible.
- Heat It Up: Sprinkle in a touch of cayenne or chili powder for those who like a bit of heat. This unexpected kick adds an exciting twist to your energy balls that will have your taste buds dancing!
Now that you’ve got options, the possibilities are endless! Whip up a batch and enjoy customizing your snack just the way you like it.
Helpful Tricks for Crunchy Peanut Butter Energy Balls
- Consistent Mixing: Ensure all ingredients are well-combined before rolling. This prevents dry spots and enhances the flavor of the crunchy peanut butter energy balls.
- Chill Time: Don’t skip refrigerating the balls for at least 30 minutes. This helps them firm up for easier handling and better texture.
- Hand Prep: Lightly wet your hands while rolling to avoid stickiness. This makes forming the balls much easier and keeps your hands clean!
- Taste as You Go: Adjust sweetness by sampling the mixture before rolling. You can add more honey or syrup as preferred to customize your energy balls.
- Storage Tips: Store in an airtight container in the fridge for up to a week, ensuring your crunchy peanut butter energy balls stay fresh and delicious!
What to Serve with Easy No-Bake Peanut Butter Energy Balls
These delightful energy balls are perfect for enhancing your snacking experience with a world of delicious pairings!
- Greek Yogurt Dip: A creamy yogurt dip adds tanginess, perfect for balancing the sweet crunch of the energy balls. Just mix in honey and your favorite spices for extra flavor.
- Fresh Fruit Medley: Serve alongside a colorful array of fresh fruits like berries and bananas for a refreshing contrast and natural sweetness.
- Trail Mix: Pair with a homemade trail mix featuring nuts and seeds. This combo offers an exciting crunch and an energy boost for adventurers on the go!
- Dark Chocolate Squares: For a decadent touch, enjoy a few dark chocolate squares on the side. The rich chocolate will enhance the nutty flavors of the energy balls.
- Nut Butter Dippers: Serve with a small bowl of your favorite nut butter for a double dose of creamy goodness, creating a delightful textural experience.
- Iced Coffee or Herbal Tea: Pair your snacks with a refreshing iced coffee or a fragrant herbal tea to balance flavors and keep you energized throughout the day.
- Oatmeal: For a wholesome breakfast, try them with a warm bowl of oatmeal topped with maple syrup and sliced banana— a hearty start to the day!
- Coconut Chips: Crunchy coconut chips add a tropical flair alongside the energy balls, offering a wonderful bite that’s sweet and satisfying.
- Homemade Granola Bars: Pair with homemade granola bars for a varied texture and delightful culinary experience that complements the energy balls perfectly.
- Chia Seed Pudding: Serve with a delightful chia seed pudding for a boost of fiber and omega-3s, rounding out your nutritious snack.
How to Store and Freeze Crunchy Peanut Butter Energy Balls
Room Temperature: These energy balls can be kept at room temperature for up to 2 hours, making them perfect for on-the-go snacking!
Fridge: Store the peanut butter energy balls in an airtight container in the refrigerator for up to 1 week. This keeps them fresh and ready whenever you need a quick bite.
Freezer: For longer storage, freeze the energy balls in a single layer on a baking sheet before transferring them to an airtight container. They can last up to 3 months in the freezer.
Reheating: No need to reheat! Enjoy them straight from the fridge or freezer for a refreshing and healthy snack.
Crunchy Peanut Butter Energy Balls Recipe FAQs
What kind of peanut butter should I use?
Absolutely! You can opt for either creamy or crunchy peanut butter based on your texture preference. Creamy peanut butter will give your energy balls a smooth consistency, while crunchy peanut butter will add delightful little bits of texture.
How do I store these energy balls?
To keep your Crunchy Peanut Butter Energy Balls fresh, store them in an airtight container in the refrigerator for up to 1 week. This way, they’re always ready for a quick grab-and-go snack! If you want to extend their shelf life, consider freezing them.
Can I freeze the energy balls?
Yes, you can! To freeze your Crunchy Peanut Butter Energy Balls, lay them out in a single layer on a baking sheet to prevent them from sticking together. Once they are fully frozen (about 1-2 hours), transfer them to an airtight container or a freezer-safe bag. They can be kept in the freezer for up to 3 months. When you’re ready to enjoy them, just take them out and enjoy them straight from the freezer or let them thaw for a few minutes!
What should I do if the mixture is too dry or crumbly?
Very! If your mixture is too dry and crumbles rather than sticks together, simply add a little more of your binding ingredient, like peanut butter or honey. Start with a tablespoon at a time, mixing well after each addition until you achieve a consistency that holds together. It’s all about achieving that perfect, moldable texture!
Are these energy balls suitable for kids with nut allergies?
Keep in mind! If you’re making these for someone with nut allergies, it’s essential to switch to a nut-free butters like sunbutter (made from sunflower seeds) or soy nut butter. Always double-check ingredient labels to ensure they are allergy-friendly.
Grilled California Avocado Chicken for a Flavorful Feast
Ingredients
Equipment
Method
- In a mixing bowl, whisk together olive oil, lime juice, minced garlic, salt, and pepper to create a marinade.
- Place the chicken breasts in a resealable plastic bag or shallow dish and pour the marinade over the top.
- Allow the chicken to marinate in the refrigerator for at least 15–20 minutes.
- Preheat your grill to medium-high heat (about 400°F).
- Remove the chicken from the marinade and grill for 6–7 minutes on each side until fully cooked.
- While the chicken grills, mash the avocados and mix in lime juice, chopped cilantro, and a pinch of salt.
- Once cooked, let the chicken rest for 5 minutes, slice it, and top with the avocado mixture.
- Serve garnished with lime wedges and extra cilantro.
Leave a Reply