
As I unrolled my lunch one busy afternoon, the kitchen was filled with the warm aroma of baked goodness and savory herbs. These Cottage Cheese Wraps quickly became my new go-to meal, offering over 21 grams of protein and a delightful, flexible texture that has no flour in sight. Whether I’m craving a low-carb sandwich or a quick breakfast burrito, these wraps are a swift solution that fits seamlessly into my meal prep routine. Discover how easy it is to whip up a batch, perfect for either on-the-go snacking or a satisfying lunch at home. What fillings will you choose to tuck inside your wraps?
Why Choose Cottage Cheese Wraps?
Health Benefits: These wraps are not only low-carb but also rich in protein, making them a perfect option for anyone on a keto diet or seeking a healthier alternative to traditional wraps.
Versatility: From savory to sweet, these wraps can transform into a variety of meals, whether you’re leaning towards a breakfast burrito or a quick sandwich.
Easy to Make: With just a few ingredients and minimal prep, you can whip up a batch in no time. It’s the ideal recipe for your busy weekdays.
Crowd-Pleaser: Impress family and friends with these unique wraps; they’re bound to be a hit at your next gathering! And if you’re in the mood for more exciting meal options, try pairing them with Crockpot Cheese Tortellini or Garlic Chicken Wraps for a delightful spread.
Cottage Cheese Wraps Ingredients
For the Wraps
- Full-fat cottage cheese – This is the star of the show, providing moisture and over 21 grams of protein per serving.
- Large eggs – Essential for binding the ingredients together and adding richness to the wraps.
- Grated Parmesan cheese – A great flavor booster that adds slight firmness to the wrap; you can use mozzarella for a milder taste.
- Garlic powder – Gives that lovely savory kick that makes each bite delicious.
- Italian seasoning – Enhances the flavor profile with a delightful mix of aromatic herbs.
Optional Fillings
- Cream cheese – Perfect for spreading, it adds creamy texture and richness.
- Cooked bacon – Adds a savory crunch that pairs wonderfully with the cottage cheese wraps.
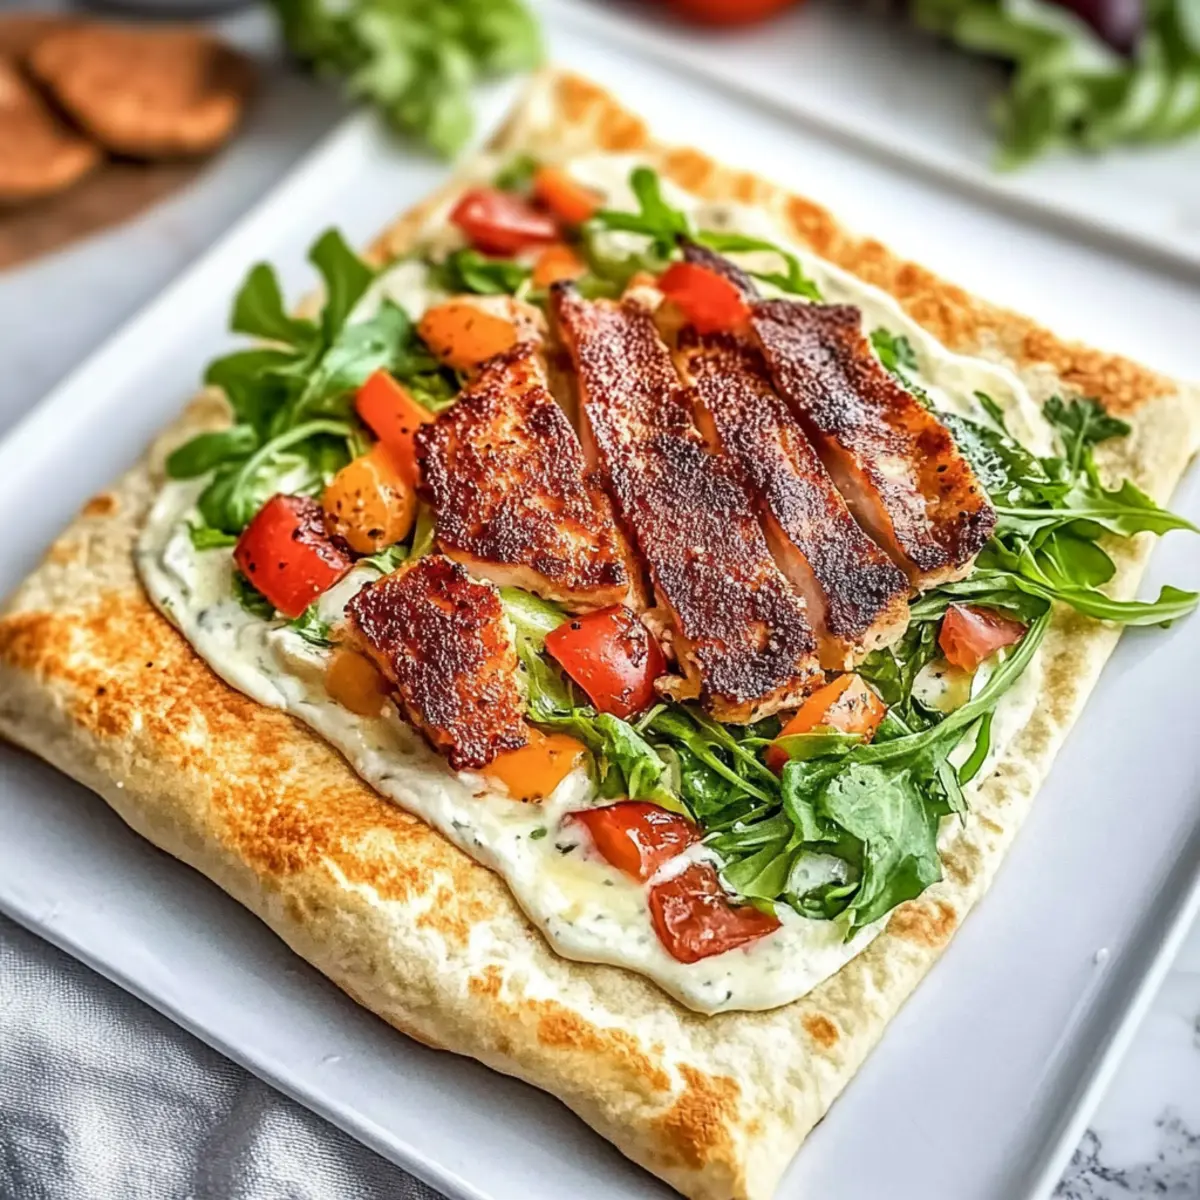
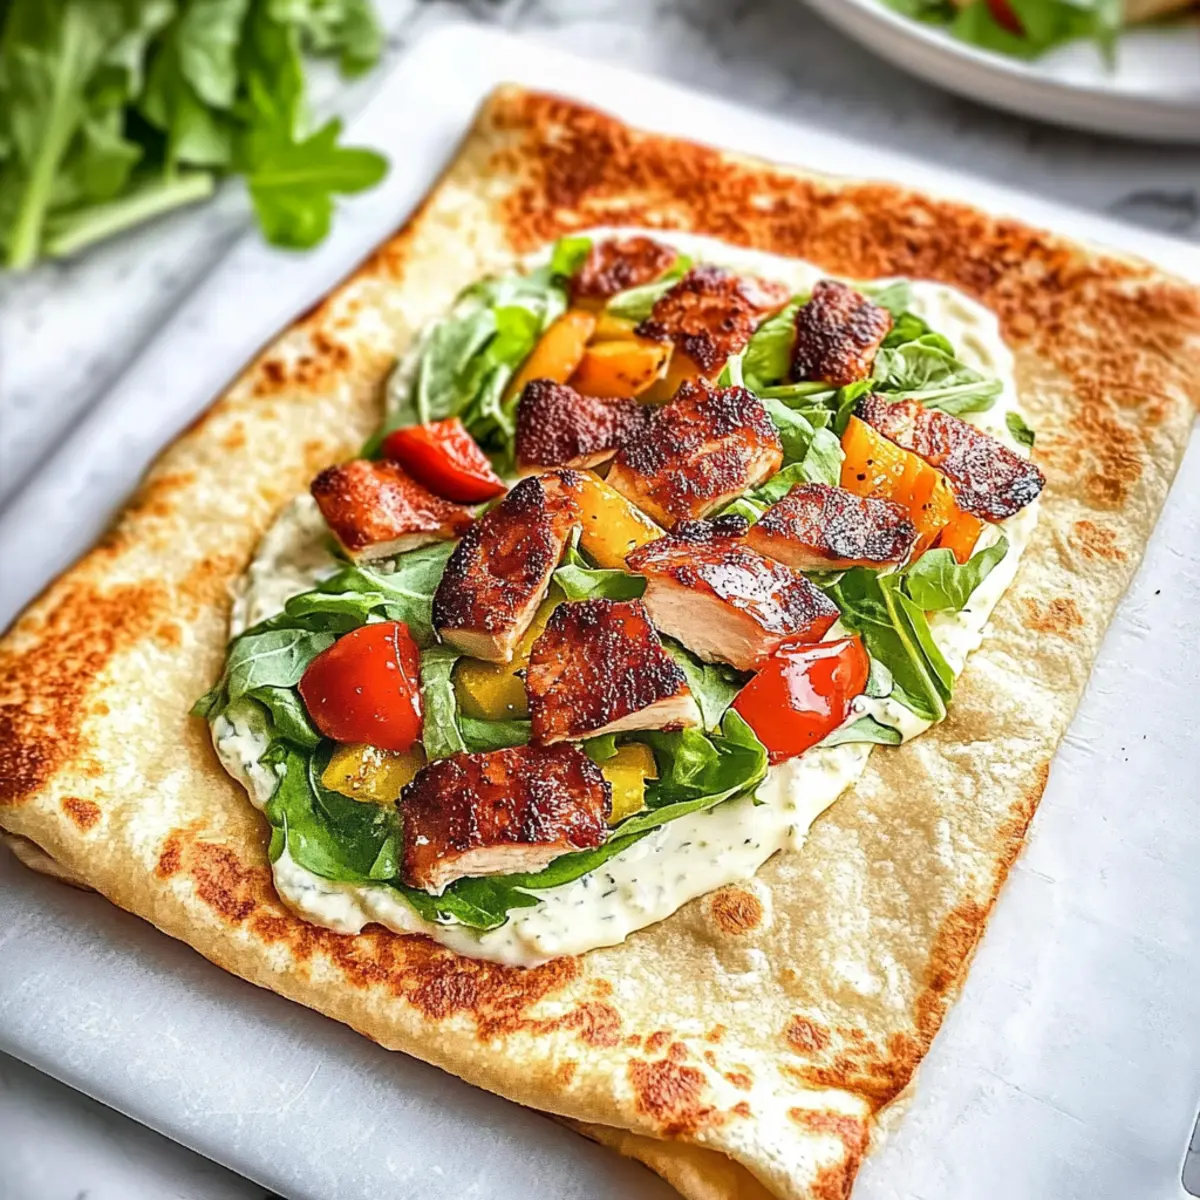
- Grilled chicken – A lean protein option that turns your wrap into a fulfilling meal.
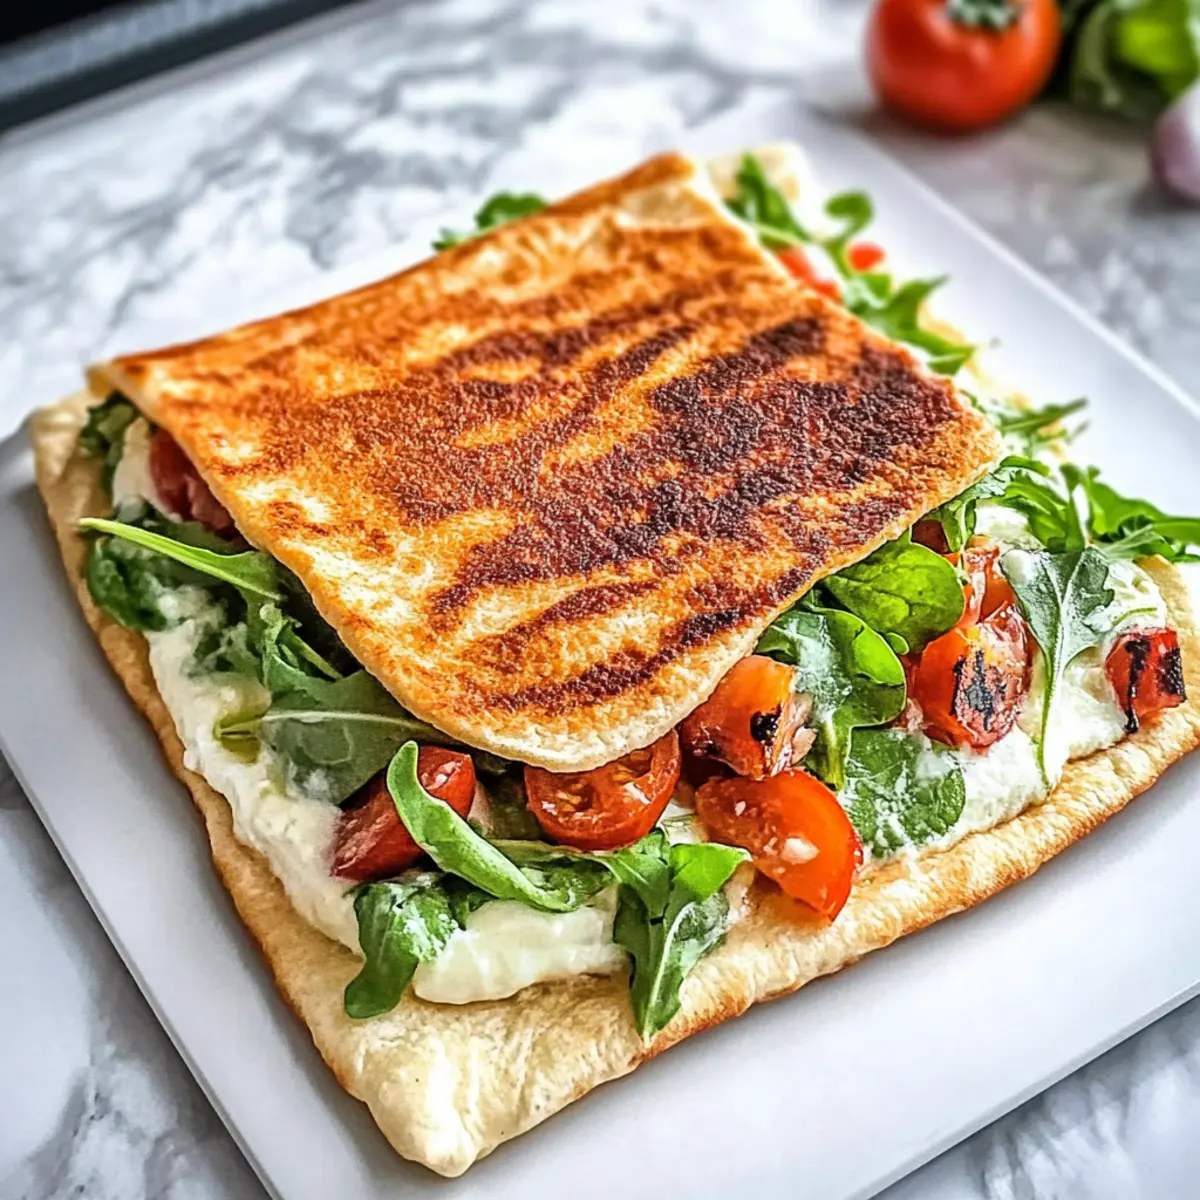
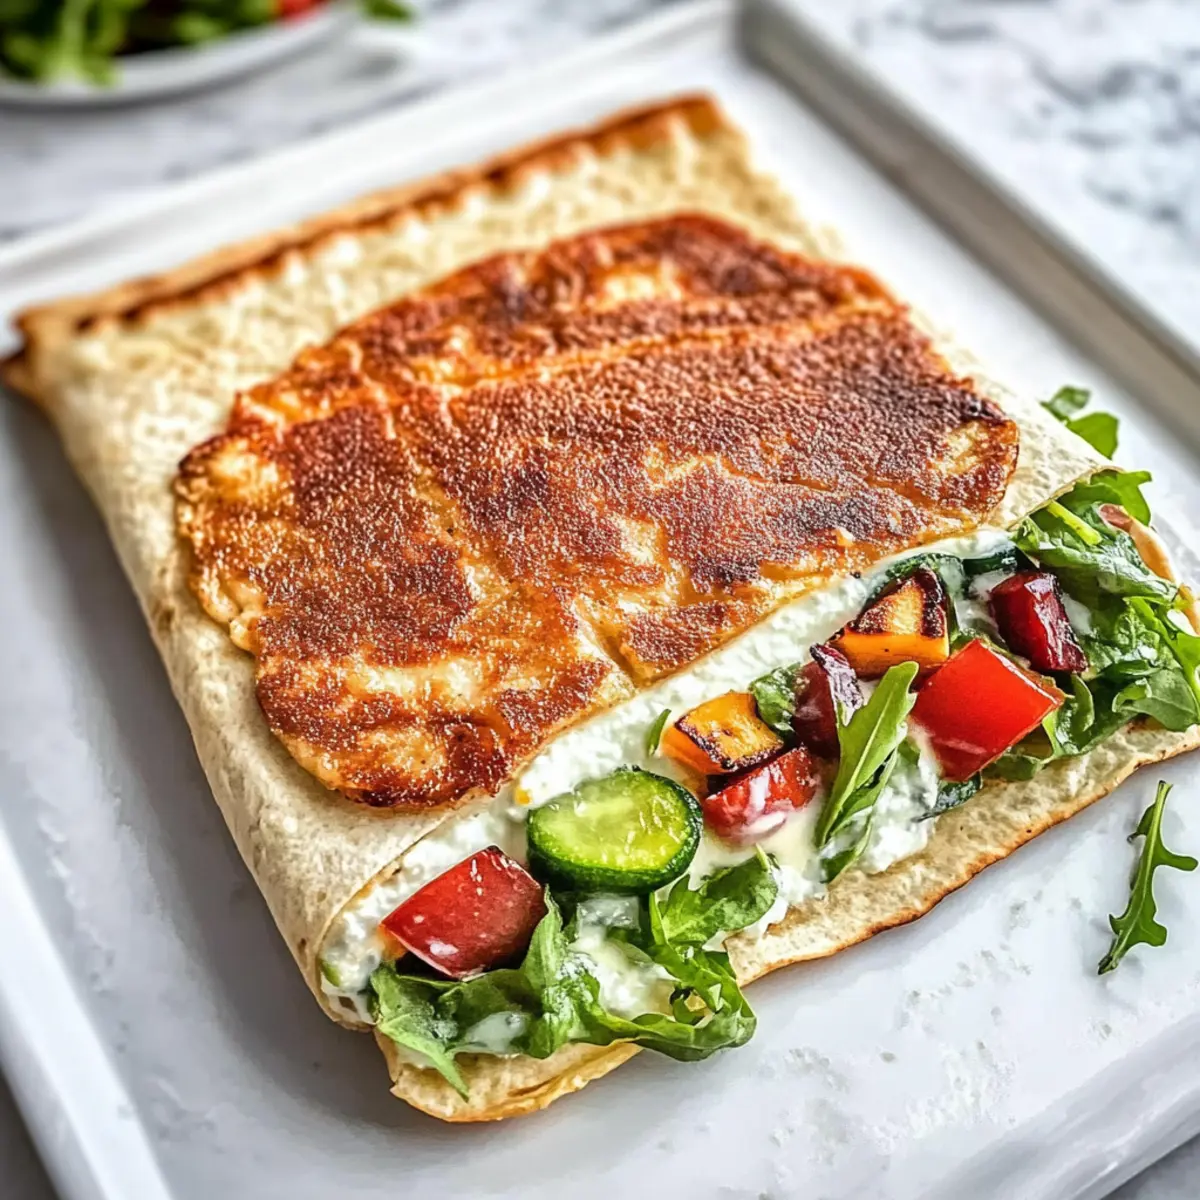
- Fresh vegetables – Add vibrant color and crunch with options like spinach, bell peppers, or cucumbers.
Explore the endless possibilities you can create with these cottage cheese wraps!
Step‑by‑Step Instructions for Cottage Cheese Wraps
Step 1: Preheat the Oven
Begin by preheating your oven to 350°F (175°C). While it warms, line a baking tray with parchment paper, ensuring you lightly grease it to prevent sticking. This initial step is crucial for achieving the perfect texture for your Cottage Cheese Wraps, making them easy to remove later.
Step 2: Blend the Ingredients
In a blender, thoughtfully combine the full-fat cottage cheese, large eggs, grated Parmesan cheese, garlic powder, and Italian seasoning. Blend on high for about 45 seconds, until the mixture transforms into a smooth, cohesive batter. This blend creates the foundation for your Cottage Cheese Wraps, so ensure there are no lumps.
Step 3: Prepare for Baking
Next, pour the luscious batter onto the prepared baking sheet, using a silicone spatula to spread it into a thin, even rectangle. This even layer ensures that your wraps cook uniformly, yielding soft and pliable Cottage Cheese Wraps that can hold any filling you desire.
Step 4: Bake to Perfection
Carefully place the baking sheet in the preheated oven. Bake for 30 to 35 minutes, monitoring the wraps until the surface appears set and edges are lightly golden. This visual cue indicates that your Cottage Cheese Wraps are nearly done, so be attentive to avoid over-baking.
Step 5: Cooling Period
Once the timer goes off, remove the baking sheet from the oven and allow the wrap to cool completely on the tray. This cooling period is essential for firming up the texture, preventing any tearing when you peel them from the parchment paper. Patience here will yield great results!
Step 6: Fill and Roll
After cooling, gently peel the wraps from the parchment paper and cut them into your desired sizes. Now comes the fun part—fill each section with your choice of ingredients, like cream cheese or grilled chicken, then roll them up. These Cottage Cheese Wraps are now perfectly ready to enjoy, brimming with your favorite flavors!
Expert Tips for Cottage Cheese Wraps
- Grease Well: Make sure to grease the parchment paper thoroughly to prevent the wraps from sticking, ensuring easy removal.
- Cool Completely: Allow the wraps to cool fully on the tray before peeling them off. This prevents tearing and maintains their perfect texture.
- Adjust Texture: If you prefer thinner wraps, add a bit more cottage cheese to the batter, creating a smoother consistency that can hold various fillings.
- Creative Fillings: Don’t be afraid to get creative with your fillings! Think beyond the basics; try roasted veggies, hummus, or even a dollop of guacamole to elevate your Cottage Cheese Wraps.
- Make Ahead: These wraps are great for meal prep! Prepare a batch on the weekend and store them for quick snacks or lunches throughout the week.
Make Ahead Options
These Cottage Cheese Wraps are fantastic for meal prep, allowing you to enjoy healthy meals throughout the week with minimal effort. You can blend the wrap batter and store it in the refrigerator for up to 24 hours before baking, which helps save time on busy days. Additionally, you can bake the wraps in advance and keep them in an airtight container for up to 3 days. To maintain their quality, make sure they cool completely before storing and add parchment paper between layers to prevent sticking. When you’re ready to serve, simply warm them in the oven for a few minutes, then fill with your favorite ingredients for a delicious, satisfying meal!
Cottage Cheese Wraps Variations & Substitutions
Feel free to get creative with these wraps and explore different flavors and fillings that suit your taste!
- Keto-Friendly: Use almond flour instead of any added flours for a nutty texture while keeping it low-carb.
- Spice it Up: Add chili powder or paprika to the batter for a zesty kick that dances on your taste buds.
- Dairy-Free: Substitute with nut-based cream cheese and use a dairy-free cheese alternative for a fully dairy-free option.
- Herb Infusion: Stir in fresh herbs like basil or parsley into the batter to elevate the flavor and add a touch of color.
- Sweet Version: For a breakfast twist, mix in vanilla extract and a sweetener of your choice, then fill with Greek yogurt and berries.
- Vegetable Add-Ins: Fold in finely chopped spinach or grated zucchini into the batter, adding nutrition while keeping the wraps soft.
- Savory Heights: Incorporate crushed red pepper flakes into the batter for a hint of heat that complements savory fillings like bacon or grilled chicken.
- Texture Twists: Try adding flaxseed meal or chia seeds to the batter for an extra crunch and nutritional boost that pairs well with fillings.
These wraps are as versatile as your imagination! You can always mix and match ideas or even savor them alongside a delicious side like Pumpkin Cream Cheese for a sweet contrast, or make a savory pairing with Korean Inspired Cheesesteak. Enjoy the journey of flavor exploration!
How to Store and Freeze Cottage Cheese Wraps
Fridge: Store your Cottage Cheese Wraps in an airtight container for up to 5 days. Place parchment paper between layers to prevent sticking and keep them fresh.
Freezer: For longer storage, these wraps can be frozen for up to 2 months. Ensure they are tightly wrapped or placed in a freezer-safe bag to avoid freezer burn.
Thawing: When ready to use, thaw the wraps in the fridge overnight before gently reheating in the microwave or oven until warm.
Reheating: Heat in the microwave for 20-30 seconds or in a warm oven at 350°F (175°C) until heated through, ensuring they remain soft and flexible for easy rolling.
What to Serve with Cottage Cheese Wraps
These wraps make for a delightful meal, ready to be paired with a variety of sides and accompaniments!
- Fresh Garden Salad: A light salad filled with mixed greens adds a crunchy contrast to the soft wraps, bringing vibrant flavors to your meal.
- Roasted Vegetables: The caramelized taste of seasonal roasted vegetables complements the creamy texture of the wraps, making each bite more satisfying.
- Yogurt Dip: A tangy yogurt dip, perhaps with herbs, enhances the protein-packed wraps, creating a refreshing side that’s both creamy and zesty.
- Steamed Broccoli: Nutty and nutritious, steamed broccoli balances the flavors while providing an extra boost of fiber and vitamins.
- Sliced Avocado: Providing a rich, buttery element, sliced avocado adds healthy fats and a smooth texture to each bite of your wraps.
- Homemade Salsa: A zesty tomato salsa brings a burst of freshness, harmonizing beautifully with savory fillings for a flavor explosion.
- Chilled Gazpacho: This cold Spanish soup offers a refreshing twist, perfect for dipping or sipping alongside your hearty wraps during summertime.
- Sparkling Water or Iced Tea: Pair these wraps with a refreshing drink to cleanse your palate, keeping the meal light and enjoyable.
- Dark Chocolate Squares: For a sweet finish, a small square of dark chocolate offers a rich contrast to your savory wraps, rounding out your meal perfectly.
Cottage Cheese Wraps Recipe FAQs
How do I choose the right cottage cheese for this recipe?
Absolutely! For the best results in making Cottage Cheese Wraps, I recommend using full-fat cottage cheese. It provides the perfect moisture levels and richness, resulting in a deliciously satisfying wrap. If you’d prefer a lighter option, low-fat cottage cheese can be used; just keep in mind it may alter the texture and flavor slightly.
How should I store leftover wraps?
Very simple! Store your Cottage Cheese Wraps in an airtight container for up to 5 days in the refrigerator. Placing parchment paper between layers will help prevent sticking, ensuring they stay fresh and ready for your next snack or meal.
Can I freeze these wraps for later use?
Absolutely! To freeze your Cottage Cheese Wraps, wrap them tightly in plastic wrap or place them in a freezer-safe bag, ensuring they are well-sealed to avoid freezer burn. They can be frozen for up to 2 months. When ready to enjoy, just thaw them in the fridge overnight before reheating gently in the microwave or oven until warm.
What should I do if my wraps stick to the parchment paper?
If your Cottage Cheese Wraps stick, it could be due to insufficient greasing of the parchment paper or premature removal. Make sure to grease the parchment well before pouring in the batter. If sticking occurs, try sliding a spatula underneath the wraps gently to loosen them. Allowing the wraps to cool completely before peeling them off is also crucial in preventing tears!
Can I use these wraps if I have dietary restrictions?
Of course! These Cottage Cheese Wraps are gluten-free and can fit into a low-carb or keto diet, making them versatile for various dietary needs. However, always check individual ingredient labels, especially if you have dairy allergies or intolerances. You can experiment with dairy-free cheese alternatives or even use bean-based products to suit your preferences!
Delicious Cottage Cheese Wraps for Quick, Healthy Meals
Ingredients
Equipment
Method
- Preheat your oven to 350°F (175°C) and line a baking tray with greased parchment paper.
- In a blender, combine the full-fat cottage cheese, large eggs, grated Parmesan cheese, garlic powder, and Italian seasoning. Blend until smooth.
- Pour the mixture onto the prepared baking sheet and spread into a thin, even rectangle.
- Bake for 30 to 35 minutes until the surface is set and edges are lightly golden.
- Remove from oven and allow to cool completely on the tray.
- Peel the wraps off the parchment, cut to desired sizes, fill with ingredients, and roll up.
Leave a Reply