
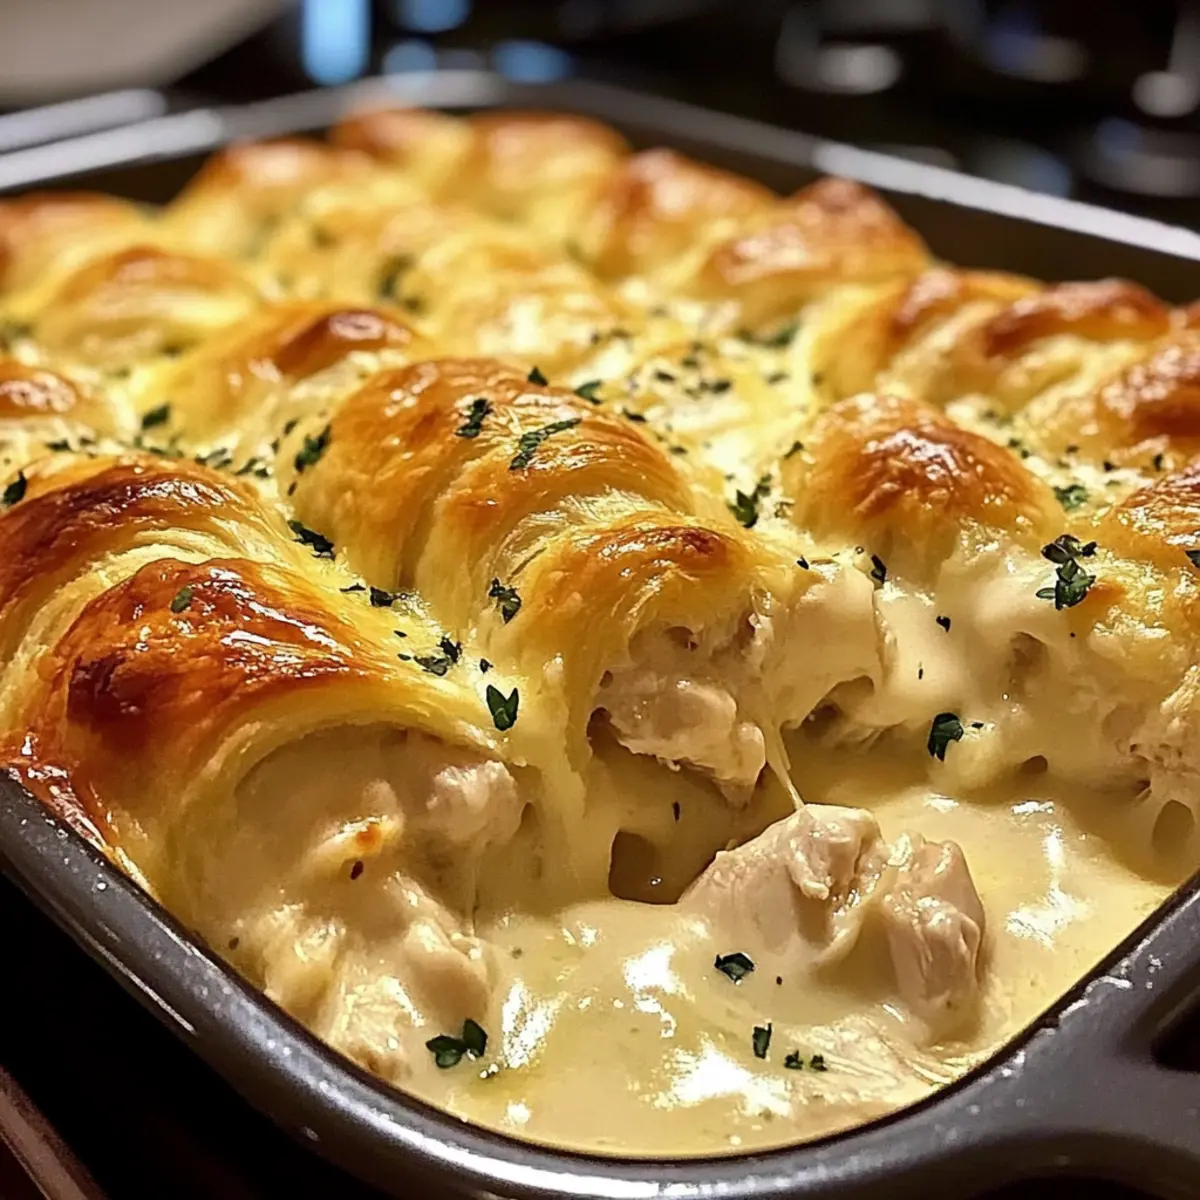
As I rummaged through the fridge, my eyes landed on some leftover rotisserie chicken, and an idea sparked instantly. What if I wrapped that tender meat in flaky crescent rolls and smothered it with a rich, creamy sauce? Enter my Cheesy Chicken Crescent Bake, a cozy casserole that transforms humble ingredients into an easy weeknight dinner your whole family will adore. In just 40 minutes, you can whip up this comforting dish, perfect for busy evenings or casual gatherings with friends. This recipe not only satiates those comfort food cravings but also brings a fun twist to classic casseroles. Are you ready to dive into a simple yet delightful meal that warms both the heart and the tummy? Let’s get cooking!
Why is Cheesy Chicken Crescent Bake a Must-Try?
Simplicity at your fingertips: With just a handful of ingredients and easy steps, this dish is perfect for anyone, even if you’re new to cooking.
Comforting flavor: The buttery crescent rolls and creamy sauce create layers of deliciousness that will have everyone asking for seconds!
Versatile options: Customize this bake with your favorite cheeses or vegetables; try it with Popper Cheesy Chicken for an exciting twist!
Quick and efficient: Ready in just 40 minutes, it’s the ideal solution for busy weeknights without sacrificing taste.
Crowd-pleaser guaranteed: Whether it’s a family dinner or a gathering, this dish is a hit that will leave everyone satisfied and happy!
Cheesy Chicken Crescent Bake Ingredients
Here’s what you’ll need to create this deliciously comforting dish:
For the Bake
- Cooked Chicken – Use shredded rotisserie chicken for ease and maximum flavor.
- Refrigerated Crescent Rolls (1 tube, 8-count) – Provides a flaky, buttery exterior that holds everything together.
- Cream of Chicken Soup (1 can, 10.5 oz) – The creamy sauce base; can be swapped with cream of mushroom for a different flavor.
- Milk (1/2 cup) – Thins the sauce for the perfect consistency; any milk or a non-dairy alternative works just fine.
- Shredded Cheddar Cheese (1 cup, divided) – Adds flavor and richness; feel free to substitute with your favorite cheese like mozzarella.
- Garlic Powder (1/2 teaspoon) – Enhances the dish with a savory touch.
- Onion Powder (1/2 teaspoon) – Adds depth and complements the other flavors.
- Black Pepper (1/4 teaspoon) – A hint of spice that you can adjust to suit your taste.
Optional Garnish
- Chopped Parsley – Adds a fresh touch and vibrant color to your Cheesy Chicken Crescent Bake.
Step‑by‑Step Instructions for Cheesy Chicken Crescent Bake
Step 1: Preheat & Prep
Begin by preheating your oven to 375°F (190°C). While the oven warms up, lightly grease a 9×13-inch baking dish with cooking spray or a bit of butter to prevent sticking. This dish will hold all the delicious layers of your Cheesy Chicken Crescent Bake, so ensure it’s ready for the magic to happen!
Step 2: Prepare Dough
Unroll the refrigerated crescent rolls and carefully separate them into individual triangles on a clean surface. The dough should be cool to the touch but pliable. As you handle each triangle, take a moment to admire that flaky texture; this will form the delightful exterior of your cheesy bake.
Step 3: Fill Crescents
At the wide end of each crescent triangle, place a generous amount of shredded cooked chicken. Sprinkle a bit of shredded cheddar cheese on top of the chicken for an extra melty surprise. Roll the dough tightly from the wide end toward the point, pinching the seams to secure the filling inside, then place each rolled piece seam-side down in the greased baking dish.
Step 4: Make Sauce
In a medium mixing bowl, combine the cream of chicken soup, milk, garlic powder, onion powder, and black pepper. Whisk these ingredients together until you achieve a smooth and creamy consistency. The sauce should look silky and inviting, providing the perfect base to drizzle over your Cheesy Chicken Crescent Bake.
Step 5: Assemble
Carefully pour the creamy sauce over the prepared crescent rolls in the baking dish. Use a spatula to ensure every roll is coated, allowing the sauce to seep into the spaces between the rolls. Then, sprinkle the remaining shredded cheddar cheese evenly over the top for that golden, cheesy finish as it bakes.
Step 6: Bake
Place the assembled Cheesy Chicken Crescent Bake in the preheated oven. Bake for 25–30 minutes, or until the crescent rolls turn a beautiful golden brown and the edges are bubbling. Keep an eye out for that lovely melted cheese effect, which is a sure sign your bake is ready to come out!
Step 7: Cool
Once out of the oven, let the Cheesy Chicken Crescent Bake cool for about 5 minutes. This time allows the cheesy goodness to settle slightly, making it easier to serve. As it cools, the aroma fills the kitchen, promising a delicious, comforting meal that’s perfect for any occasion.
Make Ahead Options
These Cheesy Chicken Crescent Bake is perfect for meal prep, making weeknight dinners a breeze! You can assemble the entire dish up to 24 hours in advance by following all the steps up to pouring the sauce over the crescent rolls. Simply cover the baking dish tightly with plastic wrap and refrigerate. To prevent the rolls from becoming soggy, ensure the sauce is spread only when you’re ready to bake. When it’s time to serve, just preheat the oven and bake as directed, adding an additional 5-10 minutes if baking straight from the fridge. This way, you can enjoy a comforting, homemade meal with minimal effort after a busy day!
What to Serve with Cheesy Chicken Crescent Bake
Looking to create a delightful meal around your comforting casserole? Here are perfect pairings that elevate your dining experience.
-
Garlicky Green Beans: Steamed green beans tossed with minced garlic add freshness and a pop of vibrant color to your plate.
-
Caesar Salad: Crisp romaine lettuce with creamy Caesar dressing and crunchy croutons provides a refreshing contrast to the rich bake.
-
Creamy Mashed Potatoes: Whipped to a smooth, velvety texture, they balance out the dish’s richness while soaking up the delicious sauce.
-
Herb Roasted Carrots: Sweet, roasted carrots enhance the meal’s flavor profile with their natural sweetness and earthy undertones.
-
Buttery Corn on the Cob: The sweetness of fresh corn complements the savory flavors of the Cheesy Chicken Crescent Bake beautifully.
-
Homemade Biscuits: Warm and flaky, these buttery wonders are perfect for sopping up the creamy sauce from your casserole.
-
Chilled White Wine: A glass of crisp Chardonnay enhances the flavors of the dish while adding a refreshing, light accompaniment.
-
Lemon Sorbet: For dessert, a light lemon sorbet cleanses the palate after the cheesy richness, finishing your meal on a bright note.
These pairing ideas help to create a memorable dining experience, showcasing the comforting essence of your feast!
Helpful Tricks for Cheesy Chicken Crescent Bake
- Perfectly Flaky Rolls: Make sure to handle the crescent dough gently; pressing too hard can prevent them from rising properly when baking.
- Seasoned Chicken: Using leftover rotisserie chicken is a great shortcut, but ensure it’s well-seasoned for maximum flavor in your Cheesy Chicken Crescent Bake.
- Creamy Consistency: If your sauce seems too thick, gradually whisk in more milk until you reach the desired creamy consistency before pouring it over the rolls.
- Even Baking: Gently rotate the baking dish halfway through the cooking time to ensure even browning and bubbling for all your cheesy goodness.
- Serving Warm: For the best experience, serve your bake warm right out of the oven, enhancing the comfort food feel and cheesy texture that everyone loves!
How to Store and Freeze Cheesy Chicken Crescent Bake
Fridge: Store leftovers in an airtight container for up to 3 days. Reheat in the microwave or oven until warmed through, ensuring each bite remains deliciously comforting.
Freezer: For longer storage, wrap individual portions tightly in plastic wrap and then in aluminum foil. Freeze for up to 2 months, but expect some texture changes upon thawing.
Reheating: When ready to enjoy, thaw in the fridge overnight and reheat in the oven at 350°F (175°C) for about 20 minutes. This will help restore the cheesy goodness!
Freshness Tips: For best results, the Cheesy Chicken Crescent Bake is best enjoyed fresh. If possible, assemble the dish before baking and freeze unbaked.
Cheesy Chicken Crescent Bake Variations
Feel free to explore your culinary creativity and make this dish your own with these exciting variations!
-
Cheese Variation: Swap cheddar for Monterey Jack, Gouda, or pepper jack to add a spicy kick to your bake. The creamy texture will complement the layers wonderfully!
-
Vegetarian Option: For a meatless twist, replace chicken with sautéed mushrooms and spinach, transforming this dish into a hearty veggie delight.
-
Flavor Twists: Add in colorful vegetables like chopped bell peppers, broccoli, or even sweetcorn for a nutritious boost and vibrant presentation.
-
Herb Infusion: Mix in fresh herbs such as thyme or rosemary into your creamy sauce for an aromatic lift that elevates the overall flavor profile.
-
Heat It Up: Toss in some diced jalapeños or a pinch of crushed red pepper flakes to spice things up, creating a delightful contrast with the creamy sauce.
-
Creamy Alternatives: Consider using cream of mushroom or celery soup instead of cream of chicken for a different flavor base. This swap works beautifully!
-
Crunchy Topping: Sprinkle some crushed crackers or panko breadcrumbs over the top before baking to add a delightful crunch to each cheesy bite.
-
Dairy-Free Delight: Opt for a dairy-free cream soup and non-dairy cheese alternatives for a suitable option that doesn’t compromise on taste.
Explore these variations to suit your taste or dietary needs, and don’t hesitate to combine ideas! If you’re inspired, why not give these a try alongside recipes like Chicken Stuffed Crescent for a similar yet different take on comfort food?
Cheesy Chicken Crescent Bake Recipe FAQs
How do I choose the right cooked chicken for the Cheesy Chicken Crescent Bake?
Absolutely! Using shredded rotisserie chicken is a fantastic shortcut that brings flavor and moisture to the dish. You can also use any leftover cooked chicken; just ensure it’s well-seasoned to enhance the overall taste.
How should I store leftovers of the Cheesy Chicken Crescent Bake?
Store any leftovers in an airtight container in the refrigerator for up to 3 days. Reheat in the microwave or oven until heated through. For optimal freshness, try to consume it within this timeframe as it’s best enjoyed warm and gooey!
Can I freeze the Cheesy Chicken Crescent Bake?
Yes, you can freeze this dish for later enjoyment! Wrap individual portions tightly in plastic wrap followed by aluminum foil to prevent freezer burn, and store it in the freezer for up to 2 months. To reheat, thaw overnight in the fridge and bake at 350°F (175°C) for about 20 minutes.
What if my crescent rolls don’t bake evenly in the Cheesy Chicken Crescent Bake?
Very! If you notice uneven browning, gently rotate the baking dish halfway through the cooking time. This simple step helps distribute heat evenly, ensuring all parts of your bake turn golden and bubbly, leading to a perfectly satisfying meal.
Are there any dietary considerations I should be aware of when making Cheesy Chicken Crescent Bake?
Certainly! Keep in mind that some people might have allergies to common ingredients. If you’re cooking for someone with dairy allergies, you can substitute the cream of chicken soup and milk with non-dairy alternatives. Always double-check ingredient labels to ensure they meet dietary needs!
Cheesy Chicken Crescent Bake for Cozy Dinner Nights
Ingredients
Equipment
Method
- Preheat your oven to 375°F (190°C) and grease a 9×13-inch baking dish.
- Unroll the refrigerated crescent rolls and separate them into triangles.
- Place shredded chicken and some cheddar cheese on the wide end of each triangle, roll tightly and place seam-side down in the baking dish.
- In a bowl, combine cream of chicken soup, milk, garlic powder, onion powder, and black pepper. Whisk until smooth.
- Pour the creamy sauce over the crescent rolls and sprinkle remaining cheddar cheese on top.
- Bake for 25–30 minutes until golden brown and bubbly.
- Allow to cool for 5 minutes before serving.
Leave a Reply