
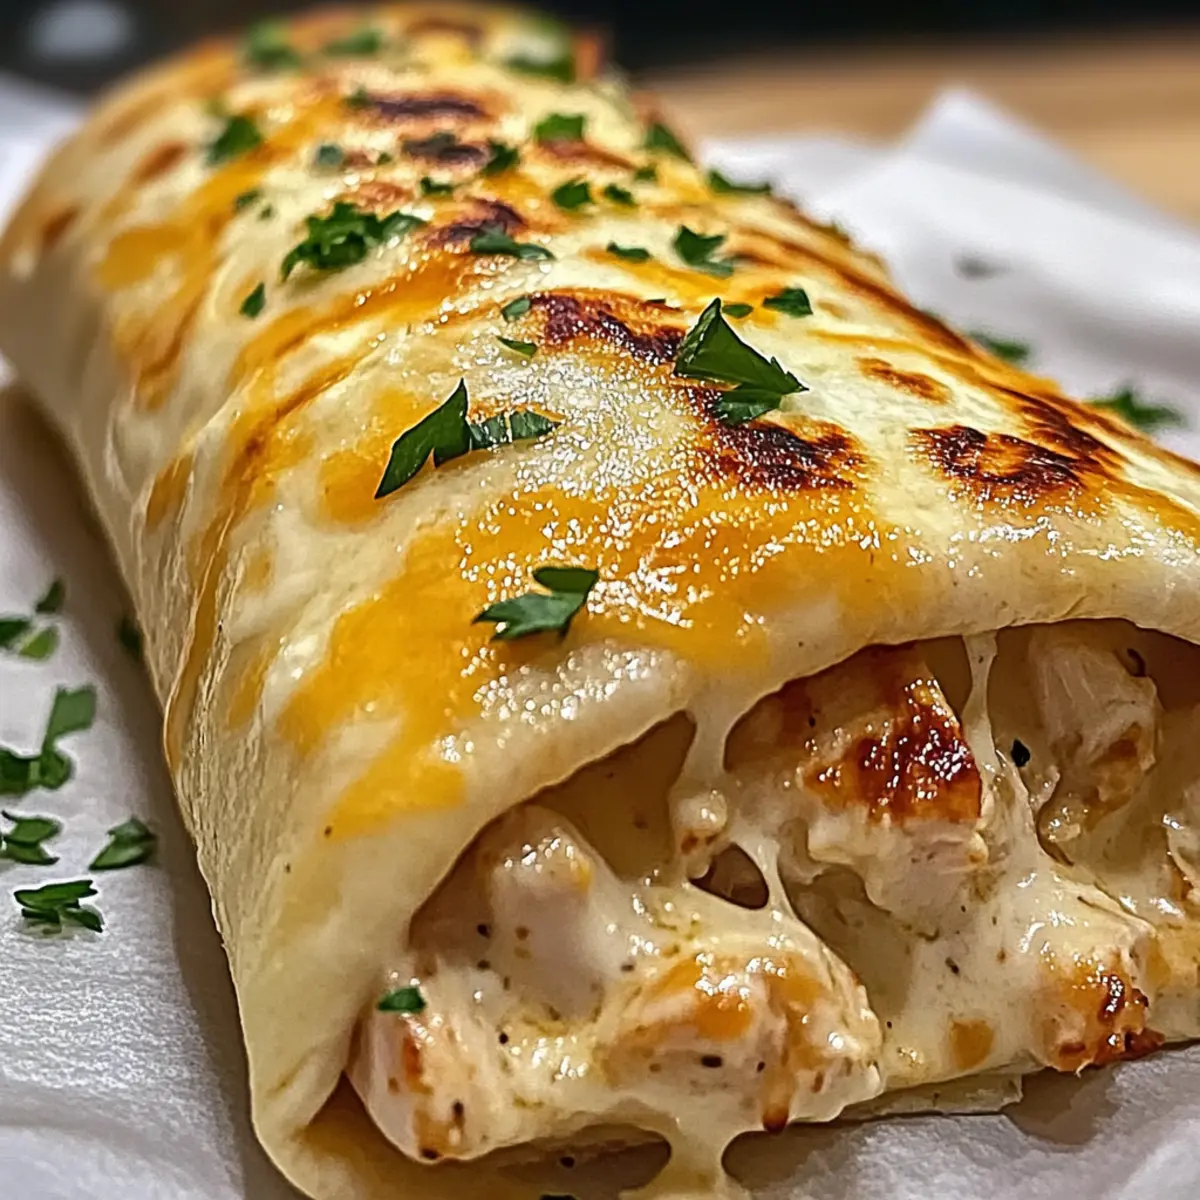
As I arranged the tortillas on the kitchen counter, the enticing aroma of garlic filled the air, setting the stage for a delicious surprise. The recipe for these Cheesy Garlic Chicken Wraps comes together in just 25 minutes, making them a perfect choice for busy weeknight dinners or laid-back weekends. Not only are they creamy and comforting, but they also invite your creativity to shine—feel free to toss in your favorite vegetables like crunchy bell peppers or nutrient-packed spinach. With this recipe, you’re not just whipping up a meal; you’re crafting a cozy dish that’s both quick to prepare and low-calorie without sacrificing taste. So, are you ready to dive into the ooey-gooey goodness? Let’s roll!
Why are Cheesy Garlic Chicken Wraps a Must-Try?
Quick & Easy: Ready in just 25 minutes, these wraps are ideal for those busy nights when you still want a homemade meal.
Endless Customization: Feel free to add your favorite veggies like spinach or bell peppers, making each wrap a unique creation suited to your taste.
Comfort Food Vibes: These wraps offer a gooey, cheesy experience that is sure to please everyone at the dinner table, echoing the flavors you crave.
Health-Conscious Delight: With simple swaps, such as using whole wheat tortillas and low-fat cream cheese, you can enjoy a meal that’s both delicious and low-calorie.
Crowd-Pleaser: Serve them with your favorite dipping sauce, whether it’s ranch or spicy aioli, ensuring every bite is packed with flavor.
Cheesy Garlic Chicken Wraps Ingredients
For the Filling
- Shredded Chicken – A heartiness that makes these cheesy garlic chicken wraps satisfying; consider using leftover rotisserie chicken for extra ease.
- Mozzarella Cheese – Provides a beautifully creamy, melty texture; feel free to swap in cheddar for a sharper flavor kick.
- Cream Cheese – Adds a rich, creamy depth; opt for low-fat cream cheese for a lighter touch.
- Minced Garlic – Infuses the dish with aromatic deliciousness; fresh garlic is best but garlic powder works in a pinch.
- Chopped Parsley – Brightens the flavor with freshness; substitute with chives or simply omit if you’re in a rush.
For the Wraps
- Tortillas – The perfect vessel for your cheesy goodness; try whole wheat tortillas for a nutritious twist.
- Olive Oil – Adds crispiness when frying; any neutral frying oil is fine, but olive oil brings extra flavor to the party.
These Cheesy Garlic Chicken Wraps are meant to impress, filling you with warmth and joy with every bite!
Step‑by‑Step Instructions for Cheesy Garlic Chicken Wraps
Step 1: Prepare the Filling
In a large mixing bowl, combine shredded chicken, mozzarella cheese, cream cheese, minced garlic, and chopped parsley. Use a fork or your hands to blend the ingredients until the mix is creamy and well incorporated. Ensure the cheese is evenly distributed throughout the chicken, creating a luscious filling that will be bursting with flavor. This step should take about 5 minutes.
Step 2: Season to Taste
After your filling is ready, sprinkle a pinch of salt and pepper over the mixture to enhance the flavors. Stir well, tasting as you go to achieve your desired seasoning balance. This careful adjustment will help in elevating the overall taste of your Cheesy Garlic Chicken Wraps, ensuring every bite is delectable. This should take roughly 2 minutes.
Step 3: Assemble the Wraps
Lay the tortillas flat on a clean surface, such as a cutting board. Spoon a generous portion of the cheesy chicken mixture into the center of each tortilla, being careful to leave about an inch of space around the edges for easy rolling. This will ensure your wraps don’t spill out during cooking, creating a perfect, compact wrap. This process should take about 3 minutes.
Step 4: Roll the Tortillas
Starting from one edge, carefully roll each tortilla tightly while tucking in the sides to secure the filling. Make sure they are snug but not overly tight, as this could cause them to burst during cooking. Repeat this for each tortilla until all the filling has been wrapped up, creating delicious Cheesy Garlic Chicken Wraps ready for cooking. This step will take around 4 minutes.
Step 5: Heat the Skillet
In a large skillet, heat approximately 2 tablespoons of olive oil over medium heat. Once the oil is shimmering and hot (but not smoking), place the prepared wraps seam-side down in the skillet. You should hear a gentle sizzle as they hit the pan, creating a golden, crispy exterior. This step should take about 1 minute.
Step 6: Cook the Wraps
Cook the wraps for about 3-4 minutes on the first side, until they are golden brown and crispy. Carefully flip them over using a spatula, and cook for an additional 3-4 minutes on the opposite side. Look for a beautiful golden color and a satisfying crispiness to indicate they are ready.
Step 7: Serve and Enjoy
Once cooked, remove the Cheesy Garlic Chicken Wraps from the skillet and let them cool slightly on a plate. Slice each wrap in half to reveal the ooey-gooey filling inside, and serve them warm with your favorite dipping sauce, like ranch or salsa. This final step is all about sharing the deliciousness with family and friends, creating a delightful meal that everyone will love!
How to Store and Freeze Cheesy Garlic Chicken Wraps
Fridge: Keep leftovers in an airtight container for up to 3 days to maintain freshness and flavor.
Freezer: Wrap each cheesy garlic chicken wrap in plastic wrap and place them in a freezer-safe bag for up to 2 months.
Reheating: For best results, reheat in a skillet over medium heat until warmed through and crispy, about 5-7 minutes.
Room Temperature: If serving immediately, enjoy the wraps warm; however, do not leave them out for more than 1 hour to ensure food safety.
Make Ahead Options
These Ooey-Gooey Cheesy Garlic Chicken Wraps are perfect for meal prep enthusiasts! You can prepare the filling (shredded chicken, mozzarella cheese, cream cheese, minced garlic, and parsley) up to 24 hours in advance. Simply mix the ingredients and store them in an airtight container in the refrigerator to keep them fresh. You can also assemble the wraps and refrigerate them for up to 3 days. When you’re ready to enjoy, just heat olive oil in a skillet over medium heat, cook the wraps until golden brown on both sides (approximately 3-4 minutes per side), and serve them warm. This easy prep makes for delicious, comforting wraps that are just as tasty as freshly made!
What to Serve with Cheesy Garlic Chicken Wraps
These delightful wraps are just the beginning of a cozy, satisfying meal that will warm your heart and tickle your taste buds.
- Fresh Garden Salad: A light and crisp salad provides a refreshing contrast to the warm, cheesy wraps, enhancing your meal with vibrant colors and textures.
- Creamy Mashed Potatoes: These velvety, buttery potatoes complement the cheesy wraps beautifully, offering a rich, indulgent side that feels like a warm embrace.
- Grilled Vegetables: The charred sweetness of grilled bell peppers and zucchini adds a smoky flavor dimension, making your plate more colorful and nutritious.
- Garlic Breadsticks: Perfectly golden and soft, they echo the savory garlic notes in the wraps while providing a satisfying, chewy texture to enjoy.
- Spicy Aioli: Drizzle this zesty sauce over the wraps to elevate their flavor profile, adding a punch that tantalizes your taste buds with every bite.
- Classic Coleslaw: The crunchiness of tangy coleslaw balances the creamy wraps, creating a delightful mix of flavors and textures that invites seconds.
- Fruit Skewers: Fresh fruits add a sweet and juicy brightness to your meal, cleansing the palate and offering a delightful contrast to the savory wraps.
Pairing any of these sides with your Cheesy Garlic Chicken Wraps will create a heartwarming feast that transforms mealtime into a celebration!
Expert Tips for Cheesy Garlic Chicken Wraps
Combine Well: Ensure you mix the filling thoroughly to distribute the flavors evenly, leading to an irresistible bite every time.
Tight Rolls: Roll your tortillas tightly, tucking in the sides. This helps prevent spillage and ensures a perfect shape during cooking.
Season Gradually: Begin with a small pinch of salt and pepper, adding more gradually. It’s easier to enhance flavor than to fix over-seasoned cheesy garlic chicken wraps!
Heat Control: Cook on medium heat to achieve a golden, crispy exterior without burning the tortillas. A gentle sizzle means you’re on the right track!
Watch for Color: Flip the wraps when they’re golden brown, ensuring they’re crispy and perfectly cooked inside. Keep an eye on them—they cook fast!
Cheesy Garlic Chicken Wraps Variations
Embrace the joy of customization and create your perfect wrap with these delightful variations.
- Veggie-Packed: Add spinach or bell peppers for a colorful burst of nutrition. Toss in a handful of spinach right into the filling mixture for added health benefits.
- Spicy Kick: Incorporate cayenne pepper or crushed red pepper for heat. Just a pinch can transform your wraps into a fiery delight that tempts the taste buds.
- Cheese Twist: Use pepper jack cheese for an extra layer of flavor. This variation adds a creamy texture with a zesty punch, perfect for cheese lovers.
- Sweet & Savory: Mix in caramelized onions for a touch of sweetness. The contrast between the savory filling and the sweet onions creates a harmonious blend of flavors.
- Herb-Infused: Add Italian seasoning or fresh basil to elevate the herbaceous notes in your wraps. This change brings a fragrant aroma and a Mediterranean flair to every bite.
- Crunch Factor: Sprinkle in some crushed tortilla chips or chopped nuts before rolling for an unexpected textural twist. The crunch adds excitement within the creamy filling.
- Dipping Delight: Serve with a tangy yogurt sauce or spicy aioli. These sauces not only elevate the dish but also allow a fun dipping experience everyone will enjoy.
- Gluten-Free Upgrade: Use gluten-free tortillas to cater to dietary needs. This simple swap ensures that everyone can indulge in this delicious wrapping experience.
For more cheesy goodness, explore the flavorful options of Cheesy Garlic Potatoes or turn your meal up a notch with the savory Garlic Butter Chicken and Rice Casserole. Let your creativity shine in the kitchen!
Cheesy Garlic Chicken Wraps Recipe FAQs
What type of shredded chicken should I use?
Absolutely! You can use leftover rotisserie chicken for convenience, as it saves time and adds flavor. Alternatively, feel free to cook your chicken beforehand; just make sure it’s shredded and seasoned to your liking for the best results.
How should I store leftovers?
Very! Store your cheesy garlic chicken wraps in an airtight container in the refrigerator for up to 3 days. This keeps them fresh, and when you’re ready to enjoy them again, just reheat in a skillet to regain that crispy texture.
Can I freeze these wraps?
Of course! To freeze, wrap each cheesy garlic chicken wrap tightly in plastic wrap, then place them in a freezer-safe bag. They will stay good for up to 2 months. When you’re ready to eat them, simply thaw in the fridge overnight before reheating.
What can I do if my wraps are spilling during cooking?
Don’t worry! If your wraps are bursting, try rolling them tighter, tucking in the sides as you go. This not only secures the filling but also creates a beautiful shape. If they still spill, just enjoy the cheesy goodness that seeps out—it’s a delicious treat!
Can I replace cream cheese for a healthier option?
Absolutely! Using low-fat cream cheese is a great alternative to reduce calories while still achieving that rich, creamy texture. If you’re looking for a dairy-free option, consider using a plant-based cream cheese. This way, everyone can enjoy their share!

Cheesy Garlic Chicken Wraps for a Quick Comfort Meal
Ingredients
Equipment
Method
- In a large mixing bowl, combine shredded chicken, mozzarella cheese, cream cheese, minced garlic, and chopped parsley. Use a fork or your hands to blend until creamy and well incorporated.
- Sprinkle a pinch of salt and pepper over the mixture and stir well, tasting as you go to achieve desired seasoning.
- Lay tortillas flat on a clean surface. Spoon a generous portion of the cheesy chicken mixture into the center of each tortilla.
- Starting from one edge, carefully roll each tortilla tightly while tucking in the sides to secure the filling.
- In a large skillet, heat approximately 2 tablespoons of olive oil over medium heat. Place the prepared wraps seam-side down in the skillet.
- Cook the wraps for about 3-4 minutes on the first side until golden brown and crispy, then carefully flip them over and cook for an additional 3-4 minutes.
- Once cooked, remove the wraps from the skillet, let them cool slightly, slice in half, and serve warm with your favorite dipping sauce.
Leave a Reply