
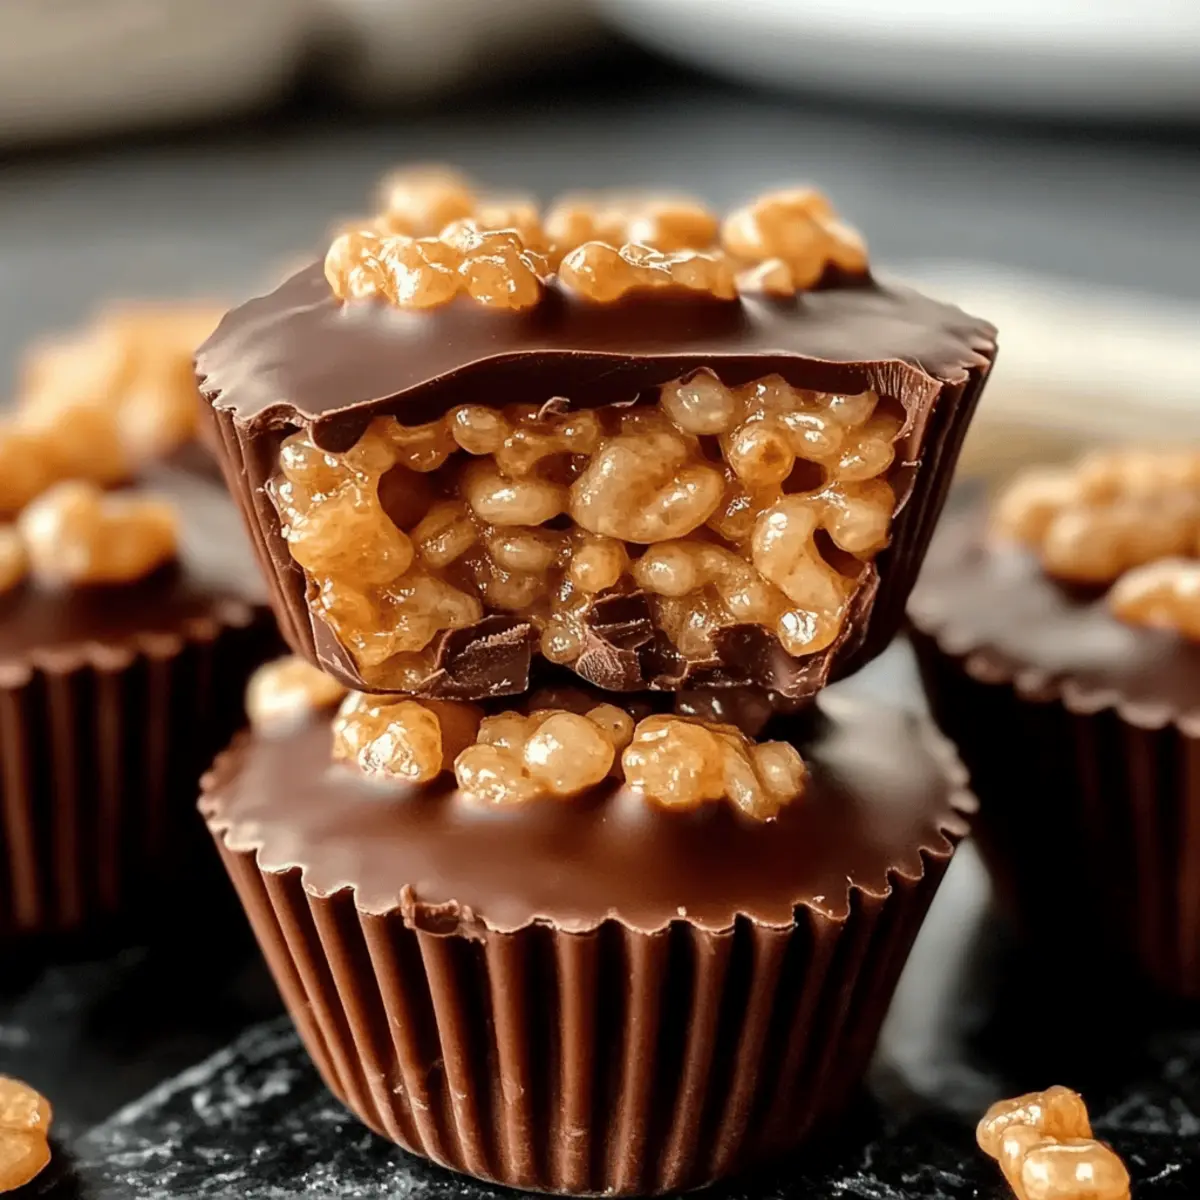
Stepping into my kitchen, I’m greeted by the irresistible scent of melting chocolate and creamy peanut butter—a combination that never fails to spark joy. Today, I’m excited to share my favorite no-bake Chocolate Peanut Butter Rice Krispie Cups with you! These delightful treats not only take mere minutes to whip up, but they also offer a customizable base that’s perfect for letting your creativity shine. With their satisfying crunch and smooth, chocolaty finish, these cups are ideal for any gathering or simply as a sweet escape during a busy week. They require no baking, making them a breeze to prepare, and you’ll love how they can easily accommodate your favorite flavors. Curious about the best ways to personalize your cups? Let’s dive into this easy recipe together!
Why Love Chocolate Peanut Butter Cups?
Quick Preparation: These no-bake treats can be ready in just minutes, making them a perfect option for impromptu cravings or gatherings.
Endless Customization: Feel free to experiment by adding ingredients like dried fruits or butterscotch chips to create your own unique flavor profile.
Crowd-Pleaser: With their sweet and savory combination, they’re bound to please both kids and adults alike—perfect for parties or family movie nights!
Simple Ingredients: Made with common pantry staples, you can whip these together whenever the craving strikes. Pair them with wholesome snacks like Yogurt Peanut Butter for an irresistible treat table!
Decadent Texture: Expect a divine mixture of creamy, crunchy, and chewy elements that make each bite a delightful adventure.
Chocolate Peanut Butter Rice Krispie Cups Ingredients
For the Rice Base
- Rice Krispies Cereal – Provides structure and crunch; ensure the cereal is fresh for maximum crispiness.
- Creamy Peanut Butter – Adds richness and flavor; can be swapped for crunchy peanut butter for extra texture.
- Unsalted Butter – Acts as a binding agent; use this to maintain flavor balance.
- Mini Marshmallows – Contribute sweetness and a chewy base; marshmallow fluff can be substituted if needed.
For the Topping
- Chocolate Chips – Adds a sweet layer on top; dark chocolate enhances the flavor or use dairy-free for a vegan option.
- Vanilla Extract (optional) – Enhances the flavor profile; feel free to omit it for a simpler experience.
- Sea Salt (optional) – Balances sweetness and enhances overall flavor; try it to elevate your Chocolate Peanut Butter Rice Krispie Cups!
Step‑by‑Step Instructions for Chocolate Peanut Butter Rice Krispie Cups
Step 1: Melt Base
In a medium saucepan over low heat, combine unsalted butter and mini marshmallows. Stir the mixture continuously for about 5 minutes until the marshmallows have completely melted and the mixture is smooth and glossy. Be careful not to let it bubble, as we want a creamy base for our Chocolate Peanut Butter Rice Krispie Cups.
Step 2: Incorporate Peanut Butter
Remove the saucepan from the heat and immediately stir in the creamy peanut butter along with the optional vanilla extract. Mix until fully blended and creamy, resulting in a luscious peanut butter mixture. This will add a rich flavor that perfectly complements the rice Krispies in your cups.
Step 3: Mix with Cereal
In a large mixing bowl, pour in the Rice Krispies cereal. Gently add the creamy peanut butter mixture on top, then fold everything together until the rice cereal is evenly coated with the mixture. This should take about 1-2 minutes, and you’ll know it’s ready when every piece of cereal is covered in that delightful peanut buttery goodness.
Step 4: Shape Cups
Line a muffin tin with paper liners to prevent sticking. Spoon the Rice Krispies mixture into each cup, making sure to fill them evenly. Press down gently with your fingers or a spatula to create a flat surface at the top. This pressing will help the cups hold their shape once set, so take your time to ensure they’re compact and firm.
Step 5: Add Chocolate Layer
In a microwave-safe bowl, melt the chocolate chips in 30-second intervals, stirring after each until they are fully melted and smooth. Once melted, spoon the chocolate over each cup, spreading it evenly to cover the top. The chocolate layer adds a decadent finish to your Chocolate Peanut Butter Rice Krispie Cups, and it should be glossy and even.
Step 6: Set & Serve
Allow the cups to cool at room temperature for 20 minutes, or place them in the refrigerator for quicker setting. Once the chocolate has hardened, carefully remove the paper liners from the cups, and they’re ready to be enjoyed. The final product will be a delightful combination of crunchy, chewy, and creamy textures, perfect for any occasion!
What to Serve with Chocolate Peanut Butter Rice Krispie Cups?
Indulging in these delightful cups can become a whole dining experience when paired with tasty complementing dishes!
- Fresh Fruit Salad: A refreshing medley of seasonal fruits adds a vibrant, juicy contrast to the rich flavors of the cups.
- Vanilla Ice Cream: Creamy, cold ice cream perfectly balances the sweetness and crunch, making every bite an explosion of delightful textures.
- Chocolate Milkshake: Lavish, thick, and chocolatey, this shake enhances the dessert theme and is sure to bring out the kid in everyone.
- Savory Cheese Platter: An array of cheeses balances the sweetness of the cups while introducing savory elements for an exciting snack table.
- Coffee or Espresso: A strong coffee complements the sweetness beautifully, making it an ideal pairing for an afternoon treat or after dinner.
- Peanut Butter Banana Smoothie: This smoothie creates a harmonious pairing with the same flavors, enhancing the peanut butter experience in a healthy, refreshing way.
- Nutty Granola Bars: Adding an extra crunch with a nutty, chewy granola bar enhances the textural variety and makes for an inviting snack table.
- Chocolate-Covered Pretzels: These salty-sweet bites add a delightful crunch and make excellent nibblers alongside your chocolate peanut butter creations.
Chocolate Peanut Butter Rice Krispie Cups Variations
Feel free to unleash your inner chef and customize these treats to your heart’s desire!
-
Nut Butters: Swap creamy peanut butter for almond butter or sunflower seed butter for unique flavors. Each nut butter has its own delightful twist!
-
Texture Variations: Add crushed nuts or butterscotch chips into the mix for an unexpected crunch. These additions bring an exciting contrast to every bite.
-
Gluten-Free Option: Use gluten-free Rice Krispies to make these delectable treats suitable for gluten-sensitive friends. Everyone deserves a taste of happiness!
-
Fruity Add-Ins: Incorporate dried fruits like cranberries or raisins for a burst of flavor in every cup. They add a lovely sweetness that complements the chocolate.
-
Choco-Dipped Delight: Dip the bottom of each cup in melted chocolate for an even richer experience. This decadent layer will elevate your dessert to new heights!
-
Spicy Kick: Sprinkle a pinch of cayenne pepper or chili flakes on top for a surprising heat that contrasts beautifully with the sweetness. It’s an adventurous twist that thrill-seekers will enjoy!
-
Experiment with Flavors: Try adding a splash of coconut extract or a sprinkle of cinnamon to the peanut butter mixture for a fragrant surprise. Your taste buds will thank you!
-
Shrink the Size: For bite-sized treats, mold them into mini muffin tins for cute, little snacks. Perfect for sharing at parties or enjoying in one delectable bite!
As you embrace these variations, don’t forget to pair them with delightful snacks like Oatmeal Chocolate Chip cookies or Bites Garlic Butter for an unforgettable dessert spread!
Expert Tips for Chocolate Peanut Butter Rice Krispie Cups
- Low Heat Usage: Always melt the butter and marshmallows over low heat to prevent burning; a gentle approach ensures a smooth mixture for your Chocolate Peanut Butter Rice Krispie Cups.
- Proper Mixing: Gently fold the Rice Krispies into the peanut butter mixture—overmixing can yield a mushy texture, so be careful!
- Firm Pressing: When shaping the cups, press the mixture down firmly but gently to maintain their crunch; a well-compressed base ensures your cups hold their shape.
- Chilling Time: For the best texture and presentation, allow the cups to chill for at least 20 minutes before serving; this helps the chocolate set nicely.
- Creative Add-ins: Don’t hesitate to swap in different nut butters or add chocolate chunks for a twist on the classic flavor of Chocolate Peanut Butter Rice Krispie Cups!
Make Ahead Options
These Chocolate Peanut Butter Rice Krispie Cups are perfect for meal prep enthusiasts! You can prepare the rice cereal mixture and press it into the muffin tin up to 24 hours in advance. Simply follow the initial steps of melting the butter and marshmallows, mixing in the peanut butter, and folding in the Rice Krispies. Once you’ve shaped the cups, cover them with plastic wrap and refrigerate to maintain their freshness. When you’re ready to serve, melt the chocolate chips and spread them over each cup, allowing them to set as the perfect finishing touch. This way, you’ll have delicious treats ready for a busy week ahead, just as tempting as if you made them fresh!
How to Store and Freeze Chocolate Peanut Butter Rice Krispie Cups
Room Temperature: Keep your Chocolate Peanut Butter Rice Krispie Cups in an airtight container, where they’ll stay fresh for up to 1 week without losing their delightful crunch.
Fridge: If you prefer a longer shelf life, store them in the refrigerator. They can last for up to 2 weeks, just be sure to let them come to room temperature before serving for the best texture.
Freezer: For long-term storage, freeze the cups in a single layer on a baking sheet until firm, then transfer them to an airtight container or freezer bag. They can be kept for up to 3 months.
Reheating: Simply allow frozen Chocolate Peanut Butter Rice Krispie Cups to thaw at room temperature for about 30 minutes or pop them in the microwave for a few seconds to enjoy their scrumptious peanut buttery goodness again!
Chocolate Peanut Butter Rice Krispie Cups Recipe FAQs
How do I select the right Rice Krispies cereal?
Absolutely! For the best texture, use fresh Rice Krispies cereal. Look for a package without any signs of moisture or clumping. If you notice any dark spots or they feel stale, it’s best to opt for a new box.
How should I store my Chocolate Peanut Butter Rice Krispie Cups?
For room temperature storage, keep your cups in an airtight container; they’ll stay fresh for up to 1 week. If you prefer a longer shelf life, opt for the refrigerator—they’ll last for up to 2 weeks, but make sure to let them reach room temperature before enjoying so they regain their delightful crunch!
Can I freeze Chocolate Peanut Butter Rice Krispie Cups?
The more the merrier! Yes, you can freeze them! Place the cups in a single layer on a baking sheet until firm, then transfer them to an airtight container or freezer bag. They can be kept in the freezer for up to 3 months. When ready to enjoy, simply let them thaw at room temperature for about 30 minutes.
What if my cups aren’t sticking together properly?
No worries! If your mixture isn’t holding together, it might be due to insufficient marshmallow or peanut butter. To troubleshoot, melt together more mini marshmallows (about 1 cup) and peanut butter (1/2 cup) in a saucepan, then fold this mix gently into your Rice Krispies mixture until fully coated.
Are there any dietary considerations I should keep in mind?
Very! If you’re making these treats for those with dietary restrictions, be sure to choose gluten-free Rice Krispies for a gluten-free option. For nut allergies, swap in sunflower seed butter instead of peanut butter. There are also dairy-free chocolate chips available for a vegan-friendly treat!
Irresistible Chocolate Peanut Butter Rice Krispie Cups Recipe
Ingredients
Equipment
Method
- In a medium saucepan over low heat, combine unsalted butter and mini marshmallows. Stir continuously for about 5 minutes until melted and smooth.
- Remove from heat and stir in creamy peanut butter and optional vanilla extract until blended.
- In a large bowl, pour in Rice Krispies cereal and gently add peanut butter mixture. Fold together until evenly coated.
- Line a muffin tin with paper liners, spoon the mixture into each cup, and press down gently to create a flat surface.
- Melt chocolate chips in a microwave-safe bowl in 30-second intervals, stirring until smooth. Spoon over each cup to cover.
- Allow cups to cool at room temperature for 20 minutes or refrigerate until chocolate hardens. Remove liners and serve.
Leave a Reply