
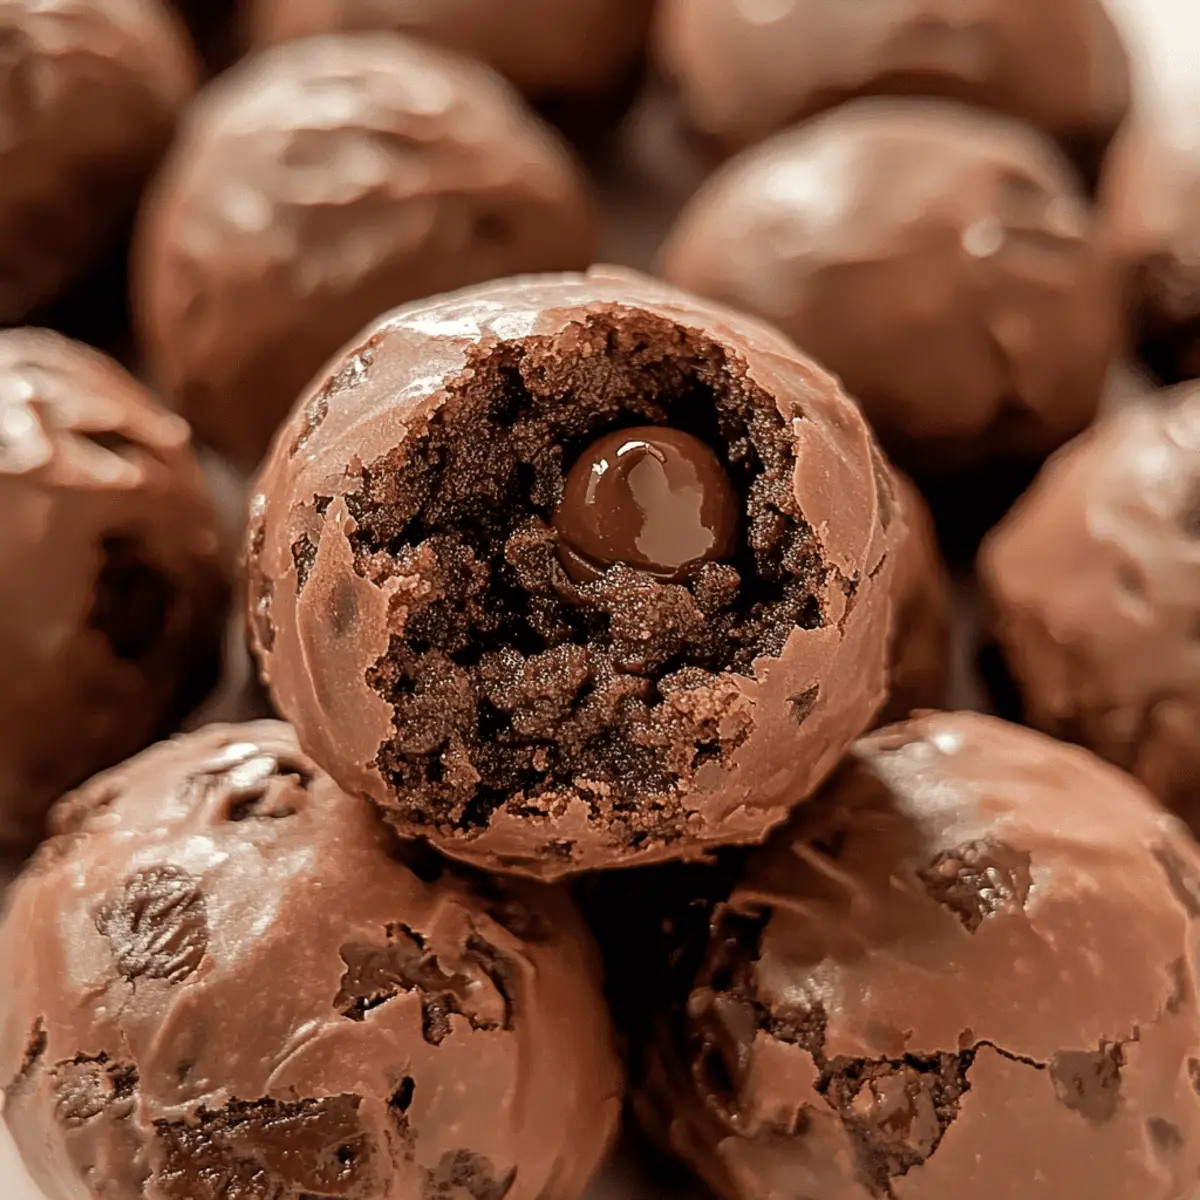
As I rummaged through my pantry, I stumbled upon a neglected bag of protein powder and a craved something sweet. That’s when the idea hit me: why not whip up some Brownie Protein Balls? This no-bake recipe combines the indulgent flavor of brownies with a healthful twist, yielding guilt-free treats that are perfect for busy days. In just minutes, these protein-packed morsels can satisfy your sweet tooth without compromising your wellness goals. Plus, they’re customizable, so whether you prefer a classic chocolate chip or a refreshing mint twist, you can make them just the way you like. Will you take the plunge into this deliciously healthy adventure with me?
Why Are Brownie Protein Balls Fantastic?
Guilt-Free Indulgence: These Brownie Protein Balls blend the taste of chocolate brownies with healthy ingredients, allowing you to indulge without worry.
No-Bake Convenience: Whip them up in just minutes with no baking required—perfect for those busy days when you crave a quick treat.
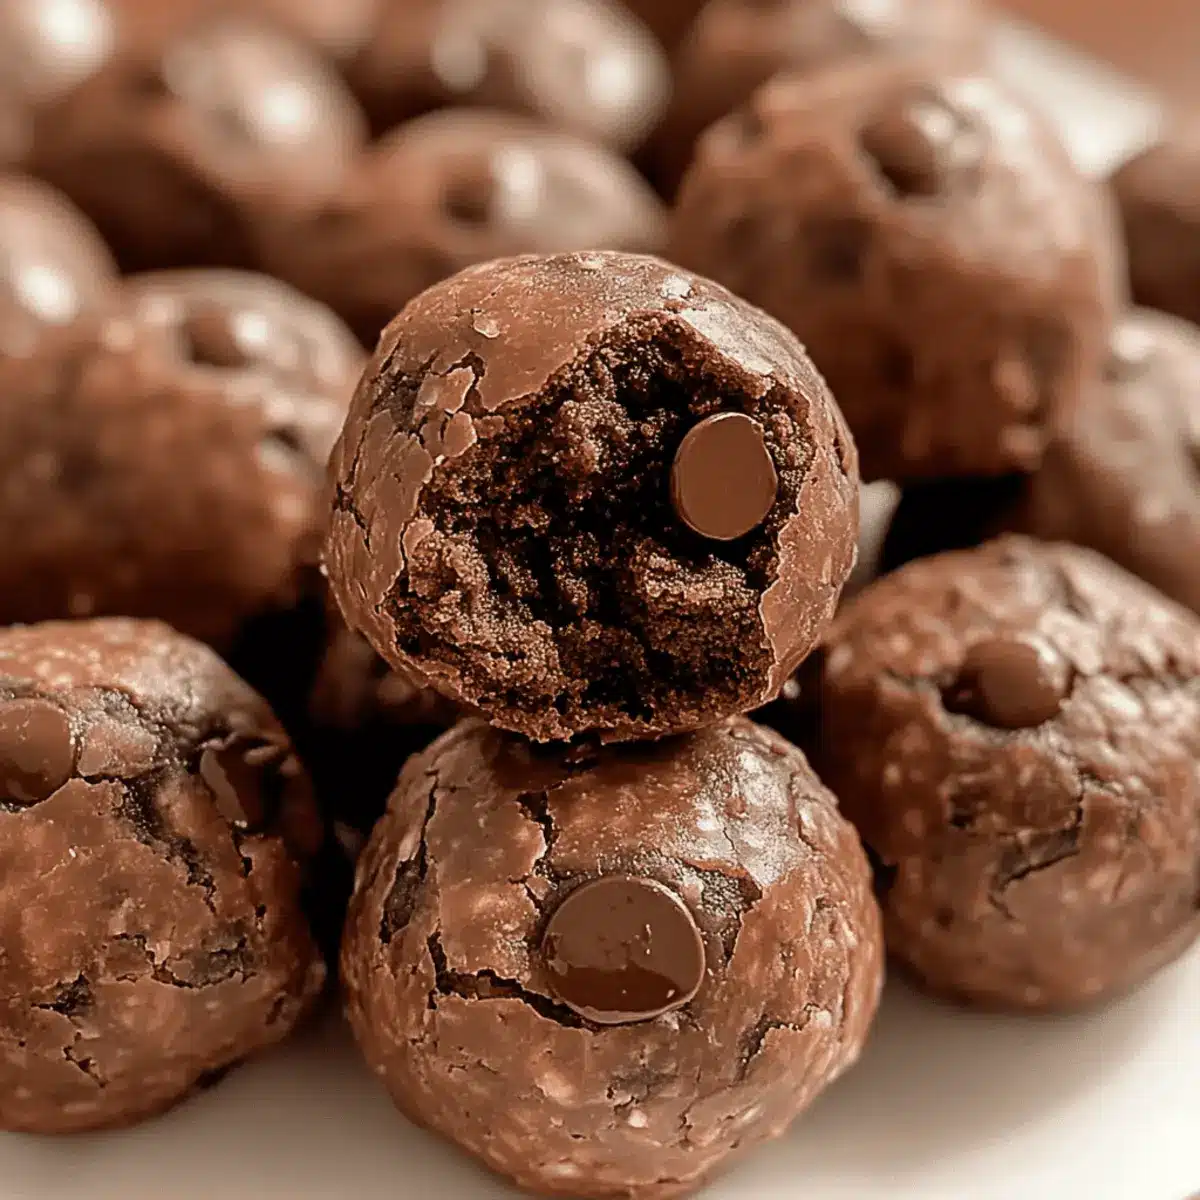
Customizable Flavors: Spice up your snacking by adding your favorite mix-ins like nuts, dried fruits, or even chocolate chips for a delightful crunch.
Nutritional Powerhouse: Packed with protein and fiber, these bites keep you energized and satisfied long after your sweet craving is met.
Perfect Anytime Snack: Whether you’re headed to the gym or need an afternoon pick-me-up, these Brownie Protein Balls are the ultimate versatile snack, just like my Chocolate Brownie Cookies or Caramel Brownie Cheesecake.
Embrace your culinary creativity while nourishing your body—these bites truly embody the best of both worlds!
Brownie Protein Balls Ingredients
• For the Base
- Oats – Provides structure and fiber; swap with almond flour for gluten-free Brownie Protein Balls.
- Nut Butter (e.g., peanut butter) – Adds creaminess and healthy fats; any nut or seed butter works beautifully.
- Protein Powder – Boosts protein content; substitute with more oats or hemp seeds if you’re avoiding protein powder.
- Cocoa Powder – Delivers that rich chocolate flavor; ensure it’s unsweetened for a healthier option.
• For the Sweetness
- Sweetener (e.g., honey or maple syrup) – Adds the perfect touch of sweetness; use stevia or monk fruit for a lower sugar alternative.
• For Flavor Enhancements
- Extras (e.g., chocolate chips, nuts, or dried fruits) – Enhances flavor and texture; feel free to customize based on your preference, creating your ideal Brownie Protein Balls.
These ingredients will transform your cravings into delightful energy bites that are as indulgent as they are nutritious!
Step‑by‑Step Instructions for Brownie Protein Balls
Step 1: Mix Dry Ingredients
In a large mixing bowl, combine oats, protein powder, cocoa powder, and any additional dry flavorings you desire. Use a whisk to break up any clumps, ensuring that the mixture is well-blended and uniform in color. This step should take about 2 minutes and will create a solid base for your Brownie Protein Balls.
Step 2: Combine Wet Ingredients
In a separate bowl, stir together your chosen nut butter and sweetener until the mixture is smooth and creamy. This will take around 1–2 minutes and requires a sturdy spatula or spoon for mixing. The goal here is to achieve a velvety consistency that can be easily integrated with the dry ingredients later on.
Step 3: Combine Mixtures
Gradually fold the wet ingredients into the dry mixture, stirring continuously until everything is thoroughly combined. This process should take 2–3 minutes, and you will know it’s ready when you can no longer see any dry ingredients, and the mixture forms a sticky dough-like consistency typical of Brownie Protein Balls.
Step 4: Add Extras
If you’re incorporating any extras like chocolate chips, nuts, or dried fruits, now is the time to fold them into the mixture. Use a spatula to evenly distribute the extras throughout the dough, ensuring each Brownie Protein Ball will have a delightful surprise. This should take about 1–2 minutes.
Step 5: Form Balls
Using a small cookie scoop or your hands, portion out the mixture and roll it into bite-sized balls. Aim for about 1-inch in diameter to ensure they are perfectly snackable. This step can be completed in about 5–7 minutes as you create these delightful Brownie Protein Balls.
Step 6: Chill
Once all your balls are formed, place them on a lined baking sheet or plate and refrigerate for at least 30 minutes. This chilling time allows the Brownie Protein Balls to firm up, making them easier to handle and enhancing their chewiness. When you see them set up and become slightly firmer to the touch, they are ready to be enjoyed.
Expert Tips for Brownie Protein Balls
• Mix Consistency: Ensure your wet and dry ingredients are well-combined to achieve the dough-like texture essential for Brownie Protein Balls.
• Sweetness Adjustment: Taste and tweak sweetness to your liking, especially if you’re using different sweeteners.
• Moisture Control: If the mixture is dry, add a splash of non-dairy milk; if too wet, stir in more oats to find the perfect consistency.
• Chilling Time: Don’t skip the refrigeration step! Chilling helps the balls firm up, making them easier to eat and enhancing their texture.
• Ingredient Safety: Since they’re raw, use safe-to-eat ingredients, especially for the protein powder and nut butter.
What to Serve with Brownie Protein Balls
As you savor the rich, chocolatey goodness of these energy-packed bites, consider complementing them with delightful pairings that heighten your snack experience.
-
Creamy Greek Yogurt: A dollop adds a refreshing, tangy contrast, making it a perfect dip for your protein balls.
-
Fresh Berries: Juicy strawberries or blueberries bring a burst of freshness that beautifully offsets the richness of the chocolate.
-
Nutty Trail Mix: The crunchy textures and diverse flavors not only enhance the snacking experience but also add extra nutrition and healthy fats.
-
Banana Slices: Sweet, soft bananas complement the chewy brownie flavor, making for a wholesome, satisfying snack combo.
-
Coconut Chips: Add a delightful crunch and subtle sweetness that harmonizes with the chocolatey protein balls—a tropical escape in every bite!
-
Dark Chocolate Drizzle: A light drizzle of melted dark chocolate elevates the indulgence factor while introducing a luxurious finish.
Pairing these treats with simple yet flavorful accompaniments will elevate your snacking ritual, turning every bite into a celebration of guilt-free indulgence!
How to Store and Freeze Brownie Protein Balls
Fridge: Store your Brownie Protein Balls in an airtight container for up to 1 week to maintain their freshness and flavor.
Freezer: For longer storage, freeze the balls in a single layer on a baking sheet before transferring to an airtight container. They can last up to 1 month.
Thawing: When you’re ready to enjoy, simply remove the desired amount from the freezer and let them thaw in the fridge for 1-2 hours or at room temperature for about 30 minutes.
Reheating: These treats are best enjoyed cold or at room temperature; however, if you prefer them warm, you can microwave them for about 10-15 seconds to soften.
Brownie Protein Balls Variations & Substitutions
Feel free to unleash your inner chef and customize these delicious bites to suit your cravings and dietary needs!
- Nut-Free: Swap nut butter for sunbutter or tahini for a nut-free option suitable for allergies.
- Vegan: Use maple syrup instead of honey and a plant-based protein powder to make these Brownie Protein Balls entirely vegan.
- Flavor Explosion: Mix in a few teaspoons of espresso powder for a delightful coffee hit that pairs perfectly with chocolate.
- Crunchy Texture: Incorporate crushed nuts or seeds to add an extra layer of crunch and flavor to your chewy treats.
- Fruity Twist: Fold in dried cherries or cranberries for a burst of sweetness and a beautiful pop of color.
- Protein Boost: For an extra protein punch, add a scoop of Greek yogurt into the wet mixture, creating an even creamier texture.
- Spicy Kick: Add a pinch of cayenne pepper or cinnamon for a surprising heat that complements the chocolate beautifully.
- Coconut Lover: Stir in unsweetened shredded coconut for a tropical feel that transports your taste buds to paradise.
Explore the wonderful world of flavors and textures with these variations, and for more inspiration, consider making some Salisbury Steak Meatballs or even a delicious batch of Meatballs in Lemon Sauce for your next meal. Let creativity lead the way in your kitchen!
Make Ahead Options
These Brownie Protein Balls are perfect for meal prep enthusiasts! You can mix and form the balls up to 24 hours in advance, allowing the flavors to meld beautifully. To prep ahead, simply follow the recipe up until the chilling step; then wrap them tightly in plastic wrap or store them in an airtight container in the refrigerator. For optimal quality, enjoy them within 3 days. When you’re ready to dive in, simply serve them cold or let them come to room temperature for a few minutes. Enjoy the convenience of having a nutritious snack ready to fuel your day with minimal effort!

Brownie Protein Balls Recipe FAQs
What kind of oats should I use for Brownie Protein Balls?
You can use any type of rolled oats, but I recommend old-fashioned oats for their texture and fiber content. If you’re aiming for gluten-free Brownie Protein Balls, simply substitute oats with almond flour or certified gluten-free oats to achieve a similar consistency.
How should I store leftover Brownie Protein Balls?
Store your Brownie Protein Balls in an airtight container in the fridge for up to 1 week. If you’re like me and enjoy batch making, you can also freeze them for longer storage! Just freeze them in a single layer on a baking sheet before transferring to an airtight container or freezer bag, where they can last for up to 1 month.
Can I freeze Brownie Protein Balls?
Absolutely! Freezing your Brownie Protein Balls is a great way to ensure you have a quick snack on hand. After shaping them, place your balls on a lined baking sheet and freeze until firm (about 1-2 hours). Once firm, transfer them to an airtight container or freezer bag for convenient snacking later.
What if my mixture is too dry?
If you’ve found your mixture to be too dry, don’t fret! Gradually add a splash of non-dairy milk (about 1 tablespoon at a time) until you reach the right dough-like consistency. If you go too far and it becomes too wet, simply incorporate more oats until it balances out. I often find that adjusting moisture yields the perfect texture!
Are there any dietary considerations I should keep in mind?
Yes, keep in mind any allergies or dietary restrictions! For nut allergies, using seed butter like sunflower seed butter is a great alternative. Additionally, if you want a sugar-free option, you can substitute all sweeteners with stevia or monk fruit to keep it guilt-free. Always ensure all your ingredients are safe to eat raw, especially the protein powder and nut butter.
How can I customize the flavors of my Brownie Protein Balls?
The possibilities are endless! You can experiment with your favorite flavors by adding extras like vanilla extract, mint extract for a chocolate-mint combo, or substitute the cocoa powder with almond flour for a cookie dough flavor. Explore your pantry; the more, the merrier in creating these delightful bites!

Delicious Brownie Protein Balls: Guilt-Free Energy Bites
Ingredients
Equipment
Method
- Mix Dry Ingredients: In a large mixing bowl, combine oats, protein powder, cocoa powder, and any additional dry flavorings. Use a whisk to break up clumps.
- Combine Wet Ingredients: In a separate bowl, stir together your nut butter and sweetener until smooth and creamy.
- Combine Mixtures: Gradually fold the wet ingredients into the dry mixture until everything is thoroughly combined.
- Add Extras: Fold in any extras like chocolate chips or nuts to evenly distribute them.
- Form Balls: Portion out the mixture and roll into bite-sized balls, about 1-inch in diameter.
- Chill: Place the balls on a lined baking sheet and refrigerate for at least 30 minutes to firm up.
Leave a Reply