
While preparing dinner, I could sense a familiar tug of nostalgia; the scent of garlic sizzling in olive oil ignited memories of family meals and laughter around the table. This Homemade Garlic Aioli Sauce has become a go-to for me, seamlessly elevating everything from classic sandwiches to fresh veggie dippers. With just a handful of ingredients, you can create this effortlessly versatile condiment that caters to any palate—gluten-free and filled with the boldness of garlic. Not only is it a quick fix for those weeknight dinners, but it also brings out the gourmet side of home-cooked meals, making everything taste a little more special. Curious about how to whip it up? Let’s dive into the delicious details!
Why is Garlic Aioli Sauce a Must-Try?
Versatile Condiment: This Garlic Aioli Sauce transforms any dish, from sandwiches to roasted vegetables, into a flavorful masterpiece.
Easy to Make: With just a few ingredients and simple steps, you’ll have a gourmet sauce ready in no time!
Customize Your Flavor: Adjust the garlic intensity and add your favorite herbs or spices for a personal touch.
Healthier Choice: Homemade means no preservatives; enjoy a fresh and wholesome condiment that’s gluten-free and full of flavor.
Crowd-Pleasing Appeal: Perfect for gatherings, it’s a delightful dip that elevates everyone’s snacking experience—try pairing it with Garlic Herb Roasted or Cheesy Garlic Chicken for a delicious spread!
Whether you’re prepping a quick weeknight dinner or hosting friends, this aioli is sure to impress!
Garlic Aioli Sauce Ingredients
• A perfect blend of flavors awaits you!
For the Base
- Mayonnaise – This creamy base provides a luscious texture; opt for homemade or high-quality store-bought for the best flavor.
- Garlic – Essential for that bold, savory taste; feel free to adjust between 4-6 cloves to suit your preference.
- Lemon Juice – Freshly squeezed adds a zesty brightness; it’s the perfect counterbalance to the richness.
- Extra Virgin Olive Oil – Enhances the depth and richness of the sauce; select a high-quality brand for maximum flavor.
For Seasoning
- Salt – A little goes a long way to enhance all the flavors; adjust to taste for your perfect blend.
- Black Pepper – Freshly ground pepper adds depth; use it to awaken the other ingredients.
- Cayenne Pepper – Optional but delightful for a hint of heat; a small pinch can elevate your aioli.
- Dijon Mustard – Adds an extra touch of tanginess; feel free to include or omit based on your taste.
For Garnish
- Fresh Parsley/Chives – Offers a burst of color and freshness; sprinkle on top before serving for that gourmet look.
Feel the magic come to life as you whisk together these simple yet impactful ingredients to create your own Garlic Aioli Sauce!
Step‑by‑Step Instructions for Garlic Aioli Sauce
Step 1: Mince the Garlic
Begin by finely mincing 4-6 cloves of garlic. For a milder flavor, you can create a paste by sprinkling a small pinch of salt and using the flat side of a knife to mash the garlic into a smooth consistency. Aim for a fragrant, aromatic result that will form the base of your creamy Garlic Aioli Sauce.
Step 2: Combine Core Ingredients
In a medium mixing bowl, add 1 cup of mayonnaise, your minced garlic or paste, 2 tablespoons of freshly squeezed lemon juice, and 2 tablespoons of extra virgin olive oil. Use a spatula to initially combine the ingredients gently, ensuring the garlic is evenly distributed throughout the mixture for a well-balanced flavor.
Step 3: Season to Taste
Next, sprinkle in 1/2 teaspoon of salt, 1/4 teaspoon of freshly ground black pepper, and a pinch of cayenne pepper if you desire a bit of heat. Mix thoroughly until all elements are integrated. Taste your Garlic Aioli Sauce mixture to ensure the seasoning is just right, adjusting any flavors as needed.
Step 4: Whisk for Creaminess
Using a whisk, vigorously mix the garlic aioli until the texture becomes smooth and creamy, typically about 1-2 minutes. The consistency should be thick yet spreadable, embodying that luscious, rich quality that makes this condiment so delightful.
Step 5: Taste and Adjust Flavors
Now that your aioli is creamy, give it another taste. If desired, add more minced garlic for a bolder flavor or additional lemon juice for brightness. It’s all about personalizing your Garlic Aioli Sauce to fit your palate, so feel free to make adjustments.
Step 6: Optional Flavor Enhancements
For a delightful twist, you can mix in a teaspoon of Dijon mustard or 1-2 tablespoons of chopped fresh herbs like parsley or chives. These additions will enhance the aioli’s flavor profile and add a touch of freshness. Stir well to incorporate any flavors you choose to add.
Step 7: Chill to Enhance Flavors
Once your aioli is perfectly seasoned, cover the bowl with plastic wrap or transfer it to an airtight container. Refrigerate the Garlic Aioli Sauce for at least 30 minutes. This chilling period lets the flavors meld beautifully, creating a richer taste that will elevate your dishes.
How to Store and Freeze Garlic Aioli Sauce
Fridge: Store any leftover garlic aioli sauce in an airtight container in the refrigerator for up to 3-4 days to maintain freshness and flavor.
Freezer: For longer storage, freeze the aioli in ice cube trays, then transfer to a zip-top bag for up to 2 months; simply thaw as needed.
Reheating: If frozen, let the garlic aioli sauce thaw overnight in the fridge, and stir well before serving. Avoid reheating in the microwave as it can alter the texture.
Avoid Spoilage: Always check for signs of spoilage such as off smells or discoloration before use, ensuring the garlic aioli stays safe and delicious for your dishes.
Make Ahead Options
These Garlic Aioli Sauce preparations are a game changer for busy home cooks! You can prepare the aioli up to 3 days in advance, allowing the flavors to deepen and meld beautifully while saving precious time on busy weeknights. Simply follow the recipe’s instructions through the chilling step, then cover and refrigerate the aioli in an airtight container. To maintain its fresh taste and creamy texture, keep it in the coldest part of your fridge—this prevents separation. When you’re ready to serve, simply give it a quick stir, adjust the seasoning if necessary, and enjoy your homemade garlic aioli as a delightful condiment that elevates every meal!
Expert Tips for Garlic Aioli Sauce
-
Mince with Care: Using a knife to mince garlic instead of a press helps avoid bitterness, ensuring a smoother flavor in your aioli.
-
Personalize the Garlic: Adjust the number of cloves based on your taste preference; remember, less is more for those sensitive to strong flavors.
-
Chill for Best Flavor: Refrigerate the aioli for at least 30 minutes before serving to allow the flavors to meld and intensify, creating a more gourmet experience.
-
Consistent Texture: If the aioli is too thick, slowly whisk in more lemon juice or olive oil to reach your desired creaminess; for a thinner consistency, add more mayonnaise.
-
Experiment Wisely: Don’t be afraid to try different herbs and spices! Adding smoked paprika or fresh herbs not only boosts flavor but brings a unique twist to your Garlic Aioli Sauce.
Garlic Aioli Sauce Variations
Dive into a world of flavor by customizing your Garlic Aioli Sauce to suit any palate!
- Smoky Paprika: Add 1 teaspoon of smoked paprika for a hint of depth and warmth that enhances the robust garlic flavor.
- Herb-Infused: Incorporate chopped fresh herbs like dill, basil, or cilantro to brighten the aioli with fresh, aromatic notes.
- Spicy Kick: For those who enjoy heat, mix in a dash of sriracha or hot sauce to give your aioli a fiery twist that excites the senses.
- Vegan Adaptation: Substitute mayonnaise with a vegan version made from aquafaba or store-bought vegan mayo for a cruelty-free delight.
- Creamy Avocado: Blend in half a ripe avocado for a creamy, rich consistency and a unique flavor twist that complements the garlic beautifully.
Feel free to experiment! The beauty of aioli lies in its versatility—try serving it alongside freshly grilled meats or as a dip for fries. For instance, this aioli pairs perfectly with Garlic Herb Roasted vegetables, bringing out their natural sweetness, or as a luxurious spread on a sandwich loaded with Cheesy Garlic Chicken.
What to Serve with Garlic Aioli Sauce
Elevate your meals with complementary dishes that bring out the wonderful flavors of this creamy, homemade sauce.
-
Grilled Shrimp Skewers: The smoky notes from grilled shrimp perfectly balance the rich garlic aioli, creating a delightful combination.
-
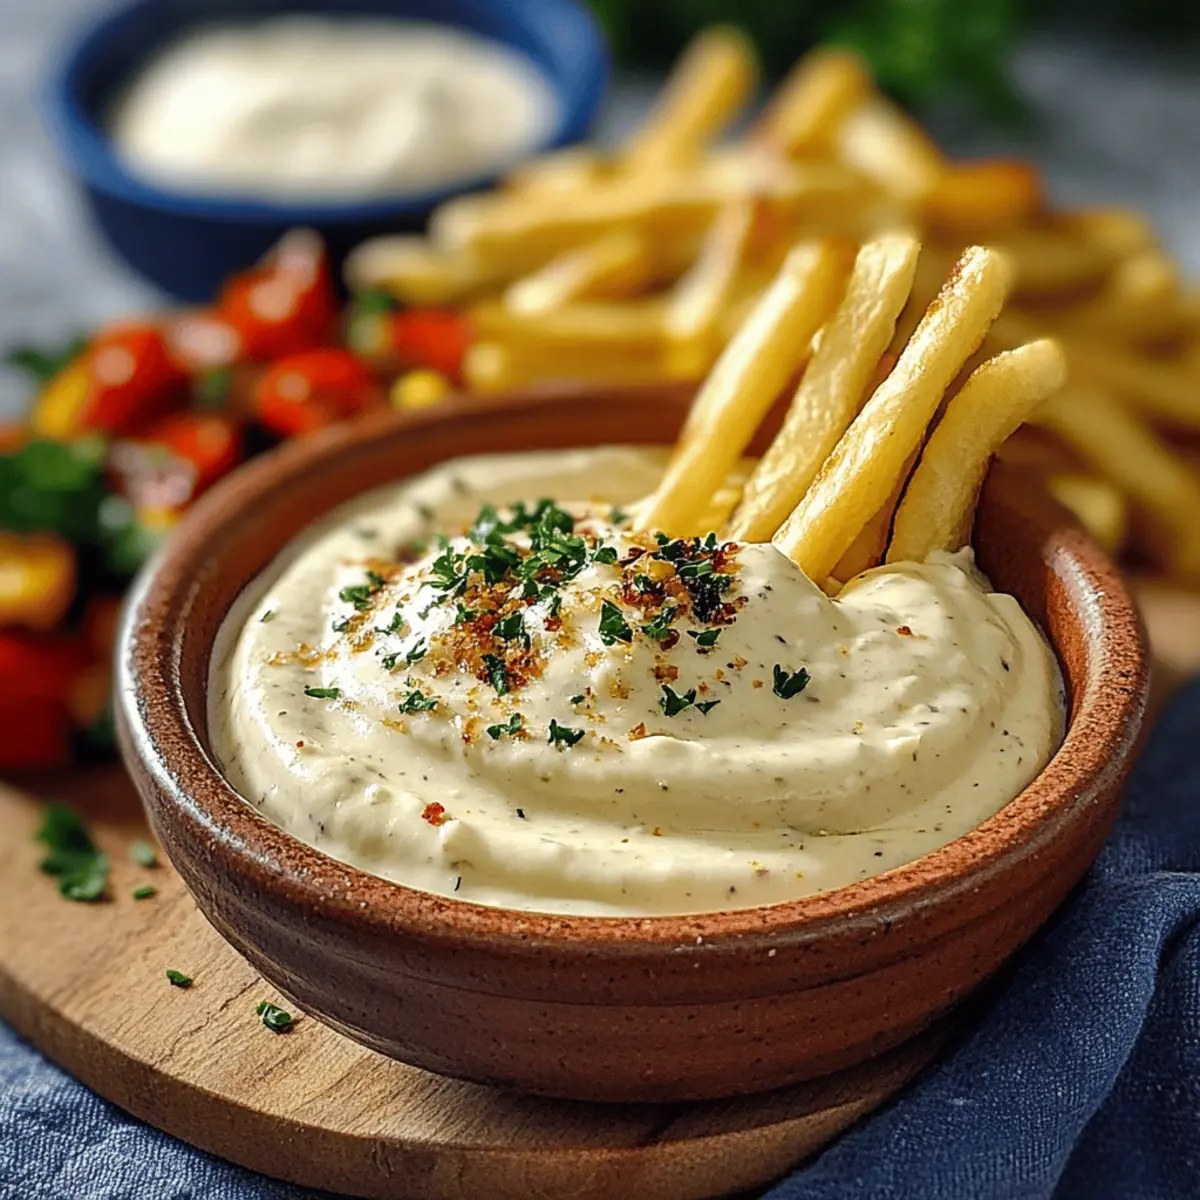
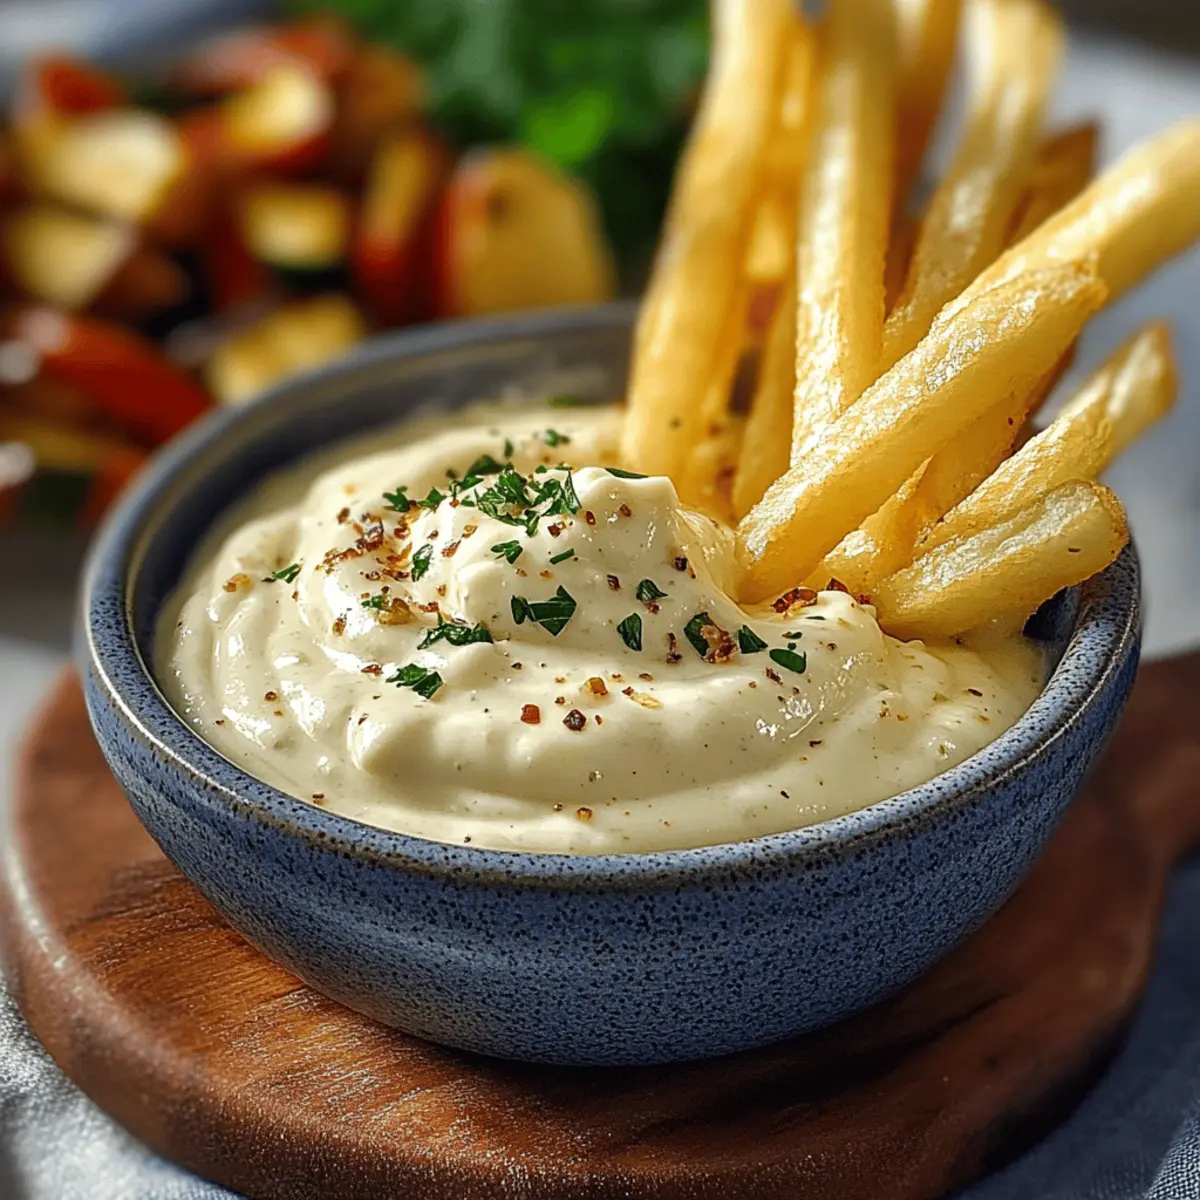
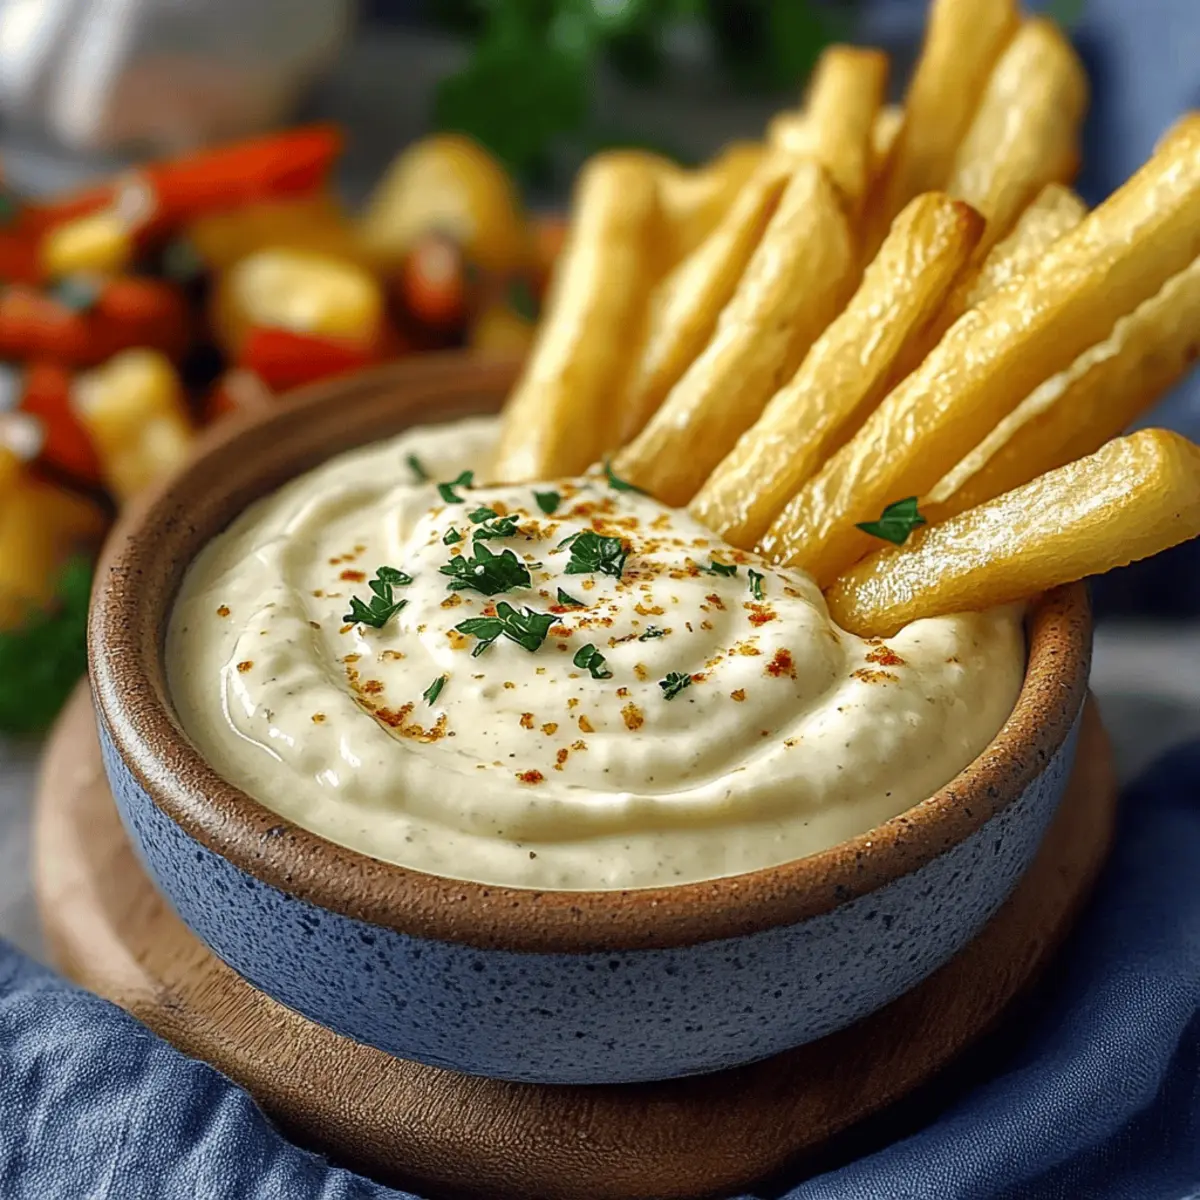
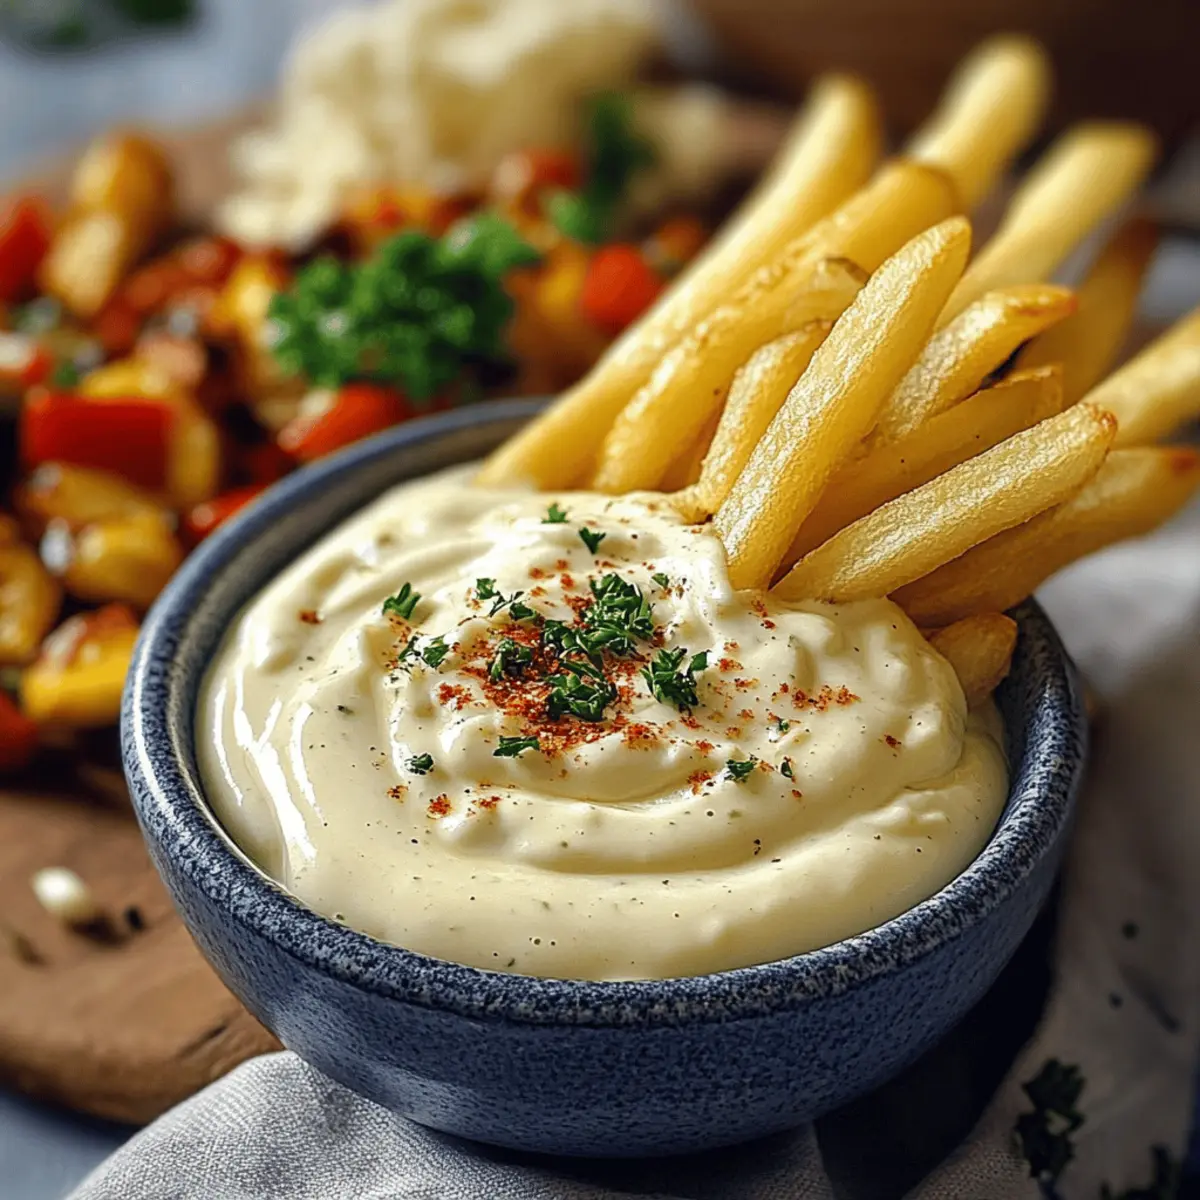
Crispy French Fries: Nothing beats the classic pairing of hot, crispy fries dipped in smooth, garlicky aioli; it’s a match made in heaven.
-
Roasted Vegetables: Tossed with olive oil and herbs, tender roasted veggies become gourmet when paired with the creamy aioli, enhancing their natural flavors.
-
Fresh Vegetable Crudités: Serve a platter of crunchy, fresh veggies with aioli as a dip for a vibrant and healthy appetizer at your gatherings.
-
Fish Tacos: Drizzle garlic aioli over grilled fish tacos, adding a creamy tang that complements the spices and freshness of toppings beautifully.
-
Savory Wraps: Spread aioli on wraps filled with turkey, fresh greens, and avocado for a satisfying meal that’s bursting with flavor.
-
Artisan Bread: A crusty loaf dipped in garlic aioli becomes an irresistible snack; the contrast of textures makes it a delightful addition to any meal.
-
Beer or White Wine: Pair a refreshing beer or a crisp white wine to elevate the enjoyment of garlic aioli-accompanied dishes, enhancing the experience.
With these mouthwatering pairings, your meals will shine and embrace the extraordinary potential of garlic aioli!
Garlic Aioli Sauce Recipe FAQs
How do I choose the best garlic for my aioli?
Absolutely! When selecting garlic, look for bulbs that are firm and have no dark spots or mold. The best garlic will have tight, unbroken skins with no soft blemishes. Fresh garlic cloves will have a bright, pungent aroma which indicates their potency.
How long can I store homemade garlic aioli sauce?
Very! You can keep your homemade garlic aioli sauce in an airtight container in the fridge for up to 3-4 days. Make sure it’s well-sealed to maintain its creamy texture and vibrant flavor. If you notice any separation or off-smells, it’s best to discard it.
Can I freeze garlic aioli sauce for later use?
Definitely! To freeze your garlic aioli sauce, spoon it into ice cube trays, creating individual portions. Cover the trays and freeze until solid. Once frozen, transfer the cubes to a zip-top bag and store for up to 2 months. When you’re ready to use it, simply thaw overnight in the fridge and give it a good stir before serving.
What should I do if my aioli is too thick or too thin?
No problem! If your aioli turns out too thick, gradually whisk in more lemon juice or olive oil until you reach your desired consistency. If it’s too thin, simply mix in more mayonnaise one tablespoon at a time until thickened. Remember to taste as you go to keep that delicious flavor intact!
Is garlic aioli sauce safe for people with allergies?
Absolutely! Garlic aioli sauce is generally gluten-free, but do check the label on your mayonnaise if you’re catering to specific dietary needs. For those with egg allergies, consider using an egg-free mayo alternative or making a vegan garlic aioli with aquafaba as a base. Always make sure to inform your guests about the ingredients to ensure their safety and enjoyment!
Creamy Garlic Aioli Sauce: Elevate Every Bite at Home
Ingredients
Equipment
Method
- Begin by finely mincing 4-6 cloves of garlic, optionally making a paste with salt.
- In a medium mixing bowl, add mayonnaise, minced garlic or paste, lemon juice, and olive oil.
- Sprinkle in salt, black pepper, and cayenne, then mix thoroughly.
- Whisk vigorously for 1-2 minutes until smooth and creamy.
- Taste and adjust flavors as needed with garlic or lemon juice.
- Mix in Dijon mustard or chopped herbs for added flavor.
- Refrigerate for at least 30 minutes before serving.
Leave a Reply