
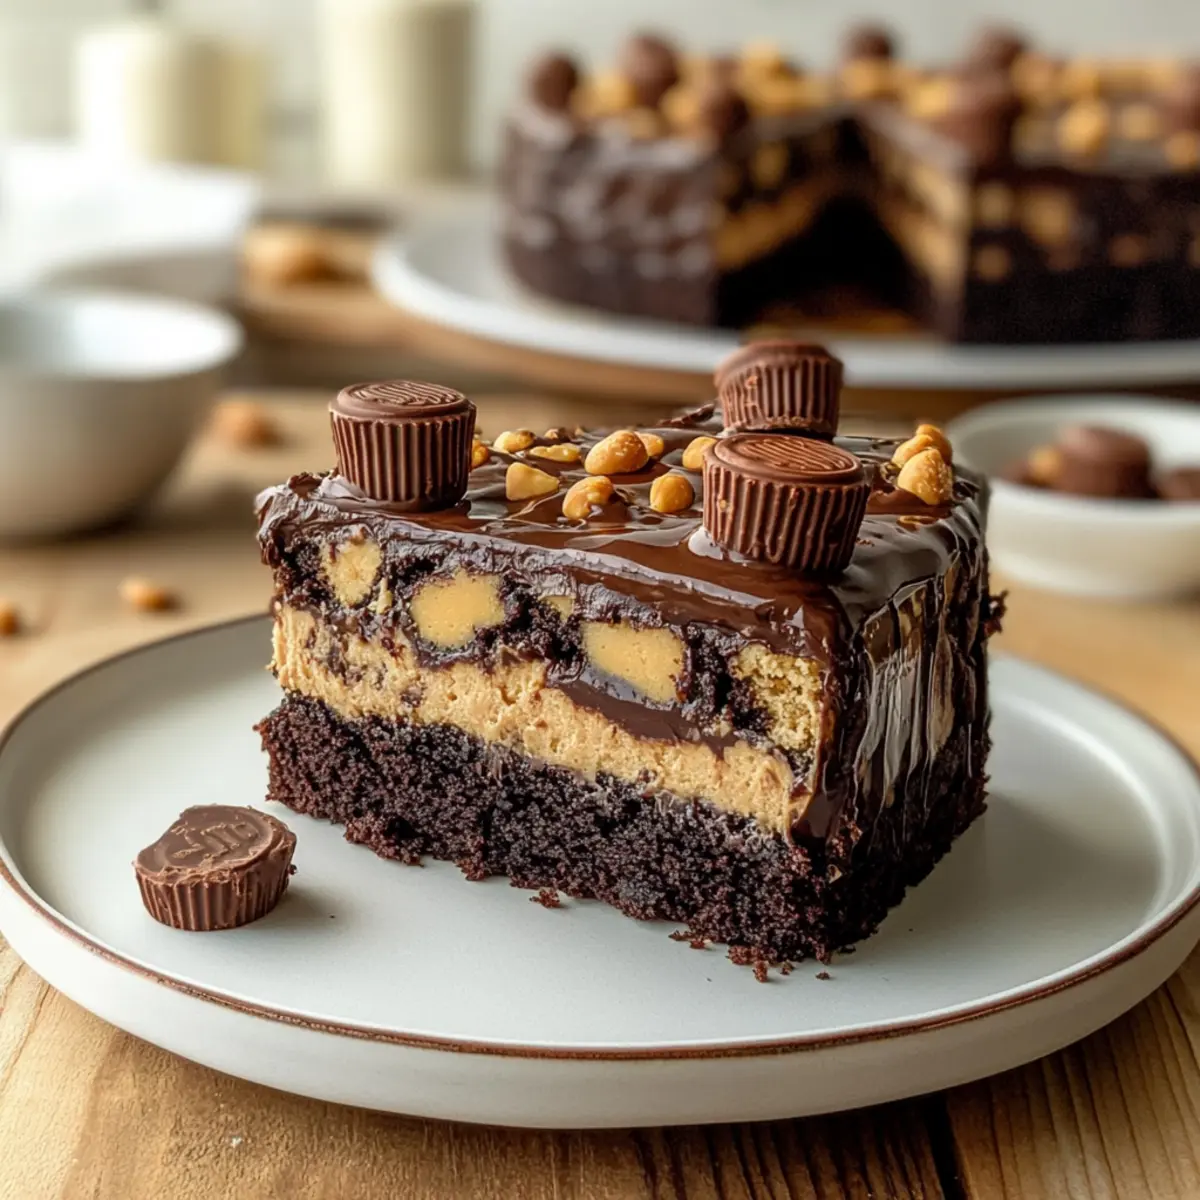
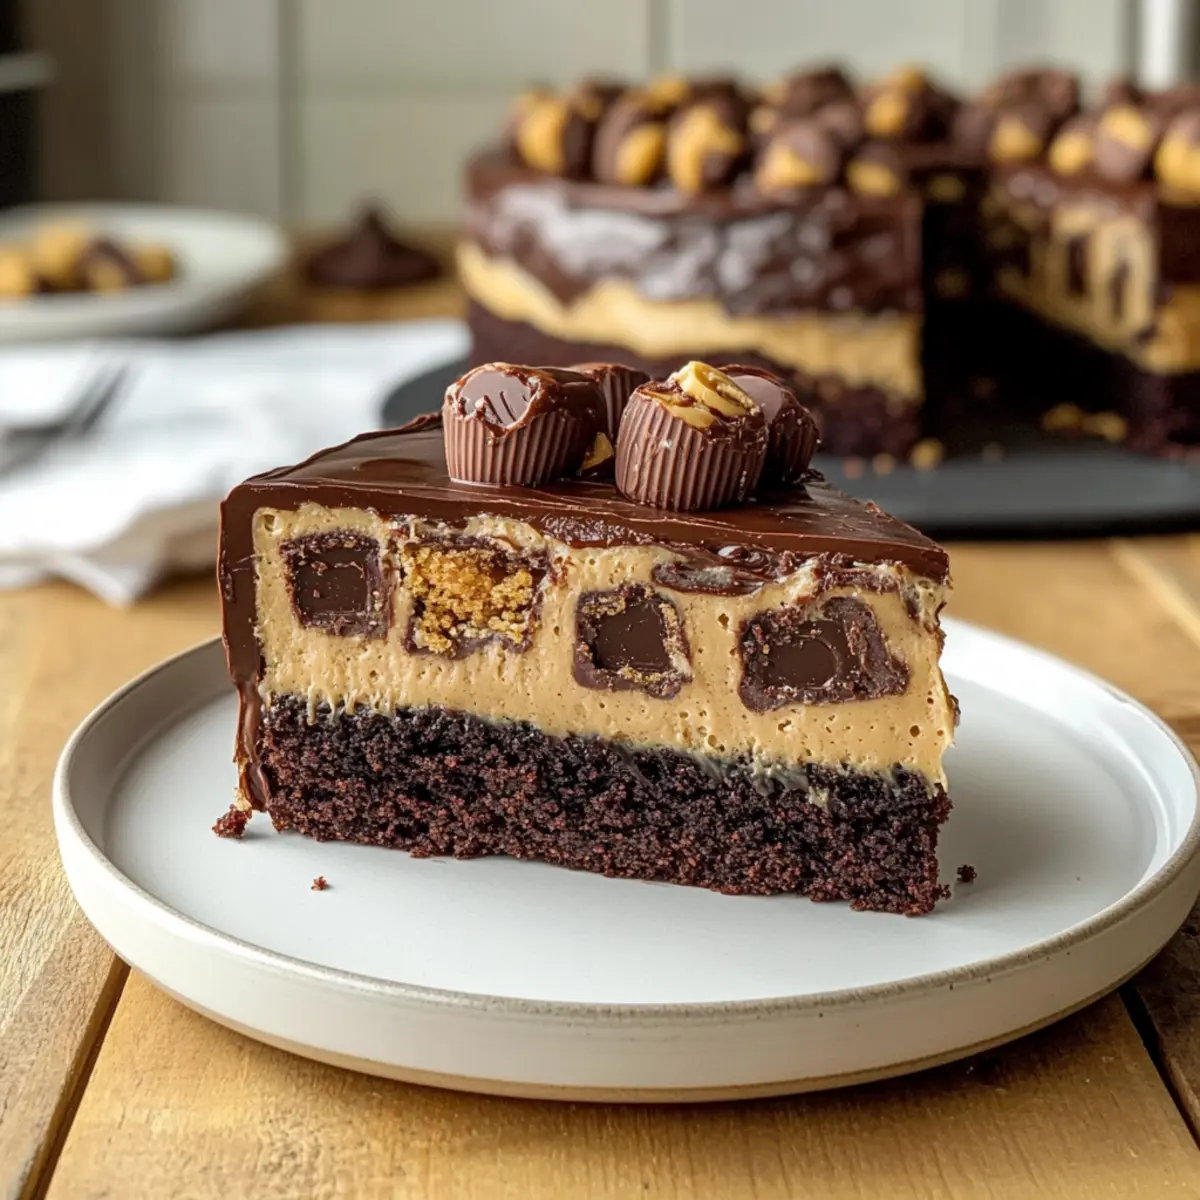
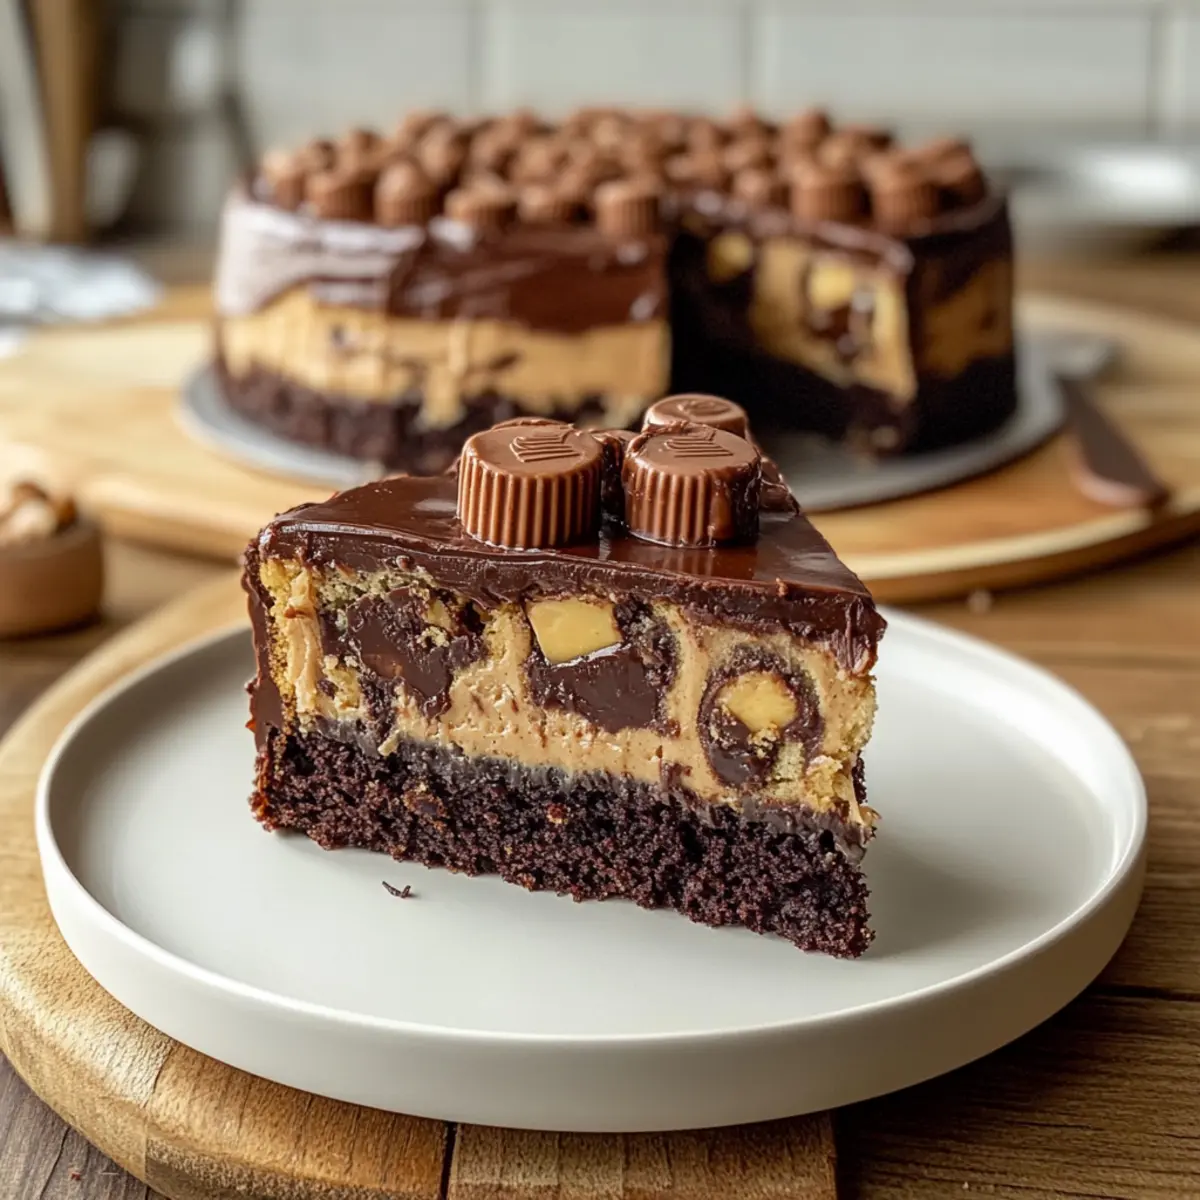
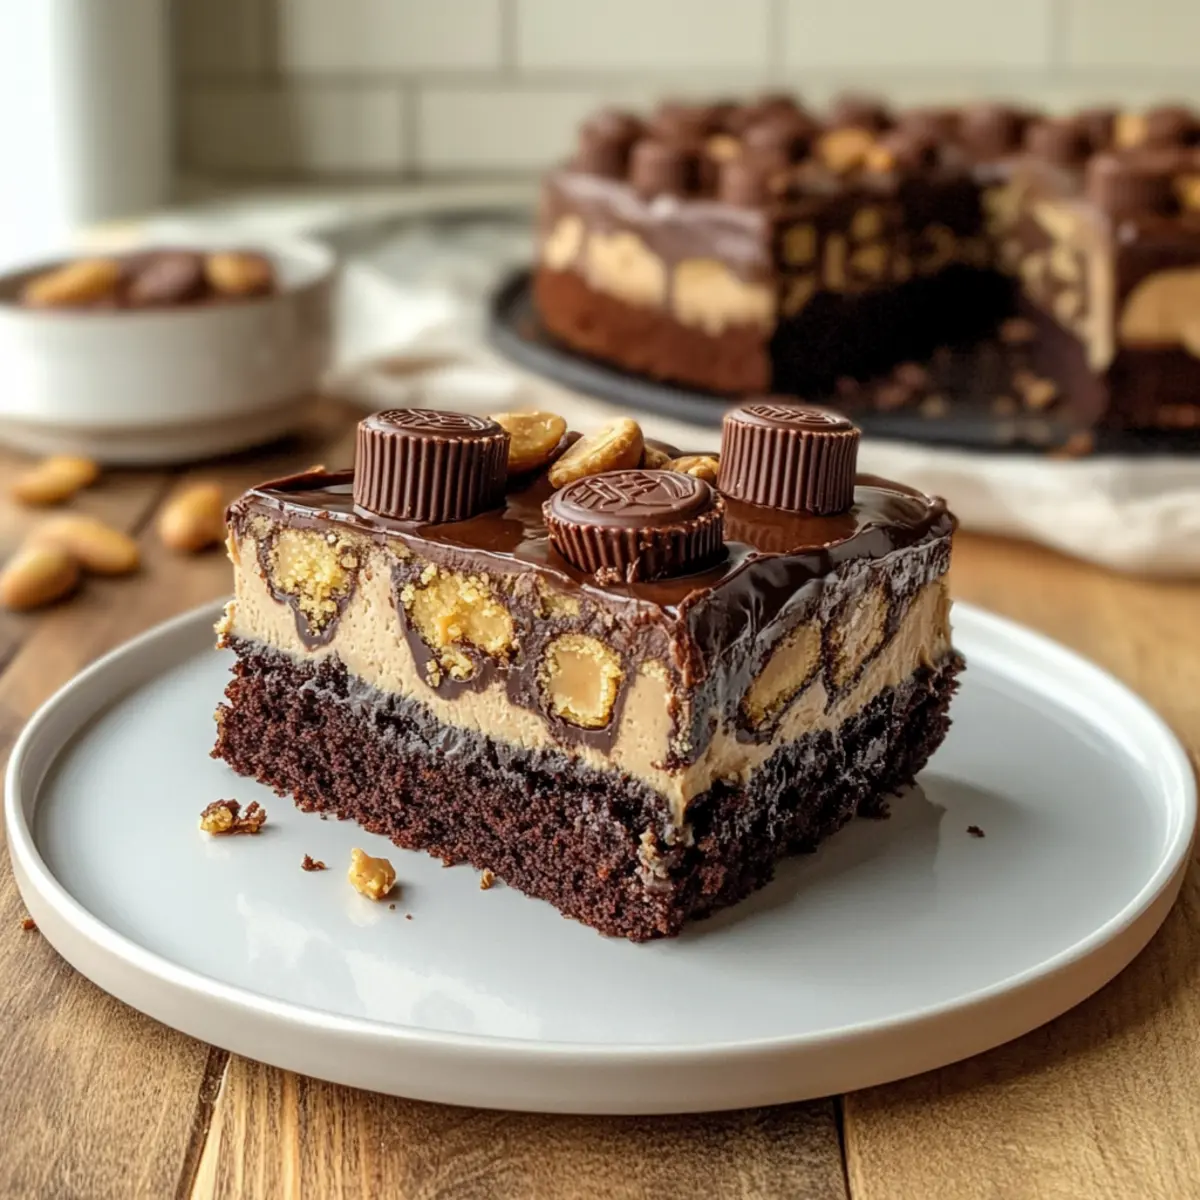
Have you ever tasted a dessert that captures the thrill of indulgence and the comfort of home? Let me introduce you to my Ultimate Reese’s Peanut Butter Earthquake Cake, a heavenly blend of chocolate and creamy peanut butter that feels like a warm hug inside a plate. This newbie-friendly recipe ensures that even the most inexperienced bakers can whip up a show-stopping treat with minimal effort. Imagine serving this fudgy delight, packed with gooey pockets of Reese’s cups, at your next gathering or during a cozy night in. It’s not only a crowd-pleaser but also an excellent way to elevate your dessert game without hours spent in the kitchen. Ready to turn your kitchen into a chocolate-peanut butter paradise? Let’s dive into this deliciously simple recipe!
Why is This Cake So Irresistible?
Decadence Defined: This Ultimate Reese’s Peanut Butter Earthquake Cake is a chocoholic’s dream, combining rich cocoa and creamy peanut butter for an unforgettable dessert experience.
Beginner-Friendly: With simple ingredients and straightforward steps, even novice bakers can impress their friends and family.
Gooey Goodness: The melting Reese’s cups create delightful pockets of sweetness that take each bite to the next level.
Versatile Treat: Feel free to experiment with toppings or mix-ins like crushed Oreos or different chocolates for a unique twist.
Perfect for Any Occasion: Whether it’s a birthday bash or a cozy movie night, this cake is always a hit, ensuring everyone leaves with a smile.
Pair this indulgent cake with a scoop of vanilla ice cream for an even more delightful treat, just like in our Garlic Butter Chicken recipe for savory inspiration as well!
Reese’s Peanut Butter Earthquake Cake Ingredients
• Get ready for a fudgy delight!
For the Cake
- All-purpose flour – Provides structure and body to the cake; feel free to use gluten-free flour for a gluten-free version.
- Granulated sugar – Sweetens the cake; brown sugar can add extra moisture and a deeper flavor.
- Cocoa powder – Imparts rich chocolate flavor; consider Dutch-processed cocoa to enhance taste, but it may change the color.
- Baking powder – Acts as a leavening agent; make sure it’s fresh for optimal rise.
- Salt – Enhances the overall flavor of the cake.
- Eggs – Contributes to moisture and binding; use flax eggs for a vegan option.
- Whole milk – Adds creaminess; almond milk or other non-dairy alternatives work great as well.
- Creamy peanut butter – Provides the signature flavor and texture; stick to creamy peanut butter for the best results.
- Reese’s peanut butter cups – The star ingredient that brings gooey sweetness to the cake; substitute with peanut butter chips for a fun variation.
- Cream cheese – Creates a gooey center that enhances the texture; make sure to soften it for easy mixing.
Feel free to gather these ingredients, and get ready to create the Ultimate Reese’s Peanut Butter Earthquake Cake that will have everyone craving more!
Step‑by‑Step Instructions for Reeses Peanut Butter Earthquake Cake
Step 1: Preheat the Oven
Begin by preheating your oven to 350°F (175°C). While the oven heats, grab a 9×13-inch baking dish and do not grease it—this will allow the cake to rise beautifully and develop those perfect cracks. Setting the right temperature is key to achieving that lovely fudgy texture we love in the Reeses Peanut Butter Earthquake Cake.
Step 2: Mix the Dry Ingredients
In a medium-sized mixing bowl, combine all-purpose flour, cocoa powder, baking powder, and salt. Whisk them together until they are well blended and free of lumps. The cocoa powder should be thoroughly incorporated to ensure your cake has that rich chocolate flavor throughout. This step sets a solid foundation for your decadent cake.
Step 3: Cream the Peanut Butter and Sugar
In a separate large bowl, mix together the creamy peanut butter and granulated sugar until smooth and well combined. Use a hand mixer or whisk vigorously for about 2-3 minutes. This creamy mixture should be fluffy and light in texture, which helps to create a tender cake. Let the delightful peanut butter aroma fill your kitchen as you prepare for the next step.
Step 4: Add Wet Ingredients
Gradually introduce the eggs and whole milk to the peanut butter and sugar mixture. Beat this together until fully incorporated, which should take another 2 minutes. The mixture should appear smooth and creamy again, ensuring that your wet ingredients bond seamlessly with the peanut butter, making your Reeses Peanut Butter Earthquake Cake rich and moist.
Step 5: Combine the Mixtures
Now, it’s time to fold the dry ingredients into the wet mixture. Gently add the dry mix to the peanut butter blend, stirring just until combined. Be careful not to overmix to maintain a tender crumb; a few lumps are okay. The batter will begin to come together, and you can start to look forward to that gooey goodness in your cake!
Step 6: Fold in the Reese’s Cups
Carefully chop the Reese’s peanut butter cups and fold them into the batter. Stir just enough to distribute the chocolatey, peanut buttery pieces throughout the mixture. This step is crucial, as these delightful chunks will create those irresistible pockets of gooeyness in every bite of your Reeses Peanut Butter Earthquake Cake!
Step 7: Bake the Cake
Pour the batter into the prepared baking dish, spreading it evenly with a spatula. Place it in your preheated oven and bake for approximately 30 minutes. Look for the edges to start pulling away from the sides of the dish while the center remains slightly jiggly—this is how you know your cake is on its way to fudgy perfection.
Step 8: Cool the Cake
Once baked, remove the Reeses Peanut Butter Earthquake Cake from the oven and let it cool in the pan. You’ll notice the cake will settle and crack as it cools, adding to its charming appearance. Allow the cake to rest for at least 20 minutes—it’s hard to wait, but this step is important for the best texture and flavor release!
What to Serve with Ultimate Reese’s Peanut Butter Earthquake Cake
Indulging in a slice of this chocolate-peanut butter delight calls for equally delightful pairings to enhance your dessert experience.
-
Vanilla Ice Cream: The cool creaminess perfectly contrasts the warm cake, creating a luscious harmony of flavors. A scoop can transform your indulgence into a glorious sundae!
-
Whipped Cream: A light and fluffy topping adds an airy touch, making each bite feel extra special. Elevate your serving by adding a sprinkle of cocoa powder or crushed peanuts.
-
Fresh Berries: Bright strawberries or raspberries provide a refreshing tartness that cuts through the richness of the cake. Their vibrant colors also add visual appeal, making your dessert table pop!
-
Chocolate Sauce: Drizzling warm chocolate sauce over the cake intensifies the decadent experience. It’s an irresistible addition for any chocolate lover seeking extra richness.
-
Peanut Butter Drizzle: Enhance the peanut buttery goodness by creating a simple drizzle with melted peanut butter. It will add an extra layer of flavor that fans of mucking up their desserts will adore.
-
Coffee or Espresso: A hot cup of coffee or espresso balances the sweetness of the cake, allowing the chocolate and peanut butter flavors to shine. The warmth complements the fudgy texture beautifully.
-
Milk: A classic combination, serving a tall glass of milk is not only nostalgic but also helps wash down the richness of this incredible dessert. Opt for chocolate milk for double the flavor!
-
Brownie Sundae: Pairing a slice of the cake with a warm brownie and ice cream will create an over-the-top dessert experience everyone will remember. Delight in layers of flavor and texture!
Reese’s Peanut Butter Earthquake Cake Variations
Feel free to get creative and make this delightful cake uniquely yours with these exciting suggestions!
-
Gluten-Free: Swap all-purpose flour for a gluten-free blend, ensuring everyone can enjoy this decadent dessert without worry.
-
Brown Sugar Bliss: Use brown sugar instead of granulated sugar for a deeper flavor and added moisture that enhances the cake’s richness.
-
Nut-Free Adventure: Replace creamy peanut butter with sunbutter for a nut-free version that offers a similarly creamy texture and delightful taste.
-
Vegan Delight: For a vegan twist, incorporate flax eggs instead of regular eggs and swap whole milk for almond milk or another non-dairy alternative.
-
Chocolate Lovers Upgrade: Boost the chocolate flavor by using Dutch-processed cocoa powder instead of standard cocoa. Your cake will taste even richer!
-
Candy Bar Creativity: Experiment by replacing Reese’s cups with chopped Snickers, crushed Oreos, or even M&M’s for different textures and flavors.
-
Swirled Surprise: Add a swirl of your favorite jam or caramel sauce into the batter before baking to surprise your taste buds with a fruity or sweet twist!
-
Spicy Kick: For those who love heat, adding a teaspoon of cayenne pepper in the batter can create an unexpected but delightful contrast to the sweetness.
Elevate your cake experience even further by pairing it with a scoop of creamy vanilla ice cream or drizzling some homemade whipped cream on top, just as you would with our delicious Garlic Butter Chicken for a savory treat!
Make Ahead Options
Preparing the Ultimate Reese’s Peanut Butter Earthquake Cake ahead of time is a brilliant way to save precious moments on busy days! You can mix the dry ingredients and store them in an airtight container for up to 3 days. Additionally, the cake itself can be baked up to 24 hours in advance. Just be sure to let it cool completely before wrapping it tightly in plastic wrap and storing it at room temperature to maintain its gooeyness. When you’re ready to serve, warm individual slices in the microwave for about 10-15 seconds to restore that delightful fudgy texture. With these make-ahead tips, you’ll enjoy a show-stopping dessert with minimal effort!
How to Store and Freeze Reese’s Peanut Butter Earthquake Cake
Room Temperature: Store the cake at room temperature in an airtight container for up to 3 days to maintain its gooey texture and flavor.
Fridge: If you prefer a longer shelf life, keep it in the refrigerator for up to 5 days. Just make sure to wrap it tightly to prevent it from drying out.
Freezer: To freeze, wrap slices individually in plastic wrap, then place them in a zip-top bag. The cake can be frozen for up to 3 months without losing its delicious taste.
Reheating: To restore that perfect gooeyness, microwave individual slices for about 15-20 seconds before serving. Enjoy the rich flavors of the Reese’s Peanut Butter Earthquake Cake even after it’s been stored!
Expert Tips for Reese’s Peanut Butter Earthquake Cake
-
Check for Jiggly Center: Ensure the cake is slightly jiggly in the center when done; it will firm up as it cools for the perfect texture.
-
Avoid Overmixing: Mix the batter gently to prevent a tough cake. A few lumps are okay; they won’t hurt your decadent dessert.
-
Use Fresh Ingredients: Make sure your baking powder is fresh for optimal rise; stale ingredients can lead to flat cake results.
-
Cooling Time Matters: Allow the cake to cool in the pan before cutting. This helps achieve those signature cracks and the gooey center.
-
Storage Tips: Wrap individual slices tightly for lasting freshness; the flavors develop beautifully overnight, making the Reese’s Peanut Butter Earthquake Cake even better the next day.
Reese’s Peanut Butter Earthquake Cake Recipe FAQs
How do I choose ripe ingredients for this cake?
Absolutely! When picking fresh ingredients, look for creamy peanut butter without added sugars or oils for the best texture. For eggs, choose ones that are not cracked and preferably organic for a richer flavor. While cocoa powder should be fresh to provide maximum chocolate flavor, make sure the baking powder is not expired to ensure optimal rise.
What is the best way to store leftover cake?
Very good question! Store your Reese’s Peanut Butter Earthquake Cake at room temperature in an airtight container for up to 3 days to maintain its gooey texture. Alternatively, if you want to keep it fresh longer, place it in the fridge, tightly wrapped, where it can last up to 5 days. Just remember, the cake often tastes even better the next day as the flavors meld!
Can I freeze this cake, and if so, how?
Absolutely! Freezing is a great option to keep it for longer. First, allow the cake to cool completely. Then, wrap individual slices tightly with plastic wrap, ensuring no air can get in. Place them inside a zip-top bag or an airtight container. Store in the freezer for up to 3 months. When you’re ready to enjoy a slice, simply remove it from the freezer, unwrap it, and microwave for 15-20 seconds to restore its delightful gooeyness.
What should I do if my cake doesn’t rise?
Don’t worry! If your Reese’s Peanut Butter Earthquake Cake doesn’t rise as expected, check that your baking powder is fresh, as expired leavening agents can lead to flat cakes. Overmixing can also contribute to density; make sure to stir gently until just combined. Remember, a slight jiggly center indicates a perfectly fudgy cake, so don’t be discouraged!
Are there any dietary considerations I should keep in mind?
Of course! For those with allergies, substituting creamy peanut butter with sunbutter makes this cake nut-free. If you’re looking for a vegan version, replace eggs with flax eggs (1 tablespoon of ground flaxseed mixed with 2.5 tablespoons of water per egg) and use plant-based milk. Just remember that these swaps may slightly alter the cake’s texture and flavor, but still delicious!
How should I serve this cake for the best experience?
Definitely serve your Reese’s Peanut Butter Earthquake Cake warm, perhaps topped with a scoop of vanilla ice cream or a dollop of whipped cream for an indulgent treat! This will take the creamy peanut butter and chocolate experience to the next level, turning every slice into a little slice of heaven.
Decadent Reeses Peanut Butter Earthquake Cake You’ll Crave
Ingredients
Equipment
Method
- Preheat your oven to 350°F (175°C) and prepare a 9x13-inch baking dish without greasing.
- In a medium-sized mixing bowl, whisk together the flour, cocoa powder, baking powder, and salt until blended.
- In a large bowl, cream together the peanut butter and sugar until smooth and fluffy.
- Add the eggs and milk to the peanut butter mixture and beat until fully combined.
- Fold the dry ingredients into the wet mixture just until combined, being careful not to overmix.
- Chop the Reese’s cups and gently fold them into the batter.
- Pour the batter into the prepared baking dish and spread evenly. Bake for approximately 30 minutes.
- Let the cake cool in the pan for at least 20 minutes to set the texture.
Leave a Reply