
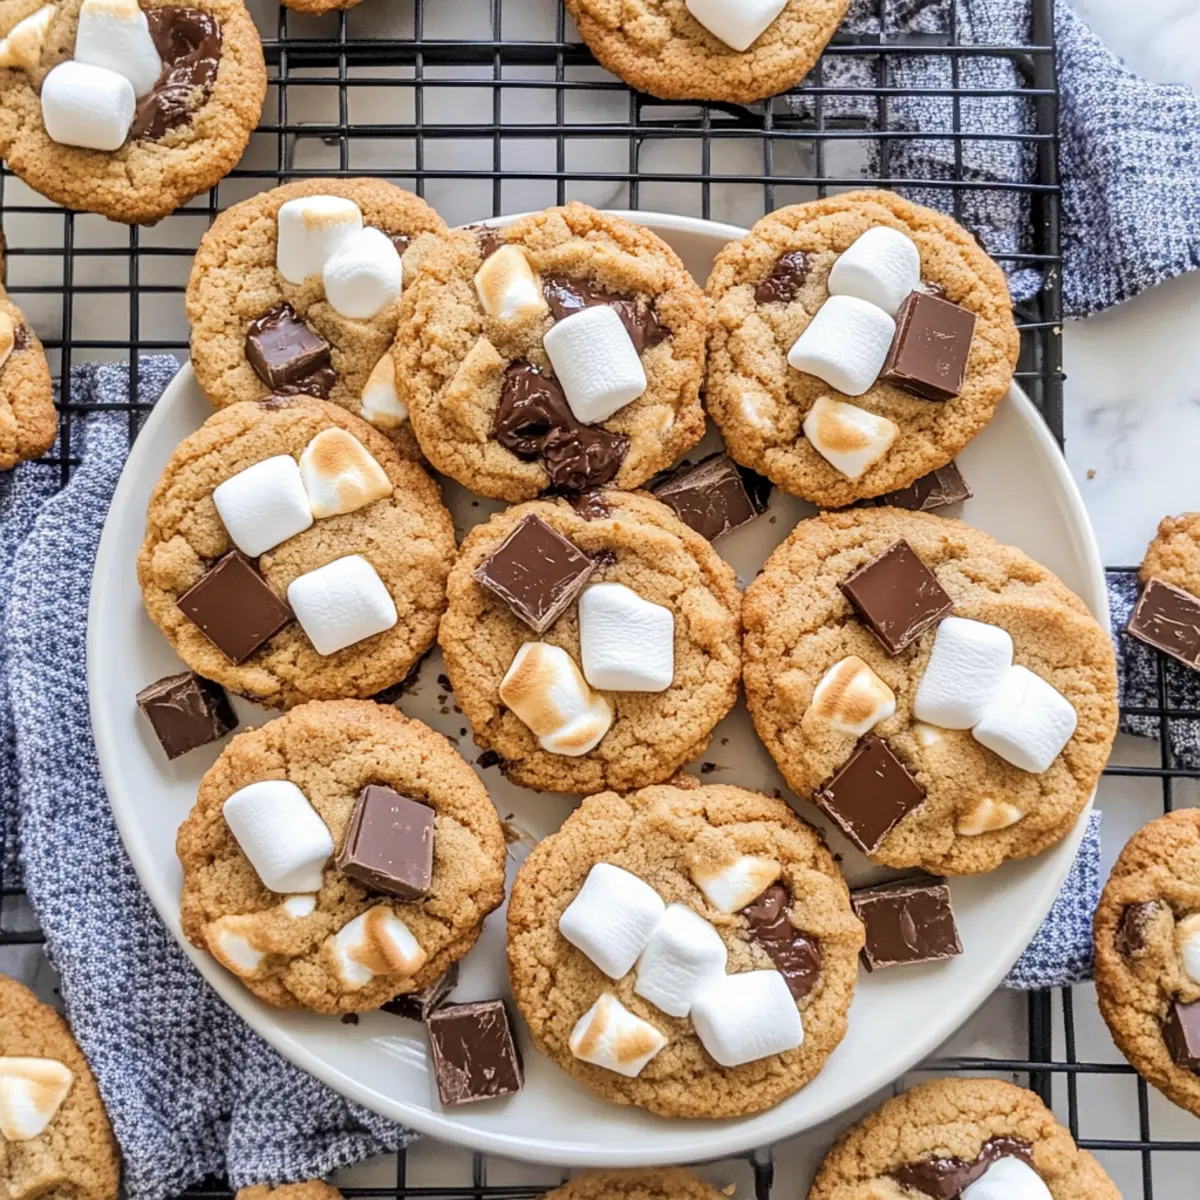
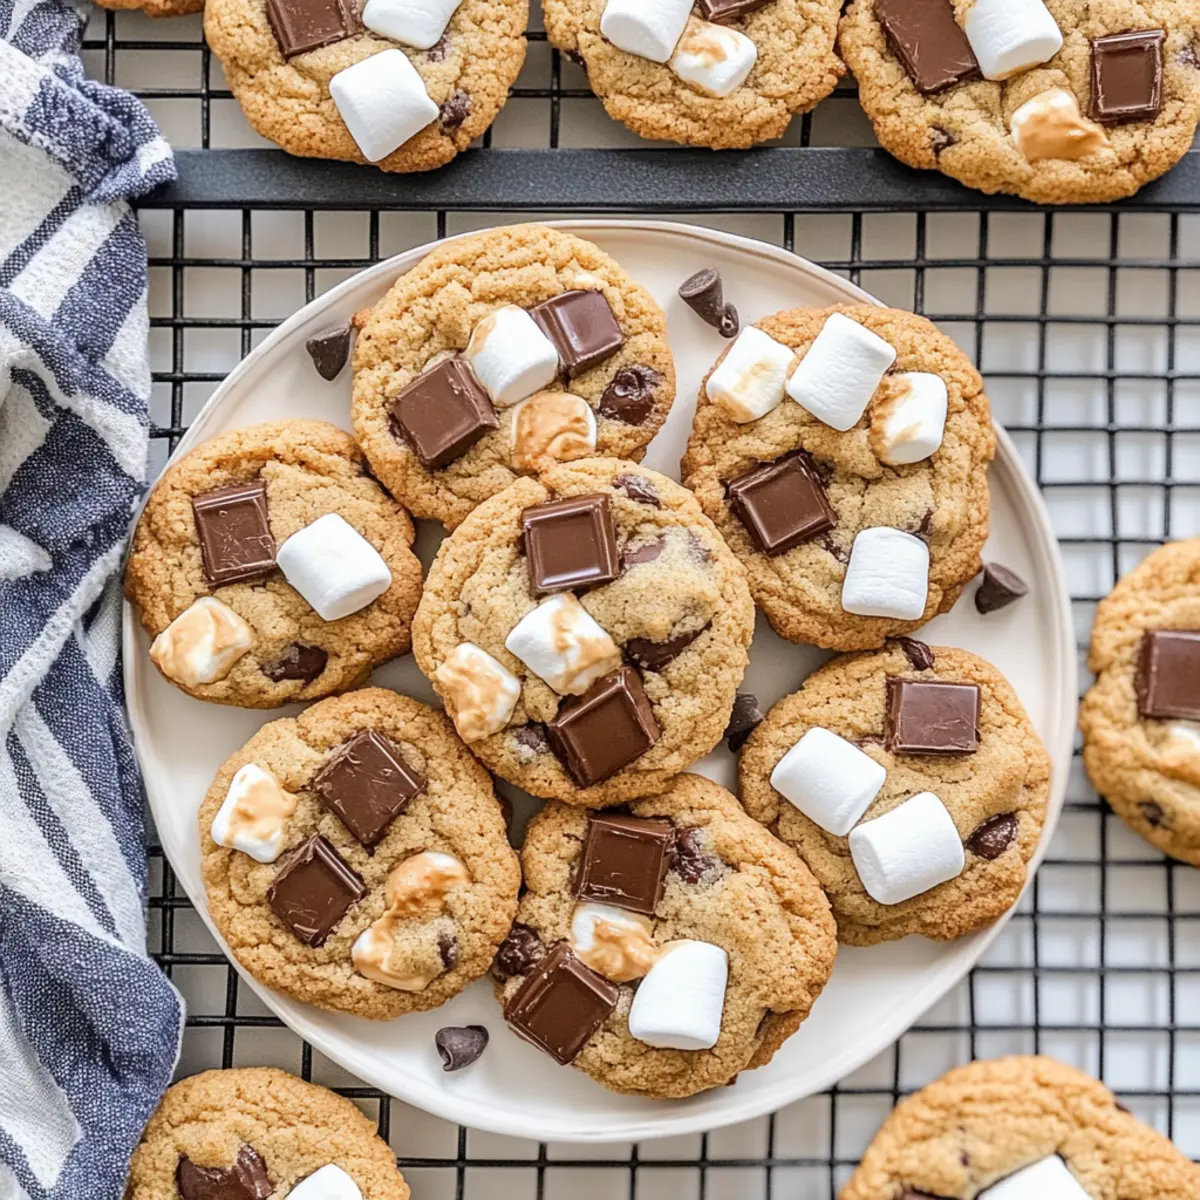
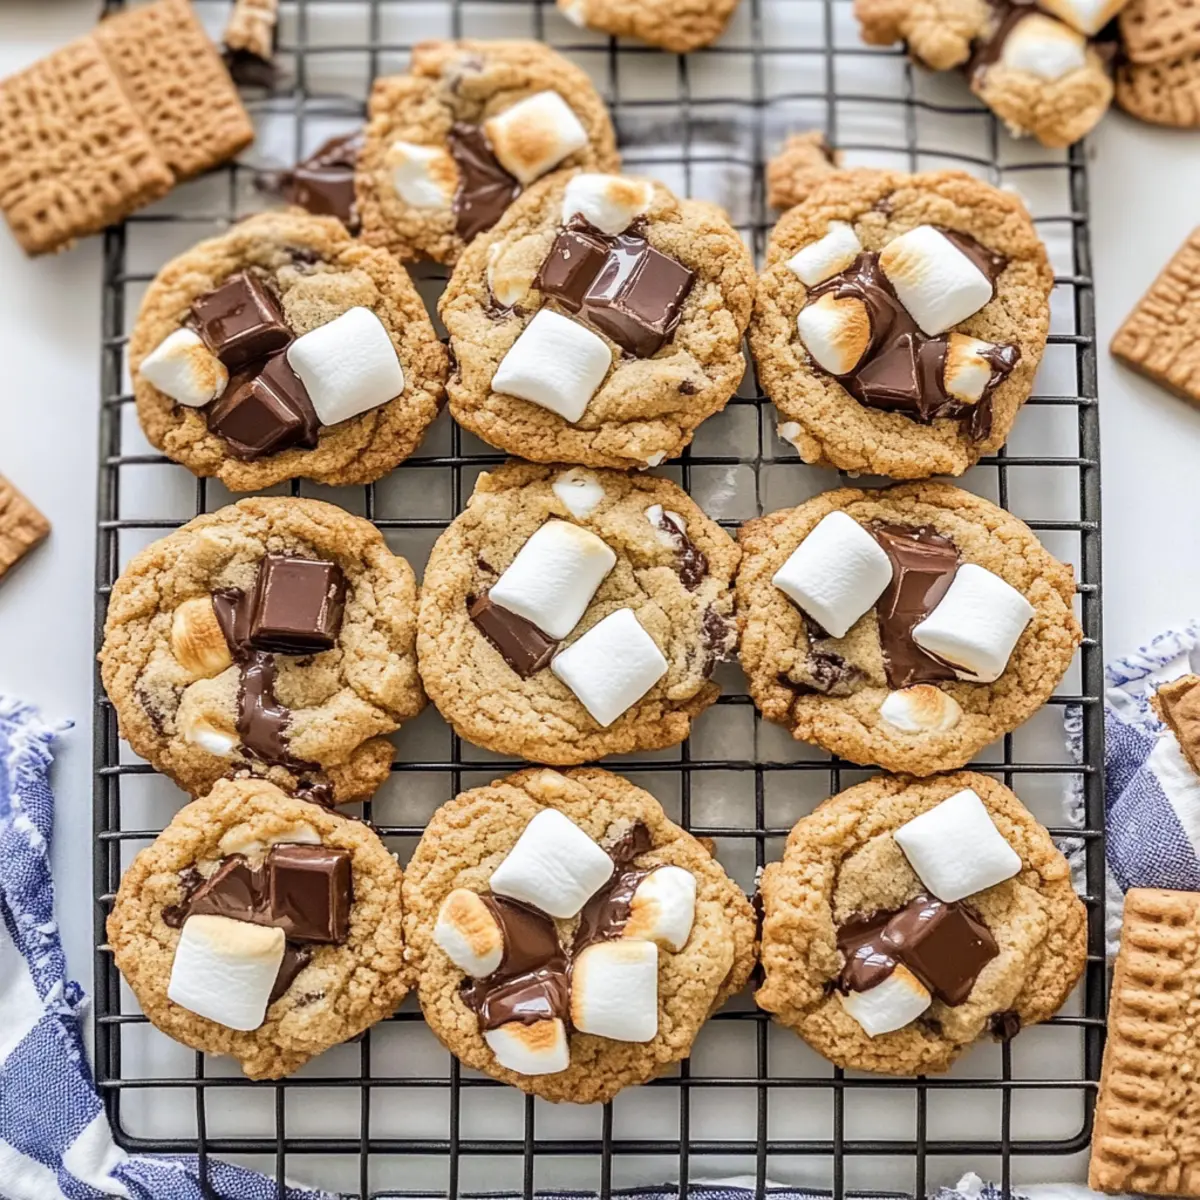
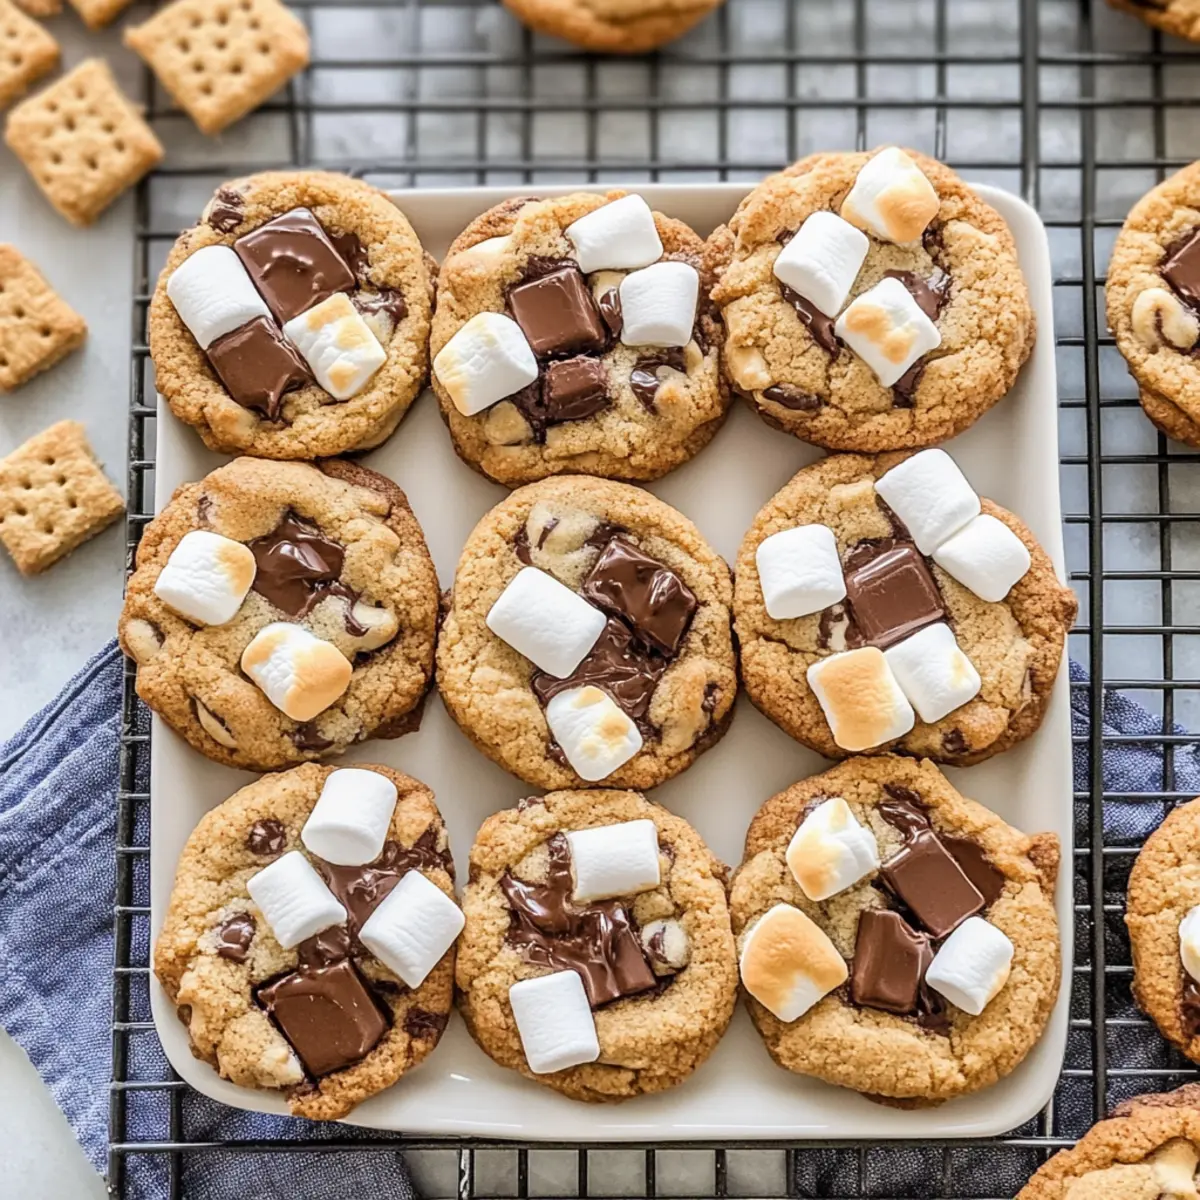
As I stood in my kitchen, reminiscing about starry summer nights and the glowing embers of a campfire, the inspiration for these Chewy S’mores Cookies struck me. This delightful recipe captures the essence of classic campfire s’mores, transforming layers of gooey marshmallows, crispy graham crackers, and rich chocolate into a cookie experience that you can enjoy year-round. Not only are these cookies incredibly chewy and soft, but they also serve as a fantastic treat for family gatherings or cozy nights in. With a simple preparation that beats the hassle of fast food, you’ll find yourself sinking into nostalgia with every bite. Ready to recreate that campfire magic in your own kitchen? Let’s get baking!
Why are S’mores Cookies a must-try?
Irresistibly Chewy: These S’mores Cookies are the perfect blend of soft and chewy textures, giving you that delightful mouthfeel you crave.
Nostalgic Flavors: Indulge in memories of your summer camping trips, with each cookie reminding you of the joy of roasting marshmallows by the fire.
Easy to Make: This straightforward recipe requires just a few simple steps, proving that homemade desserts don’t have to be complicated.
Versatile Treat: Feel free to customize these cookies by swapping chocolate chips for peanut butter or butterscotch ones—your imagination is the limit!
Crowd-Pleasing Delight: Whether it’s a family gathering or a casual get-together, these cookies are guaranteed to impress and satisfy everyone’s sweet tooth.
Quick to Bake: With minimal oven time, you can enjoy freshly baked cookies in no time, making them a fantastic solution for those late-night cravings!
S’mores Cookies Ingredients
• Get ready to bake!
For the Cookie Dough
- Salted Butter – Adds richness and serves as the primary fat; unsalted is great for better salt control.
- Light Brown Sugar – Provides moisture and a deep caramel flavor; feel free to substitute with granulated sugar but be mindful of moisture.
- Granulated Sugar – Sweetens and helps create a light texture; you can swap this with coconut sugar for a different taste.
- Large Eggs – Binds all the ingredients together and adds moisture; for a vegan version, use flax eggs instead.
- Vanilla Extract – Elevates the flavor profile; almond extract can be used for a unique twist.
- All-Purpose Flour – Acts as the main structure builder; not gluten-free? A gluten-free flour blend works here too.
- Cornstarch – Softens the cookie texture, resulting in a tender bite; stick with cornstarch, as it’s irreplaceable in this recipe.
- Baking Soda – Provides essential leavening for a lighter cookie; ensure it’s fresh for optimal results.
- Salt – Balances sweetness and enhances flavor; adjust according to your taste preferences.
For the Sweet Add-Ins
- Mini Marshmallows – Bring gooeyness to your cookies; for a more substantial bite, use larger marshmallows, cut into pieces.
- Graham Crackers – Add the signature flavor and crunch of classic s’mores; gluten-free graham crackers can be used for gluten issues.
- Milk Chocolate Chips – Provide melt-in-your-mouth sweetness; swap them out with dark chocolate for a richer flavor.
- Semisweet Chocolate Chips – Add depth to the cookie’s flavor; feel free to replace with your favorite chocolate variety.
- Hershey’s Bars – Infuse that classic chocolate flavor; chop any chocolate bar into pieces if you don’t have Hershey’s on hand.
Embrace the delightful flavors of these S’mores Cookies as you gather your ingredients and make sweet memories in the kitchen!
Step‑by‑Step Instructions for S’mores Cookies
Step 1: Preheat the Oven
Begin by preheating your oven to 375°F (190°C). While the oven warms up, take two baking sheets and line them with parchment paper to prevent sticking. This step is vital for ensuring your S’mores Cookies come out perfectly baked and easy to transfer once they’re ready.
Step 2: Cream Butter and Sugars
In a large mixing bowl, combine the softened salted butter, light brown sugar, and granulated sugar. Use an electric mixer to cream the mixture on medium speed for 2-3 minutes, or until it becomes light and fluffy in texture. This process creates a base that ensures your cookies turn out incredibly chewy.
Step 3: Combine Wet Ingredients
Next, crack in the large eggs and pour in the vanilla extract. Beat the mixture on low speed until fully incorporated, which should take about 1-2 minutes. The wet ingredients will add moisture and enhance the flavor of your S’mores Cookies, creating a delightful dough.
Step 4: Add Dry Ingredients
In another bowl, whisk together the all-purpose flour, cornstarch, baking soda, and salt. Gradually mix this dry ingredient blend into the wet ingredients until just combined. Be careful not to over-mix, as you want the texture of these S’mores Cookies to remain soft and tender.
Step 5: Incorporate Mix-Ins
Fold in 1.5 cups of mini marshmallows, crushed graham crackers, and a combination of milk and semisweet chocolate chips. Use a spatula for this step to ensure the mix-ins are evenly distributed throughout the dough, adding that signature gooey and crunchy element to your S’mores Cookies.
Step 6: Scoop the Dough
Using a cookie scoop or a tablespoon, drop 2-3 tablespoon balls of dough onto the prepared baking sheets. Ensure to leave about 2 inches of space between each cookie to allow for spreading as they bake. The dough should look slightly rough, hinting at the scrumptious textures to come.
Step 7: Initial Baking
Place the baking sheets in your preheated oven and bake the cookies for about 10 minutes. Keep a close eye on them; they should be nearly set around the edges but still soft in the center. This is the perfect stage for the chewy goodness everyone loves in S’mores Cookies.
Step 8: Top Cookies
Once baked, remove the sheets from the oven. Press additional mini marshmallows and pieces of graham cracker, along with Hershey bar chunks, onto the tops of each cookie. This will create a beautiful, gooey top layer, reminiscent of the classic s’mores experience.
Step 9: Final Baking
Return the baking sheets to the oven for an additional 1-2 minutes, allowing the toppings to melt slightly. For an extra touch, switch your oven to broil for the last minute to toast the marshmallows, but be sure to watch closely to prevent burning.
Step 10: Cooling
Once perfectly toasted and melted, remove the cookies from the oven. Let them cool on the baking sheet for about 2-3 minutes before transferring them to a wire rack to cool completely. This brief cooling time will help solidify the cookies while maintaining their gooey center, enhancing your S’mores Cookies experience.
Make Ahead Options
These Chewy S’mores Cookies are perfect for busy home cooks looking to save time during the week! You can prepare the cookie dough up to 24 hours in advance; simply mix the ingredients until combined, cover the bowl tightly, and refrigerate. The dough will remain fresh, ensuring the cookies are just as delightful when baked. For even longer storage, scoop the dough into balls and freeze them for up to 3 months; when ready to bake, just place them on a baking sheet and add an extra minute or two to the baking time. Once it’s time to enjoy, follow the final baking steps for delicious cookies that taste freshly made!
Expert Tips for S’mores Cookies
-
Avoid Marshmallow Spillage: Make sure no marshmallows are exposed when rolling the dough; this helps avoid burnt marshmallows during baking.
-
Use Fresh Ingredients: For the best results, check the freshness of your baking soda and cornstarch. Fresh ingredients guarantee your S’mores Cookies rise perfectly.
-
Adjust Baking Times: Keep an eye on your cookies as ovens can vary in temperature; underbaking slightly will give you a softer, chewier texture.
-
Customize Add-ins: Feel free to get creative! Swap chocolate chips for other flavors or add nuts for extra crunch, making each batch uniquely your own.
-
Cooling Time is Key: Allow cookies to cool on the baking sheet for a few minutes before transferring; this helps them set while keeping that irresistible gooey center!
What to Serve with S’mores Cookies
As you savor your deliciously gooey S’mores Cookies, consider these delightful pairings that will complete your dessert experience.
-
Cold Milk: A classic companion, cold milk balances the sweetness, enhancing the creamy chocolate and marshmallow flavors.
-
Vanilla Ice Cream: A scoop of creamy vanilla ice cream adds a delightful contrast to the warm, chewy cookies, creating a dreamy dessert combination.
-
Hot Chocolate: Serve your S’mores Cookies with a steaming cup of rich hot chocolate for that cozy, nostalgic feel of campfire s’mores.
-
Fruit Salad: Fresh berries or tropical fruit can provide a refreshing contrast, cutting through the sweetness and adding a burst of juiciness.
-
Chocolate Fondue: For an elegant twist, pair your cookies with a chocolate fondue pot, perfect for dipping and enhancing the chocolate experience.
-
Coffee: A warm cup of coffee can be a delightful adult pairing, its bitterness wonderfully complementing the sweetness of the cookies.
-
Caramel Sauce: Drizzle warm caramel sauce over your cookies for an indulgent treat, making each bite even more decadent and rich.
-
Graham Cracker Crust Tart: Enjoy a tart with a graham cracker base to celebrate the flavors of s’mores while adding another layer of texture and deliciousness.
Every bite becomes an adventure when you combine these pairings with your sweet S’mores Cookies!
How to Store and Freeze S’mores Cookies
Room Temperature: Store your S’mores Cookies in an airtight container at room temperature for up to 4-5 days to maintain their chewy texture and flavor.
Fridge: If you prefer them chilled, these cookies can last in the fridge for about a week—just be sure to keep them in an airtight container to prevent them from drying out.
Freezer: You can freeze cookie dough balls for up to 2 months. Simply scoop the dough, place it on a baking sheet to freeze, then transfer to a zip-top bag. When ready to bake, no need to thaw—just add a minute or two to the baking time.
Reheating: To enjoy warm cookies, reheat them in the microwave for about 10-15 seconds. This will bring back that gooey, melty goodness that makes S’mores Cookies irresistible!
S’mores Cookies Customization Ideas
Feel free to unleash your creativity and personalize these S’mores Cookies to your taste—your kitchen is your canvas!
-
Nutty Twist: Substitute peanut butter chips for milk chocolate chips to create a delightful nutty flavor. This adds a lovely depth to the classic cookie, making it even more enjoyable!
-
Flavored Chips: Experiment with caramel or butterscotch chips for unique flavor profiles. The sweet surprises meld beautifully with the gooey marshmallows, giving your cookies a fun twist!
-
Crunchy Addition: Add a handful of crushed nuts, like walnuts or pecans, for extra crunch and flavor. This crunchy texture complements the soft cookies, creating a delicious contrast.
-
Spicy Kick: Incorporate a pinch of cinnamon or a dash of cayenne pepper to the dough for a subtle spiciness. The warmth of the spices will elevate this dessert to a whole new level!
-
Hybrid Variants: Combine elements of other treats by adding crushed graham crackers into the mix while substituting some of the flour. It’s like having a browned butter s’mores cookie that boasts more flavor and intrigue!
-
Vegan Version: Substitute flax eggs for regular eggs and a nut-based butter for a vegan-friendly option without losing that gooey, chewy goodness. Everyone will enjoy the scrumptious treat!
-
Chocolate Overload: Feel free to use a mixture of chocolate varieties—dark, semisweet, or even white chocolate—for an intense chocolate experience. You can never have too much chocolate goodness!
If you’re looking for sweet inspiration later on, consider checking out these delightful recipes for Pumpkin Sugar Cookies, Apple Fritter Cookies, or even some rich Chocolate Brownie Cookies! Each of these will add more smiles to your cookie adventures.
S’mores Cookies Recipe FAQs
How do I choose the best chocolate for my S’mores Cookies?
Absolutely! For S’mores Cookies, I recommend using a mix of milk and semisweet chocolate chips for a well-balanced flavor. If you prefer a richer taste, feel free to swap in dark chocolate chips. Using Hershey’s bars adds that classic s’mores taste, but any chocolate bar you love can work beautifully!
How should I store my S’mores Cookies to keep them fresh?
Store your cookies in an airtight container at room temperature for 4-5 days. This keeps them chewy and delicious. If you’re keeping them in the fridge, they can last about a week, but make sure they’re sealed well to prevent drying out.
Can I freeze the S’mores Cookie dough? If so, how?
Yes! Freezing cookie dough is a fantastic way to enjoy warm cookies whenever you like. To freeze, scoop the dough into balls and place them on a baking sheet. Freeze until solid, then transfer the dough balls to a zip-top bag. They can be kept in the freezer for up to 2 months. When ready to bake, simply add an extra minute or two to the baking time without needing to thaw.
What if my marshmallows burn when I bake the cookies?
Very good question! To avoid burnt marshmallows, ensure they are fully covered by the dough when you scoop it. If you still find them browning too quickly, you can switch on the broiler for just the last minute to toast them lightly—just keep a close eye on them!
Are there any allergy considerations for S’mores Cookies?
While this recipe doesn’t specify any dietary restrictions, common allergens include wheat (in flour), dairy (in butter, chocolate, and marshmallows), and eggs. For gluten-free options, substitute the all-purpose flour with a gluten-free blend and use gluten-free graham crackers. Also, consider using egg substitutes like flax eggs for a vegan-friendly version.
What should I do if my cookies don’t turn out chewy?
If your cookies come out more cake-like, it may be due to overmixing the dough or using too much flour. To achieve that perfect chewy texture, mix just until combined and level your flour when measuring. The right balance of moisture from the brown sugar and butter plays a crucial role, so ensure your ingredients are accurately measured!
Irresistibly Soft S'mores Cookies for Sweet Nostalgic Moments
Ingredients
Equipment
Method
- Preheat your oven to 375°F (190°C) and line baking sheets with parchment paper.
- Cream the softened butter, brown sugar, and granulated sugar until light and fluffy.
- Add the eggs and vanilla extract, mixing until fully incorporated.
- Whisk together the flour, cornstarch, baking soda, and salt in a separate bowl, then gradually add to the wet ingredients.
- Fold in mini marshmallows, crushed graham crackers, milk chocolate chips, and semisweet chocolate chips.
- Scoop balls of dough onto the baking sheets, leaving space to spread.
- Bake for about 10 minutes, until edges are set but center is soft.
- Press additional marshmallows, graham cracker pieces, and Hershey bar chunks on top.
- Return to the oven for 1-2 minutes to melt toppings, broiling for the last minute if desired.
- Cool on the baking sheet for 2-3 minutes before transferring to a wire rack.
Leave a Reply