
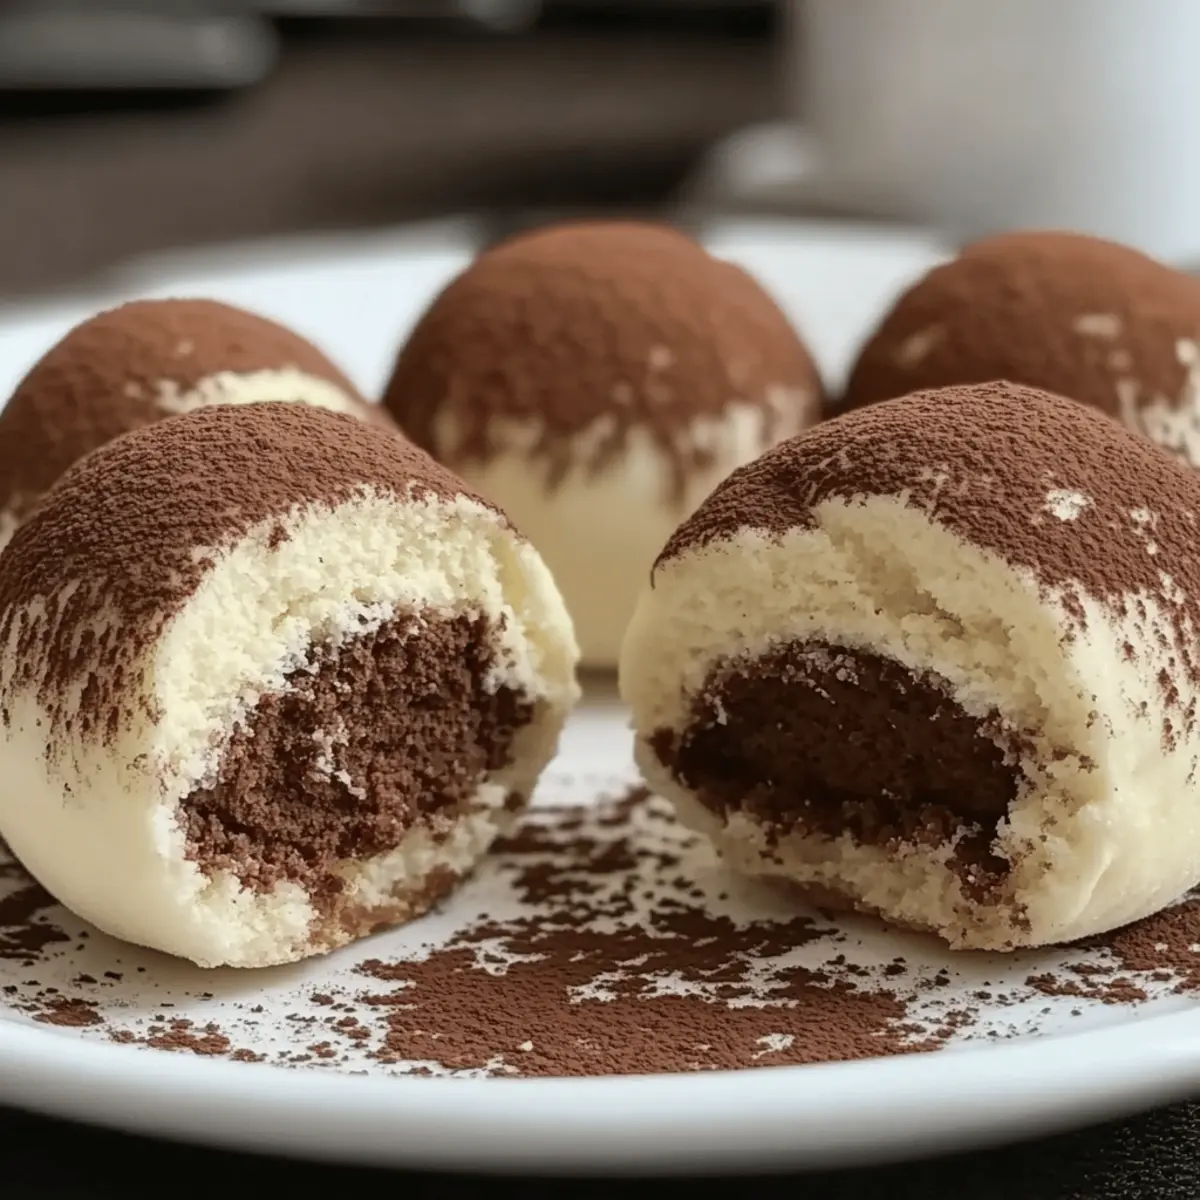
As I sifted through my pantry last week, a sprinkle of cocoa powder magically transported me to a cozy café in Rome, where delicate Tiramisu first captivated my taste buds. What if I could whip up that enchanting flavor in just 10 minutes? Enter my 10 Minute Tiramisu Balls! These delightful no-bake treats capture the essence of the classic Italian dessert, offering an irresistible indulgence without the fuss. Perfect for those busy evenings or impromptu gatherings, they’re not only quick to prepare but also a true crowd-pleaser. Imagine serving up a plate of these creamy, coffee-infused bites, ready to impress your family and friends. Curious about how simple ingredients turn into such a luxurious treat? Let’s dive into this easy recipe that’s sure to become a favorite in your home!

Why are Tiramisu Balls a must-try?
Quick preparation: In just 10 minutes, you can create these delectable treats without turning on the oven.
Luxurious taste: The creamy mascarpone and rich espresso flavor will transport you to Italy with every bite.
Versatile options: Feel free to customize by adding your favorite toppings or flavorings like orange zest to personalize your treat.
Perfect for any occasion: Whether it’s a cozy night in or an impromptu gathering, these Tiramisu Balls are sure to impress.
Minimal cleanup: With no baking required, you can enjoy these indulgences without the hassle of extensive cleanup—making them a win for busy home chefs.
Curious for more dessert ideas? Check out these Salisbury Steak Meatballs or some delightful Meatballs in Lemon Sauce for quick and tasty options!
10 Minute Tiramisu Balls Ingredients
These quick and indulgent treats require just a handful of ingredients to bring the luxurious flavor of Tiramisu to your kitchen.
For the Base
- Ladyfingers (200g) – The backbone of these Tiramisu Balls, creating a delightful sponge-like texture; swap with gluten-free ladyfingers to cater to dietary needs.
- Brewed Espresso (½ cup, cooled) – Infuses that essential coffee flavor; substitute with strong coffee or coffee-flavored syrup for a non-coffee version.
- Coffee Liqueur (1 tablespoon, optional) – This optional ingredient enhances the coffee flavor, but feel free to omit it and add more espresso for a non-alcoholic delight.
For the Creamy Mixture
- Mascarpone Cheese (250g) – The star ingredient that brings creaminess and richness; mix cream cheese and heavy cream for a good alternative if needed.
- Powdered Sugar (½ cup) – Sweetens the treat, adjust according to your sweetness preference for the perfect indulgence.
- Vanilla Extract (1 teaspoon) – Elevates the overall flavor profile, adding warmth to each bite.
- Pinch of salt – Balances the sweetness and allows the flavors to shine through.
For the Finish
- Cocoa Powder (1 tablespoon + additional for dusting) – Adds a rich chocolatey flavor; consider using dark cocoa powder for a more intense taste.
Gather your ingredients and get ready to indulge in these delightful 10 Minute Tiramisu Balls!
Step‑by‑Step Instructions for 10 Minute Tiramisu Balls
Step 1: Crush Ladyfingers
Begin by placing 200g of ladyfingers into a food processor. Pulse until you achieve fine crumbs, resembling sand, which should take about 1-2 minutes. This texture is essential for your 10 Minute Tiramisu Balls’ base, providing that delightful sponge-like feel, so be sure to check the consistency as you go.
Step 2: Mix Creamy Mixture
In a mixing bowl, combine 250g of mascarpone cheese, ½ cup of powdered sugar, 1 teaspoon of vanilla extract, and a pinch of salt. Using a spatula or electric mixer on low speed, blend for 2-3 minutes until smooth and creamy. This luscious mixture is the heart of your Tiramisu Balls, delivering that rich taste we all adore.
Step 3: Combine Espresso and Liqueur
Take ½ cup of cooled brewed espresso and, if using, 1 tablespoon of coffee liqueur, and gently stir them together. Gradually pour this liquid into the creamy mixture from step 2, mixing continuously for about a minute. The combined flavors will deepen the richness of your 10 Minute Tiramisu Balls, ensuring each bite is packed with that iconic coffee taste.
Step 4: Fold in Ladyfinger Crumbs
Carefully fold the ladyfinger crumbs into your creamy mixture using a spatula. This should take about 1-2 minutes, ensuring an even distribution without over-mixing. When fully incorporated, the mixture should be thick enough to hold its shape but still creamy, perfect for rolling into delightful balls.
Step 5: Shape the Mixture
Now it’s time to form your Tiramisu Balls! Using your hands, scoop out portions of the mixture, rolling them into balls about the size of walnuts—approximately 1 inch in diameter. This step should take around 5 minutes. Place the rolled balls on a lined tray, keeping them spaced apart for easy handling later.
Step 6: Dust with Cocoa Powder
Once all the balls are formed, take 1 tablespoon of cocoa powder and dust the tops of each Tiramisu Ball generously. Use a fine sieve for an even coating. This will not only add a rich chocolate flavor but also give your 10 Minute Tiramisu Balls an elegant finish, making them truly irresistible.
Step 7: Chill Before Serving
For the final step, transfer your completed Tiramisu Balls to the refrigerator for at least 30 minutes. This chilling time allows the flavors to meld together beautifully and makes them firmer for serving. If you’re eager, they can be enjoyed right away for a softer texture, but patience will elevate the taste even further.
Expert Tips for 10 Minute Tiramisu Balls
- Perfect Consistency: Ensure that the mixture is not too wet. If it feels runny, add more ladyfinger crumbs for stability while shaping your 10 Minute Tiramisu Balls.
- Chill Time: Allow the Tiramisu Balls to chill for at least 30 minutes for the best flavor melding and ideal firmness.
- Flavor Enhancements: Feel free to increase the amount of espresso or add a splash of coffee liqueur for an even richer coffee experience.
- Creative Coatings: Experiment with different coatings such as chopped nuts or shredded coconut to add texture and variety to your delicious Tiramisu Balls.
- Presentation Matters: Dust with extra cocoa powder just before serving to enhance their visual appeal and ensure they look as delightful as they taste.
Make Ahead Options
These 10 Minute Tiramisu Balls are perfect for meal prep enthusiasts! You can prepare the creamy mixture and roll the balls up to 24 hours in advance, storing them in an airtight container in the refrigerator. Just remember to dust them with cocoa powder just before serving to maintain their visual appeal and flavor—a fresh dusting keeps them looking indulgent and tasting delightful. For best results, roll the Tiramisu Balls tightly to retain their shape during storage, and allow them to chill for at least 30 minutes before enjoying. With this make-ahead strategy, you’ll have a delicious dessert ready at a moment’s notice, making your busy evenings a bit sweeter!
How to Store and Freeze 10 Minute Tiramisu Balls
Fridge: Store your Tiramisu Balls in an airtight container for up to 3 days. This will keep them fresh while allowing the flavors to meld beautifully.
Freezer: For longer storage, freeze the Tiramisu Balls for up to 2 months. Place them in a single layer on a baking sheet to freeze, then transfer to a freezer-safe container.
Thawing: When ready to enjoy, move the Tiramisu Balls to the fridge to thaw overnight. This gentle thawing keeps the texture creamy and delightful.
Reheating: These treats are best served cold or at room temperature, so no reheating is necessary—just enjoy these indulgences straight from the fridge!
What to Serve with 10 Minute Tiramisu Balls
These delightful no-bake treats are perfect for creating a full spread that tantalizes the senses.
- Espresso Martini: A vibrant cocktail that enhances the coffee flavor of the Tiramisu Balls while adding a touch of sophistication.
- Creamy Vanilla Ice Cream: The cold, creamy ice cream provides a delightful contrast to the rich, coffee-infused balls, balancing flavors perfectly.
- Fruit Salad: Fresh, juicy fruits like berries or citrus brighten up the dessert table, providing a refreshing counterpoint to the indulgent Tiramisu Balls.
- Chocolate-Dipped Strawberries: These sweet treats mirror the chocolate notes of the Tiramisu Balls and add an appealing touch to your dessert platter.
- Decadent Chocolate Mousse: A light and airy compliment to the dense richness of the Tiramisu, this mousse creates a layered experience for your taste buds.
- Hazelnut Biscotti: These crunchy delights pair beautifully with coffee, making them an excellent companion to have alongside the Tiramisu Balls for dipping.
- Italian Sparkling Wine: A bubbly drink that lifts the flavors of the dessert, it enhances every bite and adds a celebratory flair to your gathering.
- Whipped Cream: Serve a dollop of lightly sweetened whipped cream on the side, providing a lush touch that enhances the creamy texture of the Tiramisu Balls.
- Chilled Coffee: For a coffee lover’s dream pairing, enjoy the dessert with a cup of chilled coffee for an extra caffeine boost.
10 Minute Tiramisu Balls Variations
Feel free to get creative with these sweet little bites to make them your own!
- Gluten-Free: Replace ladyfingers with gluten-free options for a deliciously inclusive treat. Your guests won’t even notice the difference!
- Flavor Twist: Add finely grated orange zest or chocolate shavings to the creamy mixture for a pop of flavor that elevates the classic taste.
- Texture Variation: Roll some Tiramisu Balls in crushed nuts or toasted coconut instead of cocoa powder for a delightful crunch and surprise bite.
- Coffee-Free Option: If coffee isn’t your thing, substitute espresso with rich hot chocolate or a flavored syrup for a fun twist on indulgence.
- Dairy-Free: Swap mascarpone with a blend of coconut cream and dairy-free cream cheese for a creamy, vegan-friendly option.
- Extra Sweetness: For those with a sweet tooth, mix in a bit of caramel sauce to the creamy mixture, adding richness and extra flavor.
- Spiced Up: Incorporate a pinch of cinnamon or nutmeg into the cocoa powder for an aromatic twist that warms up every bite.
- Presentation Pick: Consider drizzling with chocolate sauce and serve with a side of whipped cream to add a touch of indulgence to your serving platter.
These variations provide delightful options for every palate! And if you’re interested in other creative meals, such as Salisbury Steak Meatballs or even some tantalizing Meatballs in Lemon Sauce, feel free to explore!
10 Minute Tiramisu Balls Recipe FAQs
How do I choose the right ladyfingers?
Selecting the perfect ladyfingers is essential for the right texture. Look for dry, crisp ladyfingers that hold their shape well. If you see any dark spots or signs of moisture, it’s best to skip those. You can also choose gluten-free ladyfingers if you’re catering to dietary restrictions.
How should I store my Tiramisu Balls?
You can store your Tiramisu Balls in an airtight container in the refrigerator for up to 3 days. This allows the flavors to continue melding and keeps them fresh. For longer storage, place them in the freezer where they can last for up to 2 months.
Can I freeze Tiramisu Balls? What’s the best method?
Absolutely! To freeze your Tiramisu Balls, arrange them in a single layer on a baking sheet lined with parchment paper. Freeze them until solid, which should take about 1-2 hours. Once frozen, transfer them into a freezer-safe container or freezer bag to save space. For best texture, let them thaw in the refrigerator overnight before serving.
What if my mixture is too wet?
If your mixture turns out too wet, don’t worry! Simply add more crushed ladyfingers, a tablespoon at a time, until you achieve a consistency that’s firm enough to shape into balls. This will provide the structure needed for your Tiramisu Balls without compromising flavor.
Are Tiramisu Balls safe for my pets?
Tiramisu Balls are not suitable for pets due to the presence of ingredients like caffeine from the espresso and possibly sugar, which can be harmful to animals. Always keep these indulgent treats away from your pets to ensure their health and safety.
What are some creative variations I can try?
Feel free to get creative! You can enhance the flavor by adding a bit of orange zest or finely grated chocolate to the mixture. If you want to switch up the presentation, consider rolling the balls in chocolate sprinkles, chopped nuts, or even shredded coconut. Each twist brings its unique charm while keeping the essence of the classic Tiramisu!
Delicious 10 Minute Tiramisu Balls for Quick Indulgence
Ingredients
Equipment
Method
- Crush ladyfingers in a food processor until fine crumbs, about 1-2 minutes.
- In a mixing bowl, combine mascarpone, powdered sugar, vanilla extract, and salt; blend until smooth, around 2-3 minutes.
- Stir together cooled espresso and coffee liqueur, then gradually mix into creamy mixture.
- Fold in ladyfinger crumbs until fully incorporated.
- Shape the mixture into balls about 1 inch in diameter, placing them on a lined tray.
- Dust tops with cocoa powder using a fine sieve.
- Chill in the refrigerator for at least 30 minutes before serving.
Leave a Reply