
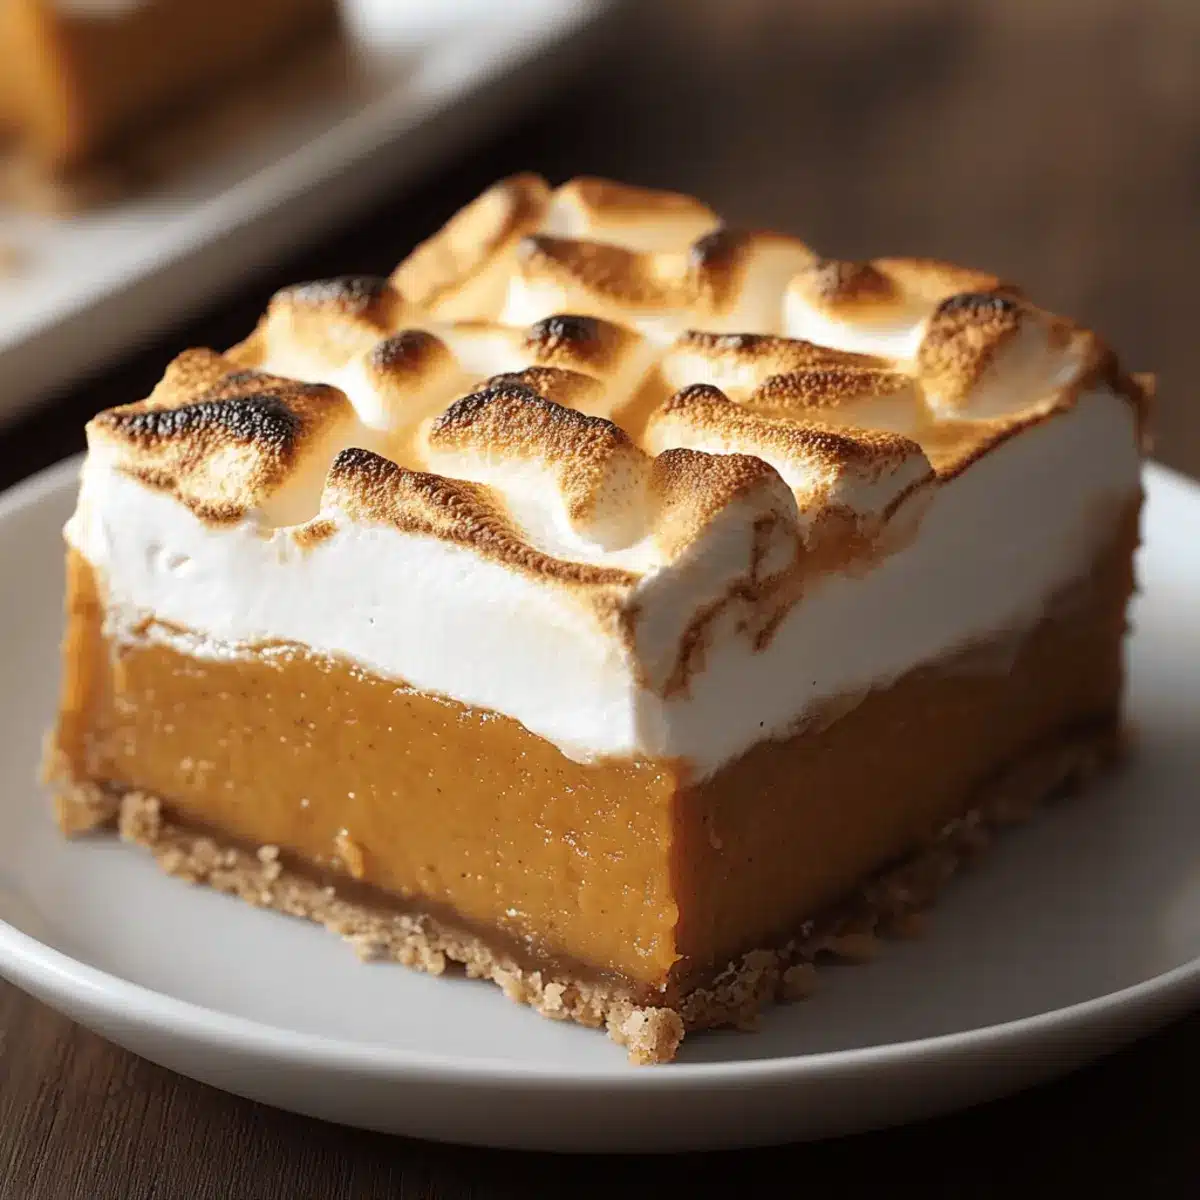
As the crisp autumn air begins to wrap around us, my kitchen transforms into a cozy haven, filled with the warm aroma of baking sweet potatoes. These Sweet Potato Pie Bars with Toasted Marshmallow Topping are the perfect embrace of fall—a delightful twist on a beloved classic. Not only are they easy to whip up, making them a fantastic option for last-minute gatherings, but they also pack a visual punch with their fluffy, golden marshmallow topping. Imagine the joy on your friends’ faces as they dive into the creamy sweet potato filling layered atop a buttery graham cracker crust, transforming your dessert table into a centerpiece of comforting flavors. Ready to bring a little fun and excitement into your fall baking? Let’s dive into this delicious recipe!
Why Are Sweet Potato Pie Bars Irresistible?
Unforgettable Comfort: Nothing says fall like the warm, cozy flavor of sweet potatoes, making these bars perfect for your seasonal gatherings.
Crowd-Pleasing Appeal: With a dreamy marshmallow topping, they not only taste incredible but look stunning.
Versatile Base: Feel free to experiment with various crusts, like Biscoff or gingersnaps, to match your preferred flavors.
Easy to Make: Quick prep and bake times mean more time enjoying with family and friends, similar to my Sweet Chili Pineapple recipe!
Perfect for Any Occasion: Elevate your Thanksgiving dessert table or impress your guests at any fall gathering with these tasty treats!
Sweet Potato Pie Bars Ingredients
For the Crust
• Graham Crackers – Provides structure and crunch for the crust; can substitute with digestive biscuits or gingersnaps for varied flavor.
• Granulated Sugar (for crust) – Sweetens the crust, creating a balanced flavor; can reduce or substitute with a sweetener of choice.
• Fine Sea Salt – Enhances overall flavor of the crust; essential for balance.
• Unsalted Butter – Binds the crust, adding richness; use unsalted to control total salt.
For the Filling
• Fresh Sweet Potato Puree – The main filling, offering natural sweetness and creamy texture; canned puree is less preferred due to higher water content.
• Granulated Sugar (for filling) – Sweetens the filling; can be adjusted based on taste preference.
• Eggs – Provides structure and stability to the filling; critical for setting texture.
• Whole Milk – Adds creaminess to the filling; can substitute with almond milk for a dairy-free version.
• Heavy Cream – Contributes richness and a velvety finish to the filling; can use coconut cream for a non-dairy alternative.
• Bourbon (or Vanilla) – Adds depth of flavor; can omit or substitute with another extract if preferred.
• Ground Spices (cinnamon, ginger, cloves) – Provide warmth and fall flavor; adjust according to personal preference.
For the Marshmallow Topping
• Egg Whites – Essential for the whipped marshmallow topping.
• Cream of Tartar – Stabilizes egg whites during whisking; can substitute lemon juice if necessary.
• Light Corn Syrup – Prevents sugar crystallization, crucial for marshmallow texture; alternatives include golden syrup or agave, though results may vary.
• Water – Used in making the marshmallow syrup, assists in achieving the right consistency.
• Vanilla Extract – Adds flavor to the marshmallow topping; enhances the overall sweetness of the Sweet Potato Pie Bars.
Step‑by‑Step Instructions for Sweet Potato Pie Bars
Step 1: Preheat and Prepare the Baking Pan
Begin by preheating your oven to 350°F (175°C). Line an 8×8-inch metal baking pan with aluminum foil, leaving some overhang for easy removal later. This will ensure your Sweet Potato Pie Bars can be lifted out easily once they are cool. Grease the foil lightly with cooking spray or butter for best results.
Step 2: Make the Graham Cracker Crust
In a food processor, combine the graham crackers, sugar, and fine sea salt, pulsing until you achieve coarse crumbs. Melt the unsalted butter and mix it into the crumb mixture, ensuring everything is thoroughly combined. Press this mixture firmly into the bottom of the prepared baking pan to form a solid crust, then bake for 10 minutes until slightly golden and fragrant.
Step 3: Prepare the Sweet Potato Filling
In a large mixing bowl, combine the fresh sweet potato puree, granulated sugar, eggs, whole milk, heavy cream, bourbon, and ground spices. Whisk together until the mixture is smooth and creamy, ensuring no lumps remain. Pour this luscious filling over the freshly baked graham cracker crust, spreading it evenly for a uniform bake.
Step 4: Bake the Filling
Place the baking pan back into the oven and bake the sweet potato filling for approximately 40 minutes. Keep an eye on it; when it is set but still has a slight wobble in the center, it’s done. The edges should be lightly golden, and the aroma will fill your kitchen, hinting at the delicious Sweet Potato Pie Bars to come.
Step 5: Whip the Egg Whites
While the pie bars are baking, prepare the marshmallow topping. In a clean mixing bowl, whip the egg whites using an electric mixer until soft peaks form. This will give your topping structure and volume. Be patient and let the egg whites reach that fluffy consistency as you prep the syrup.
Step 6: Cook the Sugar Syrup
In a small saucepan, combine the sugar, light corn syrup, water, and a pinch of salt. Heat over medium heat, stirring occasionally until it reaches a temperature of 240°F (115°C) on a candy thermometer. This sticky mixture is what creates that wonderfully fluffy marshmallow topping, so watch closely to prevent burning.
Step 7: Combine Syrup with Egg Whites
Once the sugar syrup reaches the desired temperature, carefully drizzle it into the whipped egg whites while the mixer is running on low speed. Increase to medium speed and continue whisking until the mixture is glossy and stiff peaks form. This dreamy marshmallow topping will elevate your Sweet Potato Pie Bars to a whole new level.
Step 8: Top Bars with Marshmallow
Once the sweet potato filling has cooled slightly, spread the whipped marshmallow mixture evenly over the top, ensuring full coverage. Use a spatula to create swirls for a decorative finish. For the last touch, either use a kitchen torch to toast the marshmallow until golden brown or place under the broiler for just a few minutes—watching closely to prevent burning.
Step 9: Chill and Serve
After toasting, allow the Sweet Potato Pie Bars to cool completely at room temperature. Then, refrigerate them for at least 1 hour to set the topping and filling. When ready to serve, lift the bars out of the pan using the foil overhang, slice them into squares, and enjoy!
What to Serve with Sweet Potato Pie Bars
As the comforting aroma of these bars wafts through your home, let’s create the perfect pairing for a delightful fall feast.
-
Whipped Cream: A dollop of freshly whipped cream adds a light, airy touch that enhances the sweetness of the bars.
-
Vanilla Ice Cream: Creamy vanilla ice cream balances the rich flavors and creates a delicious contrast with the warm pie bars.
-
Cranberry Sauce: Tart cranberry sauce provides a zesty brightness that complements the sweet potato filling beautifully. The tangy flavor cuts through richness, making each bite festive.
-
Pecan Crumble Topping: Add a delightful crunch with a sprinkle of pecan crumble. The nutty flavor pairs wonderfully and adds texture to the smooth bars.
-
Chai Tea: Warm chai tea, with its spicy notes of cinnamon and ginger, echoes the flavors of the sweet potato filling and provides a cozy beverage option.
-
Apple Cider: Hot apple cider is a classic fall drink that harmonizes well with the sweet potato flavors. A sprinkle of cinnamon can enhance this warm beverage even more.
Let these pairings elevate your Sweet Potato Pie Bars to a level of delicious comfort that will have everyone coming back for seconds!
Make Ahead Options
These Sweet Potato Pie Bars are a fantastic choice for meal prep and can save you time during busy fall gatherings! You can prepare the graham cracker crust up to 4 days in advance by pressing it into the pan and storing it, covered, in the refrigerator to maintain its crunchiness. The sweet potato filling can be made 24 hours ahead; just refrigerate it separately and pour it over the crust when ready to bake. Finally, whip up the marshmallow topping no more than a few hours before serving to keep it fluffy. When ready to serve, simply bake the layers together, toast the topping, and enjoy these delightful bars!
Sweet Potato Pie Bars Variations
Get ready to make these Sweet Potato Pie Bars your own with these delightful twists and variations!
-
Alternative Crusts: Try using Biscoff or gingersnap cookies for a unique flavor profile. Each crust variation brings its own flair, enhancing the sweet potato filling beautifully.
-
Dairy-Free Delight: Swap whole milk and heavy cream with almond milk and coconut cream for a deliciously dairy-free version. It’s just as creamy and tasty!
-
Spice it Up: Adjust the ground spices in the filling to suit your taste. A little more cinnamon or nutmeg can add warmth and depth to the overall profile.
-
Flavor Boost: Infuse the filling with fresh orange or lemon zest for bright, citrusy notes that elevate the sweet potato flavor. This twist brings a fresh perspective to your traditional fall dessert!
-
Heat It Up: Add a pinch of cayenne pepper or a splash of hot sauce to the filling for a surprising kick. The heat beautifully contrasts with the sweetness, creating a complex flavor experience.
-
Marshmallow Substitution: Use store-bought marshmallow fluff for a quicker topping without the hassle of making it from scratch. It’s a great option when you’re short on time.
-
Nutty Crunch: Sprinkle chopped pecans or walnuts over the marshmallow topping before broiling for an added texture and nutty flavor that enhances the whole dessert.
-
Seasonal Swaps: Replace sweet potatoes with pumpkin or butternut squash for an even richer flavor during the fall season. Each variation keeps the spirit of the season while adding new, exciting tastes.
No matter how you choose to customize these Sweet Potato Pie Bars, you’re sure to impress! For more delicious fall recipes, consider my Chocolate Chip Oatmeal Bars or treat yourself with the flavors of Apple Cider Whoopie cookies!
How to Store and Freeze Sweet Potato Pie Bars
Fridge: Store your Sweet Potato Pie Bars in an airtight container; they can last up to 5 days while maintaining freshness. This is the best approach if you want to enjoy leftovers without losing flavor.
Freezer: For longer storage, wrap the bars tightly in plastic wrap and then place them in a freezer-safe bag or container. They can be frozen for up to 3 months.
Thawing: To enjoy frozen Sweet Potato Pie Bars, remove them from the freezer and thaw in the refrigerator overnight before serving.
Reheating: If you’d like to enjoy them warm, simply microwave individual bars for about 15-20 seconds.
Helpful Tricks for Sweet Potato Pie Bars
-
Use Fresh Ingredients: Fresh sweet potatoes yield a richer flavor and a better texture in your Sweet Potato Pie Bars. Avoid canned puree for the best results.
-
Avoid Overmixing: When combining the filling ingredients, mix just until smooth. Overmixing can introduce air, resulting in cracks while baking.
-
Check Temperature Accuracy: Use a candy thermometer for your sugar syrup. An inaccurate temperature can lead to sticky or grainy marshmallow topping.
-
Pack the Crust Firmly: Ensure you press the graham cracker mixture firmly into the pan. This prevents crumbling and ensures a sturdy base for your delicious bars.
-
Toast with Care: If broiling the marshmallow topping, watch it closely to prevent burning. A kitchen torch offers better control for that perfect golden glow!
Sweet Potato Pie Bars Recipe FAQs
What type of sweet potatoes should I use?
Absolutely! Fresh sweet potatoes are preferred for this recipe as they offer a richer flavor and smoother texture compared to canned puree, which has higher water content that can affect the final consistency.
How should I store Sweet Potato Pie Bars?
Store your Sweet Potato Pie Bars in an airtight container in the refrigerator, where they can last up to 5 days. This helps maintain their freshness and deliciousness, allowing you to enjoy them over several days without losing any flavor.
Can I freeze Sweet Potato Pie Bars?
Certainly! To freeze your Sweet Potato Pie Bars, wrap them tightly in plastic wrap and then place them inside a freezer-safe bag or container. They can be frozen for up to 3 months. When you’re ready to enjoy them, thaw in the refrigerator overnight before serving.
What if my marshmallow topping is too runny?
If your marshmallow topping turns out runny, it may be due to not reaching the proper sugar syrup temperature (240°F). Next time, make sure to use a candy thermometer and drizzle the syrup slowly into the egg whites while whipping, which will help achieve the perfect consistency.
Are Sweet Potato Pie Bars safe for pets?
While sweet potatoes themselves are safe for many pets in small amounts, avoid feeding them the bars due to other ingredients like sugar, butter, and marshmallow, which may not be suitable for your furry friends.
What if my graham cracker crust crumbles?
If your crust crumbles, it might not have been pressed firmly enough in the pan. For the best results, use the back of a measuring cup to compact the mixture well before baking. This ensures a sturdy foundation for those delicious Sweet Potato Pie Bars!
Sweet Potato Pie Bars with Dreamy Marshmallow Topping
Ingredients
Equipment
Method
- Preheat your oven to 350°F (175°C) and line an 8x8-inch baking pan with foil, leaving overhang.

- Combine graham crackers, sugar, and salt in a food processor and pulse until coarse crumbs. Melt butter and mix in, then press into the pan and bake for 10 minutes.
- In a bowl, whisk together sweet potato puree, sugar, eggs, milk, cream, bourbon, and spices until smooth. Pour over crust.
- Bake filling for approximately 40 minutes until set but wobbly in the center.
- Whip egg whites until soft peaks form.
- In a saucepan, combine sugar, corn syrup, water and bring to 240°F (115°C).
- Drizzle syrup into whipped egg whites and whisk until glossy and stiff peaks form.
- Spread marshmallow over cooled filling and toast with a torch or under broiler.
- Cool completely and refrigerate for at least 1 hour before slicing and serving.
Leave a Reply