
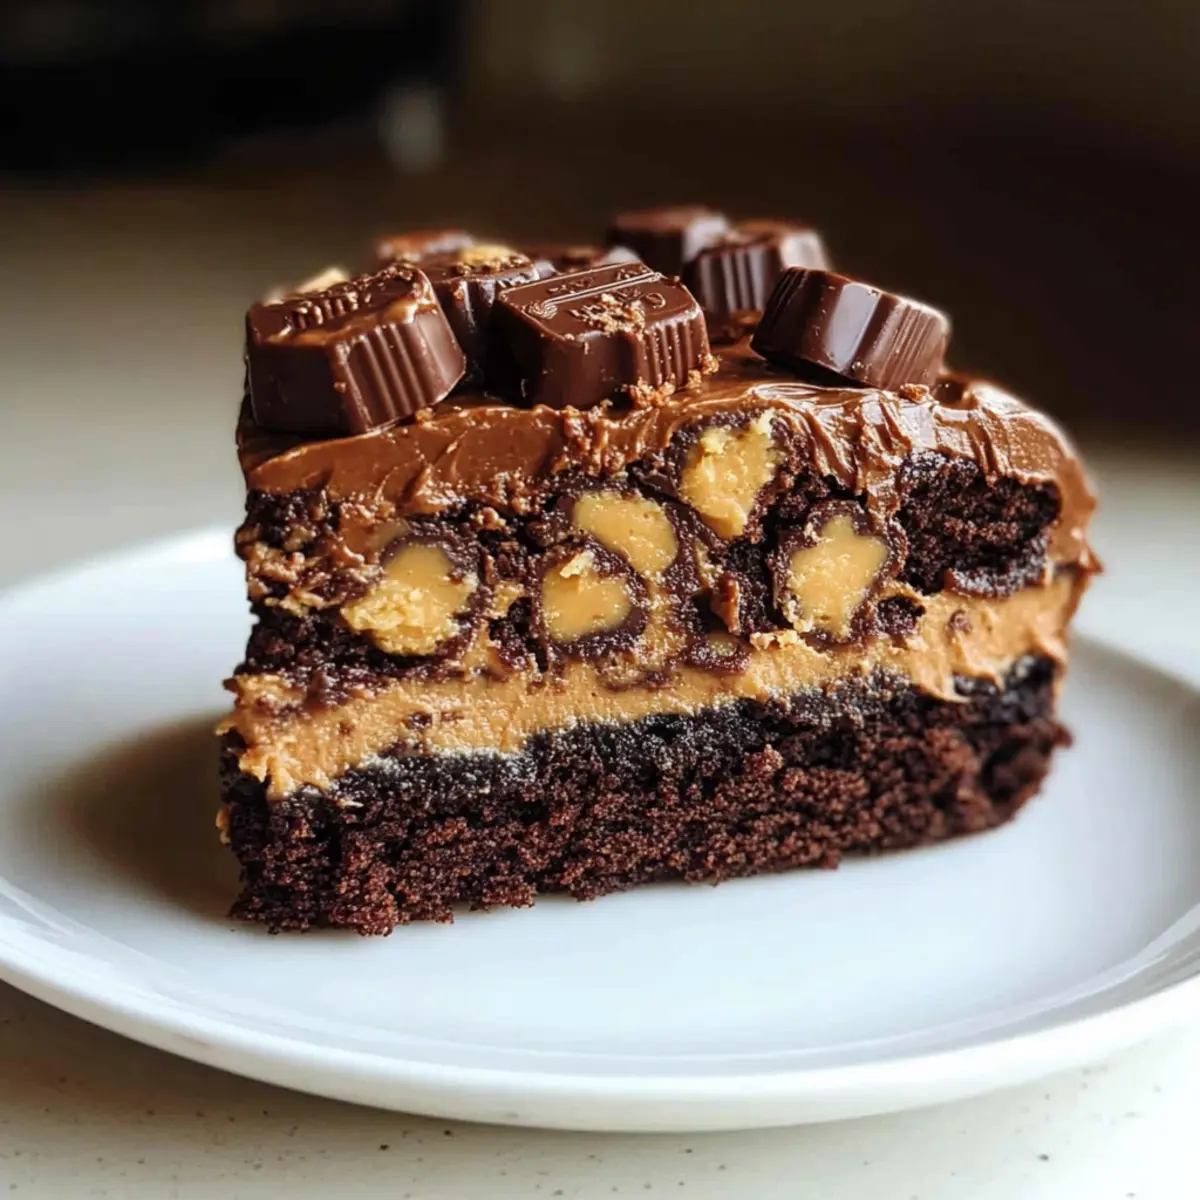
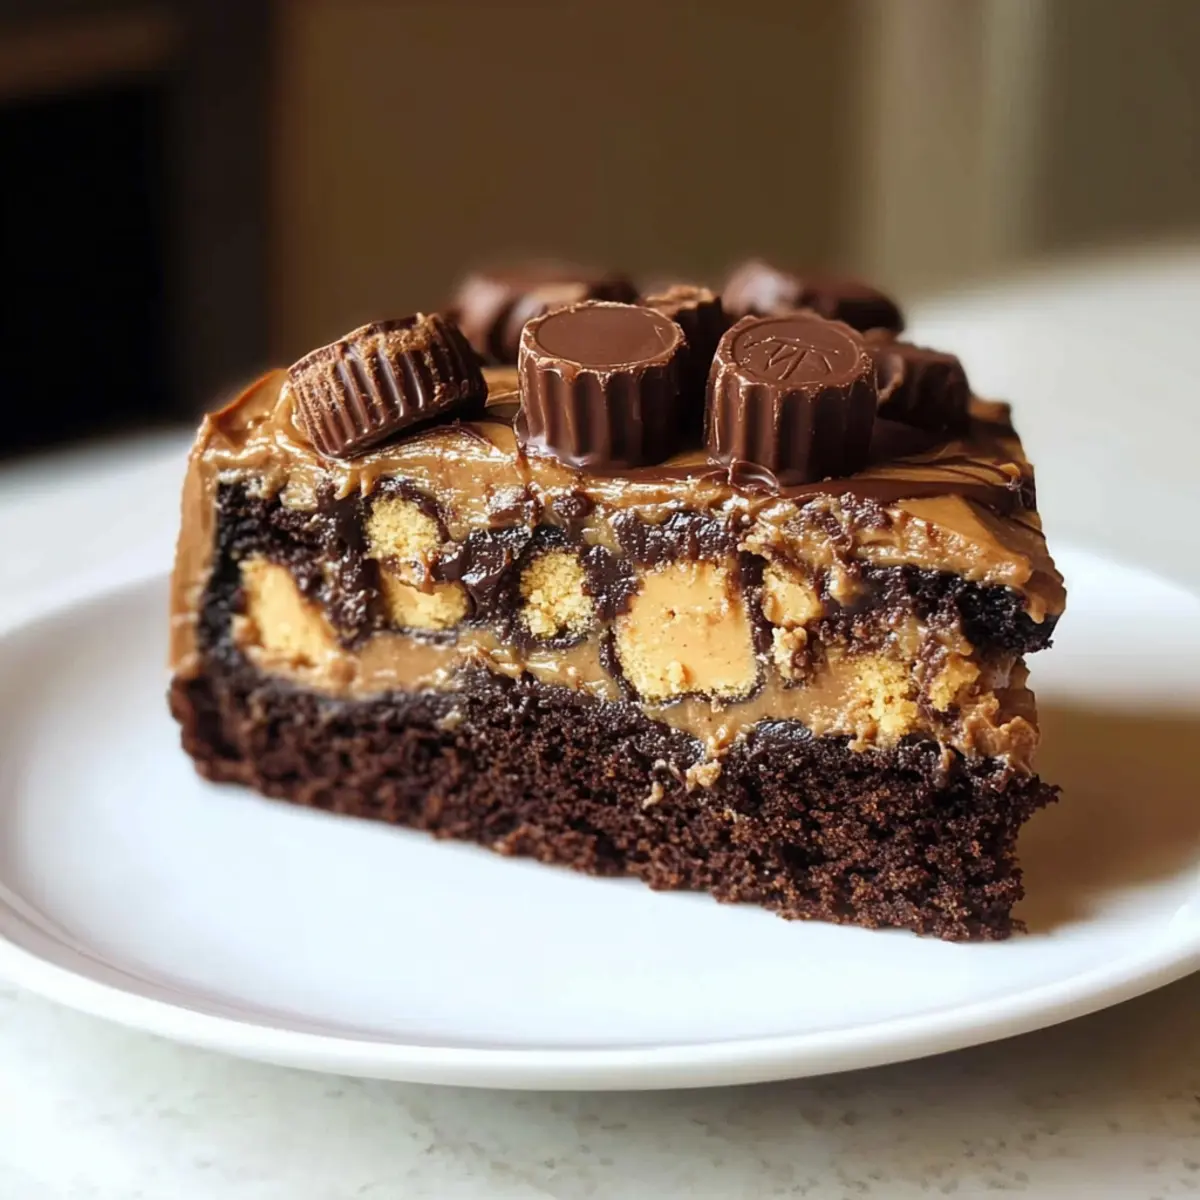
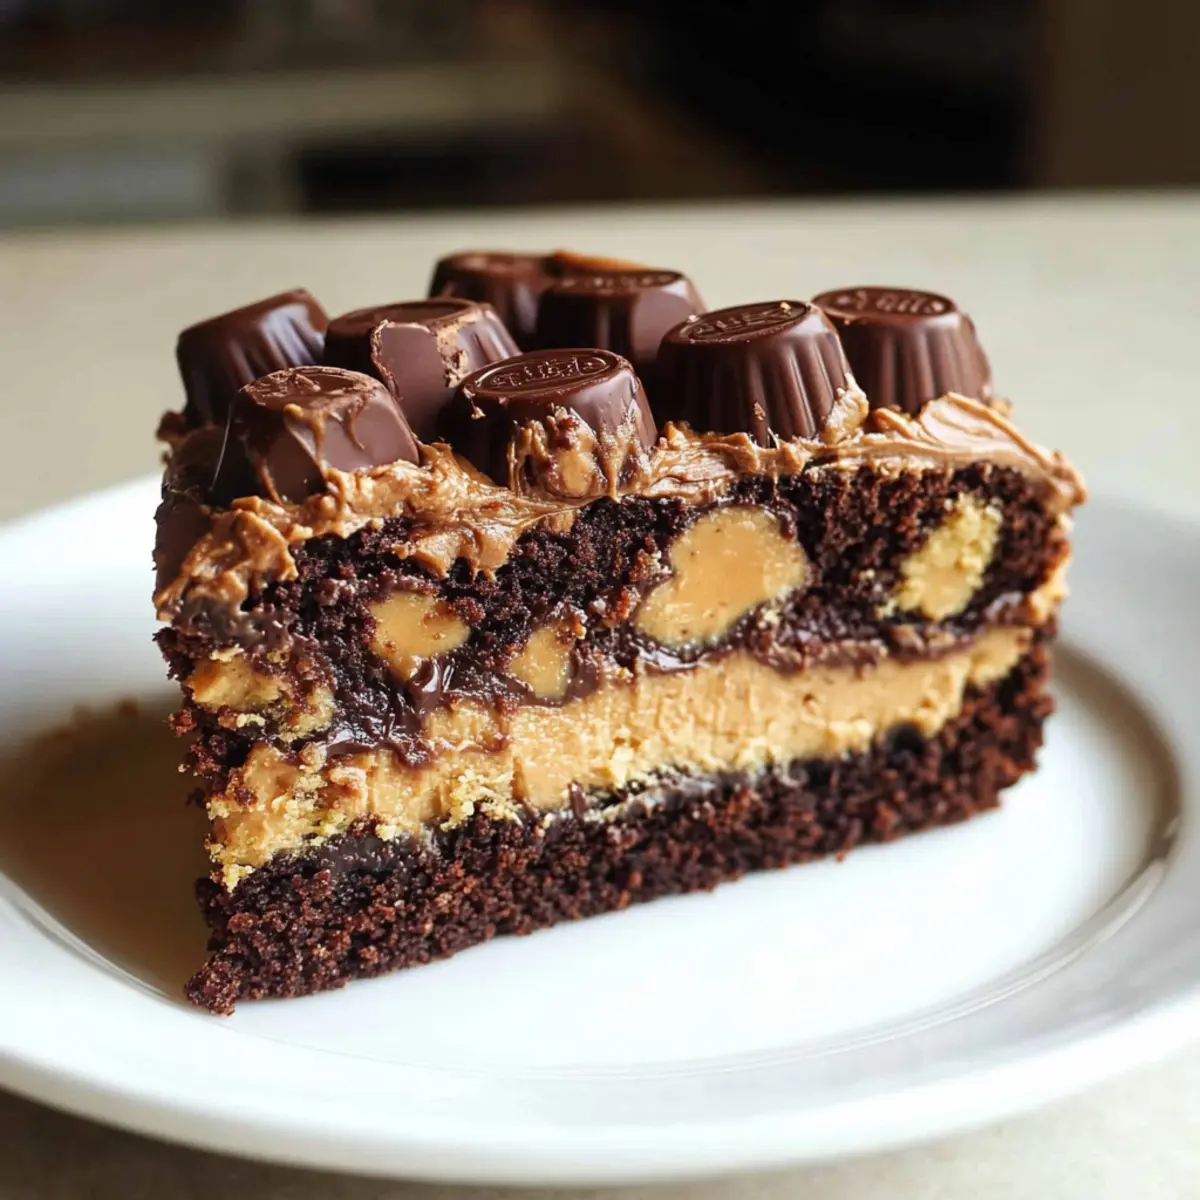
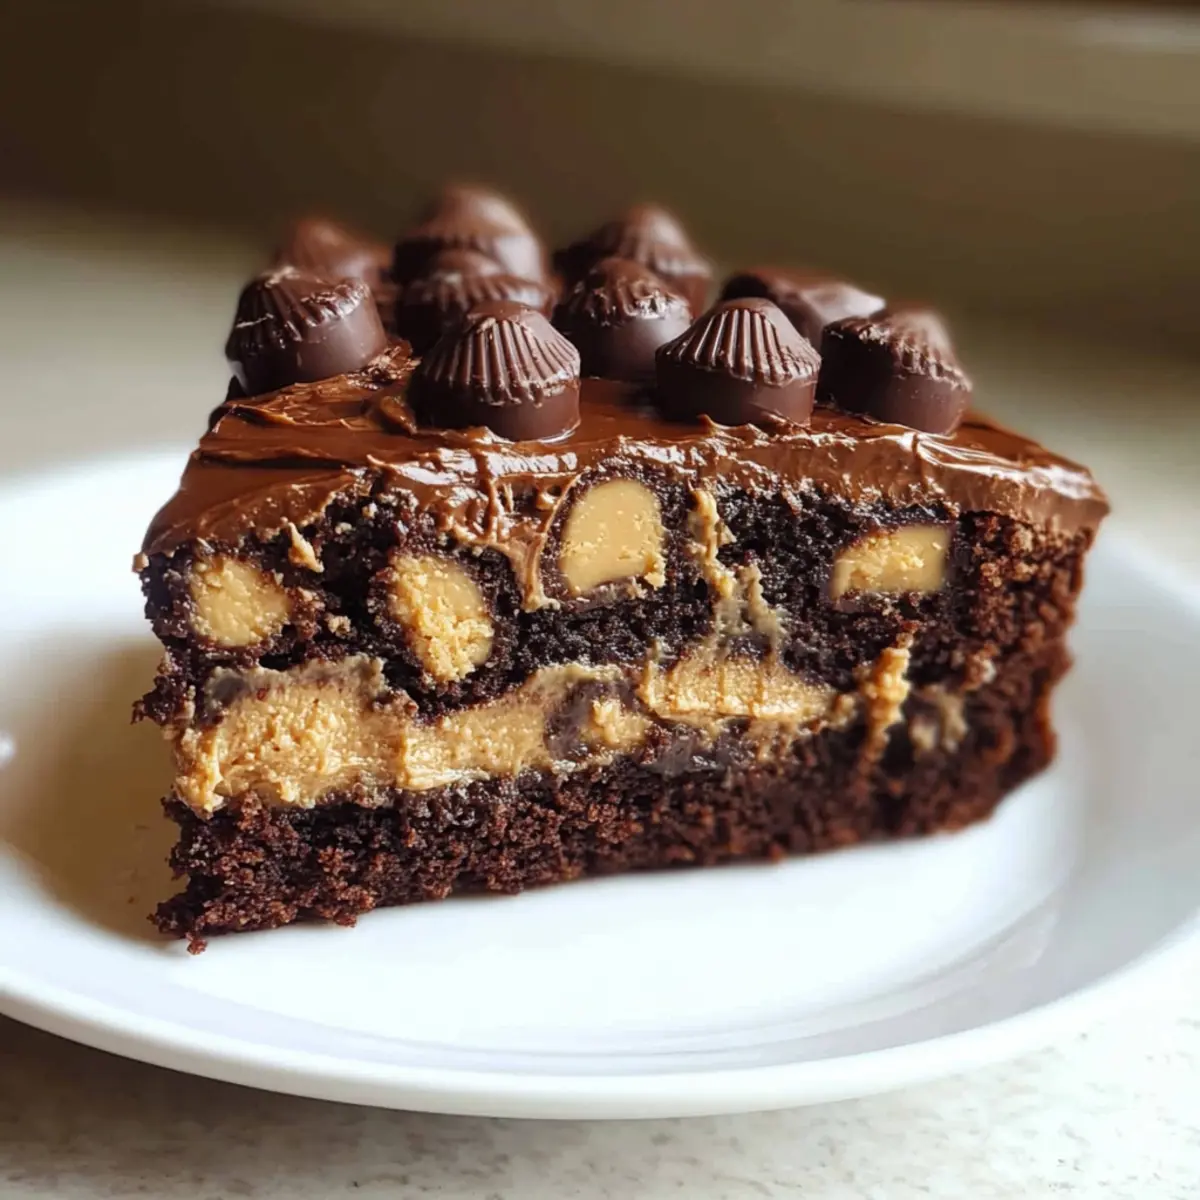
As I took my first bite of the Ultimate Reese’s Peanut Butter Earthquake Cake, a comforting wave of nostalgia washed over me. This easy dessert is more than just a cake; it’s a celebration of rich chocolate and creamy peanut butter swirls that transform any gathering into a cozy feast. Picture your friends and family huddled around the table, savoring each gooey bite and delighting in the aroma wafting through your kitchen like a candy shop. Not only is this indulgent treat quick to whip up, but it also holds a touch of magic, making it a guaranteed crowd-pleaser at any potluck. How could you resist the chance to present a dessert that’s as fun to make as it is to share? Let’s dive into the details of this chocolate-peanut butter dream!
Why is This Earthquake Cake So Irresistible?
Simplicity: You’ll love how easy this recipe is to follow, even if you’re new to baking. Just mix, swirl, and bake!
Decadent Flavor: The rich chocolate cake infused with creamy peanut butter creates a delightful explosion of taste that’s hard to beat.
Crowd-Pleaser: This cake is perfect for gatherings—everyone will want a slice, making it the highlight of your potluck spread.
Versatile Options: Feeling adventurous? Try adding crushed Oreos or marshmallow fluff for an exciting twist!
Make-Ahead Friendly: Bake it a day in advance for even richer flavors, and it keeps well at room temperature for three days.
Serve with Style: Pair it with a scoop of vanilla ice cream for an irresistible dessert experience that guests will rave about.
Reese’s Peanut Butter Earthquake Cake Ingredients
• Here’s everything you need to whip up this indulgent delight!
For the Cake
- Chocolate Cake Mix – The foundation of the cake; opt for homemade chocolate cake batter for a personal touch.
- Water – Hydrates the mix, contributing to a luscious texture; follow instructions for precise measurements.
- Oil – Adds moisture; vegetable or canola oil works best, but coconut oil adds a lovely hint of flavor.
- Eggs – Essential for structure; always use large eggs for the best results.
For the Peanut Butter Swirl
- Peanut Butter – This is the star of the show, creating a creamy swirl; sunflower seed butter is a suitable nut-free alternative.
- Powdered Sugar – Sweetens the mixture, ensuring it’s spreadable; adjust to taste for your preferred sweetness.
- Melted Butter – Enhances the richness of the peanut butter; no substitutes needed unless allergies are a concern.
For the Toppings
- Chopped Reese’s Cups – Melt into gooey pockets of joy; feel free to swap in chocolate caramel candies if desired.
- Chocolate Chips – Elevate the chocolate flavor; dark chocolate chips give a deeper taste, but semi-sweet works beautifully as well.
This Reese’s Peanut Butter Earthquake Cake is sure to be a hit at any event!
Step‑by‑Step Instructions for Reeses Peanut Butter Earthquake Cake
Step 1: Preheat the Oven
Begin by preheating your oven to 350°F (175°C). While that warms up, grab a 9×13-inch baking dish and generously grease it with butter or non-stick spray. This ensures that your Ultimate Reese’s Peanut Butter Earthquake Cake comes out easily after baking, revealing its deliciously gooey interior.
Step 2: Mix the Cake Batter
In a large mixing bowl, combine your chocolate cake mix, water, oil, and eggs. Use a hand mixer or whisk to beat the mixture until smooth, about 2 minutes. Make sure there are no dry lumps left, creating a thick and rich batter perfect for the base of your earthquake cake.
Step 3: Pour the Batter
Once your chocolate batter is smooth, pour it into the prepared baking pan. Spread the batter evenly across the bottom using a spatula or the back of a spoon, making sure it fills the corners. This layer serves as the foundation that will cradle the heavenly peanut butter swirls when baked.
Step 4: Prepare the Peanut Butter Swirl
In another mixing bowl, combine peanut butter, powdered sugar, and melted butter. Mix these ingredients together until smooth and creamy. This luscious peanut butter mixture will create the perfectly indulgent swirl in your Ultimate Reese’s Peanut Butter Earthquake Cake, so don’t rush this step!
Step 5: Create the Swirl
Drop spoonfuls of the peanut butter mixture over the chocolate batter in the baking pan. Using a butter knife, gently swirl the peanut butter into the batter, making 3-4 smooth swirls. Be careful not to mix too thoroughly; you want to maintain those beautiful pockets of peanut butter throughout the cake.
Step 6: Add Toppings
Now it’s time to top your cake! Scatter the chopped Reese’s cups and chocolate chips evenly over the surface. This step adds texture and sweetness, ensuring every bite of your Reese’s Peanut Butter Earthquake Cake is packed with delightful flavors.
Step 7: Bake the Cake
Place your beautifully assembled cake in the preheated oven and bake for 35-40 minutes. Keep an eye on it; you’ll know it’s done when the edges are set and the center has a slight jiggle. A toothpick inserted into the center should come out with moist crumbs, indicating divine decadence.
Step 8: Cool Before Slicing
Once baked, remove your cake from the oven and allow it to cool in the pan completely. This cooling period is essential for achieving the best texture and allows the flavors to meld beautifully before you slice into your delicious Ultimate Reese’s Peanut Butter Earthquake Cake.
Reeses Peanut Butter Earthquake Cake Variations
Feel free to unleash your creativity as you customize this delectable dessert with these delicious twists!
-
Nut-Free: Replace peanut butter with sunflower seed butter and leave out the Reese’s cups for a nut-free delight.
-
Chocolate Caramel: Swap out chopped Reese’s for chocolate caramel candies for a gooey, chewy texture that complements the cake.
-
Marshmallow Fluff: Add a layer of marshmallow fluff between the cake and peanut butter for an extra layer of sweetness that will delight your taste buds.
-
Crushed Oreos: Sprinkle crushed Oreos on top before baking for a delightful cookie crunch and added texture.
-
Flavor Boost: Enhance the chocolate flavor by using dark chocolate chips instead of semi-sweet for a richer experience.
-
Flavor Infusions: Add a teaspoon of vanilla extract to the peanut butter mixture for an enticing aroma and flavor boost.
-
Decorative Finish: Drizzle melted chocolate or peanut butter over the top after baking for an eye-catching presentation that’ll impress your guests.
-
Peanut Butter Swirl Variations: Mix in some cocoa powder with your peanut butter mixture for a double chocolate experience that amplifies the indulgence!
With these easy adaptations, your Ultimatem Reese’s Peanut Butter Earthquake Cake can become a new family favorite, ensuring everyone gets a slice of happiness at your gatherings. And if you’re curious to explore more, consider pairing this cake with a scoop of ice cream or trying your hand at delicious recipes like Garlic Butter Chicken for a delightful meal balance that complements your sweet dessert perfectly.
How to Store and Freeze Reese’s Peanut Butter Earthquake Cake
Room Temperature: Keep the cake covered at room temperature for up to 3 days. This maintains its moist and fluffy texture, perfect for those unexpected late-night cravings!
Fridge: If you prefer it chilled, store the cake in the refrigerator for up to a week. Just be sure to cover it tightly so it doesn’t absorb any odors!
Freezer: Wrap individual slices or the whole cake in plastic wrap, then foil, and freeze for up to 2-3 months. This way, you can enjoy your decadent Reese’s Peanut Butter Earthquake Cake whenever the mood strikes!
Reheating: When ready to enjoy, thaw in the fridge overnight and microwave a slice for about 10-15 seconds to bring back that gooey warmth.
Make Ahead Options
These Reese’s Peanut Butter Earthquake Cake is perfect for busy weeknights and meal prep enthusiasts! You can prepare the chocolate cake batter up to 24 hours in advance; simply cover the mixing bowl and refrigerate it to maintain its freshness. Additionally, mix the peanut butter swirl ahead of time and store it separately in the refrigerator. When you’re ready to bake, just pour the chilled batter into your prepared baking pan, add the peanut butter mixture, swirl, and top with Reese’s cups and chocolate chips. This way, you’ll enjoy just as delicious a cake with minimal effort, ready to impress your guests!
Helpful Tricks for Reese’s Peanut Butter Earthquake Cake
-
Day-Ahead Baking: Bake your cake a day in advance to enhance the flavors! It allows the chocolate and peanut butter to meld beautifully, making each slice even more delightful.
-
Cutting Technique: For clean slices, use a hot, dry knife. Run the knife under hot water, then dry it off before cutting to avoid sticky messes.
-
Watch Your Time: Check for doneness about 5 minutes before the minimum baking time. Look for set edges and a slightly jiggly center to prevent overbaking.
-
Nut-Free Alternatives: If you need a nut-free dessert, simply swap peanut butter with sunflower seed butter and skip the Reese’s cups for similar indulgence.
-
Swirling Tips: When swirling the peanut butter mixture into the cake batter, go gentle. Aim for 3-4 swirls to maintain pockets of peanut butter without overmixing!
-
Flavor Enhancements: Experiment with variations like crushed Oreos or marshmallow fluff for unexpected delight in your Reese’s Peanut Butter Earthquake Cake!
What to Serve with Reese’s Peanut Butter Earthquake Cake
Indulging in this delightful dessert opens the door to a world of fantastic pairings that elevate your dining experience.
-
Vanilla Ice Cream: Creamy and smooth, it perfectly contrasts the rich chocolate cake, providing a refreshing balance. The coldness of the ice cream also enhances the cake’s gooey texture.
-
Whipped Cream: A light and airy topping that adds a fluffy contrast, elevating each slice to new heights of indulgence. It also helps to tone down the sweetness for a perfect bite.
-
Chocolate Sauce: Drizzling warm chocolate sauce over the cake intensifies the chocolate experience, making your dessert even more decadent. It’s a chocoholic’s dream come true!
-
Fresh Berries: Juicy strawberries or raspberries add a burst of freshness, cutting through the richness of the cake and adding a pop of color. The tartness complements the sweetness beautifully.
-
Coffee: A warm cup of coffee is the perfect accompaniment, enhancing the chocolate flavor while providing a cozy beverage option that pairs wonderfully with dessert.
-
Peanut Butter Cup Milkshake: Blend some of those chopped Reese’s cups with ice cream and milk to create a rich milkshake that mirrors the cake’s flavors and creates a sweet, nostalgic drink!
Reese’s Peanut Butter Earthquake Cake Recipe FAQs
How do I choose the best chocolate cake mix?
Absolutely! For the Ultimate Reese’s Peanut Butter Earthquake Cake, opt for a high-quality chocolate cake mix. Check the ingredients for cocoa content, as a richer chocolate flavor enhances the overall taste. If you’re feeling adventurous, substitute with a homemade chocolate cake batter—it adds a personal touch that’s always appreciated!
What is the best way to store leftover cake?
Very simple! Keep the cake covered at room temperature for up to 3 days for optimal moisture. If you’d like a chillier treat, store it in the refrigerator for up to a week. Just ensure it’s tightly covered to prevent any pesky odors from infiltrating your decadent dessert!
Can I freeze Reese’s Peanut Butter Earthquake Cake?
Definitely! To freeze your cake, wrap individual slices or the entire cake tightly in plastic wrap, followed by foil. This protects against freezer burn and keeps it fresh. You can enjoy this indulgent treat for up to 2-3 months—perfect for any occasion or craving!
What should I do if my cake is overbaking?
If you notice your cake starting to dry out or overbake, take it out of the oven immediately! Ideally, check for doneness 5 minutes before the minimum baking time. Look for set edges with a slight jiggle in the center. A toothpick inserted should come out with moist crumbs, ensuring that rich texture we all love!
Are there any allergens I should consider?
Absolutely! If you or your guests have nut allergies, substitute peanut butter with sunflower seed butter for a nut-free alternative. Also, make sure the chocolate chips and toppings you select are free from nuts to keep it safe for everyone. Enjoy baking this delightful Reese’s Peanut Butter Earthquake Cake without worry!
Decadent Reeses Peanut Butter Earthquake Cake You'll Love
Ingredients
Equipment
Method
- Preheat your oven to 350°F (175°C) and grease a 9x13-inch baking dish.
- Combine chocolate cake mix, water, oil, and eggs in a large mixing bowl. Mix until smooth.
- Pour the batter into the prepared baking pan and spread evenly.
- In another bowl, mix peanut butter, powdered sugar, and melted butter until smooth.
- Drop spoonfuls of the peanut butter mixture over the chocolate batter and swirl gently.
- Scatter chopped Reese's cups and chocolate chips over the cake surface.
- Bake for 35-40 minutes until edges are set and center has a slight jiggle.
- Cool in the pan completely before slicing.
Leave a Reply