
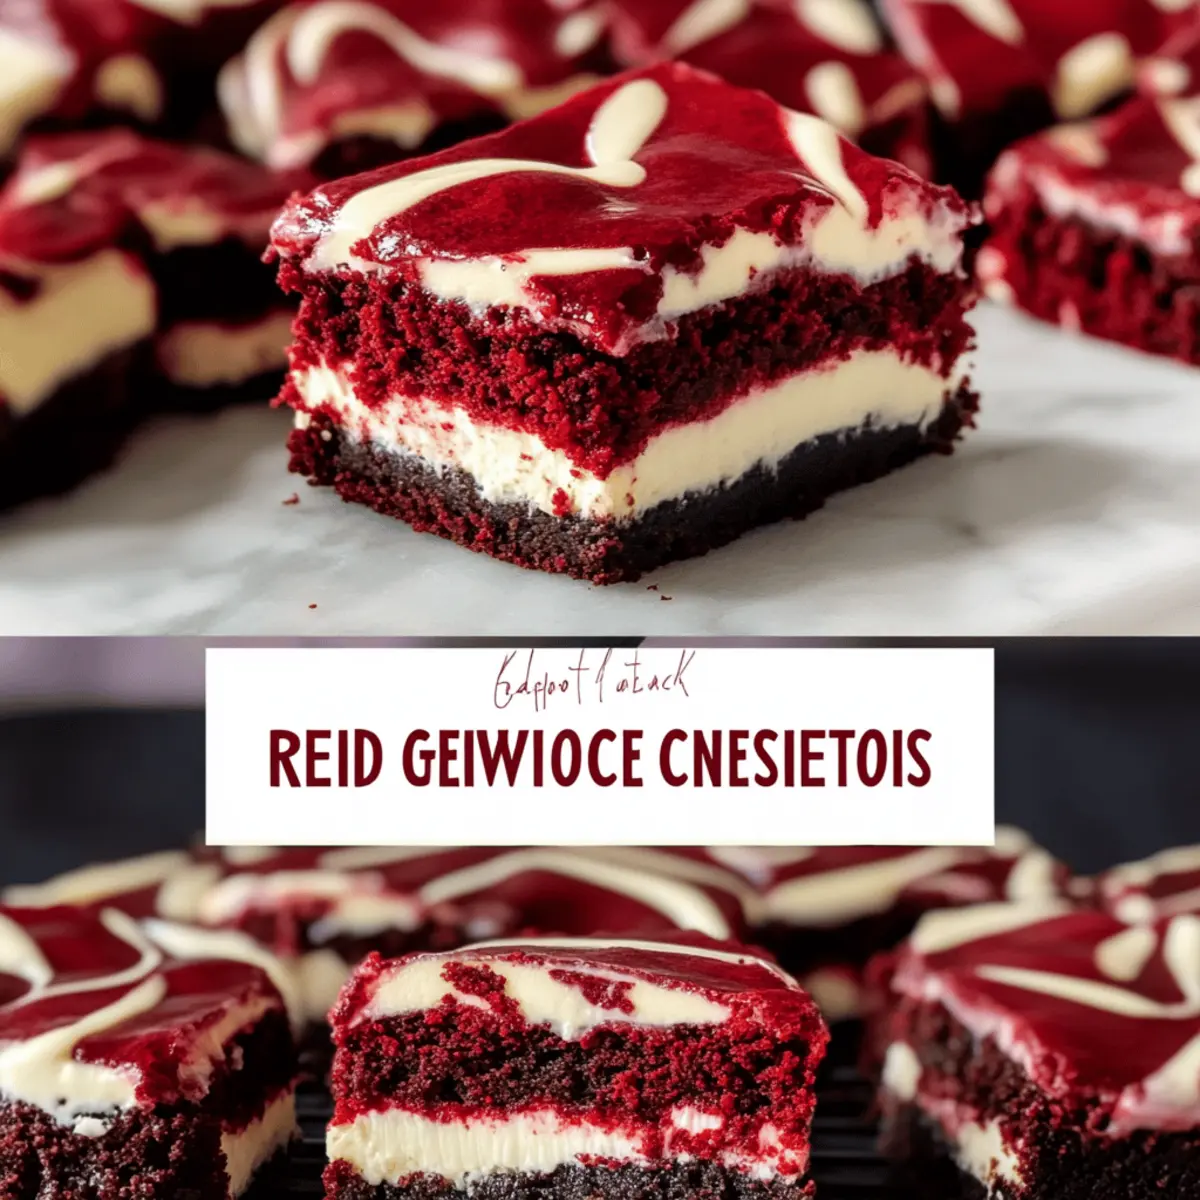
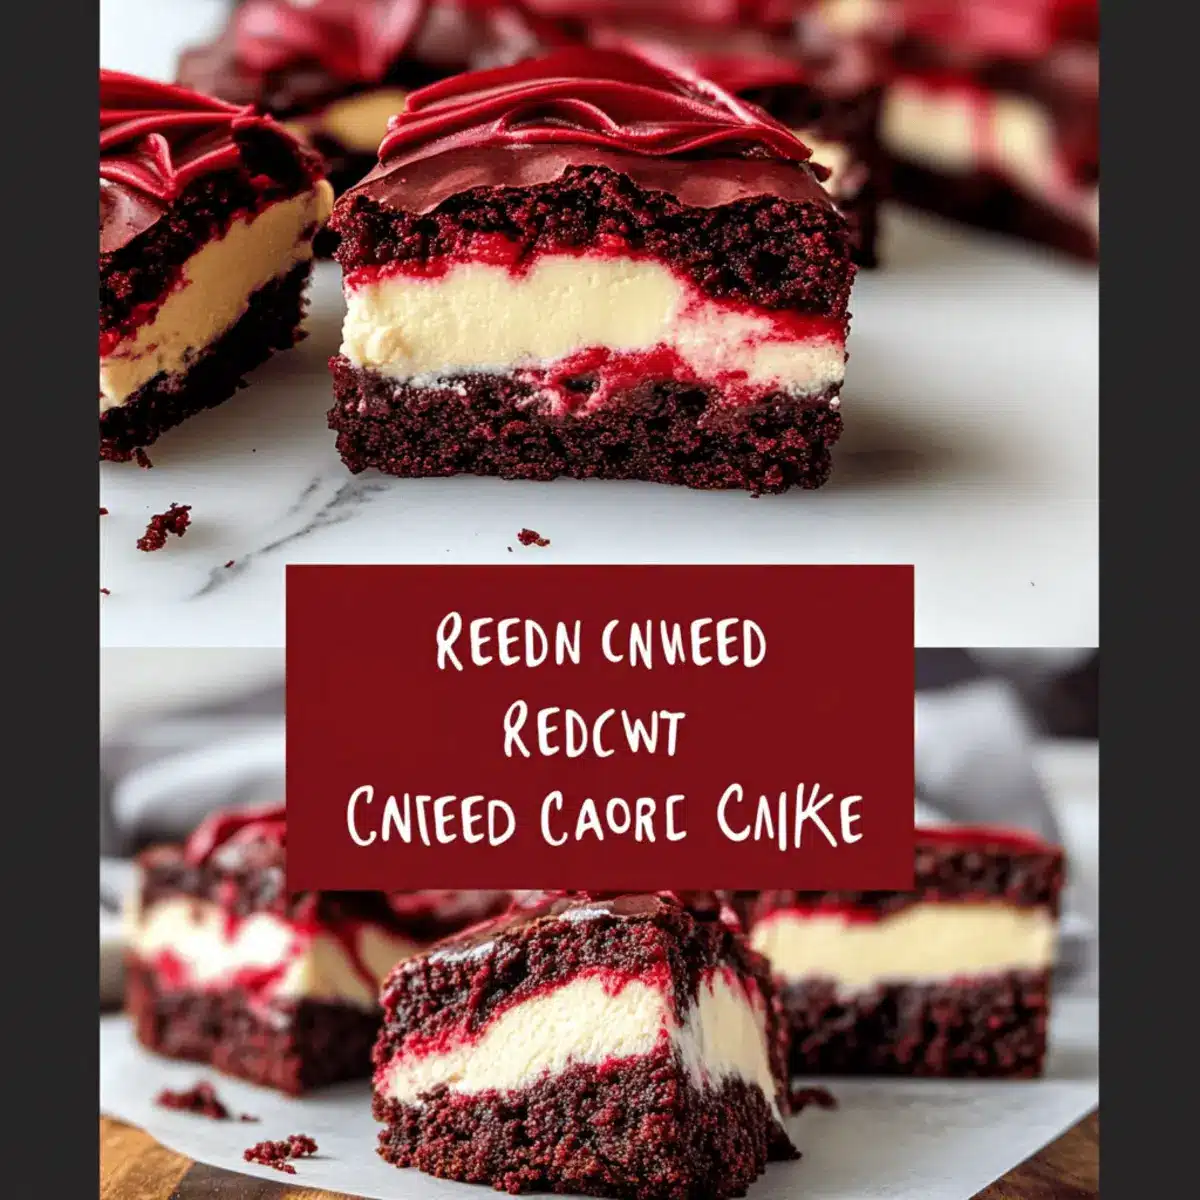
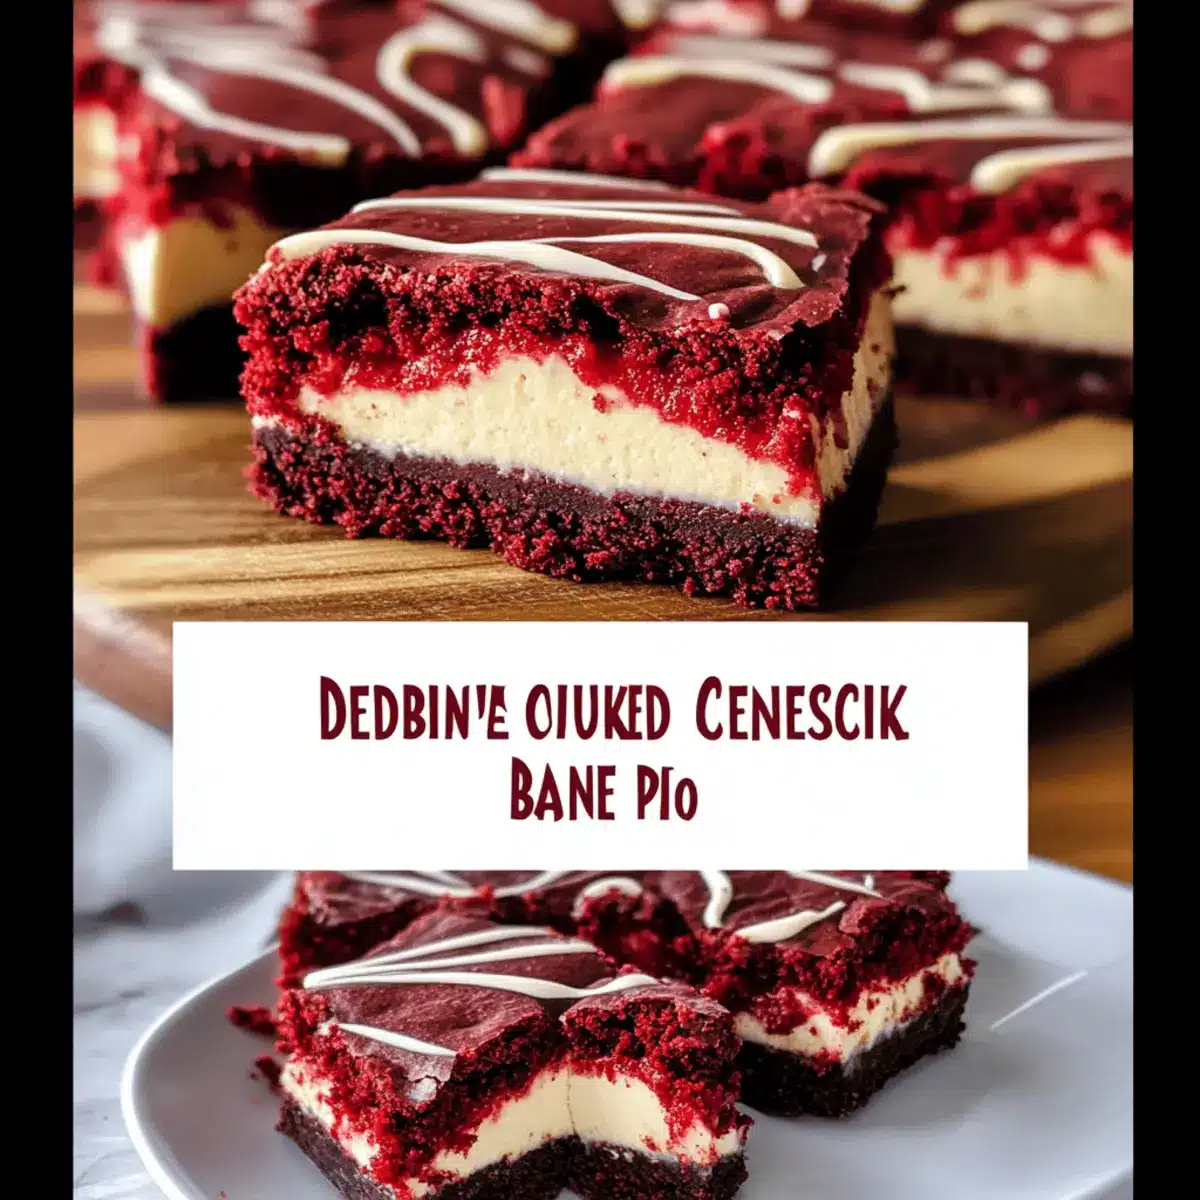
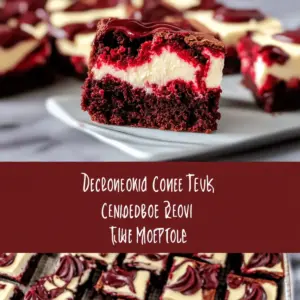
As I stood in the kitchen, the distinct aroma of melted chocolate filled the air, whisking me away to a cozy café that served the most indulgent desserts. Today, I’m excited to share my take on an unforgettable dessert: Red Velvet Cheesecake Brownies. These beautifully swirled delights are the perfect marriage of rich, chocolaty brownie richness and the creamy tang of cheesecake, making them ideal for any celebration or just a well-deserved treat. Not only do these brownies look fabulous, but they also deliver a luscious texture that will leave your guests guessing the secret to their irresistible taste. Plus, they’re quick to whip up, ensuring you can spend less time in the kitchen and more time enjoying the sweet rewards. Curious to see how this stunning dessert comes together? Let’s dive into the details!
Why are these brownies so irresistible?
Decadent indeed! The Red Velvet Cheesecake Brownies are a showstopper, combining two beloved desserts into one fabulous bite. Flavor explosion: The rich cocoa flavor pairs harmoniously with the creamy cheesecake swirl, delivering balance in every forkful. Visual appeal: Their striking red and white layers create an eye-catching dessert perfect for impressing guests. Quick and easy: With straightforward steps, you can whip these up in no time, leaving you free to indulge in delightful bites. Perfect for sharing: Ideal for gatherings or special occasions, your friends and family will rave and request seconds! Want a twist on other classic treats? Check out my Caramel Brownie Cheesecake or a hearty Chicken Alfredo Tater for more delicious inspiration!
Red Velvet Cheesecake Brownie Ingredients
Get ready to create a delightful treat!
For the Brownie Base
- Melted Butter – Provides richness and moisture; can substitute with vegetable oil for a lighter option.
- Sugar – Adds sweetness and structure; use brown sugar for a deeper flavor.
- Eggs – Binds ingredients together and adds moisture; no direct substitution recommended.
- Vanilla Extract – Enhances overall flavor; opt for pure vanilla for the best quality.
- Red Food Coloring – Gives the brownies their signature red hue; omit for a less vibrant color but it won’t look traditional.
- Cocoa Powder – Adds rich chocolate flavor; use Dutch-processed cocoa for a smoother taste.
- All-Purpose Flour – Provides structure; can substitute with a gluten-free flour blend.
- Salt – Balances sweetness and enhances flavors.
For the Cheesecake Layer
- Cream Cheese – Creates a rich cheesecake layer; soften for easy mixing or use a dairy-free alternative.
- Additional Sugar for Cheesecake Layer – Sweetens the cream cheese mixture.
- Additional Egg for Cheesecake Layer – Helps firm up the cheesecake portion; no direct substitution recommended.
Prepare to amaze your friends and family with these Red Velvet Cheesecake Brownies—they are sure to become a cherished recipe in your collection!
Step‑by‑Step Instructions for Red Velvet Cheesecake Brownies
Step 1: Preheat the Oven
Preheat your oven to 350°F (175°C). While it warms, prepare an 8×8-inch baking pan by lining it with parchment paper, allowing some overhang to make removing the brownies easier. This step ensures an even bake and prevents sticking, setting the stage for your luscious Red Velvet Cheesecake Brownies.
Step 2: Prepare the Brownie Batter
In a large mixing bowl, whisk together the melted butter and sugar until the mixture is smooth and glossy. Incorporate the eggs, vanilla extract, and red food coloring, blending until fully combined. Gradually sift in the cocoa powder, flour, and salt, gently folding until just combined to maintain a fudgy texture without overmixing.
Step 3: Make the Cheesecake Layer
In a separate bowl, beat the softened cream cheese with the additional sugar until creamy and smooth. Add the additional egg and a splash of vanilla extract; mix until the cheesecake batter is lump-free and velvety. This rich layer will perfectly complement the brownie base, so set it aside while you assemble the dessert.
Step 4: Assemble the Brownies
Spread approximately 3/4 of the red velvet brownie batter evenly in the bottom of your prepared pan. Pour the cheesecake layer over the brownie base, smoothing it out with a spatula. Dollop the remaining brownie batter on top, then gently swirl it with a knife to create a beautiful marbled effect.
Step 5: Bake
Place the assembled Red Velvet Cheesecake Brownies in the oven and bake for 30-35 minutes. The brownies are done when the edges are set and the center appears slightly moist but not jiggly; a toothpick inserted should come out with only a few moist crumbs.
Step 6: Cool and Chill
Once baked, remove the brownies from the oven and allow them to cool completely in the pan on a wire rack. For cleaner cuts, chill the pan in the refrigerator for at least 30 minutes. This cooling period enhances the flavors and makes slicing easier.
Step 7: Serve
Once chilled, lift the brownies out of the pan using the parchment paper overhang. Cut them into squares and serve them plain or with a drizzle of whipped cream or chocolate sauce for an extra touch of decadence. Enjoy these Red Velvet Cheesecake Brownies and watch them disappear!
Red Velvet Cheesecake Brownies Variations
Feel free to let your creativity flow and customize these delightful brownies to suit your taste buds!
-
Dairy-Free: Swap cream cheese for a dairy-free alternative and use plant-based butter to make these brownies vegan-friendly. They will still be creamy and delicious!
-
Nutty Twist: Add a sprinkle of chopped pecans or walnuts into the brownie batter for an extra layer of texture and flavor. The nuts bring a lovely crunch that complements the softness of the brownies.
-
White Chocolate: Fold in white chocolate chips into the brownie batter for a sweet and creamy contrast to the red velvet. The melted chips will add delightful pockets of sweetness!
-
Spicy Kick: Incorporate a pinch of cinnamon or a dash of cayenne pepper into the brownie batter for a surprising warmth. This twist creates a lovely depth of flavor that elevates the classic recipe.
-
Herb Infusion: Experiment with mint or lavender extract instead of vanilla for an aromatic experience. Just a few drops can transform your brownies into a refreshing dessert.
-
Caramel Swirl: Drizzle caramel sauce over the cheesecake layer before swirling. This adds a decadent sweetness that complements the tangy creaminess beautifully.
-
Chocolate Peanut Butter: Blend in some peanut butter into the cheesecake layer for a fantastic flavor combination. The nutty richness pairs oh-so-well with the chocolatey brownie base.
-
Frozen Treat: Slice the brownies and freeze them for an icy dessert. Enjoy them cold on a hot summer day; the creamy cheesecake will still remain a delightful treat!
Let your taste buds lead the way! These variations can take your Red Velvet Cheesecake Brownies to another level of deliciousness. And if you’re looking for more dessert inspiration, don’t miss out on the creamy goodness of my Caramel Brownie Cheesecake or get hearty flavor ideas from the savory Chicken Alfredo Tater.
Expert Tips for Red Velvet Cheesecake Brownies
-
Perfect Consistency: Ensure your melted butter is slightly cooled before mixing with sugar to avoid a greasy batter and achieve a delightful texture in your Red Velvet Cheesecake Brownies.
-
Avoid Overmixing: Gently fold in dry ingredients to keep the brownies fudgy. Overmixing can lead to dry brownies instead of the intended moist and rich flavor.
-
Layering Technique: When assembling, spoon the brownie and cheesecake layers carefully, then swirl gently. This maintains distinct layers and enhances visual appeal without fully blending.
-
Cooling Matters: Allow brownies to cool completely before slicing. Chilling them for at least 30 minutes will provide cleaner cuts and improve the overall presentation.
-
Slice with Care: Use a sharp knife to cut the brownies, wiping it between cuts to maintain the gorgeous marbled effect and keep every slice looking fabulous.
What to Serve with Red Velvet Cheesecake Brownies?
Indulging in a slice of these brownies opens up a world of delightful pairings to enhance your dessert experience.
-
Vanilla Ice Cream: The creamy sweetness of vanilla ice cream beautifully contrasts with the rich flavors of the brownies, creating a harmonious balance. Picture a warm brownie crowned with a scoop of velvety vanilla—there’s nothing quite like it!
-
Berry Medley: A fresh mix of strawberries, raspberries, and blueberries adds a bright, tangy burst that cuts through the richness, elevating each bite. The juicy fruits also add a pop of color to your dessert plate.
-
Chocolate Drizzle: A warm chocolate sauce drizzled on top or served alongside enhances the decadent experience, making each forkful feel luxurious and indulgent.
-
Whipped Cream: Light and airy whipped cream provides a delightful contrast in texture. It’s the perfect topping to add a creamy softness that complements the dense brownie and cheesecake layers beautifully.
-
Espresso or Coffee: A rich cup of espresso or a smooth coffee pairs excellently, offering a bold contrast to the sweetness of the brownies. The warmth and bitterness of coffee enhance the chocolate flavor perfectly.
-
Minty Fresh Tea: A refreshing mint tea provides a cooling contrast to the warm, indulgent brownies, cleansing the palate and leaving a refreshing aftertaste.
These options not only complement the Red Velvet Cheesecake Brownies but also create an unforgettable experience for you and your guests!
Make Ahead Options
These Red Velvet Cheesecake Brownies are a fabulous choice for meal prep enthusiasts looking to save time! You can prepare the brownie batter and the cheesecake layer up to 24 hours in advance. Simply whisk the brownie ingredients and prepare the cheesecake mixture, then store them separately in airtight containers in the refrigerator. To maintain their quality, cover the mixtures tightly to prevent drying out. When you’re ready to bake, simply combine the layers as instructed and swirl them together, then bake as directed. This allows for a delightful treat that not only retains its rich flavor but also ensures you can enjoy a homemade dessert with minimal effort on a busy day!
How to Store and Freeze Red Velvet Cheesecake Brownies
Fridge: Keep the brownies in an airtight container for up to 5 days. This helps preserve their moist and creamy texture, so you can enjoy them a little longer!
Freezer: For longer storage, place the brownies in a freezer-safe container, layered with parchment paper, and freeze for up to 3 months. Thaw in the fridge for a few hours before serving.
Reheating: Warm individual squares in the microwave for about 10-15 seconds for a delightful treat. This will restore some of that gooey cheesecake goodness!
Room Temperature: If serving at a gathering, you can leave the brownies out for up to 2 hours. Just make sure they don’t sit out too long to maintain freshness!
Red Velvet Cheesecake Brownies Recipe FAQs
What should I look for when selecting red food coloring?
Absolutely! When choosing red food coloring, opt for a gel or paste version rather than a liquid one. Gel food coloring offers a more intense color and doesn’t alter the batter’s consistency as much. Look for products specifically labeled as “food coloring” in the baking aisle; these tend to give bolder results. I often prefer using a high-quality brand that is free from artificial additives, ensuring a vibrant hue that enhances the visual appeal of the Red Velvet Cheesecake Brownies.
What is the best way to store leftover brownies?
Very! To store your Red Velvet Cheesecake Brownies, place them in an airtight container at room temperature for up to 5 days. If you want to keep them longer, consider refrigerating them as this helps maintain their moisture. Ensure they are properly sealed to prevent drying out. If you’re planning to eat them later, I recommend wrapping individual pieces in plastic wrap to make grabbing a sweet treat easy and convenient!
Can I freeze these brownies? If so, how?
Absolutely! To freeze your Red Velvet Cheesecake Brownies, first ensure they are completely cooled. Then, wrap each brownie in plastic wrap. Place the wrapped brownies in a freezer-safe container or zip-top bag, making sure to remove as much air as possible to avoid freezer burn. They can be stored like this for up to 3 months. When you’re ready to enjoy them, simply thaw them in the refrigerator for a few hours or allow them to come to room temperature on the counter for about 30 minutes before serving!
What should I do if my cheesecake layer is too runny?
Very! If your cheesecake layer appears too runny before baking, it can be due to the cream cheese not being soft enough or overmixing. To troubleshoot this, make sure your cream cheese is at room temperature when you beat it with sugar. If it’s lumpy and hard to mix, microwave it in 10-second intervals until softened. For best results, avoid overmixing after adding the egg to keep the batter thick and creamy. Should it still feel runny, you can bake the brownies slightly longer to firm them up, but remember that the top may still be a bit wobbly.
Are these brownies suitable for a gluten-free diet?
Absolutely! If you want to make your Red Velvet Cheesecake Brownies gluten-free, simply substitute the all-purpose flour with a gluten-free flour blend. Make sure to use a blend that contains xanthan gum, which helps to mimic the texture of regular flour. I often recommend using brands specifically designed for baking, as they provide the best results. Enjoy your gluten-free treat without sacrificing flavor or texture!
Can I give these brownies to my pets?
No, I wouldn’t recommend that. While the ingredients in Red Velvet Cheesecake Brownies are delicious for humans, many are not suitable for pets. Chocolate and sugar can be harmful to dogs and cats, leading to health issues. Always keep sweet treats like these away from furry friends, and consider making pet-friendly treats specifically designed for their dietary needs.

Irresistible Red Velvet Cheesecake Brownies to Delight You
Ingredients
Equipment
Method
- Preheat your oven to 350°F (175°C) and line an 8x8-inch baking pan with parchment paper.
- In a large mixing bowl, whisk together melted butter and sugar until smooth. Incorporate eggs, vanilla extract, and red food coloring, blending until fully combined.
- Sift in cocoa powder, flour, and salt, folding gently to maintain fudgy texture.
- In a separate bowl, beat softened cream cheese with additional sugar until creamy. Add the additional egg and mix until lump-free.
- Spread 3/4 of the brownie batter evenly in the prepared pan. Pour the cheesecake layer over it, smoothing it out.
- Dollop remaining brownie batter on top, swirling gently with a knife to create a marbled effect.
- Bake for 30-35 minutes until edges are set and center is slightly moist. A toothpick should come out with a few moist crumbs.
- Allow brownies to cool completely in the pan, then chill in the refrigerator for at least 30 minutes before slicing.
- Lift out of the pan, cut into squares, and serve plain or with whipped cream or chocolate sauce.
Leave a Reply