
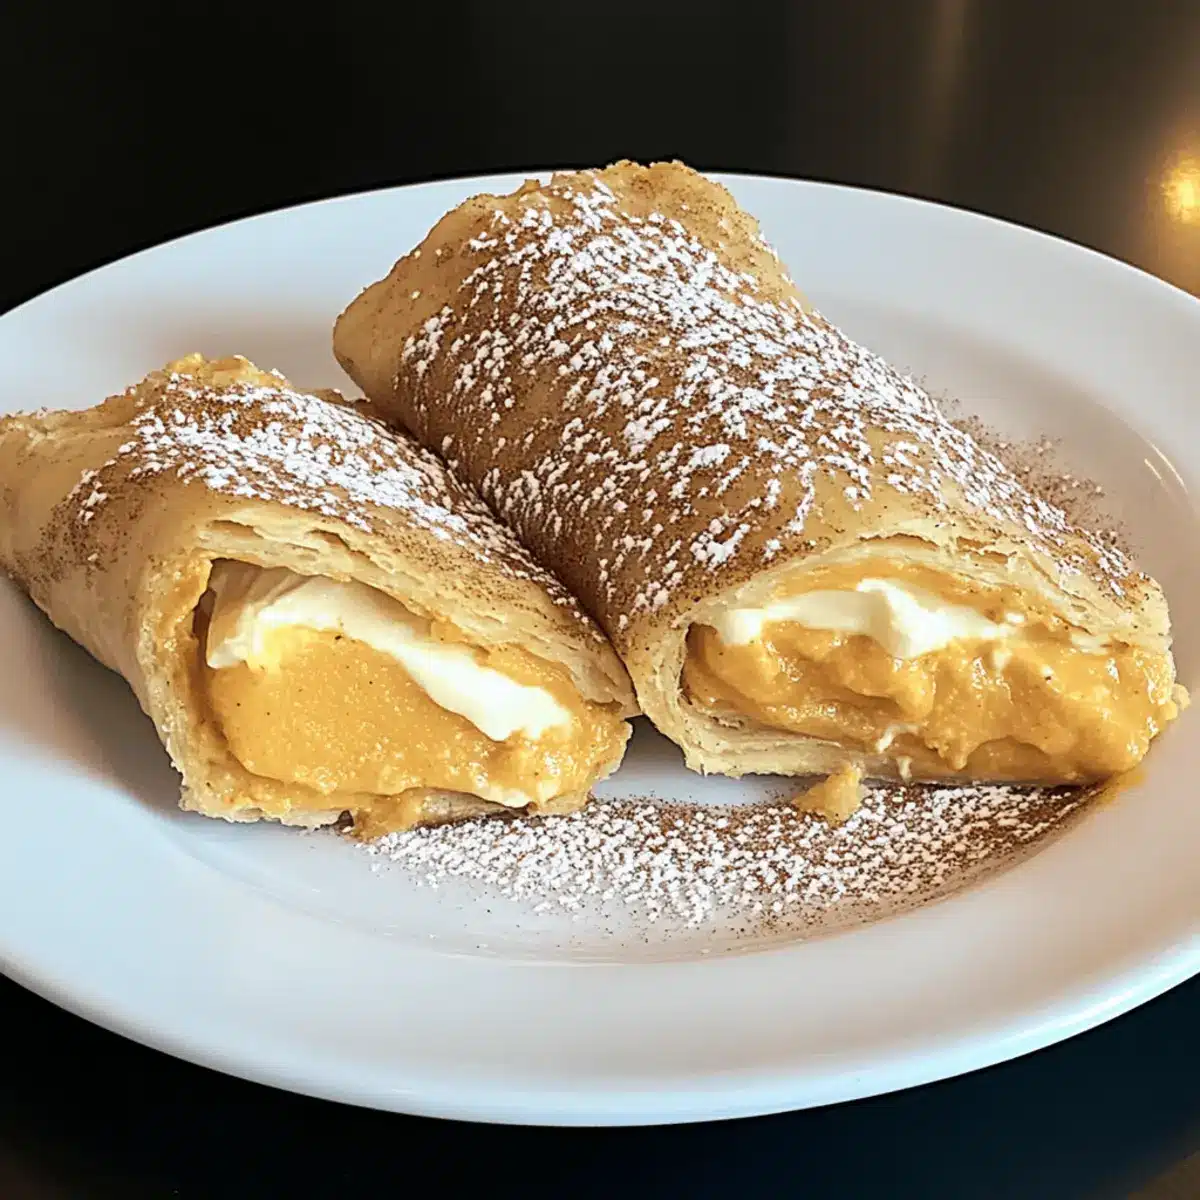
As the crisp air of autumn settles in, there’s something undeniably magical about the scent of pumpkin wafting through the kitchen. I’m always on the lookout for delightful ways to celebrate the season, and my latest creation—Pumpkin Cream Cheese Rollups—has quickly become a favorite. These effortless desserts bring together the comforting essence of pumpkin pie and the creamy goodness of cheesecake, all wrapped in a warm, crispy tortilla. Not only are they a fun twist on traditional fall treats, but they can also be made gluten-free, making them perfect for gatherings or cozy nights at home. Ready to indulge in a slice of autumn bliss? You won’t want to miss this delightful recipe!
Why Are Pumpkin Cream Cheese Rollups Irresistible?
Unforgettable Flavor: This dessert perfectly combines the seasonal warmth of pumpkin with a creamy cheesecake filling, making it a delightful treat for any occasion.
Easy to Make: With just a few simple ingredients, you can whip these up quickly, making them a stress-free option for family gatherings or last-minute get-togethers.
Versatile Options: You can easily switch to gluten-free tortillas for those with dietary restrictions, ensuring everyone can enjoy these delicious rollups.
Crowd Pleaser: Whether served as a dessert or a whimsical snack, these rollups are sure to impress your guests and keep them coming back for more. Pair them with a dollop of whipped cream or drizzled with caramel for extra indulgence. Don’t forget to check out our Pumpkin Cream Cheese for an amazing twist!
Pumpkin Cream Cheese Rollups Ingredients
Get ready to create an autumn delight with these essential components!
For the Rollups
- Flour Tortillas – Perfect for holding the creamy filling together; use unbaked varieties like La Tapatia or Sol de Oro for the best results.
- Cream Cheese – This key ingredient lends a rich, velvety texture; make sure it’s softened to room temperature for easy mixing.
- Canned Pumpkin – Adds the essential moisture and flavor; it’s the star of the filling and brings that irresistible pumpkin taste.
- Sugar – Sweetens both the filling and the coating; remember to split it into ½ cup for the filling and 1 cup for dusting.
- Pumpkin Pie Spice – Enhances the overall flavor; feel free to substitute with cinnamon if you prefer a simplified version.
- Whipped Topping – Lightens up the cream cheese mixture and helps achieve a fluffy filling; options include whipped cream or Cool Whip.
- Cinnamon – Infuses warmth in the sugar mix that coats the rollups; a flavorful addition for that comforting touch.
- Oil – Needed for frying; be generous to ensure the rollups fry evenly and achieve a golden-brown crust.
- Margarine (Optional) – For an extra layer of flavor when dipping the rollups post-frying; this is a delightful touch.
Step‑by‑Step Instructions for Pumpkin Cream Cheese Rollups
Step 1: Mix the Filling
In a spacious mixing bowl, blend 8 oz of softened cream cheese, 1 cup of canned pumpkin, ½ cup of sugar, and 2 teaspoons of pumpkin pie spice using a hand mixer until the mixture is smooth and creamy. This should take about 2-3 minutes. The filling will be thick and beautifully integrated, giving you that deliciously vibrant pumpkin color.
Step 2: Fold in Whipped Topping
Gently fold in 2 cups of whipped topping into the pumpkin cream cheese mixture until well combined, yielding a light and airy filling. Ensure that the incorporation is smooth without deflating the mixture overly much. This will add a delightful fluffiness, perfect for your Pumpkin Cream Cheese Rollups.
Step 3: Chill the Mixture
Transfer the pumpkin mixture into a large Ziploc bag and seal it tightly. Refrigerate for at least 1 hour, allowing the filling to thicken and flavors to meld beautifully. This step is essential for achieving the right consistency that makes filling your tortillas easier.
Step 4: Heat the Oil
In a large frying pan, pour in enough oil to reach halfway up the sides, then heat it over medium heat. You’re looking for the oil temperature to be around 350°F, which is ideal for frying. To check readiness, drop a small piece of tortilla into the oil; it should sizzle upon contact.
Step 5: Prepare the Sugar-Coating
While the oil heats, mix 1 cup of sugar and 1 tablespoon of cinnamon in a shallow bowl, creating a flavorful cinnamon-sugar blend. Set it aside as you’ll coat your fried rollups in this sweet mixture, adding that irresistible crunch and flavor to each bite.
Step 6: Pipe the Filling
Cut a small corner off the Ziploc bag, then lay a tortilla flat on your workspace. Pipe a generous line of the pumpkin mixture down the center, leaving about a 1-inch edge on all sides for easier rolling. The tortilla should appear filled but manageable, ensuring a delightful surprise when you take each bite.
Step 7: Roll and Secure
Carefully roll the tortilla away from you, keeping it tight and secure; use a toothpick if necessary to prevent the filling from oozing out. Each Pumpkin Cream Cheese Rollup should be tightly rolled to maintain its shape during frying and ensure no filling escapes during the cooking process.
Step 8: Fry the Rollups
Gently place the rolled tortilla in the hot oil seam-side down. Allow them to fry for about 2-3 minutes on each side, or until they turn a golden brown color and become delightfully crispy. Using tongs, monitor closely to ensure even frying and avoid burning.
Step 9: Coat with Cinnamon-Sugar
Once fried, immediately remove the rollups from the oil, letting excess oil drip off, and roll them in the cinnamon-sugar mixture until well coated. This step adds a delightful sweetness and texture, enhancing the overall flavor of your Pumpkin Cream Cheese Rollups.
Step 10: Slice and Serve
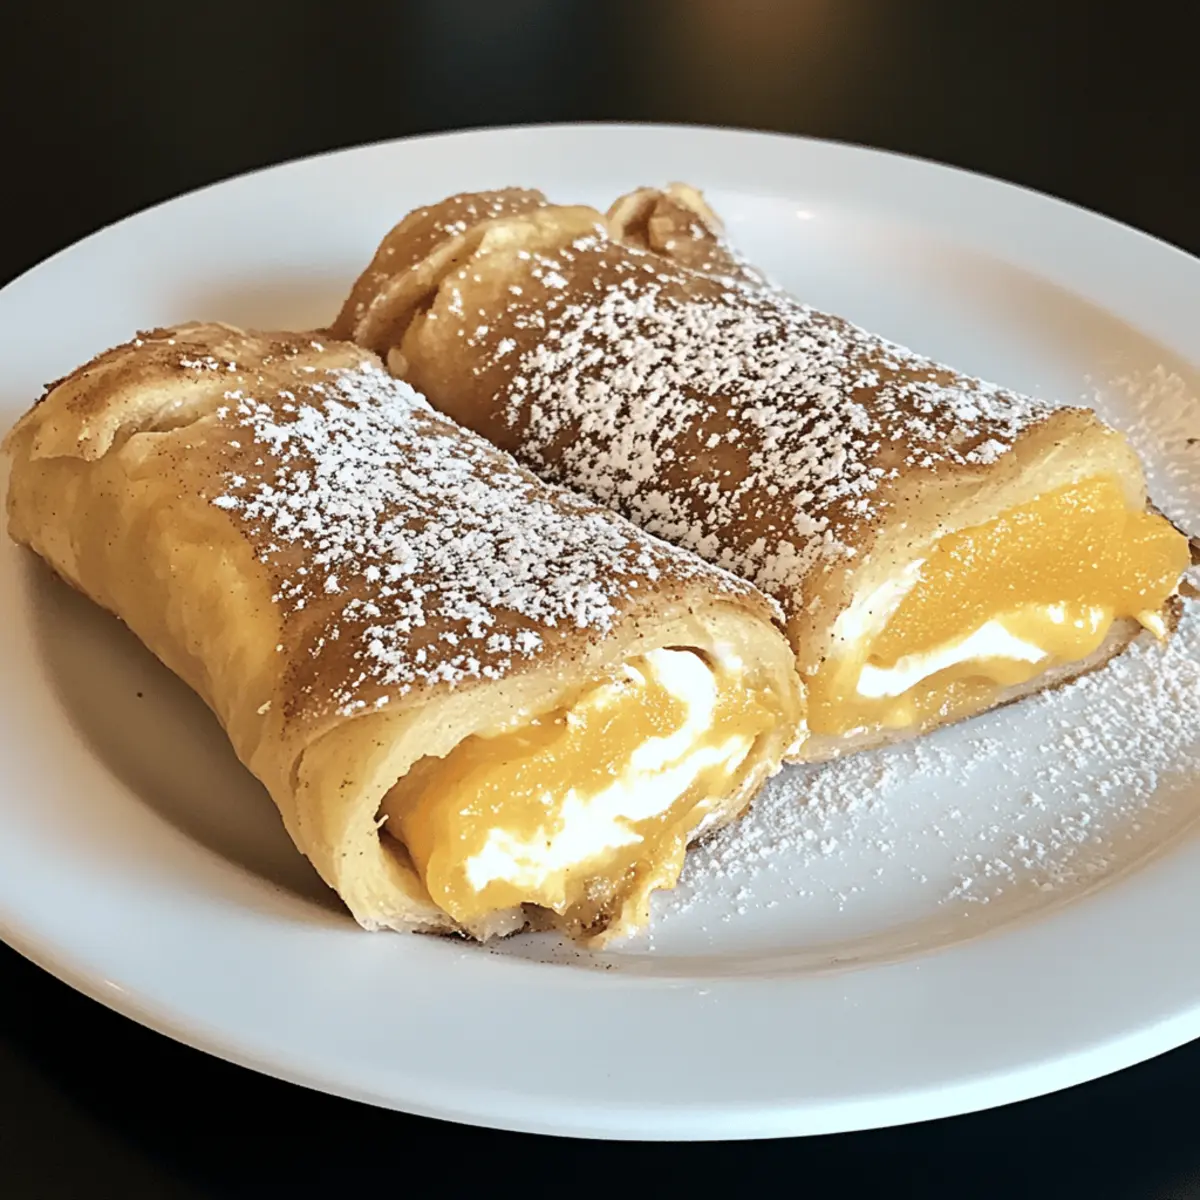
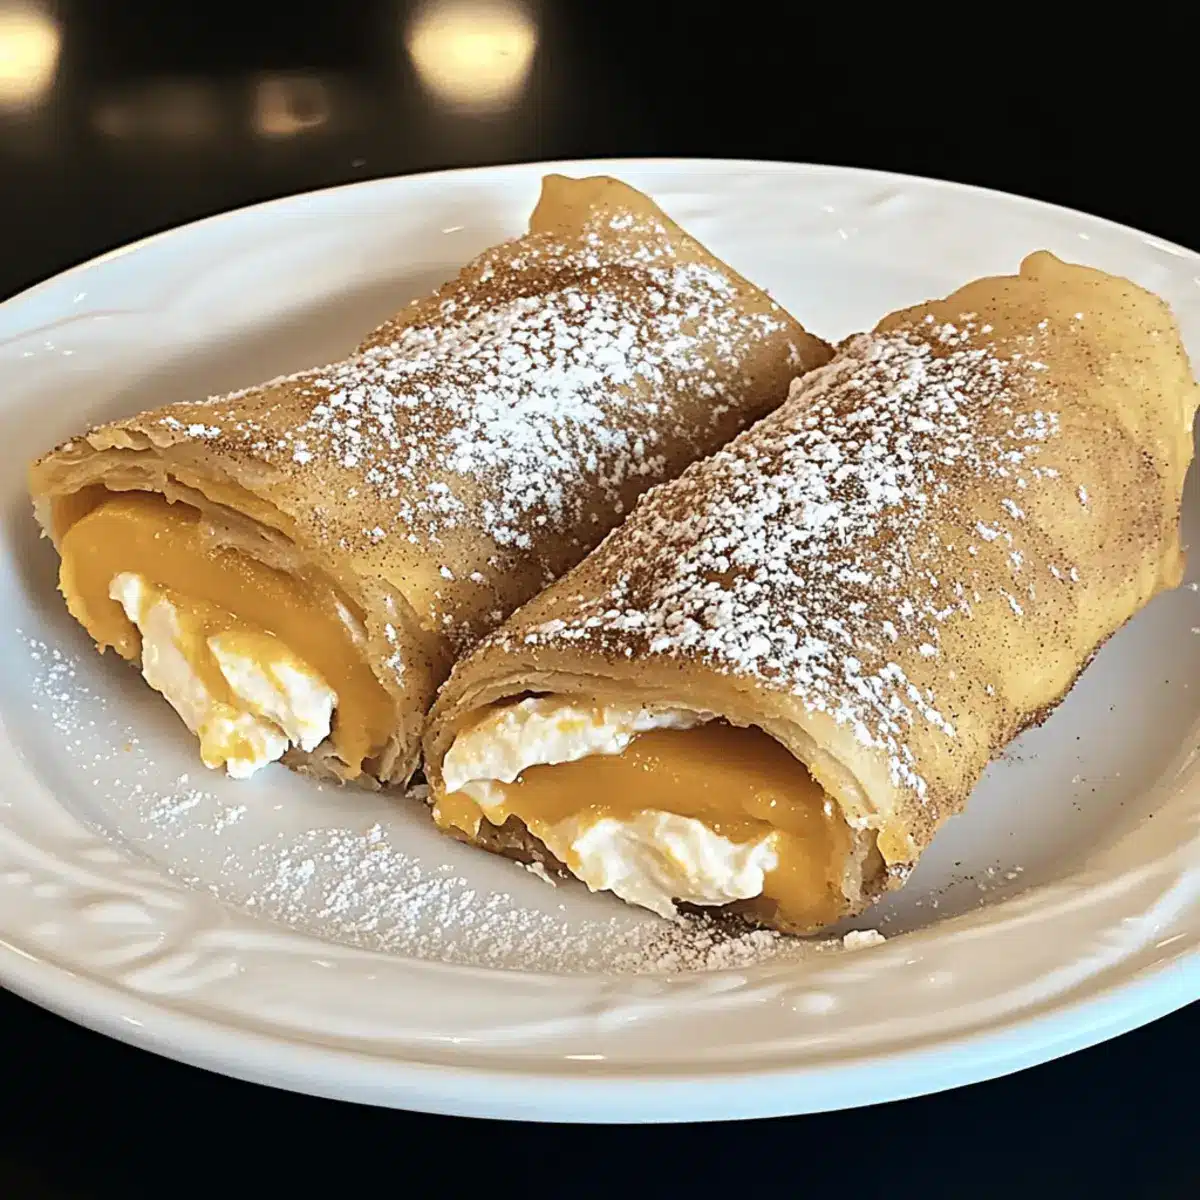
Finally, slice each rollup diagonally into bite-sized pieces for easy serving. Enjoy warm, optionally pairing with additional whipped cream or a sweet dipping sauce. These delightful treats are perfect for gatherings or a cozy dessert night at home, bringing the taste of fall to your table!
Pumpkin Cream Cheese Rollups Variations
Feel free to get creative with your Pumpkin Cream Cheese Rollups and enjoy a personal twist on this delightful treat!
- Gluten-Free: Use gluten-free tortillas to cater to dietary needs, ensuring everyone can indulge in this autumn delight.
- Nutty Addition: Add chopped walnuts or pecans to the filling for a lovely crunch and earthy flavor that complements pumpkin beautifully.
- Spiced Up: Enhance the flavor by adding a pinch of cayenne pepper to the cinnamon-sugar mixture for a warm, spicy kick.
- Flavor Boost: Substitute pumpkin pie spice with chai spice blend for a unique twist that adds an exciting aromatic character.
- Extra Creamy: Incorporate sour cream into the cream cheese filling for a tangy richness that elevates the overall taste.
- Sweet & Salty: Drizzle with caramel sauce or sprinkle a touch of sea salt on top after coating in the cinnamon-sugar mixture for the perfect sweet-and-salty balance.
- Fruit-Filled: Include finely chopped apples or pears in the pumpkin filling for a seasonal twist that provides additional moisture and sweetness.
- Churro Style: Roll the cooked rollups in a mixture of cinnamon and sugar before serving them with a side of warm chocolate sauce for dipping, resembling churros in flavor.
And while you’re exploring these fun variations, don’t forget to check out our delightful Pumpkin Cream Cheese and add a little variety to your dessert table!
Make Ahead Options
These Pumpkin Cream Cheese Rollups are perfect for meal prep enthusiasts! You can make the pumpkin cream cheese filling and refrigerate it for up to 24 hours before assembling. Simply mix the filling, transfer it into a Ziploc bag, and chill to allow the flavors to meld. The tortillas can also be rolled and secured with toothpicks, then stored in an airtight container in the fridge for up to 3 days. When you’re ready to serve, simply fry the rolled tortillas until golden brown and coat them in cinnamon-sugar for that irresistible crunch. This method ensures that your pumpkin cream cheese rollups are just as delicious and fresh, saving you time and hassle on busy weeknights.
Expert Tips for Pumpkin Cream Cheese Rollups
-
Cream Cheese Consistency: Ensure your cream cheese is fully softened; this step prevents lumps and creates a smooth filling for your Pumpkin Cream Cheese Rollups.
-
Frying Temperature Check: Monitor the oil temperature closely. If it’s too hot, the rollups can burn; too cool, and they’ll absorb excess oil. A mid-range sizzle indicates readiness.
-
Securing the Roll: Use toothpicks to secure your rollups if they feel loose. This makes frying and serving easier, ensuring that no luscious filling leaks out.
-
Coating Technique: Roll the fried rollups in the cinnamon-sugar mixture while they’re still hot for optimal adherence; this gives that warm, inviting sweetness every bite deserves.
-
Storage and Reheating: If making in advance, store rollups in an airtight container and reheat briefly in the oven; this helps maintain their crispness when serving later.
How to Store and Freeze Pumpkin Cream Cheese Rollups
Fridge: Store leftover rollups in an airtight container in the refrigerator for up to 3 days. This keeps them fresh and allows flavors to develop.
Freezer: For longer storage, freeze the rollups individually on a baking sheet, then transfer to a freezer bag for up to 2 months. This prevents sticking and keeps them well-preserved.
Reheating: To reheat, bake frozen rollups in a preheated oven at 350°F (175°C) for about 15 minutes or until heated through and crispy. Enjoy the delightful flavors of your Pumpkin Cream Cheese Rollups fresh!
Make-Ahead: These can be prepared a day in advance; just store them chilled in the fridge and reheat briefly before serving for a warm, delicious treat.
What to Serve with Pumpkin Cream Cheese Rollups
Indulging in pumpkin cream cheese rollups invites a delightful symphony of flavors to your table, making it essential to create a well-rounded meal experience.
- Warm Apple Cider: Embrace fall with a cup of warm apple cider, perfectly complementing the spices in the rollups and keeping you cozy.
- Roasted Pumpkin Soup: Creamy and warming, this soup echoes the pumpkin flavor, adding a savory balance to your sweet treats.
- Cinnamon Sugar Donuts: For the ultimate dessert extravaganza, serve fluffy cinnamon sugar donuts for a delightful texture contrast.
- Pecan Pie Bars: Their rich, nutty flavor provides a decadent addition, pleasing those with a sweet tooth and enhancing your pumpkin theme.
- Autumn Salad: Fresh greens tossed with cranberries and candied nuts provide a crunchy, zesty contrast to the creamy rollups, offering a burst of freshness.
- Spiced Hot Chocolate: Rich and velvety, a cup of spiced hot chocolate pairs beautifully with the warm, crunchy rollups, amplifying the fall vibes.
- Vanilla Ice Cream: A scoop of creamy vanilla ice cream makes a dreamy complement, adding a refreshing cold contrast to the warm rollups.
- Chai Tea: The aromatic spices in chai tea harmonize beautifully with the flavors in your rollups, creating a comforting pairing for chilly evenings.
- Ginger Snap Cookies: These spicy cookies provide an exciting twist, adding a crunchy texture that wonderfully contrasts with the creaminess of the rollups.

Pumpkin Cream Cheese Rollups Recipe FAQs
What is the best way to select canned pumpkin?
Absolutely! When choosing canned pumpkin, look for pure pumpkin puree rather than pumpkin pie filling, which contains added sugars and spices. Check the label to ensure there are no additives. A can that specifies “100% pure pumpkin” on the label is the best choice for these rollups.
How should I store leftover Pumpkin Cream Cheese Rollups?
For sure! Store any leftover rollups in an airtight container in the fridge for up to 3 days. Make sure they cool to room temperature before sealing to reduce condensation, which can affect their texture. When you’re ready to enjoy them again, simply reheat in the oven for a few minutes to restore their crispness.
Can I freeze Pumpkin Cream Cheese Rollups?
Yes, definitely! To freeze, lay the cooked rollups on a baking sheet in a single layer. Freeze for about 1-2 hours until firm, then transfer them to a freezer bag or container, layering parchment paper between layers to prevent sticking. They can be stored for up to 2 months. Reheat from frozen in the oven at 350°F (175°C) for approximately 15 minutes until warmed through and crispy.
What if my rollups burst while frying?
No worries! If your rollups burst, it’s usually because they were overloaded with filling or rolled too loosely. Make sure to pipe the pumpkin mixture with just enough room to roll and secure tightly. If they do burst, try to minimize the heat to avoid burning and serve the delicious filling as a dip alongside!
Are Pumpkin Cream Cheese Rollups suitable for gluten-free diets?
Absolutely! You can easily make these rollups gluten-free by substituting flour tortillas with gluten-free alternatives, which are now widely available. Just ensure that all other ingredients, like your sugar and spices, are also gluten-free. Enjoy these festive treats without worry!
How long can I keep these rollups in the fridge?
You’ll be pleased to know that Pumpkin Cream Cheese Rollups can be stored in the refrigerator for up to 3 days. For the best flavor and texture, consume them within this timeframe. Simply reheat in the oven at 350°F (175°C) for about 5-10 minutes to enjoy their delightful crunch again!
Pumpkin Cream Cheese Rollups: The Ultimate Fall Treat
Ingredients
Equipment
Method
- In a spacious mixing bowl, blend cream cheese, canned pumpkin, sugar, and pumpkin pie spice using a hand mixer until smooth and creamy.
- Gently fold in whipped topping into the pumpkin cream cheese mixture until well combined.
- Transfer the pumpkin mixture into a large Ziploc bag and refrigerate for at least 1 hour.
- In a large frying pan, pour in enough oil to reach halfway up the sides and heat over medium heat.
- Mix sugar and cinnamon in a shallow bowl for coating.
- Cut a small corner off the Ziploc bag, lay a tortilla flat, and pipe the pumpkin mixture down the center.
- Carefully roll the tortilla away from you and use a toothpick to secure if necessary.
- Fry the rolled tortilla seam-side down until golden brown, about 2-3 minutes on each side.
- Remove from oil and roll in the cinnamon-sugar mixture until well coated.
- Slice each rollup diagonally into bite-sized pieces and serve warm.
Leave a Reply