
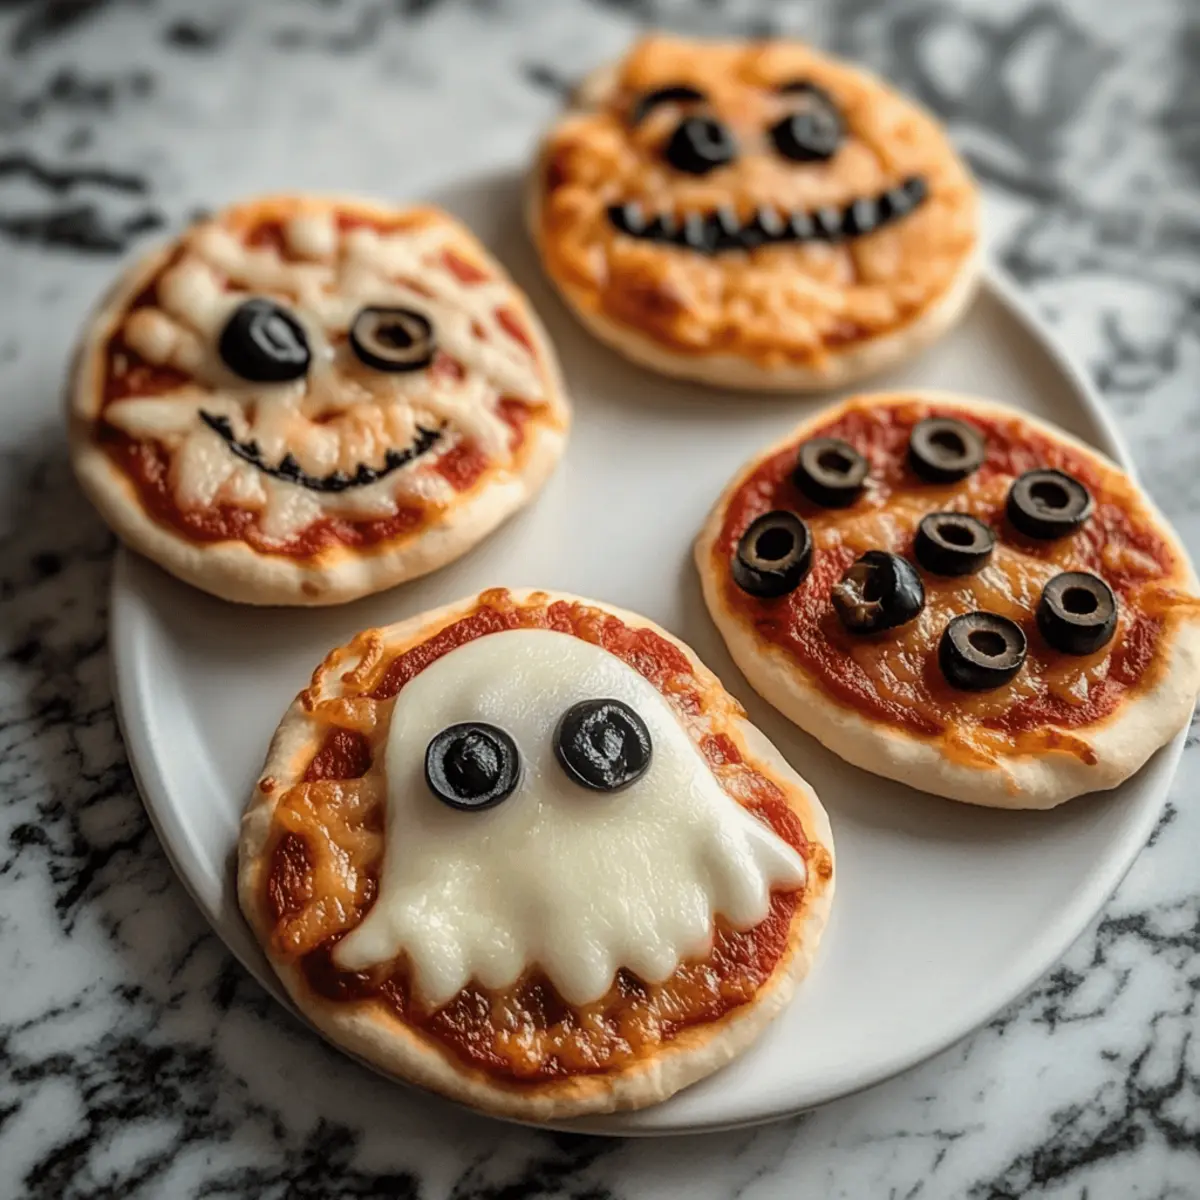
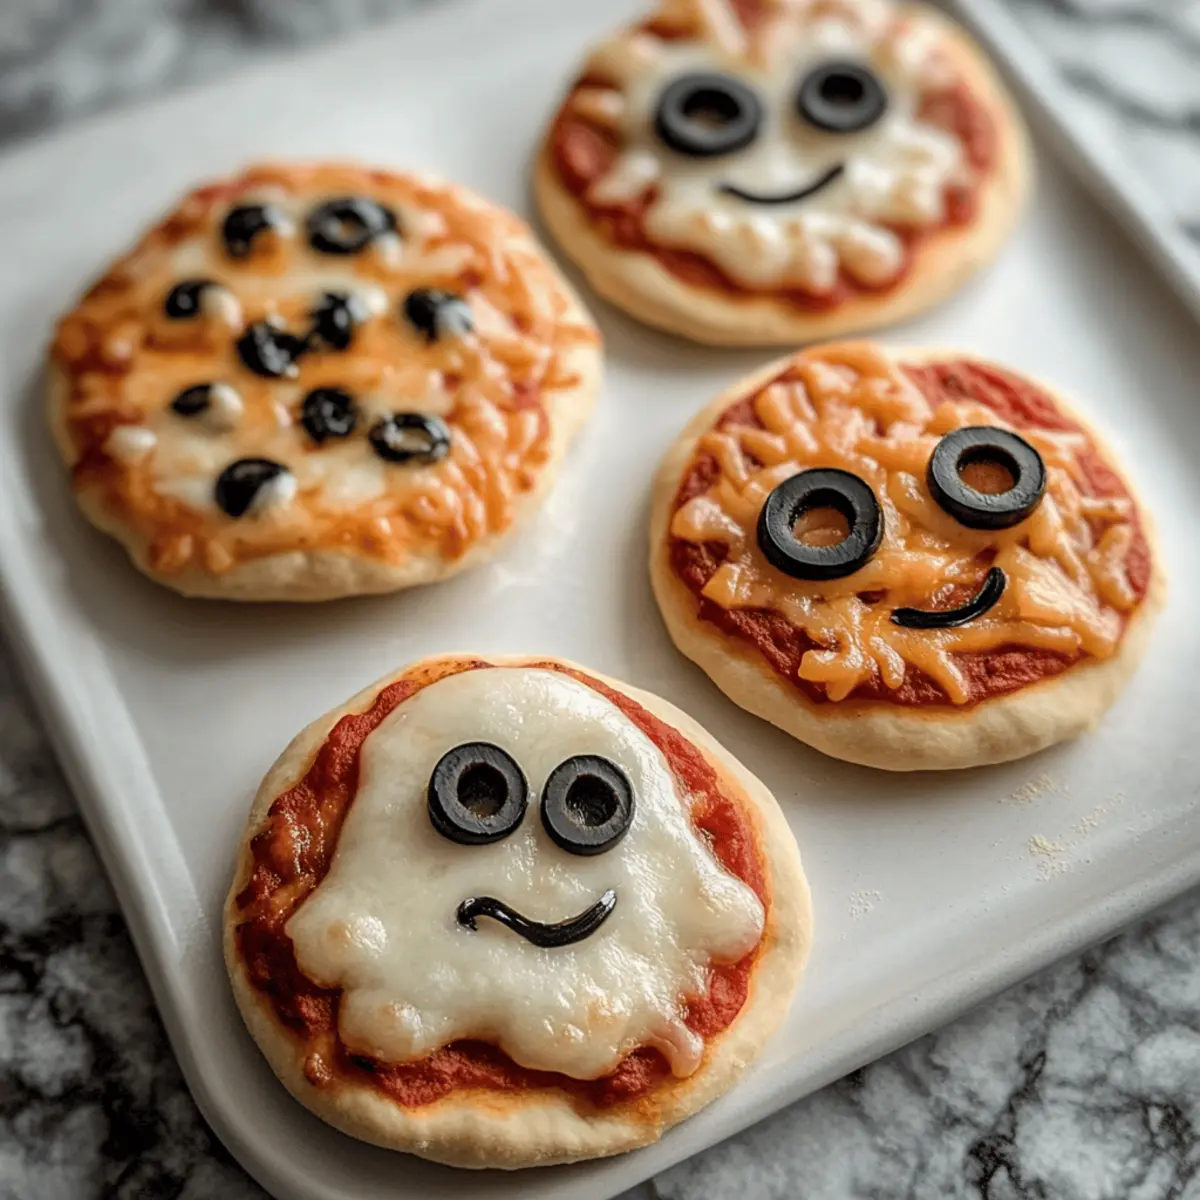
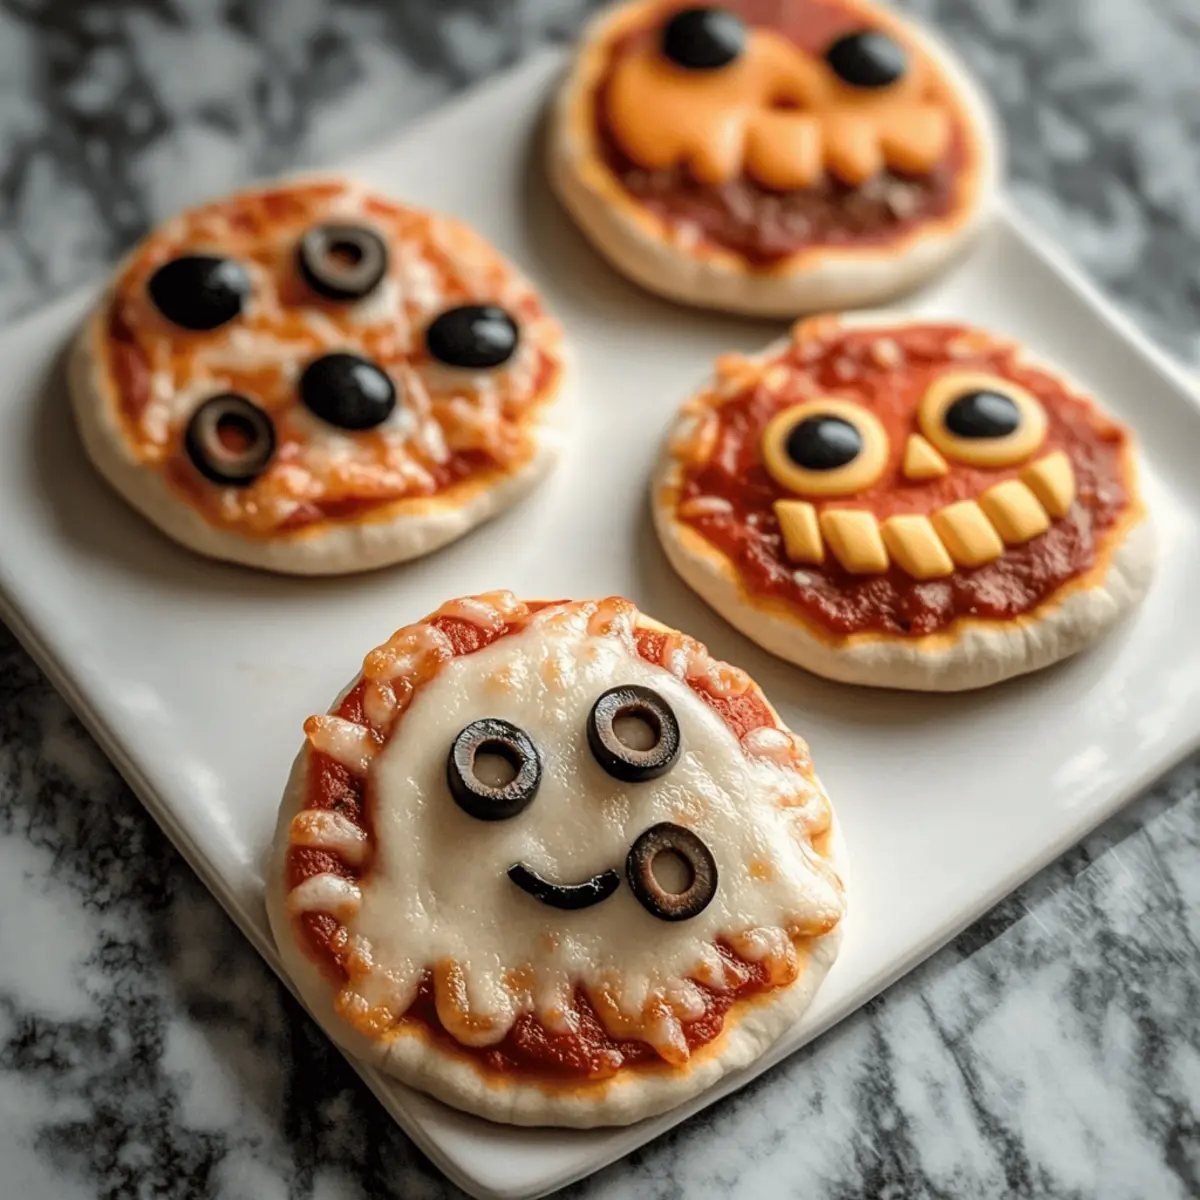
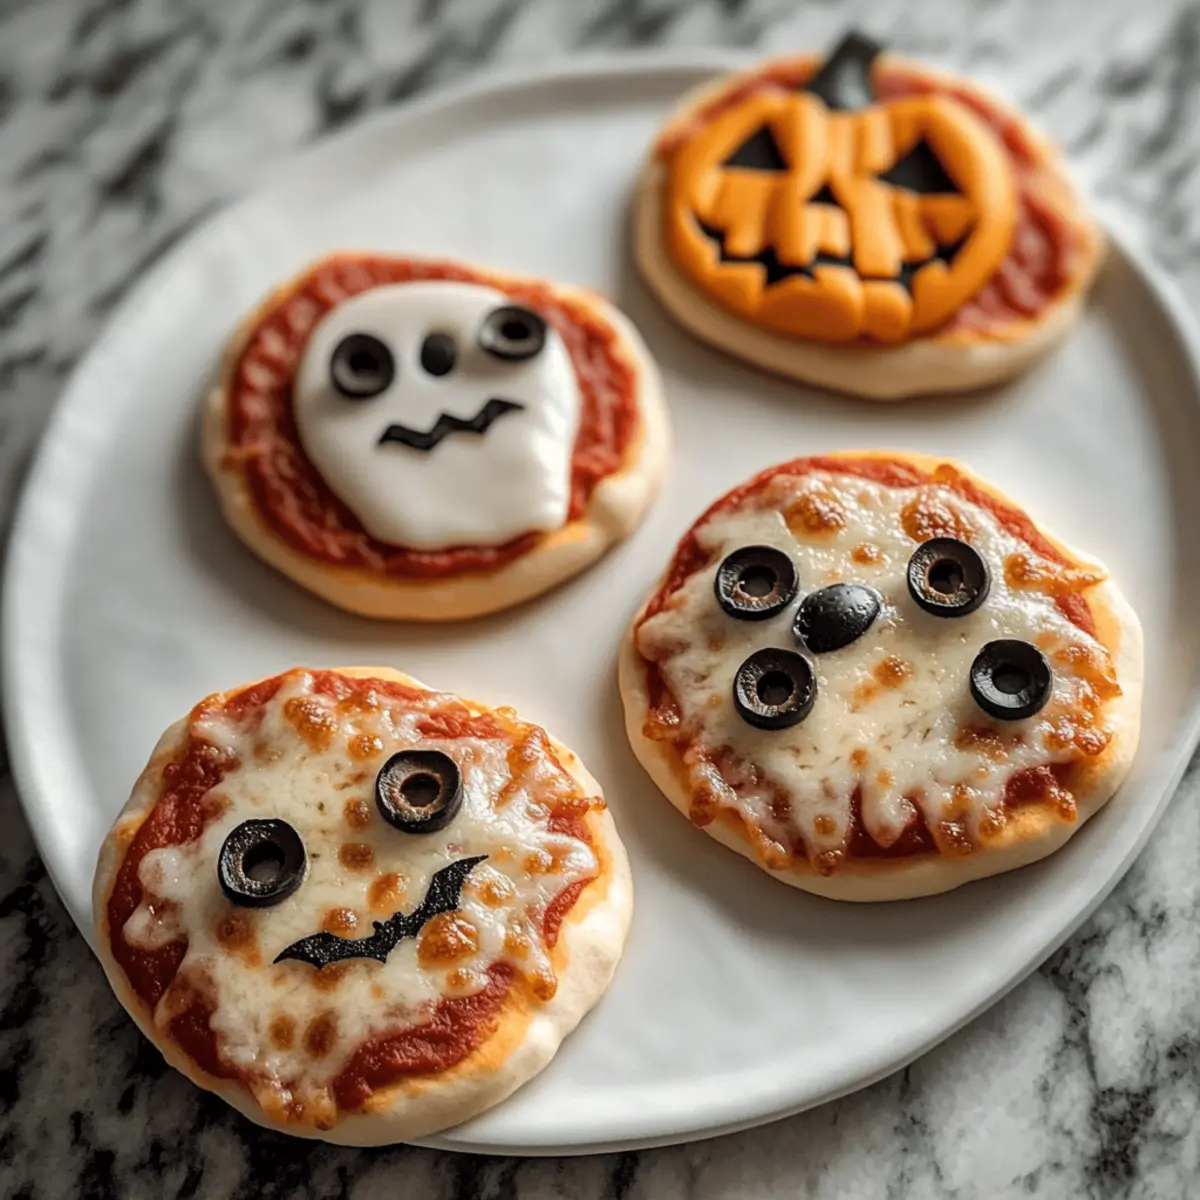
Every October, my kitchen transforms into a mini haunted workshop, and it never fails to spark joy. This year, I’m excited to whip up some Easy Mini Halloween Pizzas that will delight friends and family alike! These pizzas aren’t just quick to prepare—in just 25 minutes, you can create a whimsical feast that will bring smiles to everyone’s faces. Each bite showcases gooey cheese and a crispy base, while the customizable character designs like mummies, ghosts, and jack-o’-lanterns turn a simple meal into festive fun. Whether you’re hosting a Halloween party or looking for an after-school treat, these mini pizzas will be a hit for young and old alike. Ready to get creative in the kitchen? Let’s dive into this spooky culinary adventure!
Why Are These Mini Halloween Pizzas Unique?
Customization: These mini pizzas are perfect for creative cooks of all ages, allowing everyone to decorate their own spooky designs.
Quick Prep: Ready in just 25 minutes, they’re an excellent choice for busy weeknights or last-minute gatherings.
Kid-Friendly: The fun shapes and colors make these a hit with kids, turning dinnertime into a playful experience.
Flavorful: Enjoy the gooey, cheesy goodness paired with your choice of toppings that cater to all taste preferences.
Interactive Fun: Set up a topping bar and let everyone get involved in the making process, ensuring a festive atmosphere.
Versatile Base: Use your preferred crusts like English muffins or tortillas, making them adaptable to dietary needs or personal tastes.
Mini Halloween Pizzas Ingredients
For the Crusts
- Mini Pizza Crusts – English muffins, naan rounds, or small tortillas serve as the base; choose according to texture preference.
For the Sauce
- Pizza Sauce – ¾ to 1 cup of homemade or jarred sauce for flavor; homemade adds a personal touch.
For the Cheese
- Shredded Mozzarella Cheese – 1½ cups will provide that classic cheesy topping; opt for low-fat for a lighter version.
- Mozzarella/Provolone Slices – 4–6 slices are perfect for creating character designs (like ghosts or mummies); use cookie cutters for fun shapes.
- Grated Parmesan – ¼ cup is optional for an extra flavor boost; skip if lactose-intolerant.
For the Toppings
- Toppings (for Variety) – Diced bell peppers, mushrooms, mini pepperoni, cooked sausage, spinach, and red onion; mix and match according to preference.
- Italian Seasoning – 1 teaspoon adds flavor; substitute with dried oregano if preferred.
- Olive Oil – For brushing on crusts; can be omitted for fewer calories.
These Easy Mini Halloween Pizzas are not only customizable but also a fun and festive way to enjoy a cozy meal with loved ones. Let the celebration begin!
Step‑by‑Step Instructions for Easy Mini Halloween Pizzas
Step 1: Preheat the Oven
Start by preheating your oven to 425°F (220°C). While the oven warms up, line a baking sheet with parchment paper for easy cleanup. The parchment will prevent the mini pizzas from sticking, helping to keep them perfectly crispy and delicious as they bake.
Step 2: Prepare Bases
Take your choice of mini pizza crusts—English muffins, naan rounds, or small tortillas—and lightly mist or brush them with olive oil. This step ensures a golden, crunchy texture as the Easy Mini Halloween Pizzas bake. Arrange your bases on the lined baking sheet to keep them organized for the next steps.
Step 3: Spread Sauce
Using a spoon, top each prepared base with 1-2 tablespoons of pizza sauce, carefully spreading it to leave a border around the edges. This creates a flavorful layer while preventing any spillover during baking. The sight of the vibrant sauce on each mini pizza will get everyone excited for the upcoming creations!
Step 4: Add Cheese
Sprinkle a light layer of shredded mozzarella cheese over the sauce on each mini pizza. This layer will help the decorations adhere properly while adding that classic cheesy flavor we all love. As you sprinkle, imagine how each of these Easy Mini Halloween Pizzas will soon transform into spooky delights!
Step 5: Create Designs
Now it’s time to get creative! For a mummy pizza, lay strips of mozzarella cheese across the sauce and add little olive or pepper eyes. For ghosts, place a ghost-shaped mozzarella slice and dot on some eyes. For spider web designs, create a web pattern with shredded cheese and an olive for the spider body. Lastly, for a jack-o’-lantern, use cheddar shapes for the face and add features with olives or bell peppers.
Step 6: Sprinkle Seasonings
Sprinkle optional Italian seasoning and grated Parmesan cheese over the assembled mini pizzas for added flavor. This aromatic touch will enhance the overall taste and make your Easy Mini Halloween Pizzas even more enticing. The blend of fragrances will fill your kitchen with delicious anticipation!
Step 7: Bake
Place the baking sheet in the oven and bake the mini pizzas for 8-12 minutes. Keep an eye on them; they are ready when the cheese is melted and bubbly, and the edges of the crust are golden brown. The warm, inviting smell will signal that your festive treats are nearly complete!
Step 8: Serve Warm
Once baked, remove the Easy Mini Halloween Pizzas from the oven and allow them to cool slightly. Arrange them by character on a platter for a fun and festive display. Their whimsical shapes and cheesy goodness are sure to delight everyone at your gathering, making Halloween even more special!
Mini Halloween Pizzas Variations & Substitutions
Feel free to let your creativity shine by customizing these delightful mini pizzas to suit your taste and dietary needs!
- Gluten-Free Crust: Use caulifower rounds or gluten-free pizza crusts for a delicious, gluten-free option. These alternatives deliver a crunchy base without sacrificing flavor.
- Dairy-Free Delight: Swap regular mozzarella with plant-based cheese to cater to lactose sensitivity. You’ll still get the satisfying melty texture without the dairy.
- Flavorful Freedom: Experiment with different sauces, like pesto or barbecue, to switch up the flavor profile of your mini pizzas. Each new sauce will surprise the taste buds!
- Spicy Kick: Add jalapeños or crushed red pepper flakes as toppings for those who crave a bit of heat in their pizzas. It’s an exciting twist that brings a bit of zest to Halloween!
- Unique Toppings: Replace traditional toppings with unusual options like feta, artichokes, or roasted red peppers to create gourmet mini pizzas. This can elevate your festive treats to a whole new level!
- Sweet Twist: Transform one of your mini pizzas into a dessert by using Nutella as sauce and topping with bananas and mini marshmallows. It’s an unexpected but delightful way to end your Halloween fun!
- Mini Pumpkin Pizzas: Shape your mini pizzas like pumpkins using pumpkin puree as sauce and mini cheese slices for eyes. Kids will love this cute twist on a classic!
- Herb Infusion: Mix fresh herbs like basil or thyme into your pizza sauce for an aromatic flavor lift. This small addition can make a pleasant difference in taste and aroma.
Looking for more pizza ideas? Check out our Homemade Pizza Dough recipe or explore Topping Combinations to inspire your next kitchen adventure!
Tips for the Best Mini Halloween Pizzas
- Choose the Right Crust: Select mini pizza crusts that match your preferred texture—English muffins for crunchiness, naan for chewiness, or tortillas for a lighter option.
- Even Sauce Distribution: Apply sauce evenly to prevent sogginess and ensure all parts of the pizza are flavorful. Leaving a proper border is key!
- Creative Cheese Use: Use a mix of shredded mozzarella and sliced cheese for designs; melted cheese helps secure toppings, enhancing the character designs of your mini Halloween pizzas.
- Watch the Bake Time: Keep an eye on the pizzas as they bake; over-baking can lead to tough crusts. Aim for bubbly cheese and golden edges.
- Encourage Decorating: Set up a creative topping bar! Allow kids (or adults) to customize their mini Halloween pizzas, ensuring everyone enjoys the experience.
Make Ahead Options
These Easy Mini Halloween Pizzas are perfect for busy home cooks looking to save time! You can assemble the mini pizzas (without baking) up to 4 hours in advance by preparing all the crusts and toppings, then layering on the sauce, cheese, and decorations. Simply cover the assembled pizzas tightly with plastic wrap and refrigerate until you’re ready to bake. When it’s time to serve, preheat your oven and pop them in for 8-12 minutes until the cheese is melted and bubbly. This way, you can enjoy delicious, festive flavors without the last-minute rush, making your Halloween celebrations even more enjoyable!
What to Serve with Easy Mini Halloween Pizzas?
Let the festivities continue with delightful pairs that elevate your Halloween gatherings!
-
Crispy Green Salad: A refreshing mix of greens adds crunch and balances the richness of the cheesy pizzas, making each bite even more enjoyable. Toss in some tangy vinaigrette for added flavor!
-
Warming Tomato Soup: This classic duo is perfect for dipping, as the hearty soup contrasts beautifully with the rich, cheesy pizzas, creating a cozy meal ideal for chilly Halloween nights.
-
Seasoned Sweet Potato Fries: Their natural sweetness and crispy texture complement the savory pizzas wonderfully, plus they offer a colorful, seasonal touch that aligns perfectly with the Halloween theme!
-
Spooky Fruit Skewers: Assemble fun fruit shapes like bat and pumpkin using fresh berries and melon. This playful addition introduces a refreshing sweetness to balance out the savory flavors.
-
Cider or Sparkling Apple Juice: A festive drink option that pairs nicely, enhancing the meal’s merriment. The sweet, fruity notes echo the fall season and are sure to please guests of all ages.
-
Chocolate-Dipped Pumpkin Cookies: End on a sweet note! These treats provide a delightful contrast to the savory pizzas, wrapping up your Halloween feast with a touch of indulgence everyone will love.
How to Store and Freeze Mini Halloween Pizzas
Fridge: Store leftover Mini Halloween Pizzas in an airtight container for up to 3 days to maintain freshness.
Freezer: For longer storage, freeze the cooked mini pizzas by laying them flat in a single layer and then transferring to a freezer-safe bag. They’ll keep well for up to a month.
Reheating: When you’re ready to enjoy them again, reheat the frozen pizzas directly from the freezer at 375°F (190°C) for 10-15 minutes, or until heated through and crispy.
Make-Ahead: You can also prepare the mini pizzas without baking them. Assemble and refrigerate for up to 4 hours; baking when ready ensures they’re fresh and delicious.
Easy Mini Halloween Pizzas Recipe FAQs
What’s the best way to select mini pizza crusts?
Absolutely! When choosing mini pizza crusts, consider your texture preference. English muffins offer a satisfying crunch, naan rounds provide a soft chew, and small tortillas can give a lighter feel. Inspect the freshness of the crusts—look for any signs of dark spots or mold, ensuring you pick the freshest options for your Easy Mini Halloween Pizzas.
How should I store leftover mini Halloween pizzas?
Very well! Store leftover Easy Mini Halloween Pizzas in an airtight container in the refrigerator for up to 3 days. If preserving extra crispiness, try to layer them with parchment paper to prevent sticking. When ready to eat, reheat at 375°F (190°C) for about 5–7 minutes to restore that delightful gooey and crunchy texture.
Can I freeze mini Halloween pizzas for later?
Absolutely! To freeze the mini Halloween pizzas, lay them flat in a single layer on a baking sheet until they are solid, then transfer them to a freezer-safe bag or container. They’ll keep well for up to 3 months. When you’re ready to enjoy, reheat them directly from the freezer at 375°F (190°C) for 10-15 minutes. This way, you can savor the festive flavors even when you haven’t had time to cook!
What if I have dietary restrictions regarding toppings?
Very important! If you or your guests have dietary considerations, consider alternative toppings. For a gluten-free version, use gluten-free mini pizza crusts. Dairy-free cheese can substitute regular mozzarella for those with lactose intolerance. Always double-check labels if you’re unsure about ingredients. I often make these adjustments and find there’s still plenty of deliciousness to go around!
How do I ensure my pizza designs turn out well?
Great question! To ensure your designs look fantastic, avoid overcrowding with toppings as this can obscure the shapes. Use light layers of sauce and cheese to highlight your character designs, ensuring they stay visible during baking. For added fun, let everyone decorate their own pizzas—this turns dinner into a lively activity while allowing creativity to shine!
Can I make mini Halloween pizzas ahead of time?
Absolutely! You can prepare the Easy Mini Halloween Pizzas without baking them in advance. Assemble all the ingredients, stack them in a single layer on a baking sheet, and cover with plastic wrap. They can stay in the fridge for up to 4 hours. When it’s time to serve, just pop them in the oven for fresh and warm pizzas right before your guests arrive!
Mini Halloween Pizzas: Create Spooky Fun with Every Bite
Ingredients
Equipment
Method
- Preheat your oven to 425°F (220°C) and line a baking sheet with parchment paper.
- Take your choice of mini pizza crusts and lightly mist or brush them with olive oil.
- Top each prepared base with 1-2 tablespoons of pizza sauce, leaving a border around the edges.
- Sprinkle shredded mozzarella cheese over the sauce on each mini pizza.
- Create spooky designs using mozzarella slices and toppings as desired.
- Sprinkle optional Italian seasoning and grated Parmesan cheese over the assembled mini pizzas.
- Place the baking sheet in the oven and bake for 8-12 minutes until the cheese is melted and bubbly.
- Remove from the oven and arrange them by character on a platter to serve warm.
Leave a Reply