
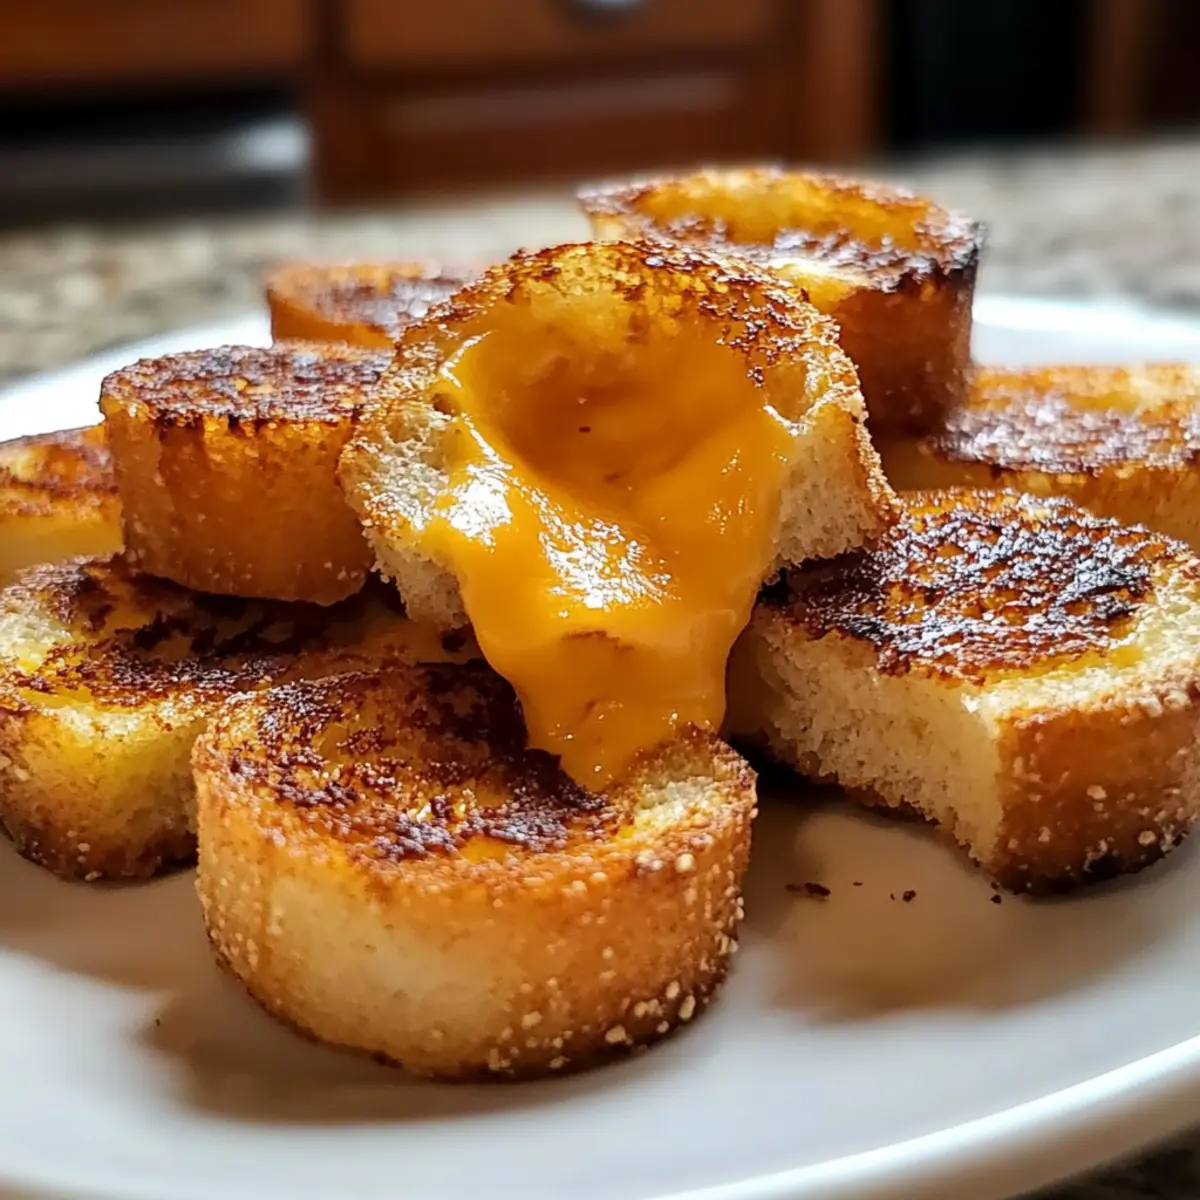
There’s something magical about tiny bites of comfort food that bring a smile to my face, and these Mini Grilled Cheese Dippers do just that. Each crispy morsel is golden brown on the outside, hiding a gooey, melty center that takes me back to lazy afternoons spent with friends. What I love most about this recipe is its flexibility—it’s quick to whip up for unexpected guests and can easily accommodate gluten-free diets. Plus, they’re a total crowd-pleaser, whether served at a game day gathering or as a fun family dinner side. So, are you ready to take your grilled cheese game to the next level? Let’s dive into these irresistible little dippers!
Why are Mini Grilled Cheese Dippers a Hit?
Perfectly Portable: These delightful dippers are easy to grab and munch on, making them ideal for parties or family movie nights.
Gooey Goodness: Each bite features oozy, melted cheese that adds an irresistible charm to your snack table.
Versatile Creativity: Feel free to experiment! Swap out cheeses or add tomatoes and meats to create your twist, just like with Crockpot Cheese Tortellini or Egg Cream Cheese.
Gluten-Free Option: With a simple switch to gluten-free bread, everyone can indulge in this comforting treat.
Quick to Make: These dippers come together in a snap, so dinner or snacking never feels like a chore.
Crowd Pleaser: Whether at a gathering or a cozy night in, these Mini Grilled Cheese Dippers are sure to warm hearts and fill bellies!
Mini Grilled Cheese Dippers Ingredients
For the Bread
• Sturdy bread – Use high-quality sandwich bread or gluten-free bread for a delicious gluten-free option.
For the Cheese
• Sharp cheddar – Delivers a rich, bold flavor that pairs perfectly with other cheeses.
• Mozzarella or provolone – Offers a lovely melt and stretch, making the experience delightful.
For Frying
• Unsalted butter – Creates a wonderfully golden crust while adding subtle flavor.
• Mayonnaise – A great alternative for spreading on the outside, enhancing the richness without burning.
Explore these ingredients and see how the Mini Grilled Cheese Dippers can transform your next snack time into a cozy moment of joy!
Step‑by‑Step Instructions for Mini Grilled Cheese Dippers
Step 1: Prepare the Bread
Begin by selecting sturdy bread for your Mini Grilled Cheese Dippers, cutting it into bite-sized squares or triangles, ensuring thickness to maintain dippability. A thickness of about half an inch works well for an ideal texture. Lay these pieces out on a clean surface, ready for assembly.
Step 2: Assemble the Sandwiches
Layer your selected cheese, like sharp cheddar and mozzarella, between two slices of bread, keeping the filling relatively thin to make the sandwiches easier to handle. Press the slices gently together to create a bond while ensuring the cheese is nested snugly, preparing them for grilling.
Step 3: Top the Sandwiches
Spread a generous layer of unsalted butter or mayonnaise on the outside of each sandwich. This will not only create a delicious flavor but also ensure an enticing golden crust as the Mini Grilled Cheese Dippers cook. Make sure to coat all sides evenly for the best results.
Step 4: Grill the Sandwiches
Heat a nonstick skillet over medium-low heat, allowing it to warm up before placing the sandwiches in the pan. Carefully add the dippers to the skillet, making sure not to overcrowd the pan. The moderate heat is essential to avoid burning while cooking the cheese to a melty perfection.
Step 5: Cook to Golden Perfection
Cook the sandwiches for approximately 3-4 minutes on one side, until they achieve a beautiful golden-brown color. Use a spatula to gently lift the edges for a sneak peek at their doneness. The goal is a perfectly crisp exterior that contrasts with the gooey cheese inside.
Step 6: Flip and Finish
Once the first side is golden, use a spatula to carefully flip the dippers over and cook for an additional 3-4 minutes. Watch as the cheese melts and the bread continues to transform into a crispy treat. Keep an eye on the heat to ensure both sides reach optimal crispiness without burning.
Step 7: Rest and Slice
After removing the dippers from the skillet, allow them to rest on a cutting board for a minute. This resting period helps the cheese settle slightly, making cutting easier and preventing it from oozing out too quickly.
Step 8: Create the Dippers
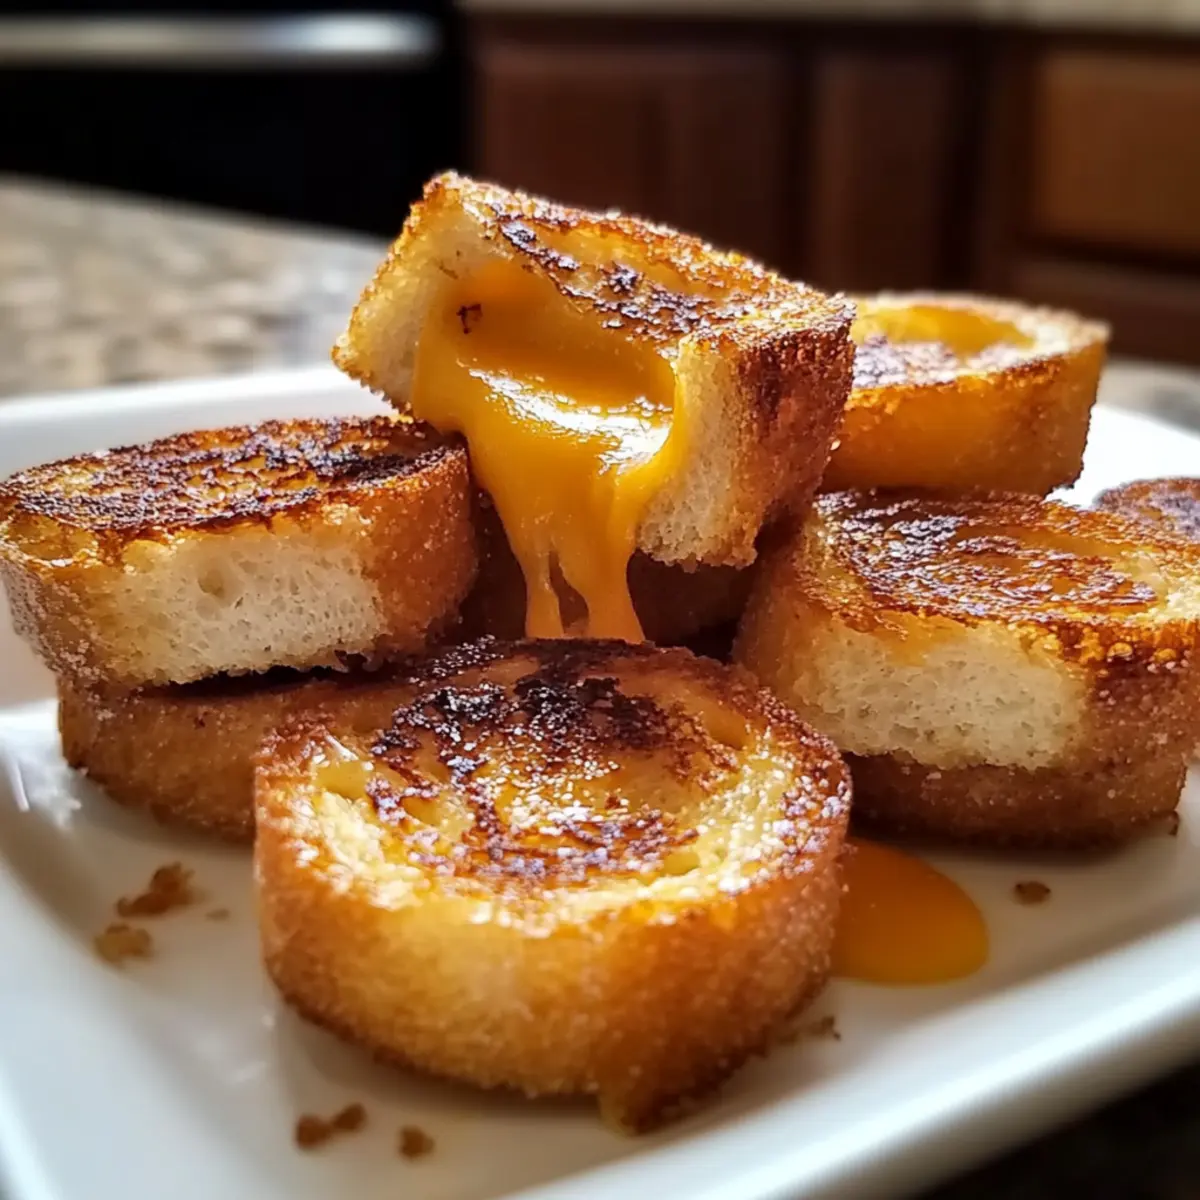
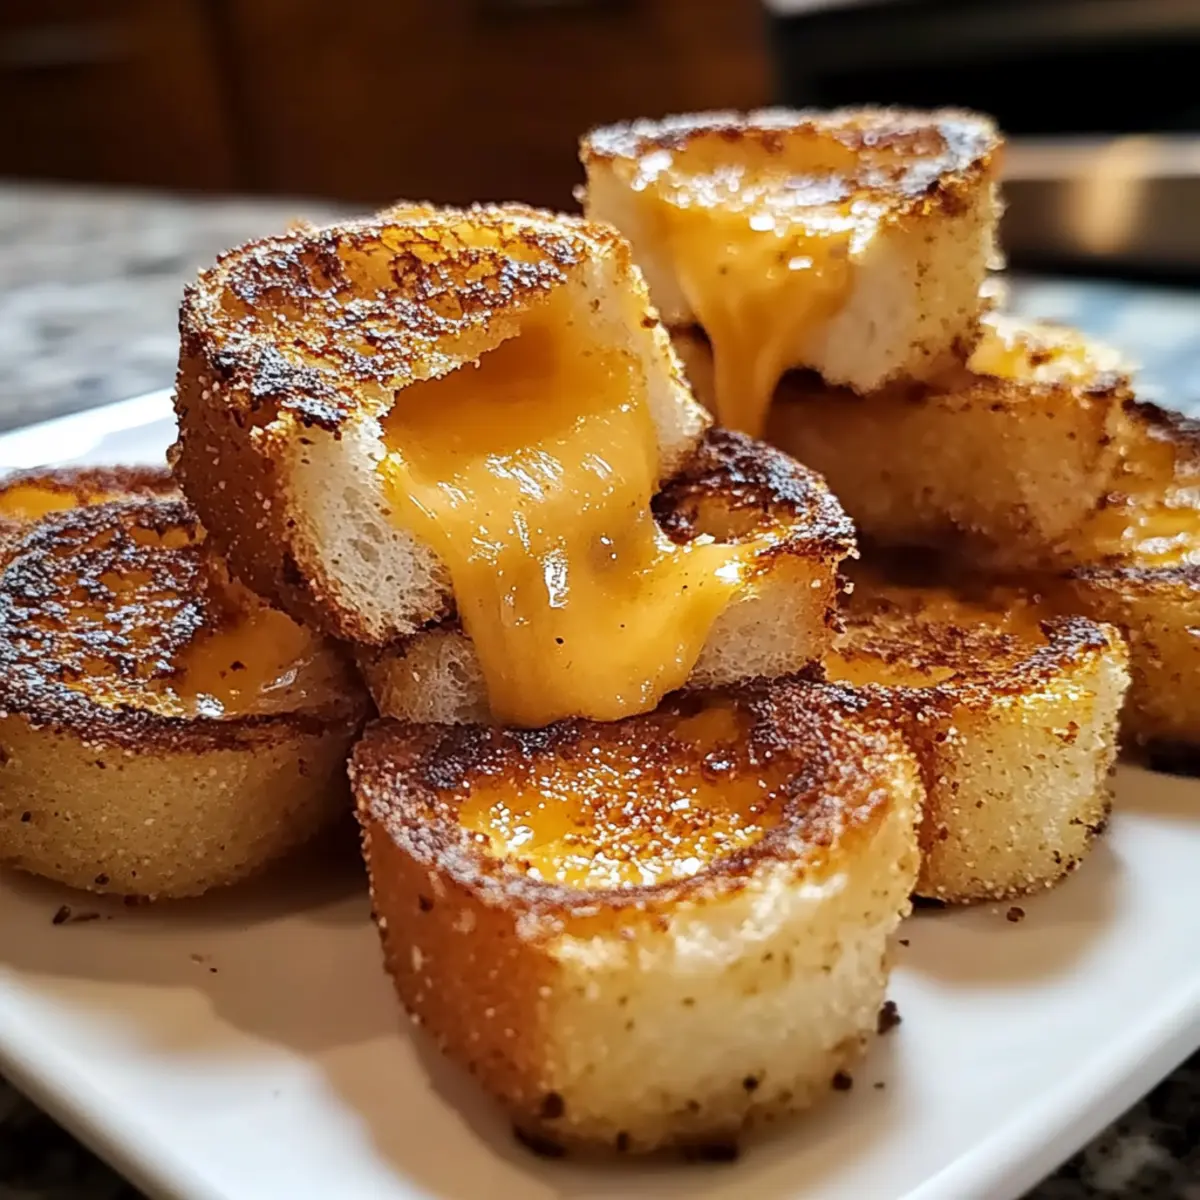
Using a sharp knife, cut each sandwich into bite-sized mini dippers. Aim for pieces that are small enough for dipping but large enough to hold the melty cheese inside. The attractive shapes make them even more fun to enjoy with your favorite dipping sauce.
Step 9: Serve Immediately
Present your Mini Grilled Cheese Dippers while they’re warm, paired with a delightful dip like marinara or creamy ranch. Their warm, gooey interiors paired with the crispy exteriors make them a perfect treat for gatherings, family meals, or cozy evenings at home.
How to Store and Freeze Mini Grilled Cheese Dippers
Fridge: Store leftovers in an airtight container for up to 2 days. This keeps the Mini Grilled Cheese Dippers fresh and ready for a quick snack!
Freezer: For longer storage, freeze the dippers on a baking sheet until firm, then transfer to a freezer-safe bag. They can last up to 1 month in the freezer.
Reheating: To restore crispiness, reheat in a skillet over medium heat for 3–4 minutes per side, or use an air fryer at 350°F for about 5 minutes.
Thawing: If frozen, thaw in the fridge overnight before reheating to ensure even warming and a delightful texture.
What to Serve with Mini Grilled Cheese Dippers
Warm and inviting, it’s time to build a meal that elevates your Mini Grilled Cheese Dippers into a delightful dining experience.
-
Creamy Tomato Soup: This classic pairing complements the crispy dippers with its rich, velvety texture and vibrant flavor, making each bite a warm hug.
-
Spicy Marinara Sauce: The zesty notes of marinara bring an exciting kick to your dippers, creating a playful blend of flavors for dipping delight.
-
Garlic Butter Dip: Elevate your experience with a savory garlic butter dip. Its aromatic richness envelops each dippable piece, enhancing the comforting cheese flavors.
-
Fresh Garden Salad: A crunchy salad with refreshing greens balances the rich dippers while adding a pop of color and nutrients to your meal.
-
Guacamole: Creamy and rich, guacamole offers a delightful twist on traditional dips, providing a smooth contrast to the crispy texture of the dippers.
-
Crispy Onion Rings: Adding a fun crunch, onion rings offer a bite-sized companion that fits the dippable theme perfectly, enhancing the overall snack appeal.
-
Apple Slices: Sweet and crunchy apple slices provide a refreshing contrast to the savory flavors of cheese, bringing brightness to your plate.
-
Berry Smoothie: A sweet and tangy berry smoothie serves as a delightful drink option that compliments the savory taste of your dippers wonderfully.
-
Craft Beer: Enjoy a light lager or an amber ale alongside your dippers for a bubbly pairing that enhances the flavors in each bite.
With these pairings, you can transform your Mini Grilled Cheese Dippers into a comforting, delightful meal that pleases everyone at the table.
Expert Tips for Mini Grilled Cheese Dippers
Cheese Choice: Use a blend of cheeses for maximum flavor. Mixing sharp cheddar with mozzarella lends both rich taste and a perfect melt to your Mini Grilled Cheese Dippers.
Avoid Pre-Shredded Cheese: Skip the convenience of pre-shredded cheese; it often has anti-caking agents that prevent smooth melting. Opt for block cheeses for the best results.
Control the Heat: Keep the skillet on medium-low heat to allow for an even cook. Rushing at higher temperatures can result in burned outsides and unmelted cheese inside.
Thicker Slices: Cut your bread into thicker slices—around half an inch—to maintain sturdiness during dippage. Thin pieces may lose their structure and break apart.
Experiment with Fillings: Don’t hesitate to customize! Adding tomatoes or meats can elevate flavors and create unique variations that enhance the classic Mini Grilled Cheese Dippers experience.
Mini Grilled Cheese Dippers Variations
Feel free to get creative—these Mini Grilled Cheese Dippers are your canvas for delightful twists!
- Gluten-Free: Use gluten-free bread to accommodate dietary needs while enjoying the same delicious flavor and texture.
- Cheese Blend: Combine Gruyère and sharp cheddar for a nutty, rich flavor profile that takes these dippers to new heights.
- Tomato-Cheese Surprise: Add thinly sliced tomatoes inside for a refreshing burst of flavor alongside the gooey cheese.
- Savory Additions: Layer in some cooked bacon or turkey slices to make them heartier and more satisfying!
- Spicy Kick: Sprinkle some crushed red pepper flakes into the cheese blend for an enticing heat that will awaken your taste buds.
- Herbed Cheese: Mix in some fresh herbs like basil or dill with your cheese for an aromatic lift that adds depth to each bite.
- Creamy Spinach Filling: Blend some cooked spinach with cream cheese for a decadent dipper that feels both indulgent and nutritious.
- Dip Varieties: Pair with unique dips like avocado hummus or smoky chipotle mayo for extra flavor dimension beyond the classic marinara.
For even more irresistible ideas, consider checking out these tempting treats: Caramel Brownie Cheesecake or, if you’re in the mood for something sweet, try Pumpkin Cream Cheese!
Make Ahead Options
These Mini Grilled Cheese Dippers are perfect for busy home cooks looking to save time! You can assemble the sandwiches up to 24 hours in advance. To prep in advance, simply create the sandwiches, spread butter or mayo on the outside, and store them in an airtight container in the refrigerator. This will keep the bread from drying out. When ready to serve, heat your nonstick skillet and grill the dippers straight from the fridge—just remember to keep the heat on medium-low to achieve that delectable golden crust without burning. You’ll have a delicious batch ready in no time, making your meal planning easy and stress-free!
Mini Grilled Cheese Dippers Recipe FAQs
How do I select the right bread for my Mini Grilled Cheese Dippers?
Absolutely! For the best results, choose sturdy sandwich bread or gluten-free bread if you need a gluten-free option. Look for bread that’s fresh and has a good structure; a thicker slice, about half an inch, holds up better during grilling and dippability. Avoid soft and flimsy bread that may fall apart.
How should I store leftover Mini Grilled Cheese Dippers?
Very! Store any leftovers in an airtight container in the refrigerator for up to 2 days. Make sure they’re completely cool before sealing to preserve freshness. Reheating in a skillet is ideal, so they regain that delightful crispness.
Can I freeze Mini Grilled Cheese Dippers?
Absolutely! To freeze, lay the dippers on a baking sheet in a single layer and freeze until firm. Then, transfer them to a freezer-safe bag, ensuring to squeeze out as much air as possible. They can be stored in the freezer for up to 1 month.
What’s the best way to reheat frozen Mini Grilled Cheese Dippers?
To reheat, it’s best to thaw them in the fridge overnight. Once thawed, heat them in a skillet over medium heat for 3-4 minutes per side until crispy and warm. Alternatively, if you’re short on time, you can use an air fryer set at 350°F, cooking for about 5 minutes until golden and heated through.
What are some common issues when making Mini Grilled Cheese Dippers?
Cooking too quickly on high heat can lead to burnt exteriors while the cheese remains unmelted. To avoid this, keep your skillet on medium-low heat, allowing the cheese to melt thoroughly while the bread gets golden brown. Look for slight bubbling on the surface to know the cheese is melting beautifully.
Are there any dietary considerations for Mini Grilled Cheese Dippers?
Very! For those with gluten sensitivities, simply switch to gluten-free bread, allowing everyone to enjoy this delightful treat. Always check cheese labels if you are managing allergic reactions, as some products may contain allergens. Enjoy customizing with alternatives that suit your dietary needs!

Mini Grilled Cheese Dippers for Cozy Comfort Food Moments
Ingredients
Equipment
Method
- Prepare the Bread: Cut the bread into bite-sized squares or triangles, about half an inch thick.
- Assemble the Sandwiches: Layer sharp cheddar and mozzarella between two slices of bread, pressing gently.
- Top the Sandwiches: Spread unsalted butter or mayonnaise on the outside of each sandwich.
- Grill the Sandwiches: Heat a nonstick skillet over medium-low heat and add the sandwiches.
- Cook to Golden Perfection: Cook for 3-4 minutes until golden brown, then peek at doneness.
- Flip and Finish: Carefully flip the dippers and cook for an additional 3-4 minutes.
- Rest and Slice: Allow the dippers to rest on a cutting board for a minute before cutting.
- Create the Dippers: Cut each sandwich into bite-sized pieces for easy dipping.
- Serve Immediately: Present warm, paired with a delightful dip like marinara or creamy ranch.
Leave a Reply