
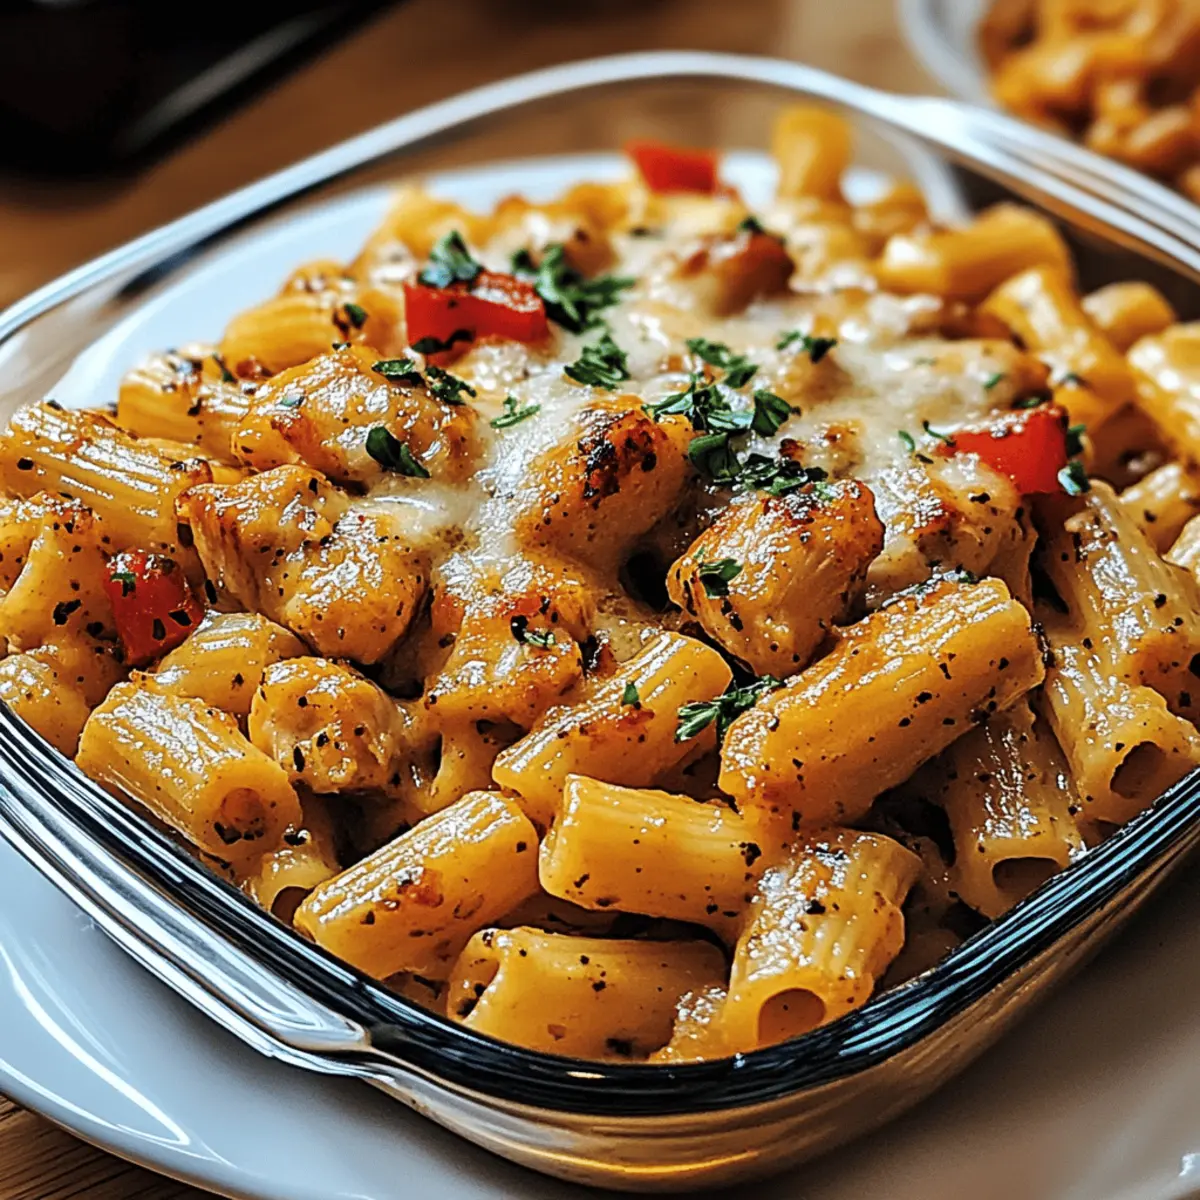
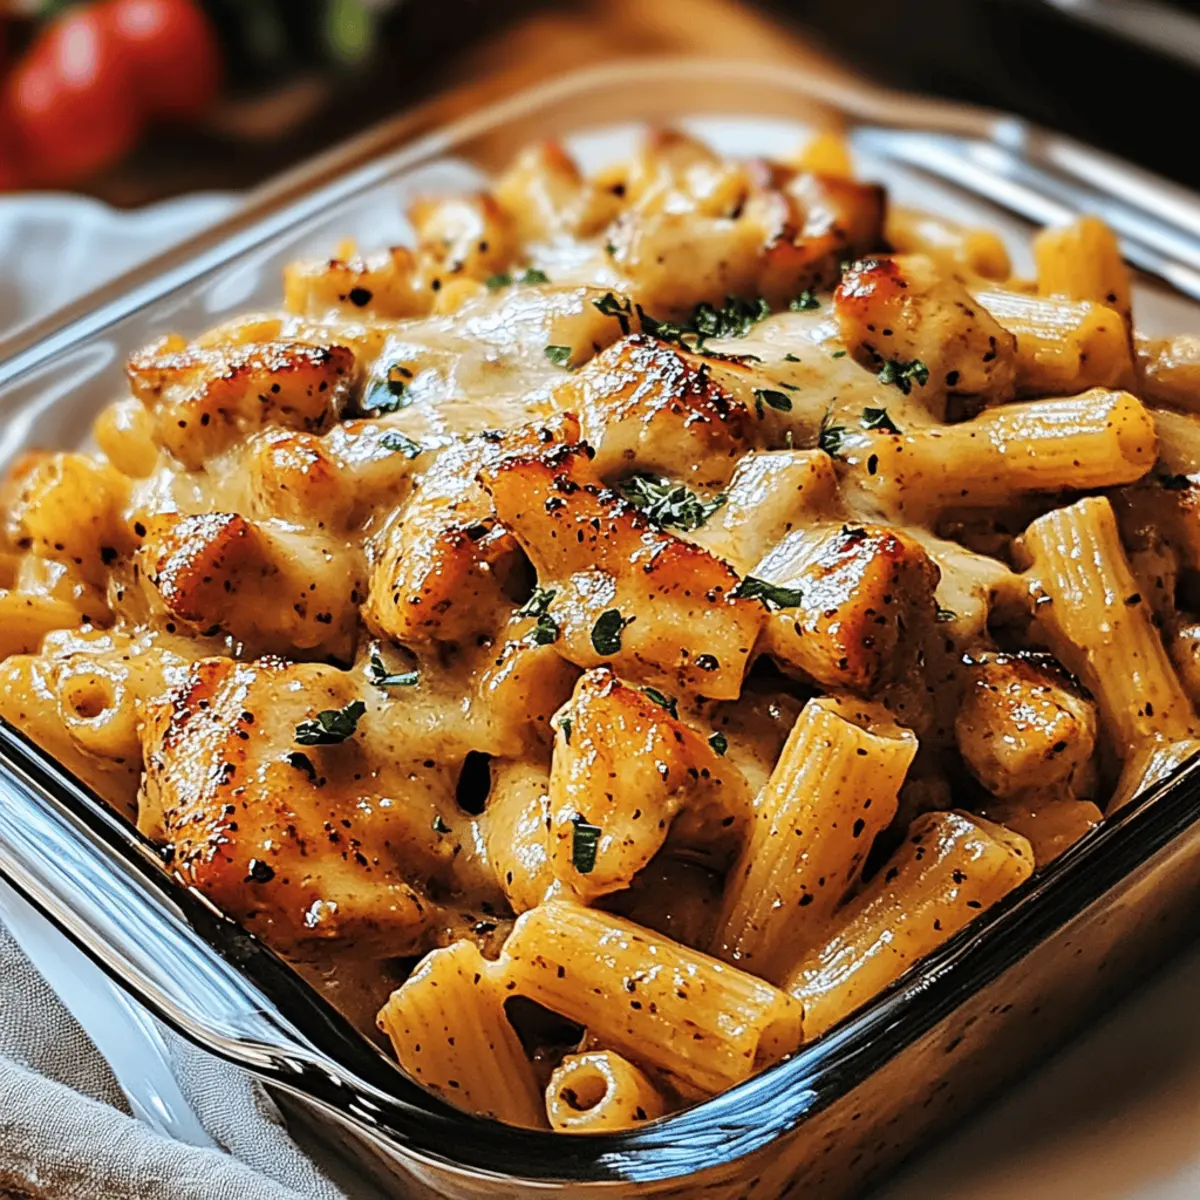
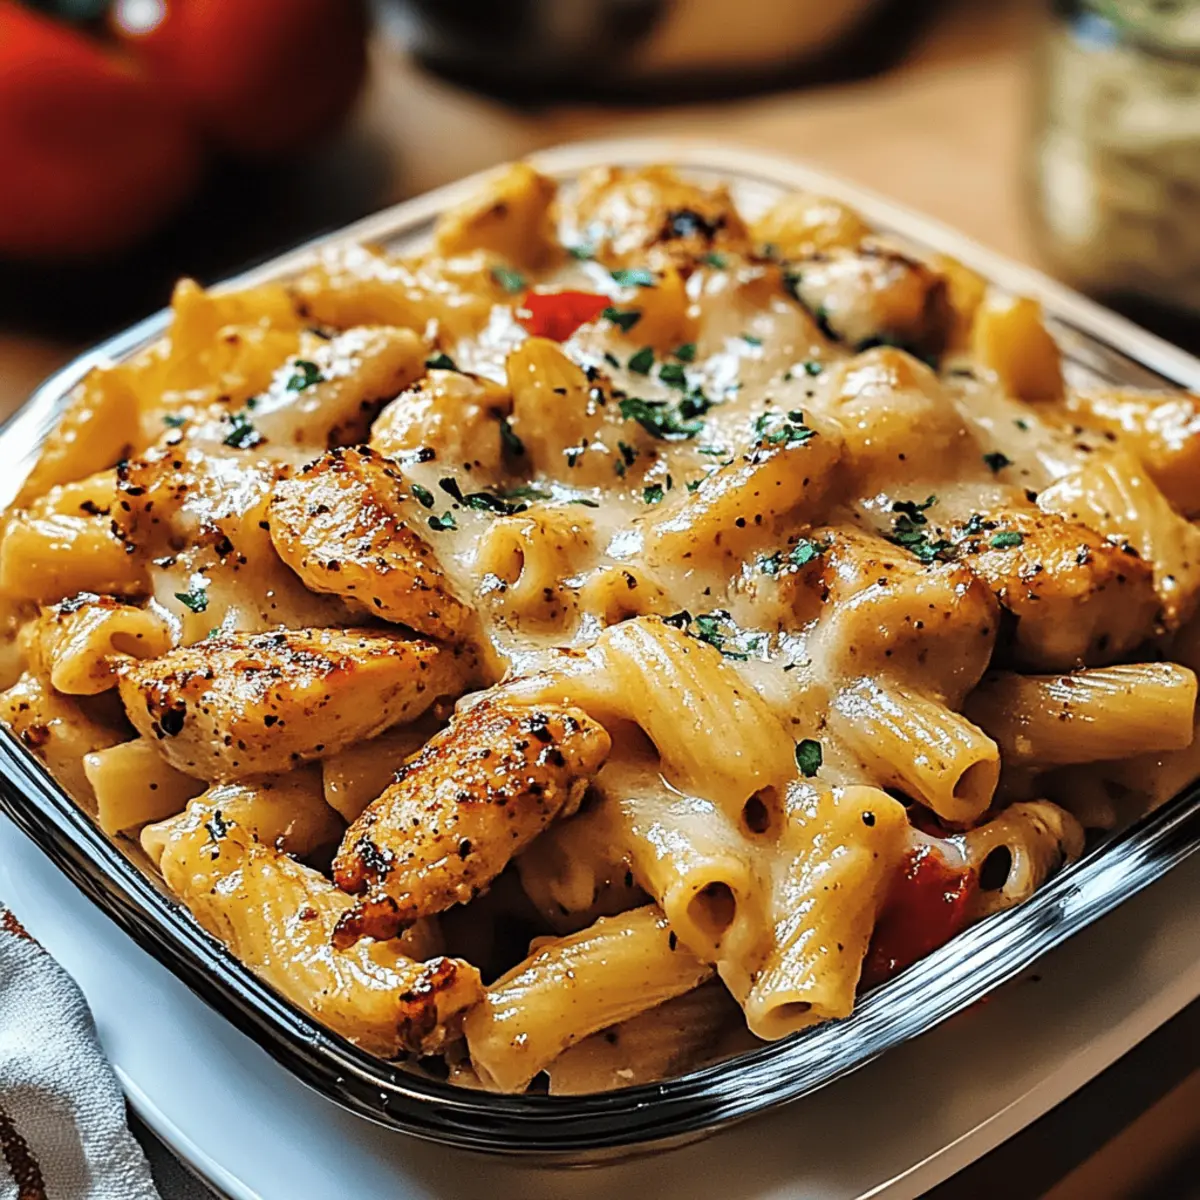
There’s a certain magic that happens when sweet meets savory, and my Honey Pepper Chicken Panini Pasta is a perfect example. Picture tender chicken bites enrobed in a sticky honey glaze, nestled among creamy pasta that embraces each flavor beautifully. This dish isn’t just a convenient weeknight dinner; it’s a versatile canvas for your culinary creativity, whether you’re looking to impress guests or simply craving a comforting meal at home. Plus, it’s gluten-free adaptable, ensuring everyone at your table can dig in without a care. Trust me, once you experience the delightful balance of sweet and spicy in every bite, you’ll be wondering how you ever lived without this quick and delicious recipe. Ready to bring a taste of restaurant-quality comfort straight to your kitchen? Let’s dive in!
Why Is This Pasta Recipe Special?
Flavor Explosion: Each bite bursts with a sweet and savory combo that tantalizes your taste buds. The honey pepper glaze adds a unique twist that transforms ordinary chicken into a gourmet delight.
Versatile Dish: This Honey Pepper Chicken Panini Pasta can be easily customized. Want to make it gluten-free? Simply swap the pasta and flour!
Quick & Easy: It’s a weeknight hero—ready in under 30 minutes. Perfect for busy evenings when you crave something comforting yet impressive.
Crowd-Pleasing Favorites: Serve it alongside a crisp salad or some Cheesy Garlic Chicken Wraps for a complete meal that everyone will love!
Make Ahead: Preparing the glaze and chicken in advance means you can whip up this delicious dish whenever the craving strikes.
Honey Pepper Chicken Panini Pasta Ingredients
For the Chicken
- Honey – Adds sweetness and glaze texture; substitute with maple syrup for a different sweetness profile.
- Soy Sauce – Contributes umami and saltiness; can be replaced with tamari for a gluten-free option.
- Apple Cider Vinegar – Provides acidity and balancing tang; lemon juice can be used as an alternative.
- Black Pepper – Adds heat; adjust to taste for milder or spicier versions.
- Red Chili Flakes – For added spice; omit or reduce for a milder dish.
- Garlic Powder – Enhances flavor depth; fresh minced garlic can also be used.
- Chicken Breasts/Thighs – The main protein, providing texture and flavor; use rotisserie chicken for a quicker option.
- All-Purpose Flour – Coating that creates a crispy texture; gluten-free flour blend can be substituted.
- Paprika – Adds color and flavor; smoked paprika can be used for a smoky taste.
- Olive Oil – Ideal for searing chicken; can be replaced with vegetable oil.
For the Sauce and Pasta
- Butter – Adds richness to the sauce; use margarine for a dairy-free version.
- Minced Garlic – Fresh flavor base for the pasta sauce.
- Heavy Cream – For a luscious sauce texture; substitute with coconut cream for a dairy-free option.
- Chicken Broth – Adds depth to the sauce; vegetable broth can be used for variation.
- Parmesan Cheese – Provides creaminess and flavor; Romano or Asiago can replace it, or omit for a dairy-free alternative.
- Pasta (e.g., penne, rigatoni) – The tasty base of the dish that holds the sauce; gluten-free pasta can be used.
- Fresh Parsley – For garnish and color; omit if fresh herbs are unavailable.
Step‑by‑Step Instructions for Honey Pepper Chicken Panini Pasta
Step 1: Make the Glaze
In a small saucepan over medium-low heat, combine honey, soy sauce, apple cider vinegar, black pepper, red chili flakes, and garlic powder. Stir the mixture continuously for about 3-5 minutes until it slightly thickens and becomes syrupy. Once done, remove it from heat and set aside to cool slightly, allowing the flavors to meld beautifully.
Step 2: Prepare the Chicken
While your glaze is simmering, cut the chicken breasts or thighs into bite-sized pieces. In a separate bowl, mix all-purpose flour, paprika, salt, and a dash of black pepper. Dredge each piece of chicken thoroughly in this mixture, ensuring an even coating that will crisp up perfectly during cooking.
Step 3: Cook the Chicken
Heat a skillet over medium-high heat and pour in olive oil. Once the oil shimmers, add the coated chicken pieces in a single layer, cooking for 4-5 minutes on each side until golden brown and cooked through. The chicken should reach an internal temperature of 165°F. Remove from skillet and set aside, keeping it warm.
Step 4: Cook the Pasta
Bring a large pot of salted water to a rolling boil. Add your choice of pasta, such as penne or rigatoni, and cook according to package instructions until al dente, typically around 8-10 minutes. Reserve 1/2 cup of the pasta water before draining the pasta to ensure you can adjust the sauce’s consistency later.
Step 5: Make the Sauce
In the same skillet used for the chicken, lower the heat to medium and add butter. Once melted, sauté minced garlic for about 30 seconds until fragrant, then pour in the heavy cream and chicken broth. Stir gently, bringing the mixture to a simmer, and add the Parmesan cheese gradually, mixing until smooth and creamy. Season with salt and pepper to taste.
Step 6: Combine Ingredients
Add the drained pasta to the creamy sauce in the skillet, tossing well to combine. Gently fold in the crispy chicken pieces, ensuring everything is well-coated with the luscious sauce. Drizzle in a portion of the honey pepper glaze, mixing to achieve an even distribution of flavors that make this Honey Pepper Chicken Panini Pasta truly irresistible.
Step 7: Serve
Once everything is combined, transfer the Honey Pepper Chicken Panini Pasta to serving plates. Garnish with freshly chopped parsley or additional Parmesan cheese for a burst of color and flavor. Serve warm and enjoy this comforting dish that brings together sweet, savory, and creamy in every delightful bite.

How to Store and Freeze Honey Pepper Chicken Panini Pasta
Fridge: Store leftovers in an airtight container in the refrigerator for up to 3 days. Reheat gently on the stovetop or in the microwave, adding a splash of broth or cream for moisture.
Freezer: For longer storage, freeze the Honey Pepper Chicken Panini Pasta in a freezer-safe container for up to 2 months. Thaw in the fridge overnight before reheating.
Reheating: When ready to enjoy, reheat in a skillet over medium-low heat, adding reserved pasta water or cream to bring back the creamy consistency.
Make-Ahead: Prepare the chicken and glaze in advance, storing them separately in the fridge for up to 2 days, allowing for quicker assembly during busy nights.
Tips for the Best Honey Pepper Chicken Panini Pasta
-
Control the Heat: Start with a smaller amount of red chili flakes if you prefer a milder dish. You can add more later for that perfect spicy kick.
-
Even Cooking: Avoid overcrowding your skillet while cooking chicken; give each piece space to brown nicely for a crispy texture in your Honey Pepper Chicken Panini Pasta.
-
Pasta Consistency: Reserve some pasta water before draining your noodles. Adding a splash to the sauce can create a silkier, creamier texture.
-
Cheese Tips: Stir the cheese into the sauce gradually while keeping the heat low to prevent curdling and ensure a smooth finish.
-
Prep Ahead: Make the glaze and cook the chicken a day in advance. This will cut down prep time and let the flavors develop even more!
-
Fresh Herbs: For the best presentation and flavor, don’t skip on garnishing with fresh parsley or additional cheese before serving.
Make Ahead Options
These Honey Pepper Chicken Panini Pasta options are perfect for busy home cooks! You can prepare the honey pepper glaze and cook the chicken up to 2 days in advance, storing them in separate airtight containers in the refrigerator. By doing this, you save valuable time during your weeknight rush. When you’re ready to enjoy this delicious dish, simply reheat the glaze and chicken in a skillet, then cook your pasta, and combine everything with the sauce. This method ensures that the chicken remains juicy and the glaze retains its fantastic flavor, letting you serve a comforting meal that’s just as delightful as when freshly made!
What to Serve with Honey Pepper Chicken Panini Pasta
Set the stage for a cozy dinner experience by pairing your creamy pasta dish with delightful sides that enhance its flavors and textures.
- Garlic Bread: The warm, buttery crunch of garlic bread contrasts perfectly with the creamy pasta, making every bite feel indulgent.
- Crisp Side Salad: A fresh salad with mixed greens, cherry tomatoes, and a tangy vinaigrette refreshes your palate between bites of the rich pasta.
- Roasted Vegetables: Seasonal roasted veggies like bell peppers or zucchini add a sweet, caramelized complement to the sweet-and-spicy chicken flavor.
- Steamed Broccoli: Tender broccoli florets provide a nutritious crunch while soaking in the savory sauce, rounding out your meal beautifully.
- Creamy Coleslaw: The cool, crunchy coleslaw offers a delightful contrast to the warm pasta and adds a zesty zing, enhancing the overall dish.
- Light White Wine: A chilled glass of Pinot Grigio balances the sweetness of the honey pepper glaze, elevating your dining experience to a special occasion.
- Dessert – Chocolate Mousse: End your meal on a high note with a light and airy chocolate mousse for a sweet finish that complements the pasta’s flavors perfectly.
Honey Pepper Chicken Panini Pasta Variations
Feel free to let your creativity shine and make this dish your own!
- Gluten-Free: Substitute regular pasta and flour for gluten-free alternatives like rice or almond flour and gluten-free pasta.
- Spicy: Amp up the heat with extra red chili flakes or a splash of your favorite hot sauce for a fiery twist. Remember, you can always start with a little and add more!
- Vegetable Boost: Toss in fresh spinach, bell peppers, or broccoli for added nutrition and flavor. The vibrant colors and crunch will elevate your dish!
- Protein Swap: Try shrimp, tofu, or even chickpeas instead of chicken for a delightful transformation—give it a try with shrimp for a special seafood twist!
- Creamy Alternative: Swap heavy cream with coconut cream for a dairy-free, tropical flavor that complements the sweetness of honey beautifully.
- Flavor Twist: Add fresh herbs like basil or thyme for an aromatic touch, or stir in sun-dried tomatoes for a burst of umami goodness.
- Cheesy Delight: Experiment with different cheeses such as gouda or feta for a unique flavor profile that adds richness to your dish.
- One-Pan Wonder: For a true convenience meal, consider trying it as a one-pan dish, mixing all ingredients directly in the baking dish like a comforting casserole!
Once you explore these variations, you’ll be inspired by the endless possibilities that await you. And for a complementary side, consider pairing your dish with a light salad or some delectable French Onion Chicken to round out your meal perfectly!
Honey Pepper Chicken Panini Pasta Recipe FAQs
How do I select the right chicken for this recipe?
Absolutely! When choosing chicken, look for breasts or thighs that are firm, plump, and have no dark spots or a foul odor. Fresh chicken can be refrigerated for 1-2 days, or you can freeze it for up to 9 months. I often prefer using thighs for more flavor, but breasts work wonderfully too!
What is the best way to store leftovers of Honey Pepper Chicken Panini Pasta?
The more the merrier! Store any leftovers in an airtight container in the refrigerator for up to 3 days. When you’re ready to enjoy again, simply reheat gently on the stovetop or microwave, adding a splash of broth or cream to maintain moisture and creaminess.
Can I freeze Honey Pepper Chicken Panini Pasta?
Yes, absolutely! To freeze, let the pasta cool completely first. Then, transfer it into freezer-safe containers, ensuring you remove as much air as possible. You can freeze it for up to 2 months. When ready to eat, thaw it overnight in the fridge and reheat on low heat, adding some reserved pasta water or cream as needed.
What if my sauce turns out too thick while making Honey Pepper Chicken Panini Pasta?
Don’t worry; it’s an easy fix! If your sauce is too thick, gradually stir in some of the reserved pasta water until you reach your desired consistency. Aim for a silky texture that beautifully coats the pasta. Remember, you can always add, but you can’t take away!
Are there any dietary considerations for this dish?
Very much so! If you need to make this dish gluten-free, simply swap out the all-purpose flour and pasta with gluten-free alternatives. Additionally, you can make it dairy-free by using coconut cream and omitting Parmesan cheese. Enjoy it worry-free, no matter your dietary needs!
How should I adjust the spice levels in the recipe?
If you prefer a milder flavor, it’s best to start with a small amount of red chili flakes, then taste as you go. You can always add more if needed! For a completely different flavor, try substituting the chili flakes with a favorite hot sauce or even a sprinkle of smoked paprika for a unique twist.
Honey Pepper Chicken Panini Pasta: A Sweet and Spicy Delight
Ingredients
Equipment
Method
- In a small saucepan over medium-low heat, combine honey, soy sauce, apple cider vinegar, black pepper, red chili flakes, and garlic powder. Stir continuously for about 3-5 minutes until it slightly thickens and becomes syrupy. Set aside to cool slightly.
- Cut the chicken breasts or thighs into bite-sized pieces. In a separate bowl, mix all-purpose flour, paprika, salt, and black pepper. Dredge each piece of chicken in this mixture.
- Heat a skillet over medium-high heat and pour in olive oil. Once the oil shimmers, add the chicken pieces and cook for 4-5 minutes on each side until golden brown and cooked through. Remove and keep warm.
- Bring a large pot of salted water to a boil. Add pasta and cook according to package instructions until al dente, around 8-10 minutes. Reserve 1/2 cup of the pasta water before draining.
- In the same skillet, lower the heat to medium and add butter. Once melted, sauté minced garlic for about 30 seconds, then pour in heavy cream and chicken broth. Stir gently and add the Parmesan cheese gradually.
- Add the drained pasta to the sauce and toss well. Fold in the crispy chicken pieces and drizzle in a portion of the honey pepper glaze.
- Transfer to serving plates and garnish with parsley or additional cheese. Serve warm.
Leave a Reply