
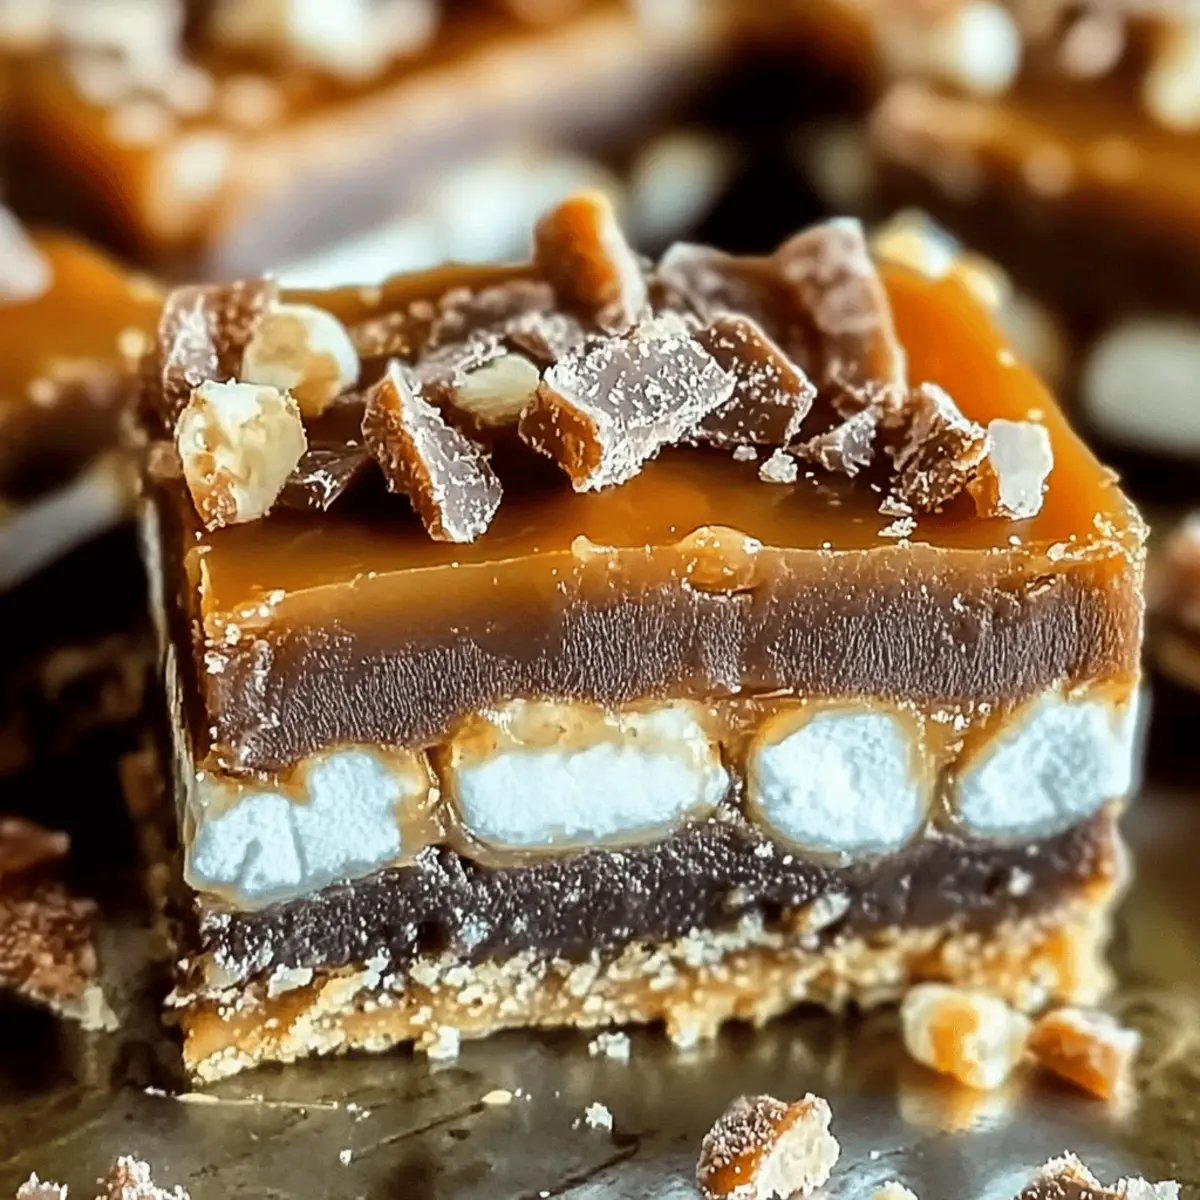
How often do you find yourself daydreaming about a dessert that’s not only delicious but a total breeze to make? Enter these No-Bake Butterfinger Caramel Bars—your new go-to treat that will rescue you from the fast-food dessert rut! With just 11 minutes of prep time, these bars promise a delightful combination of gooey caramel, crunchy Butterfinger pieces, and fluffy marshmallows, making them perfect for family movie nights or spontaneous gatherings. Plus, their customizable nature means you can switch up toppings and candies to suit your taste—hello, Snickers or M&Ms! Whether you’re seeking a quick sweet fix or a fun project in the kitchen, these bars deliver on both flavor and ease. Ready to indulge in a nostalgic treat that everyone will love? Let’s dive in!
Why Are Butterfinger Caramel Bars Amazing?
Simplicity at Its Best: With just 11 minutes of prep time, you can create a delicious dessert that’s perfect for any occasion.
Customize Your Way: Swap out Butterfinger for your favorite candies like Snickers or M&Ms, making it a fun project for family gatherings.
Gooey Goodness: These bars combine rich caramel and fluffy marshmallows, delivering an irresistible texture that melts in your mouth.
Crowd-Pleasing Treat: Whether for movie nights or parties, everyone loves these delightful bars—say goodbye to store-bought desserts!
Quick and Easy: Not only do they save time, but they also require minimal cleanup, giving you more time to enjoy your creation.
Serve with a Twist: Pair them with vanilla ice cream or homemade chocolate sauce for an indulgent treat that will impress any guest!
Butterfinger Caramel Bars Ingredients
For the Base
• Graham Crackers – Structure. Substitute with digestive biscuits for a similar texture.
• Mini Marshmallows – Sweetness and texture. Regular marshmallows can be chopped if needed.
For the Filling
• Caramel Bits – Sweetness and binding agent. Unwrapped caramels can also be used.
• Butterfinger Bars – Crunch and flavor. Can be swapped with any favorite chocolate-covered candy.
• Milk – Creaminess and smoothness. Any type suitable, including dairy or non-dairy.
For the Topping
• Chocolate Drizzle – Adds richness and visual appeal. Use your favorite melting chocolate for it.
• Sea Salt – Enhances taste. Sprinkle on top before serving for added balance.
These Butterfinger Caramel Bars are not just a treat; they’re a customizable delight waiting for your personal touch!
Step‑by‑Step Instructions for No-Bake Butterfinger Caramel Bars
Step 1: Prepare the Pan
Start by lining a 9×9-inch baking pan with aluminum foil, ensuring you leave some overhang for easy removal later. Press the foil down tightly so it forms to the bottom and sides of the pan, creating a smooth base for your Butterfinger Caramel Bars.
Step 2: Layer the Base
Next, evenly layer graham crackers across the bottom of the pan, creating a firm and crunchy foundation. Make sure to fit them snugly together without gaps, as this will provide structure and support for the layers above.
Step 3: Add Marshmallows
Generously spray mini marshmallows over the graham cracker layer, covering it completely. The fluffiness of the marshmallows will add delightful texture and sweetness to your Butterfinger Caramel Bars. Don’t skimp—more marshmallows will give a better consistency!
Step 4: Melt Caramel
In a microwave-safe bowl, combine caramel bits and milk. Set your microwave to high and heat for about 1 minute, then stir well. You’re aiming for a smooth, pourable consistency, so if needed, return it to the microwave in 15-second intervals until fully melted.
Step 5: Pour Over Layers
Once the caramel is melted and smooth, pour it evenly over the layered marshmallows and graham crackers. Use a spatula to gently spread it to cover the entire surface, ensuring that each marshmallow is coated in this gooey goodness.
Step 6: Press Butterfinger
Chop the Butterfinger Bars into small pieces, then evenly press them down into the warm caramel layer. The warmth will help the pieces adhere nicely, and you’ll enjoy their crunch in every bite of your finished Butterfinger Caramel Bars.
Step 7: Chill to Set
If you like, drizzle melted chocolate over the top for added richness, and sprinkle a pinch of sea salt for contrast. Then, place the pan in the refrigerator and chill for about 1-2 hours or until the bars are firm and set.
Step 8: Cut into Squares
Once set, use the aluminum foil overhang to lift the bars out of the pan. Place them on a cutting board and use a warm, sharp knife to cut into squares. This technique will help maintain the layers and keep your Butterfinger Caramel Bars looking fantastic!
Butterfinger Caramel Bars Variations
Feel free to let your creativity shine and customize these bars for a unique twist on flavor and texture!
-
Candy Swap: Replace Butterfinger with Snickers or M&Ms to try new flavor profiles; each change will bring a delightful surprise!
-
Nutty Addition: Add chopped almonds or peanuts for a satisfying crunch; the nutty flavor complements the sweetness beautifully.
-
Flavor Boost: Use flavored marshmallows, like chocolate or caramel, for an extra layer of indulgence; your taste buds will thank you!
-
Dairy-Free Delight: Substitute almond or coconut milk and opt for dairy-free caramel for an inclusive treat, ensuring everyone at the table can enjoy.
-
Chocolate Overload: Want more chocolate? Increase the chocolate drizzle or sprinkle chocolate chips on top before chilling for a decadent experience.
-
Cookie Crust: Instead of graham crackers, use crushed cookies like Oreos for an exciting twist in texture and flavor; this combination can be irresistibly fun!
-
Spicy Surprise: Add a dash of cayenne pepper to the caramel for a hint of heat; it’s a playful way to balance out the sweetness.
-
Fruit Fusion: Incorporate dried fruit like cranberries or cherries for a chewy element that’s refreshing against the rich caramel and chocolate—I bet your guests will love this surprising addition!
For even more delightful ideas, consider pairing these bars with a scoop of vanilla ice cream or drizzling them with homemade warm chocolate sauce, just like with my Caramel Brownie Cheesecake or Chocolate Chip Oatmeal Bars. Enjoy your culinary adventure!
What to Serve with No-Bake Butterfinger Caramel Bars?
Elevate your dessert experience by pairing these delightful treats with delicious accompaniments that enhance their flavors.
- Vanilla Ice Cream: Creamy and rich, ice cream brings a cool contrast to the warm caramel bars, creating a perfect melt-in-your-mouth experience.
- Fresh Berries: Add a burst of color and tartness; strawberries or raspberries not only look lovely but also balance the sweetness of the bars.
- Chocolate Sauce: Drizzling warm chocolate sauce over the bars intensifies the chocolate flavor. It’s a decadent touch that any chocolate lover would adore.
- Whipped Cream: Light and airy, a dollop of whipped cream provides a delightful texture contrast and makes the dessert even more indulgent.
- Nuts and Sprinkles: For added crunch, sprinkle chopped nuts over your bars, or use colorful sprinkles to make them festive—perfect for special occasions.
- Coffee or Milk: Pair these bars with a strong cup of coffee or cold milk to intensify those chocolatey flavors and make a delightful snack or dessert experience.
Unleash your creativity and enjoy these Butterfinger Caramel Bars in new and delicious ways!
Expert Tips for Butterfinger Caramel Bars
-
Melt Carefully: Ensure the caramel is fully melted for a smooth texture. Stir well to avoid lumps and achieve a liquid consistency.
-
Chill Time Matters: Allow at least 2 hours in the fridge for proper setting. Rushing this step can lead to gooey bars that don’t hold their shape.
-
Cut with Ease: Use a warm, sharp knife to cut into squares. This prevents the layers from sticking together and keeps your Butterfinger Caramel Bars looking neat.
-
Experiment Freely: Feel free to swap out Butterfinger with your favorite chocolate bars, like Snickers or M&Ms. This customization makes the recipe versatile and fun!
-
Storage Savvy: For the best flavor and texture, store in an airtight container. They can last up to 1 week at room temperature or 2 weeks in the fridge.
-
Garnish for Flair: Add a sprinkle of sea salt or extra chocolate drizzle on top before serving for a gourmet touch!
How to Store and Freeze Butterfinger Caramel Bars
Room Temperature: Store the bars in an airtight container at room temperature for up to 1 week. This keeps them chewy and delicious for snacking anytime!
Fridge: For an extended freshness, refrigerate the bars in an airtight container for up to 2 weeks, preserving their gooey consistency and flavor.
Freezer: Wrap the bars tightly in plastic wrap and transfer them to a freezer-safe container. They can be frozen for up to 3 months. Thaw overnight in the fridge before indulging.
Reheating: If you prefer a warm treat, gently microwave a square for a few seconds, just until it’s warmed through, enhancing its gooey texture.
Make Ahead Options
These No-Bake Butterfinger Caramel Bars are a fantastic option for meal prep enthusiasts! You can prepare the base (graham crackers and marshmallows) up to 24 hours in advance, simply layering them in the pan and covering lightly to prevent drying. For the caramel layer, melt and pour it over when you’re ready to serve—this way, it maintains its gooey texture and flavor. Additionally, you can chop and press your Butterfinger pieces up to 3 days ahead, just store them in an airtight container to keep them fresh. When it’s time to enjoy your bars, simply drizzle melted chocolate on top and chill until set for a delightful treat that’s just as delicious as fresh!

Butterfinger Caramel Bars Recipe FAQs
How do I choose the right Butterfinger Bars for this recipe?
Absolutely! When selecting Butterfinger Bars, look for ones that are fresh and free of dark spots or damage. Fresh bars will provide the best crunch and flavor. If you can, choose the fun-sized versions; they’re easier to chop and distribute evenly throughout your caramel layers!
What’s the best way to store leftover Butterfinger Caramel Bars?
To keep your delicious bars at their best, store them in an airtight container at room temperature for up to 1 week. If you’re planning to keep them longer, refrigerate them for up to 2 weeks. The cool environment will maintain their gooey texture while preventing them from becoming too sticky.
Can I freeze my Butterfinger Caramel Bars?
Yes, you can! To freeze, wrap the bars tightly in plastic wrap, then place them in a freezer-safe container or bag. They can stay fresh in the freezer for up to 3 months. To enjoy, simply thaw in the fridge overnight. This method keeps them tasty and ready to satisfy your sweet tooth later!
What if my caramel doesn’t melt smoothly?
If your caramel isn’t melting smoothly, it may need more time in the microwave. Heat it in 15-second bursts, stirring in between, until it reaches a velvety, pourable consistency. Don’t worry; if it gets too thick, a splash of milk can help achieve the desired texture. Just ensure everything is thoroughly mixed together!
Are Butterfinger Caramel Bars allergy-friendly?
Depending on your dietary needs, this recipe can be customized. For gluten-free options, substitute regular graham crackers with a gluten-free alternative. Be cautious with the candies you choose, as some may contain common allergens like nuts or dairy. Always check labels for cross-contamination if allergies are a concern.
Can I use different candy for this recipe?
Very much! The beauty of Butterfinger Caramel Bars lies in their versatility. Feel free to experiment by swapping Butterfinger Bars for candies like Snickers or M&Ms. You can even throw in some chopped nuts for a delightful crunch. The more, the merrier when it comes to exciting flavors and combinations in your no-bake dessert!
Irresistible Butterfinger Caramel Bars Made Easy at Home
Ingredients
Equipment
Method
- Start by lining a 9x9-inch baking pan with aluminum foil, ensuring you leave some overhang for easy removal later. Press the foil down tightly so it forms to the bottom and sides of the pan, creating a smooth base for your Butterfinger Caramel Bars.
- Next, evenly layer graham crackers across the bottom of the pan, creating a firm and crunchy foundation. Make sure to fit them snugly together without gaps, as this will provide structure and support for the layers above.
- Generously spray mini marshmallows over the graham cracker layer, covering it completely. The fluffiness of the marshmallows will add delightful texture and sweetness to your Butterfinger Caramel Bars. Don’t skimp—more marshmallows will give a better consistency!
- In a microwave-safe bowl, combine caramel bits and milk. Set your microwave to high and heat for about 1 minute, then stir well. You’re aiming for a smooth, pourable consistency, so if needed, return it to the microwave in 15-second intervals until fully melted.
- Once the caramel is melted and smooth, pour it evenly over the layered marshmallows and graham crackers. Use a spatula to gently spread it to cover the entire surface, ensuring that each marshmallow is coated in this gooey goodness.
- Chop the Butterfinger Bars into small pieces, then evenly press them down into the warm caramel layer. The warmth will help the pieces adhere nicely, and you’ll enjoy their crunch in every bite of your finished Butterfinger Caramel Bars.
- If you like, drizzle melted chocolate over the top for added richness, and sprinkle a pinch of sea salt for contrast. Then, place the pan in the refrigerator and chill for about 1-2 hours or until the bars are firm and set.
- Once set, use the aluminum foil overhang to lift the bars out of the pan. Place them on a cutting board and use a warm, sharp knife to cut into squares. This technique will help maintain the layers and keep your Butterfinger Caramel Bars looking fantastic!
Leave a Reply