
The delightful crunch of pretzels meets the sweetness of M&M’s in these Chewy Christmas Kitchen Sink Cookies, a festive treat that will have your holiday gatherings buzzing with joy. What I love most is how this recipe transforms humble ingredients into a cookie that feels like a celebration—it’s quick to whip up, taking just 30 minutes to bake from start to finish! Imagine the laughter and smiles around the cookie platter as everyone dives into the perfect blend of salty and sweet flavors. Plus, there’s no chilling time needed, making it a fantastic last-minute addition to your holiday baking lineup. Ready to fill your kitchen with the aroma of freshly baked cookies? Let’s dive in!

Why are Christmas Kitchen Sink Cookies a must-try?
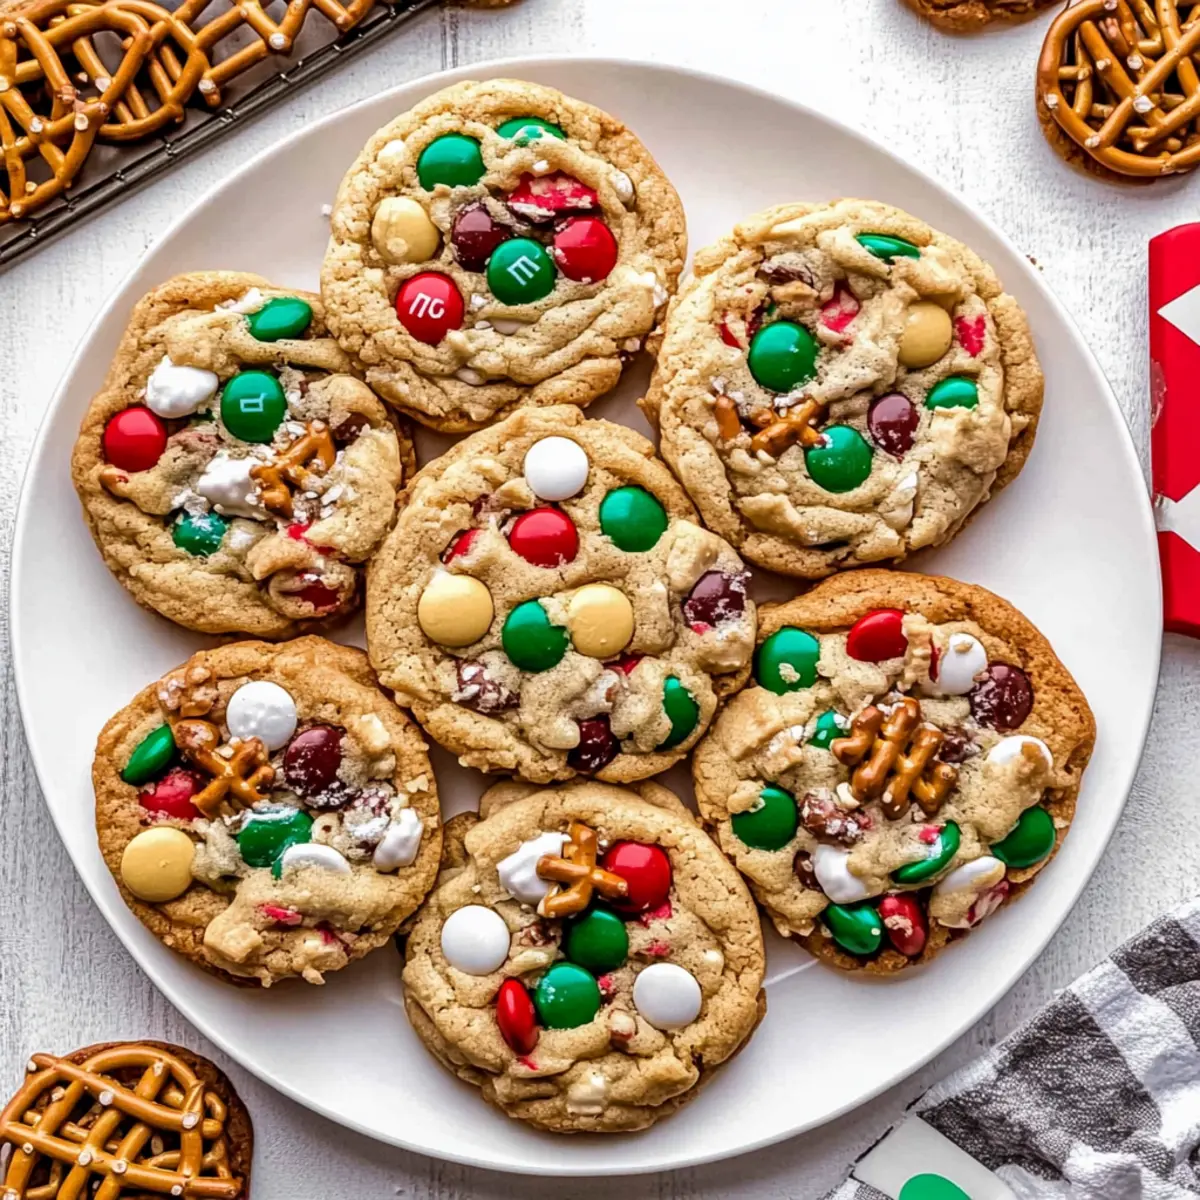
Irresistible Flavor Combination: The blend of salty pretzels and sweet M&M’s creates a unique taste that will leave your taste buds craving more.
Quick and Easy: Ready in just 30 minutes, these cookies are perfect for busy holiday schedules—no chilling necessary!
Crowd Pleaser: With their colorful mix-ins, these cookies are guaranteed to be a hit at any gathering, just like my Pumpkin Sugar Cookies or Apple Fritter Cookies.
Textural Delight: Each bite offers a satisfying crunch combined with a chewy center, making them a delightful cookie-cracker hybrid.
Versatile Options: Feel free to get creative! Swap in nuts or dried fruit for a personalized twist, ensuring there’s something for everyone.
Christmas Kitchen Sink Cookies Ingredients
For the Cookie Base
- Salted Butter – Provides moisture and rich flavor; can be replaced with unsalted butter (add a pinch of salt).
- Light Brown Sugar – Adds sweetness and chewiness; substitute with granulated sugar for a drier texture.
- Granulated White Sugar – Enhances sweetness and browning; replace with more brown sugar if desired.
- Egg Yolks – Adds richness and structure; whole eggs can be used, impacting texture slightly.
- Vanilla Bean Paste or Extract – Imparts depth of flavor; any vanilla extract works as a substitute.
- All-Purpose Flour – Provides structure; for gluten-free, use a 1:1 gluten-free flour blend.
- Baking Powder – Acts as a leavening agent; must be measured accurately for best results.
- Baking Soda – Works with acids for leavening; ensure it’s fresh for effectiveness.
- Salt – Balances sweetness; enhances overall flavor profile.
For the Sweet Mix-Ins
- Red and Green M&M’s – Liven up the cookies with color and a fun crunch; swap with any candy-coated chocolates.
- White Chocolate Chips – Adds creaminess; can substitute with milk or dark chocolate chips if preferred.
- Red and Green Jimmies – Decorative sprinkles that enhance appearance; optional or can use any color.
For the Crunchy Add-Ins
- Pretzel Pieces – Contributes that perfect salty crunch; adds chewiness to the cookies.
- Potato Chip Pieces – Introduces an unexpected crunch; use any plain-flavored chips for similar results.
With this ingredient list in hand, you’re already on your way to baking those delightful Christmas Kitchen Sink Cookies that everyone will love!
Step‑by‑Step Instructions for Christmas Kitchen Sink Cookies
Step 1: Preheat the Oven
Begin by preheating your oven to 350°F (175°C). While the oven warms up, prepare two baking sheets by lining them with parchment paper, creating a non-stick surface for your cookies. This initial step sets the stage for the rest of your Christmas Kitchen Sink Cookies, ensuring they bake evenly and come out perfectly golden.
Step 2: Cream the Butter and Sugars
In a large mixing bowl, combine the softened salted butter, light brown sugar, and granulated white sugar. Using a hand mixer or a stand mixer, beat the mixture on medium speed for about 2 minutes until the mixture is light and fluffy. This step is crucial as it adds air into the dough, giving your cookies that desirable chewy texture.
Step 3: Add Egg Yolks and Vanilla
Next, incorporate the egg yolks and vanilla bean paste (or extract) into the creamed butter and sugars. Mix for an additional 2 minutes on medium speed until everything is well combined, and the mixture appears pale and fluffy. This combination infuses your Christmas Kitchen Sink Cookies with rich flavors and helps bind the ingredients for a delightful final product.
Step 4: Combine Dry Ingredients
Gradually add the all-purpose flour, baking powder, baking soda, and salt to the wet mixture. Mix on low speed just until the dry ingredients are incorporated. Be careful not to overmix, as you want your cookies to remain soft and chewy. The dough will start to take shape, ready for all the delicious mix-ins.
Step 5: Fold in the Mix-Ins
Gently fold in the red and green M&M’s, white chocolate chips, pretzel pieces, potato chip pieces, and sprinkles (if using). Use a spatula or wooden spoon to ensure an even distribution of these festive ingredients throughout the dough. This is the fun part where your Christmas Kitchen Sink Cookies gain their colorful character and irresistible crunchy elements.
Step 6: Scoop the Dough
Using a cookie scoop or two tablespoons, portion the dough into approximately 20 balls. Place them 2 inches apart on the prepared baking sheets to allow for spreading during baking. For an extra touch, feel free to place additional M&M’s or sprinkle more toppings on top of each dough ball before baking.
Step 7: Bake the Cookies
Slide the baking sheets into your preheated oven and bake the cookies for 10 to 12 minutes. Keep an eye on them; you want to pull them out when the edges are lightly golden while the centers remain soft. If you prefer chewiness, aim for the 10-minute mark; for a slightly crispier cookie, let them go for the full 12 minutes.
Step 8: Cool and Enjoy
After baking, remove the cookies from the oven and allow them to cool on the baking sheets for about 5 minutes. This helps them firm up a bit before transferring them to a wire rack to cool completely. Now that your Christmas Kitchen Sink Cookies are ready, it’s time to enjoy the sweet aroma and share them with family and friends!
Christmas Kitchen Sink Cookies Variations
Feel free to let your creativity shine by customizing these delicious cookies! The possibilities are endless, and every twist brings new flavors and surprises.
-
Nutty Touch: Replace pretzels with chopped nuts like walnuts or pecans for a hearty crunch. This variation adds a delightful earthy flavor that pairs beautifully with the sweetness of the chocolate.
-
Fruity Addition: Toss in dried cranberries or chopped dried apricots for a chewy, fruity element. These add a splash of color and contrasting flavor, making each bite even more exciting.
-
Coconut Twist: Add shredded coconut to the mix for a tropical flair. The coconut complements the sweetness while providing an extra layer of texture—it’s like a little vacation in every cookie!
-
Spice It Up: Enhance the flavor with a dash of cinnamon or nutmeg in the dough. This will give your cookies a warm, festive aroma that feels like a cozy hug during the holidays.
-
Different Chocolates: Experiment with different types of chocolate chips—try dark chocolate or even mint chocolate for something refreshing. Each chocolate brings its unique flavor profile, allowing for endless holiday variations.
-
Pumpkin Spice Option: For a seasonal twist, use pumpkin spice in place of vanilla extract. This flavor swap will give your cookies a lovely autumn vibe, perfect for any festive gathering.
-
Caramel Surprise: Mix in caramel bits or chocolate-covered caramel candies for an explosion of gooey sweetness. The melty bits will create pockets of deliciousness that everyone will love.
If you’re looking for more holiday-inspired treats, consider trying my Pumpkin Sugar Cookies for a classic dessert or the delightful Apple Cider Whoopie Pie Cookies for something unique. Enjoy exploring these variations as you create your perfect batch of Christmas Kitchen Sink Cookies!
Make Ahead Options
These Chewy Christmas Kitchen Sink Cookies are perfect for busy home cooks looking to save time during the holiday season! You can prepare the cookie dough up to 3 days in advance by refrigerating it. Just scoop the dough into balls and place them in an airtight container. When you’re ready to bake, simply take the dough out, let it sit at room temperature for about 15 minutes to soften slightly, and then bake as directed. This method keeps the cookies just as delicious and fresh while allowing you to enjoy that delightful, home-baked aroma without the last-minute rush!
What to Serve with Christmas Kitchen Sink Cookies
These delectable cookies bring joy and warmth to your holiday gatherings, making them perfect for pairing with delightful accompaniments.
-
Cold Glass of Milk: The classic pairing; the coldness balances the warm, chewy cookies for ultimate satisfaction.
-
Hot Cocoa: Rich and creamy hot cocoa enhances the melting chocolate chips, creating a cozy treat for chilly nights.
-
Whipped Cream Topping: A dollop of whipped cream on the side adds a light, airy texture that beautifully complements the cookie’s chewiness.
-
Fruit Salad: Fresh, tangy fruit salad creates a refreshing contrast that balances the cookies’ sweetness, adding a burst of color to your table.
-
Spiced Apple Cider: The warm spices in apple cider perfectly complement the cookies’ sweet and salty profile, making every sip a delight.
-
Pumpkin Pie: The flavors of pumpkin and spices echo holiday themes, providing a comforting dessert balance alongside these festive cookies.
-
Chocolate Dipped Pretzels: A crunchy side with a sweet-salty twist; they mirror the cookie’s flavors while offering a satisfying crunch.
-
Ice Cream Sandwich: For a fun twist, sandwich a cookie between scoops of vanilla or peppermint ice cream for a delightful treat.
-
Chewy Brownies: Pairing with fudgy brownies introduces a rich chocolate flavor, amplifying the holiday indulgence perfectly.
Expert Tips for Christmas Kitchen Sink Cookies
-
Accurate Measurements: Measure flour by spooning it into your measuring cup instead of scooping straight from the bag to avoid dense cookies.
-
Uniform Size: Use a cookie scoop for evenly sized cookies that bake consistently; you can also reshape them with a circular cutter just after baking.
-
Room Temperature Rest: If your cookie dough was refrigerated, let it sit at room temperature for about 10-15 minutes before baking. This helps them spread evenly.
-
Watch the Bake Time: Keep a close eye on your cookies while baking; 10 minutes yields a chewy center, while 12 minutes will give you a more golden, crispy edge.
-
Mix-Ins Variability: Get creative! Feel free to swap in nuts or dried fruits for added flavor and crunch in your Christmas Kitchen Sink Cookies.
How to Store and Freeze Christmas Kitchen Sink Cookies
Airtight Container: Store your cookies in an airtight container at room temperature for up to 3 days to keep them fresh and chewy.
Refrigeration: If you want to extend their life, you can refrigerate the cookies in a sealed container for up to 5 days.
Freezer: For longer storage, freeze cookies in a single layer until solid, then transfer to a freezer bag or container for up to 2 months.
Reheating: When ready to enjoy, reclaim their chewy texture by reheating straight from the freezer in a 350°F (175°C) oven for about 5-10 minutes.

Christmas Kitchen Sink Cookies Recipe FAQs
How do I choose the right ripeness of ingredients?
Absolutely! When selecting your ingredients, especially the butter, aim for softened salted butter at room temperature. This ensures easy creaming with the sugars, which helps achieve that delightful chewy texture. Fresh eggs are a must too—look for ones without any cracks and ideally, choose those farthest from their expiration date for the best results.
What is the best way to store Christmas Kitchen Sink Cookies?
I recommend storing your cookies in an airtight container at room temperature for up to 3 days. If you want to keep them for a bit longer, you can refrigerate them in a sealed container for up to 5 days. However, for longer storage, freeze them in a single layer until solid, then transfer to a freezer bag or container for up to 2 months. Just remember, they’ll taste best when fresh!
Can I freeze the cookie dough before baking?
Yes, entirely! After scooping the cookie dough into balls, place them on a baking sheet lined with parchment paper and freeze until solid. Once frozen, transfer the cookie dough balls to a freezer bag for up to 2 weeks. When you’re ready to bake, let the dough sit at room temperature for about 10-15 minutes before baking at 350°F (175°C). This way, you’ll always have fresh cookies at your fingertips!
What should I do if my cookies aren’t spreading while baking?
Very common! If your Christmas Kitchen Sink Cookies aren’t spreading as they should, there are a couple of things you can try. First, ensure your butter was at the right temperature—softened, but not melted. If you added too much flour, it can also impact spreading; next time, be sure to spoon and level the flour instead of scooping directly from the bag. You could also let the cookie dough rest at room temperature for about 10-15 minutes before baking to ensure they spread nicely!
Are there any dietary considerations I need to keep in mind?
Yes, indeed! These delicious Christmas Kitchen Sink Cookies contain common allergens like gluten and dairy due to both the all-purpose flour and salted butter. If you’re baking for someone with these allergies, consider substituting with a gluten-free 1:1 flour blend and using dairy-free butter options. It’s always best to check ingredient labels and keep allergies in mind to ensure a tasty and safe treat for everyone!

Chewy Christmas Kitchen Sink Cookies for a Festive Treat
Ingredients
Equipment
Method
- Preheat your oven to 350°F (175°C) and line two baking sheets with parchment paper.
- In a large mixing bowl, cream the salted butter, light brown sugar, and granulated white sugar for about 2 minutes until light and fluffy.
- Add the egg yolks and vanilla paste (or extract) into the mixture, mixing for an additional 2 minutes.
- Gradually incorporate the all-purpose flour, baking powder, baking soda, and salt, mixing on low until combined.
- Fold in the M&M's, white chocolate chips, pretzel pieces, potato chip pieces, and sprinkles (if using) evenly.
- Scoop the dough into approximately 20 balls and place them 2 inches apart on the baking sheets.
- Bake for 10 to 12 minutes, watching for the edges to be lightly golden while the centers remain soft.
- Let the cookies cool on the baking sheets for about 5 minutes before transferring to a wire rack.
Leave a Reply