
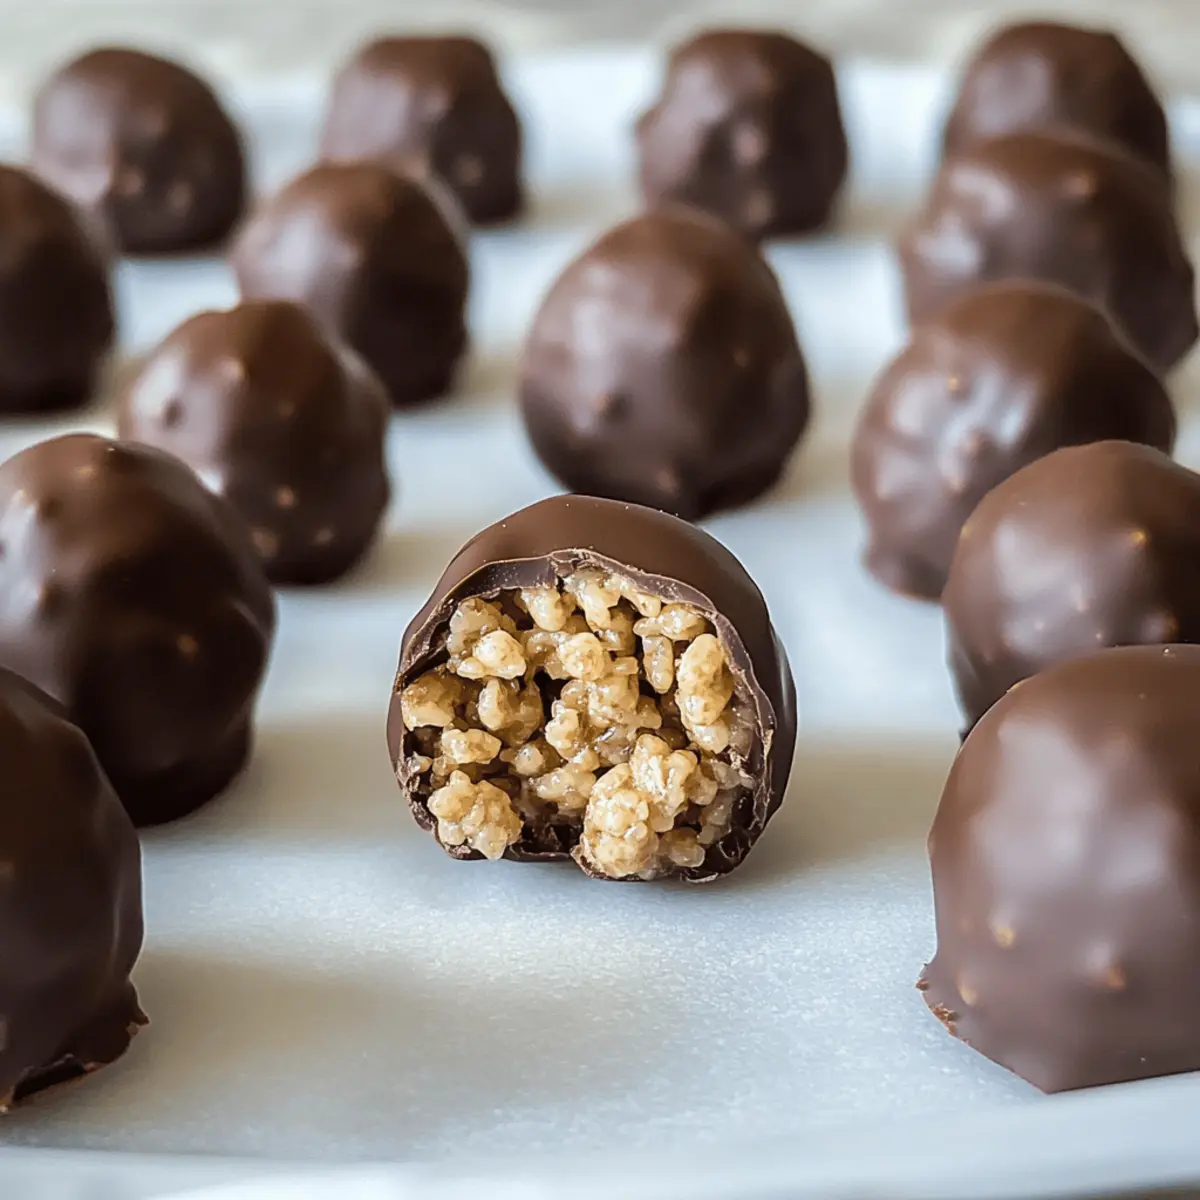
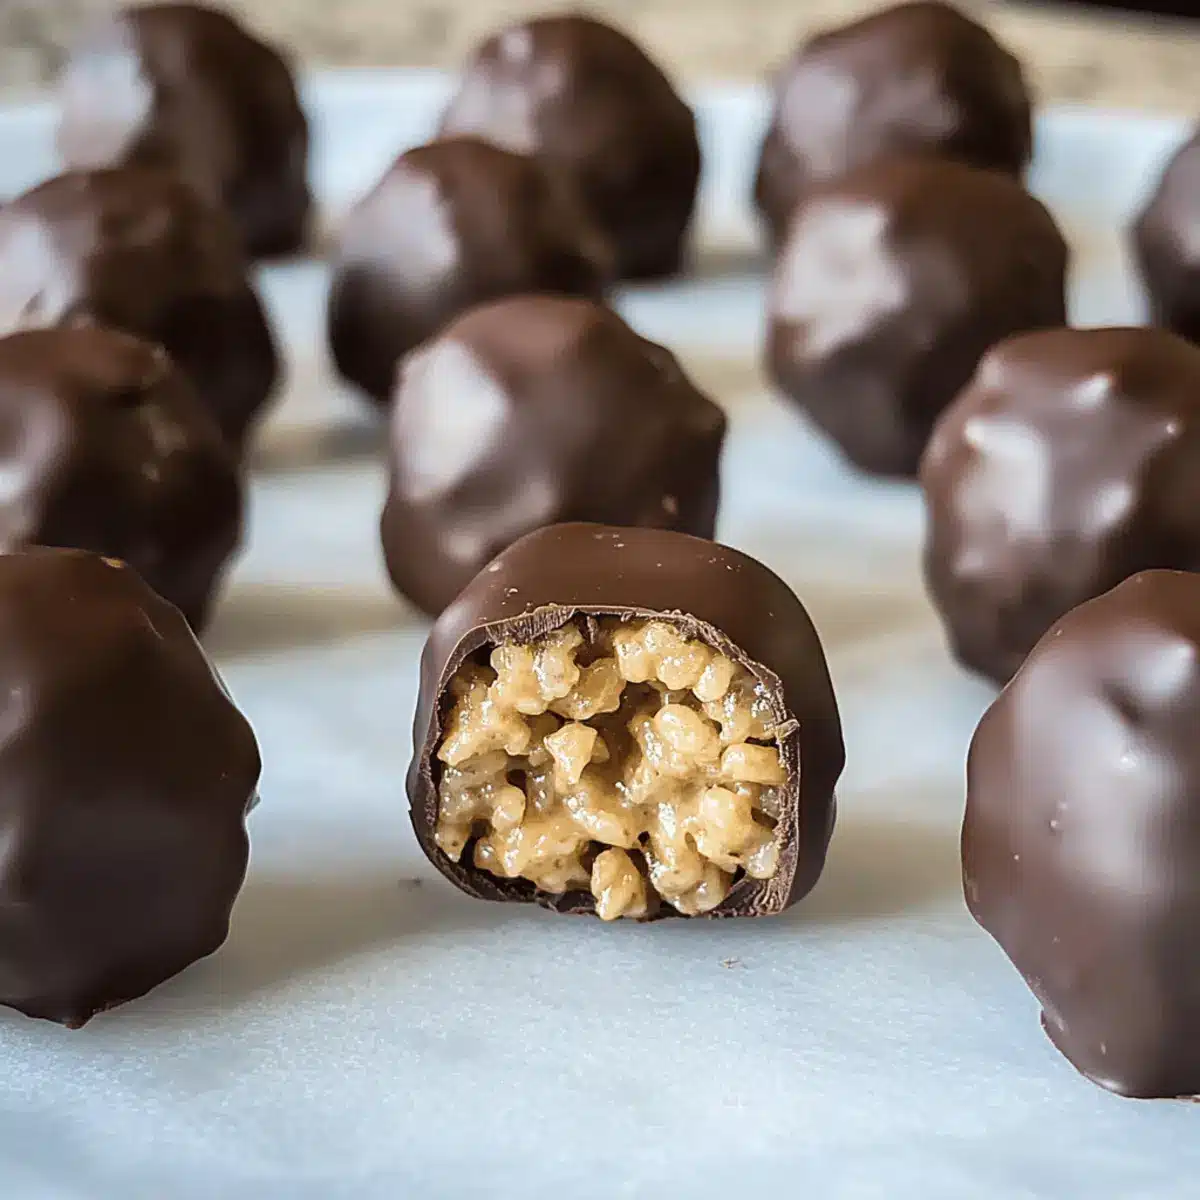
As I stood in my kitchen, the sweet aroma of melting chocolate wafted through the air, instantly whisking me back to my childhood. That’s when I first discovered the joy of No-Bake Chocolate Peanut Butter Balls with Rice Krispies. These irresistible bites not only transport you to a nostalgic sweet spot, but they also make dessert preparation a breeze! With no baking involved, they come together in minutes, perfect for those busy weekdays or last-minute gatherings. Each crunchy, chocolate-drenched ball is a delightful combination of rich peanut butter and crispy textures, making it a treat that both kids and adults absolutely love. Are you ready to dive into this simple yet scrumptious recipe? Let’s get rolling!
Why Are These Peanut Butter Balls Special?
No-Bake Convenience: There’s nothing better than a dessert that requires no baking! These Chocolate Peanut Butter Balls come together in mere minutes, perfect for those who crave sweet treats without the hassle.
Crowd-Pleasing Delight: Their irresistible combination of flavors and textures makes them a hit at any gathering, from holiday parties to casual get-togethers.
Customizable Joy: Feel free to get creative by replacing peanut butter with almond or cashew butter, or even adding dried fruit or nuts for a personal twist!
Kid-Friendly Fun: Involving kids in the rolling and dipping process turns making these treats into a fun family activity.
Easy Storage: Store them in an airtight container at room temperature for up to 2 weeks, or keep them in the fridge for a cool, refreshing bite any time!
Once you’ve mastered these Peanut Butter Balls, why not try them alongside great options like our Yogurt Peanut Butter bites? They’re a perfect way to expand your homemade snack repertoire!
Peanut Butter Balls with Rice Krispies Ingredients
For the Base
• Cocoa Rice Krispies – Adds a delightful crispy texture; regular Rice Krispies can be substituted for a milder flavor.
• Peanut Butter – Infuses rich flavor and helps bind the mixture; choose creamy or crunchy, ensuring freshness for the best result.
• Butter – Acts as a crucial binder and adds a touch of richness; make sure to use softened butter, not melted, for the right consistency.
• Powdered Sugar – Sweetens the mixture while helping it to hold together; essential for achieving the perfect texture as granulated sugar won’t work.
For the Coating
• Chocolate Melting Wafers – Creates a smooth, rich outer layer; choose high-quality melting chocolate for superior results over chips.
Step‑by‑Step Instructions for No-Bake Chocolate Peanut Butter Balls with Rice Krispies
Step 1: Mix Base
In a stand mixer, beat together 1 cup of softened butter and 1 cup of peanut butter until you achieve a creamy mixture that’s smooth and well-combined, usually about 2-3 minutes on medium speed. Gradually add 2 cups of powdered sugar, mixing until the texture is consistent and no lumps remain. This will create a thick base for your Peanut Butter Balls with Rice Krispies.
Step 2: Add Rice Krispies
Gently fold in 3 cups of Cocoa Rice Krispies using a spatula or wooden spoon. It’s important to be gentle during this step so the Rice Krispies keep their crunchiness, which will enhance the texture of your no-bake treats. Mix until the Krispies are evenly coated with the peanut butter mixture, creating a delightful, crispy consistency throughout.
Step 3: Form Balls
Scoop out about 1 tablespoon of the mixture and roll it into a 1-inch ball between your palms. If the mixture feels overly sticky, rinse your hands with cold water before continuing, as the coolness will help minimize stickiness. If the mixture crumbles, add small amounts of vegetable oil until it holds together well, ensuring all balls are uniform in size.
Step 4: Chill
Arrange the rolled balls on a baking sheet lined with parchment paper, and place them into the refrigerator for at least 1 hour to firm up. If you’re short on time, you can chill them in the freezer for about 20 minutes. This step is crucial for achieving the right texture for your Peanut Butter Balls before the chocolate coating.
Step 5: Melt Chocolate
While the balls are chilling, melt 1 ½ cups of chocolate melting wafers in a microwave-safe bowl. Heat them in 30-second intervals, stirring well in between to prevent burning. If using a double boiler, ensure no water gets into the bowl with the wafers. The chocolate should be smooth and completely melted, ready for coating.
Step 6: Coat Balls
Once the peanut butter balls have chilled and firmed up, dip each one into the melted chocolate using a fork, ensuring they are fully coated. Lift them out and gently tap the fork on the side of the bowl to remove excess chocolate. Place the coated balls back onto the parchment paper to cool and set, ensuring they maintain their shape and glossy finish.
Step 7: Cool and Store
Allow the coated Peanut Butter Balls with Rice Krispies to sit at room temperature until the chocolate is fully set, usually about 30 minutes. Once set, store the treats in an airtight container at room temperature for up to 2 weeks or refrigerate them for a cooler option.
How to Store and Freeze Peanut Butter Balls with Rice Krispies
Room Temperature: Keep your Peanut Butter Balls in an airtight container at room temperature for up to 2 weeks. This allows for easy snacking without compromising flavor.
Fridge: For a cool and refreshing treat, store them in the refrigerator for up to 1 month. The chill enhances their texture and helps them stay firm.
Freezer: To enjoy these sweet delights longer, freeze the peanut butter balls for up to 4-6 months. Just be sure to wrap them tightly to prevent freezer burn.
Reheating: If you prefer warm treats, thaw them in the fridge overnight before enjoying. You can briefly microwave them for a few seconds if you want them just a bit warm but be cautious not to overheat!
Peanut Butter Balls with Rice Krispies Variations
Feel inspired to customize these delightful treats to suit your tastes and preferences!
-
Nut Butter Twist: Use almond or cashew butter for a unique flavor profile and a delightful twist on the classic. Both options bring a rich nuttiness that pairs beautifully with chocolate, making every bite memorable.
-
Crispy Delight: Incorporate crushed graham crackers or corn flakes along with the Rice Krispies for an extra layer of crunch. This adds an inviting texture and a hint of sweetness that will surprise and delight your guests!
-
Dried Fruit Add-in: Toss in some dried cranberries, apricots, or cherries for a fruity burst. These offer a chewy contrast to the crispiness of the Rice Krispies, creating a well-rounded flavor experience in every delectable bite.
-
Spiced Nutmeg: Add a sprinkle of cinnamon or nutmeg to the base for a warm, aromatic flavor that transforms the treats into a seasonal delight. The spice adds a cozy element, perfect for sharing during the chilly months or holiday gatherings!
-
Vegan Friendly: Swap regular butter with coconut oil or a vegan alternative and use dairy-free chocolate for a completely plant-based treat. It’s just as indulgent while being a kinder choice for the planet.
-
Crunchy Cocoa: Replace Cocoa Rice Krispies with chocolate chips for a fudgier consistency, amplifying the chocolate flavor and creating a rich dessert that chocolate lovers will adore!
-
Coconut Coating: Roll the balls in desiccated coconut after dipping in chocolate for a tropical twist. The coconut flakes add a chewiness and tropical vibe that brightens up the classic flavor.
Once you’ve conquered these variations, consider trying them alongside our delightful Yogurt Peanut Butter bites or even some savory options like Butter Chicken Rice for a balanced menu your family will rave about!
Make Ahead Options
These No-Bake Chocolate Peanut Butter Balls with Rice Krispies are perfect for meal prep! You can prepare the mixture up to 24 hours in advance by rolling the balls and placing them in an airtight container in the refrigerator. This not only saves time but also allows the flavors to meld beautifully. When you’re ready to indulge, simply dip the chilled balls in melted chocolate and let them set. If you want to keep them fresh longer, you can freeze the rolled balls for up to 3 months; just thaw in the fridge before coating. With these make-ahead options, you’ll have a delightful treat ready to go at a moment’s notice!
Expert Tips for Peanut Butter Balls with Rice Krispies
• Proper Butter Consistency: Use softened butter at room temperature to ensure a smooth, creamy mixture. Melted butter can lead to a runny texture that’s hard to work with.
• Gentle Folding: When adding Rice Krispies, gently fold them in to keep their crunchy texture intact. Overmixing can lead to a mushy result.
• Cooling Hands: If the mixture becomes sticky while rolling into balls, washing your hands in cold water will help reduce tackiness and make rolling easier.
• Chocolate Temperature: Make sure the melted chocolate cools slightly before dipping the balls. Too hot chocolate can melt the peanut butter mixture, ruining your beautiful treats.
• Storage Tips: Store your Peanut Butter Balls in an airtight container to maintain their freshness. Avoid direct sunlight for best results.
What to Serve with No-Bake Chocolate Peanut Butter Balls with Rice Krispies
Indulging in these sweet bites can be even more delightful when paired with complementary treats and sides that enhance their rich flavors.
-
Creamy Vanilla Ice Cream: A scoop of smooth vanilla ice cream balances the sweetness and adds a refreshing contrast to the rich chocolate.
-
Fresh Berries: Strawberries or raspberries provide a tart and juicy burst that contrasts beautifully with the creamy sweetness of the peanut butter balls.
-
Crunchy Veggie Sticks: Crisp celery or carrot sticks offer a refreshing crunch, lightening up the dessert experience with a satisfying texture.
-
Chocolate Dipped Pretzels: The salty crunch of chocolate-dipped pretzels makes for an exciting flavor combination, enhancing the chocolate and peanut butter theme.
-
Homemade Whipped Cream: Light and airy whipped cream serves as a delightful topping, adding a touch of elegance that pairs wonderfully with the richness of the balls.
-
Milk or Almond Milk: A cold glass of milk—dairy or plant-based—perfectly complements these treats and adds a nostalgic touch, reminiscent of classic dessert pairings.
-
Coffee or Espresso: For adults, a warm cup of coffee or a shot of espresso brings out the chocolate flavors beautifully, and creates a heartwarming end to any gathering.
-
Chocolate Milkshake: A thick, chocolatey milkshake provides ultimate indulgence; its creamy sweetness echoes the peanut butter balls and makes dessert a fun experience.
-
Mini Fruit Tarts: Light and fruity, these tarts bring a colorful, fresh element to your dessert spread, creating visual appeal and a variety of flavors.
Peanut Butter Balls with Rice Krispies Recipe FAQs
How do I choose the right peanut butter?
When selecting peanut butter for these Peanut Butter Balls, look for options that are fresh and do not contain added sugars or oils. You can use creamy or crunchy varieties depending on your texture preference; just be sure to check the expiration date to ensure the best flavor!
What is the best way to store Peanut Butter Balls with Rice Krispies?
Store your Peanut Butter Balls in an airtight container at room temperature for up to 2 weeks. If you prefer a colder treat, you can refrigerate them for up to 1 month. For longer storage, they can be frozen for up to 4-6 months. Just make sure to wrap them tightly to prevent any freezer burn!
Can I freeze Peanut Butter Balls with Rice Krispies?
Absolutely! Freezing these treats is a great way to enjoy them later. To freeze, place the Peanut Butter Balls on a baking sheet lined with parchment paper so they don’t stick together, and freeze for about 1-2 hours until firm. Then, transfer them to an airtight container or freezer bag, separating layers with parchment paper. You can enjoy them frozen or thaw them in the fridge overnight for a softer treat.
What if my chocolate coating is too thick?
If your chocolate seems too thick when melting, try adding a teaspoon of vegetable oil to thin it out while mixing. This can help give a smoother coating to your Peanut Butter Balls. Also, ensure you’re working with high-quality melting wafers, as they generally have a better consistency than regular chocolate chips.
Are there any dietary considerations I should know about?
Yes! For those with nut allergies, be cautious about the use of peanut butter. You can substitute it with sunflower seed butter or soy nut butter for a nut-free alternative. Also, check labels to ensure that the chocolate melting wafers are dairy-free if lactose intolerance is a concern. It’s always a good idea to inform guests about the ingredients if you’re serving these treats.
Delicious Peanut Butter Balls with Rice Krispies for Easy Treats
Ingredients
Equipment
Method
- In a stand mixer, beat together 1 cup of softened butter and 1 cup of peanut butter until creamy, about 2-3 minutes.
- Gradually add 2 cups of powdered sugar, mixing until consistent and lump-free to create a thick base.
- Gently fold in 3 cups of Cocoa Rice Krispies, ensuring they maintain their crunch.
- Scoop out about 1 tablespoon of the mixture and roll it into 1-inch balls.
- Chill the rolled balls on a baking sheet for at least 1 hour or 20 minutes in the freezer.
- Melt 1.5 cups of chocolate melting wafers in a microwave-safe bowl in 30-second intervals, stirring in between.
- Dip each ball into the melted chocolate until fully coated and place back onto parchment paper to cool.
- Allow the balls to set at room temperature for about 30 minutes before storing.
Leave a Reply