
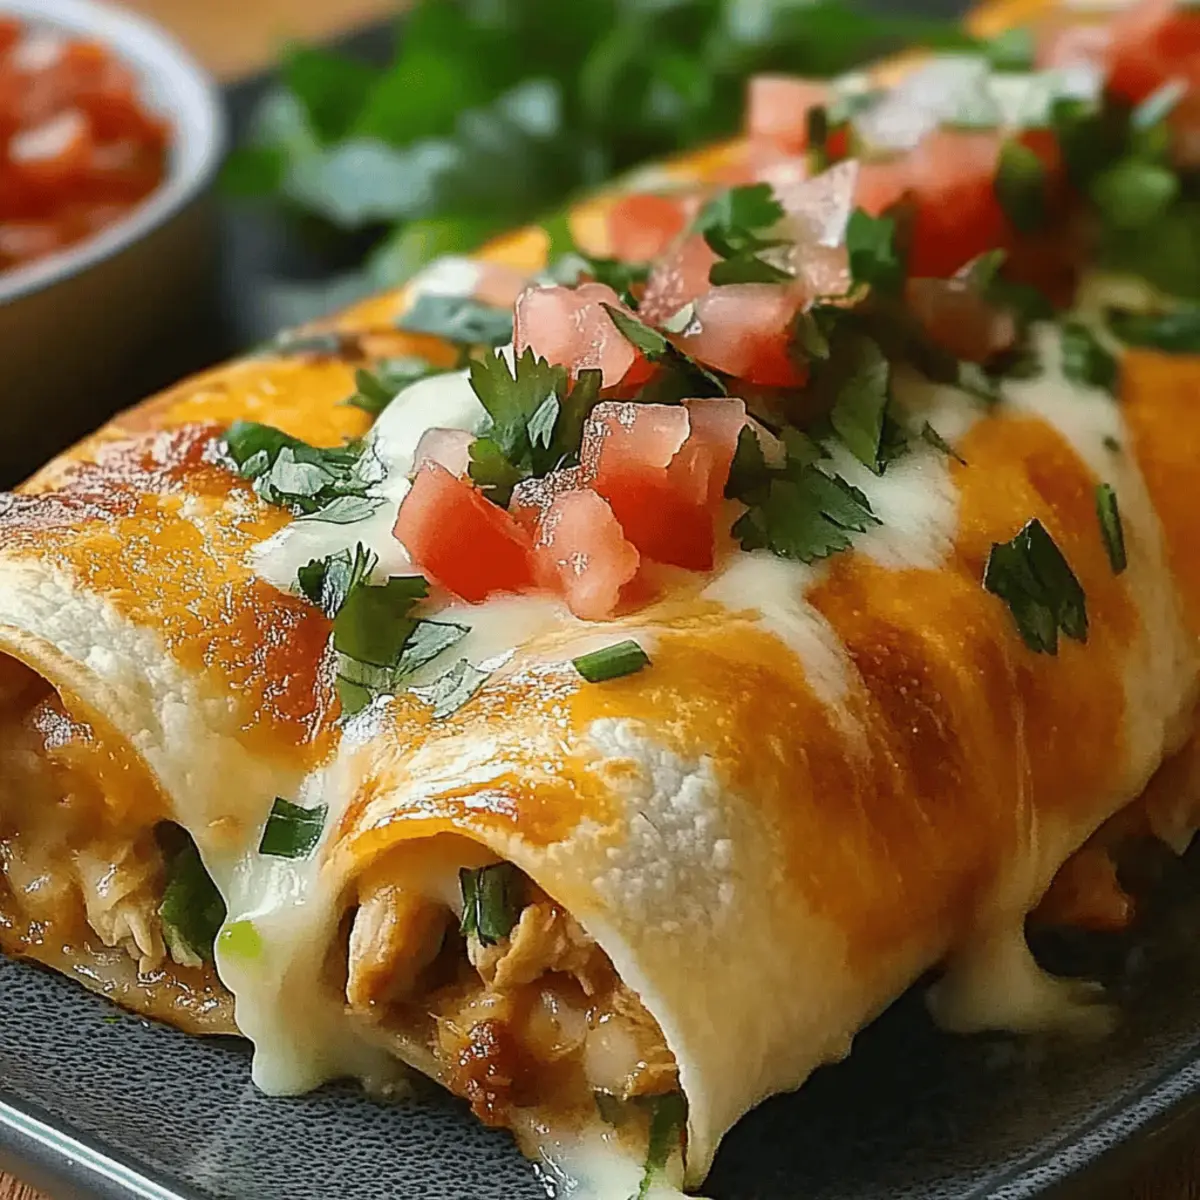
As I rummaged through my pantry one rainy afternoon, the last thing I expected was to create a new family favorite. The aroma of seasoned chicken and melted cheese wafting from the oven quickly filled my kitchen, transforming it into a cozy Tex-Mex haven. These Chi-Chi’s Baked Chicken Chimichangas are not only easy to throw together but also deliver that satisfying crunch without the added guilt of frying! Perfect for a weeknight dinner or casual gathering, this recipe is fully customizable to suit your cravings, whether you want to add black beans, chirpy BBQ sauce, or try a breakfast twist. Ready to transform your mealtime? Let’s dive into this delectable dish that everyone will love!
Why are these chimichangas a must-try?
Crispy Perfection: The baked method offers a delightfully crunchy exterior without the oiliness of frying.
Customizable Flavors: With options for black beans, BBQ sauce, or even scrambled eggs, you can tailor these chimichangas to suit everyone’s tastes.
Healthier Choice: Enjoy all the Tex-Mex goodness with less guilt, thanks to their baked nature and choice of healthier ingredients.
Family-Friendly: This dish is quick to prepare, making it ideal for busy weeknight dinners or a fun family gathering. Serve with sides like sour cream and guacamole for extra flair!
Unique Twist: Elevate your dinner game with variations like seafood or veggie delights, ensuring there’s always something new on your table.
These Chi-Chi’s Baked Chicken Chimichangas will surely become a staple, just like our popular Cheesy Garlic Chicken or Pumpkin Baked Oatmeal!
Chi-Chi’s Baked Chicken Chimichangas Ingredients
For the Filling
• Cooked Shredded Chicken – Provides protein and heartiness; substitute with leftover rotisserie chicken for convenience.
• Shredded Monterey Jack Cheese – Adds creaminess and flavor; can replace with pepper jack for spicier notes.
• Shredded Cheddar Cheese – Offers sharpness and depth; mix with mozzarella for a different cheese profile.
• Salsa – Adds moisture and flavor; use fresh salsa for a vibrant taste or sub with enchilada sauce.
• Diced Green Chilies – Imparts mild heat and texture; swap with jalapeños for a spicier kick.
• Ground Cumin – Provides earthy, warm notes; substitute with taco seasoning for added flavor complexity.
• Chili Powder – Enhances base flavor; use smoked paprika for a different twist.
• Garlic Powder – Adds aromatic flavor; fresh minced garlic can be used as a substitute.
• Cayenne Pepper (optional) – Increases spiciness; omit for a milder version.
• Salt and Pepper – For seasoning to enhance all flavors; adjust to taste.
• Flour Tortillas – Acts as the main wrapper; use corn tortillas for a gluten-free option.
• Cooking Spray – Assists in achieving crispiness; brush with olive oil as a healthier alternative.
For Serving
• Sour Cream – A creamy dip that cools the heat while complementing the flavors.
• Guacamole – Adds a fresh and creamy touch; use homemade or store-bought for convenience.
• Fresh Salsa – Provides a burst of flavor; personalize with your favorite mix-ins like cilantro or lime juice.
Dive into these delicious Chi-Chi’s Baked Chicken Chimichangas, where each ingredient plays an essential role in creating an unforgettable experience!
Step‑by‑Step Instructions for Chi-Chi’s Baked Chicken Chimichangas
Step 1: Preheat and Prepare
Begin by preheating your oven to 400°F (200°C) and prepare a baking sheet by lining it with parchment paper. This will help prevent sticking and ensure even baking. Gather all your ingredients for the Chi-Chi’s Baked Chicken Chimichangas to streamline the assembly process.
Step 2: Mix the Filling
In a large mixing bowl, combine the cooked shredded chicken, shredded Monterey Jack and cheddar cheese, salsa, diced green chilies, cumin, chili powder, garlic powder, and cayenne pepper if desired. Season the mixture with salt and pepper, and stir until well incorporated. The filling should be moist yet not overly wet, as excess liquid can lead to sogginess.
Step 3: Assemble the Chimichangas
Grab a flour tortilla and place a generous scoop of the filling in the center. Fold the sides in and then roll it up tightly to create your chimichanga. Repeat this process with the remaining tortillas and filling. Aim for even distribution to ensure all your Chi-Chi’s Baked Chicken Chimichangas are packed to perfection.
Step 4: Arrange for Baking
Carefully position each chimichanga seam-side down on the prepared baking sheet, making sure to leave space between each one for proper cooking. This step is crucial, as it allows hot air to circulate and helps achieve a crispy exterior.
Step 5: Crisp the Chimichangas
Lightly spray the tops of the chimichangas with cooking spray or brush them with olive oil. This will enhance their crispiness while baking and give them a beautiful golden color.
Step 6: Bake to Perfection
Place the baking sheet in the preheated oven and bake the chimichangas for 20-25 minutes. Keep an eye on them and bake until they are golden brown and crispy. The delightful aroma will fill your kitchen, signaling that your Chi-Chi’s Baked Chicken Chimichangas are almost ready!
Step 7: Cool and Serve
Once baked, remove the chimichangas from the oven and allow them to cool for a few minutes. This helps the filling settle. Serve warm with your favorite sides like sour cream, guacamole, and fresh salsa for dipping. Enjoy this delicious and healthier take on chimichangas with your family!
Expert Tips for Chi-Chi’s Baked Chicken Chimichangas
- Prevent Sticking: Use parchment paper that’s oven-safe to ensure your chimichangas don’t stick during baking.
- Crispier Results: Bake your chimichangas seam-side down for an extra crunch that everyone will love!
- Avoid Sogginess: Ensure the filling isn’t too wet; drain any excess liquid from ingredients like salsa or cooked beans.
- Make Ahead: Assemble chimichangas ahead of time and refrigerate until you’re ready to bake. Just adjust the baking time for chilled fillings.
- Customize Wisely: Don’t hesitate to experiment with different fillings! Just remember to keep the balance to ensure they bake perfectly, like your Chi-Chi’s Baked Chicken Chimichangas.
Chi-Chi’s Baked Chicken Chimichangas Variations
Feel free to get creative with these variations, transforming your beloved chimichangas into something new and exciting!
-
Veggie Delight: Add bell peppers, onions, and corn for a colorful and nutritious filling. This twist brings extra texture and nutrition to your chimichangas, making them vibrant and satisfying.
-
Southwest Flavor Burst: Stir in cooked black beans for added protein and a hearty feel. The earthy flavor pairs beautifully with the spices, making every bite even more delightful.
-
Tangy BBQ Twist: Swap out salsa for your favorite BBQ sauce to create a unique flavor profile. This savory twist adds a touch of sweetness that is sure to become a family favorite.
-
Breakfast Chimichangas: Fill with scrambled eggs and cooked breakfast sausage for a filling breakfast twist. These are perfect for brunch or a savory morning treat that will keep everyone happy.
-
Hawaiian Twist: Incorporate diced pineapple for a sweet contrast, balancing the savory flavors beautifully. It’s a fun surprise that will make your chimichangas stand out at any gathering.
-
Seafood Sensation: Replace the chicken with shrimp or lump crab meat for an upscale option. This elegant variation turns your meal into a seafood-loving delight, perfect for impressing guests.
-
Green Chile Goodness: Include diced roasted green chiles for a mild, flavorful addition. Their smoky taste enhances the overall profile, bringing a delightful kick without overwhelming heat.
-
Cheesy Overload: Experiment with different cheese combinations like pepper jack, gouda, or feta for extra cheesiness. Each cheese brings its unique flair, creating a chimichanga experience that’s truly unforgettable.
Enjoy these variations as you explore all the ways to bring your Chi-Chi’s Baked Chicken Chimichangas to life! And if you’re looking for something else to try, don’t forget to check out our delicious French Onion Chicken or the comforting flavors of Sugar Pineapple Chicken. Your dinner table is about to get a whole lot more exciting!
How to Store and Freeze Chi-Chi’s Baked Chicken Chimichangas
Fridge: Store leftovers in an airtight container for up to 3-4 days. Ensure they have cooled completely before sealing to preserve texture.
Freezer: Freeze assembled or baked chimichangas in a single layer on a baking sheet, then transfer to freezer-safe bags or containers for up to 2-3 months.
Reheating: To reheat, place frozen chimichangas in the oven at 350°F (175°C) for about 20-25 minutes or until heated through and crispy. For best results, avoid microwave reheating to maintain that delicious crunch.
Make-Ahead Tips: Assemble chimichangas in advance and refrigerate them before baking. When ready, bake straight from the refrigerator—just adjust the baking time accordingly.
Make Ahead Options
These Chi-Chi’s Baked Chicken Chimichangas are perfect for busy weeknight meal prep! You can assemble the chimichangas up to 24 hours in advance; simply wrap them tightly in plastic wrap and refrigerate. Alternatively, you can freeze them uncooked for up to 2-3 months. To maintain quality, ensure the filling is not too wet, which could lead to sogginess. When ready to bake, if using refrigerated chimichangas, place them directly in a preheated oven (400°F/200°C) and bake for 25-30 minutes until golden brown. For frozen ones, add an extra 5-10 minutes to the baking time. Enjoy restaurant-quality results with minimal fuss!
What to Serve with Chi-Chi’s Baked Chicken Chimichangas?
Elevate your family dinner night with delightful accompaniments that perfectly pair with the scrumptious flavors of baked chicken chimichangas.
-
Creamy Guacamole: This rich and buttery dip adds a refreshing contrast and enhances the Tex-Mex flavors of the chimichangas.
-
Fresh Salsa: Bright and bursting with flavor, a fresh salsa made from tomatoes, cilantro, and onion brings a zesty twist to your meal.
-
Sour Cream: A classic pairing that cools and complements the spicy notes of the filling, adding a creamy layer to each bite.
-
Mexican Rice: Serve with seasoned, fluffy Mexican rice to soak up all the delicious sauces and provide a wholesome element to your plate.
-
Refried Beans: Creamy refried beans not only enhance the protein but also bring a comforting richness that pairs beautifully with the crispy chimichangas.
-
Corn on the Cob: Grilled or roasted corn on the cob is a sweet, crunchy addition that’s perfect for summer gatherings and adds a pop of color to your table.
-
Crispy Tortilla Chips: Serve a basket of crunchy tortilla chips alongside homemade salsa or guacamole for a fun, snackable side.
-
Lime Wedges: A sprinkle of fresh lime juice over your plate brightens up the flavors, adding a citrusy zing that complements the dish beautifully.
These pairings are sure to create a vibrant and delicious feast that your family will love, perfectly complementing the crunchy goodness of your Chi-Chi’s Baked Chicken Chimichangas!
Chi-Chi’s Baked Chicken Chimichangas Recipe FAQs
How do I choose the right ripeness of ingredients?
Absolutely! For your chimichangas, select ripe avocados for creamy guacamole and fresh, vibrant tomatoes for salsa. Look for tortillas that are pliable and without any signs of breakage or drying out, ensuring a pleasant wrap for your filling.
How should I store leftover chimichangas?
Store any leftovers in an airtight container in the refrigerator for up to 3-4 days. Allow them to cool completely before sealing to maintain their crispy texture and avoid sogginess.
Can I freeze the chimichangas for later use?
Absolutely! To freeze, place assembled or baked chimichangas on a baking sheet in a single layer. Once frozen, transfer them to freezer-safe bags or containers. They can be stored for up to 2-3 months. For reheating, bake from frozen at 350°F (175°C) for about 20-25 minutes until heated through and crispy.
What if my chimichangas turn out soggy?
Very! If your chimichangas are soggy, it might be due to excess moisture in the filling. It’s vital to drain any liquid from salsa or beans. You can also bake seam-side down to ensure they get crispy. If they become soggy after storing, a quick re-bake can help restore their crunch.
Are there any dietary considerations I should keep in mind?
Absolutely! If you’re preparing for those with allergies, be cautious with ingredients like dairy and gluten. Use corn tortillas for a gluten-free option and non-dairy cheese for lactose sensitivity. Always check labels for sauces and toppings to ensure they meet dietary needs.
How can I adjust the spice level in my chimichangas?
Very! To customize the spice level, you can adjust the amount of cayenne pepper you add or swap diced green chilies for spicier jalapeños. For a less spicy version, simply omit the cayenne altogether, or use milder cheeses. Enjoy finding that perfect heat balance!
Crispy Chi-Chi’s Baked Chicken Chimichangas You’ll Love
Ingredients
Equipment
Method
- Preheat your oven to 400°F (200°C) and prepare a baking sheet lined with parchment paper.
- In a large mixing bowl, combine the cooked shredded chicken, shredded Monterey Jack and cheddar cheese, salsa, diced green chilies, cumin, chili powder, garlic powder, and cayenne pepper if desired.
- Grab a flour tortilla and place a generous scoop of the filling in the center. Fold the sides in and roll it up tightly.
- Position each chimichanga seam-side down on the prepared baking sheet, ensuring space between each.
- Lightly spray the tops of the chimichangas with cooking spray or brush them with olive oil.
- Bake the chimichangas in the preheated oven for 20-25 minutes until golden brown and crispy.
- Allow the chimichangas to cool for a few minutes before serving warm with sour cream, guacamole, and fresh salsa.
Leave a Reply