
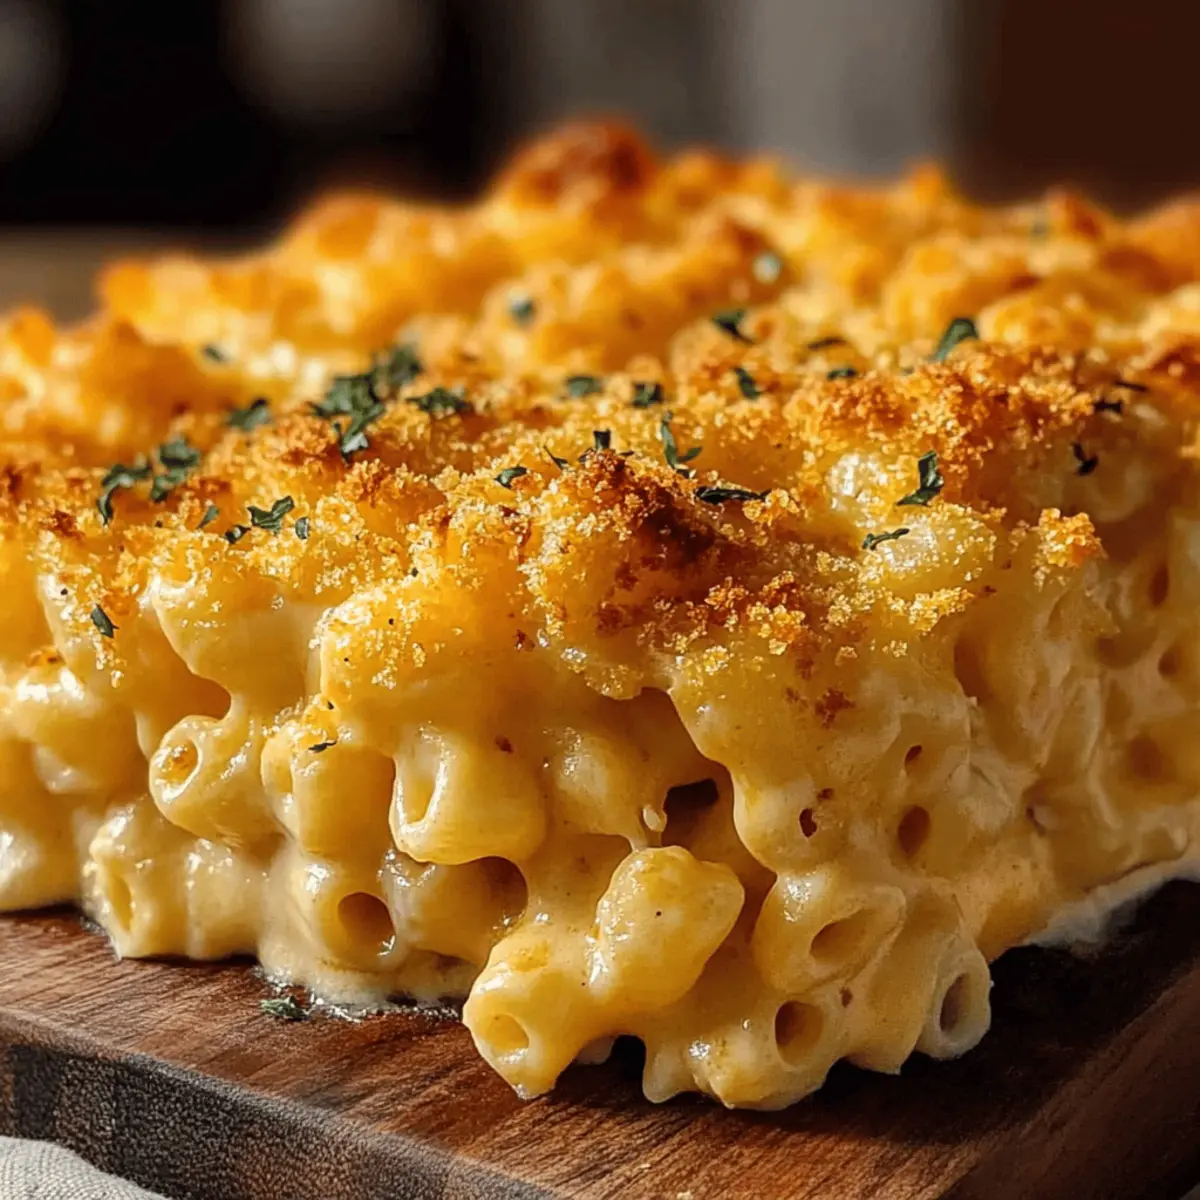
As I entered the kitchen on a dreary afternoon, an intense craving for comfort food hit me like a wave. That’s when I decided to whip up a steaming dish of Baked Mac and Cheese, the ultimate remedy to chase away the gloom. This recipe isn’t just about combining pasta and cheese; it’s a delightful dance of creamy textures and gooey goodness that will wrap you in warmth, much like a cozy blanket on a chilly night. Not only can you prepare it quickly—making it perfect for weeknight dinners—but it’s also a crowd-pleaser that’s sure to bring family and friends together. Who can resist that golden, crunchy topping? Ready to dive into a bowl of nostalgia and comfort? Let’s get cooking!
Why is Baked Mac and Cheese a Favorite?
Comforting Deliciousness: This Baked Mac and Cheese is the ultimate comfort food that wraps you in a warm hug.
Cheesy Goodness: With a blend of sharp cheddar, mozzarella, and parmesan, every bite bursts with rich flavor that delights your taste buds.
Easy to Make: It requires simple ingredients and straightforward steps, making it perfect for weeknight meals or unexpected gatherings.
Customizable: You can add veggies or spices to cater to your personal taste—try mixing in spinach for a nutritional boost or a touch of hot sauce for some zing!
Crowd-Pleasing: Whether it’s a family dinner or a cozy night in with friends, this dish is sure to impress—everyone loves a gooey, cheesy pasta!
Enjoy it alongside a fresh salad or with a slice of grilled chicken, and don’t forget to check out our delicious Crockpot Cheese Tortellini for more hearty meals!
Baked Mac and Cheese Ingredients
• Dive into the creamy goodness!
For the Pasta
- Elbow Macaroni – Provides the base structure for the dish; substitute with gluten-free pasta for a gluten-free version.
For the Cheese Sauce
- Sharp Cheddar Cheese – Adds a robust flavor; can be replaced with mild cheddar for less intensity or a mix of cheeses for varied taste.
- Mozzarella Cheese – Enhances creaminess; use provolone or gouda for a different flavor twist.
- Parmesan Cheese – Contributes a salty, nutty flavor; Grana Padano works well as a substitute.
- Unsalted Butter – Creates a roux base; substitute with margarine for a dairy-free option.
- All-Purpose Flour – Thickens the cheese sauce; gluten-free flour or cornstarch can be alternatives.
- Whole Milk – Provides creaminess to the sauce; swap with half-and-half for an extra rich sauce or almond milk for a dairy-free option.
- Salt – Enhances overall flavor; keep the amount adjustable based on taste preference.
- Black Pepper – Adds warmth and slight heat; substitute with white pepper for a milder flavor.
- Paprika – Introduces a subtle smokiness; smoked paprika can elevate the dish’s flavor profile.
For the Topping
- Panko Breadcrumbs – Creates a crunchy topping; regular breadcrumbs can be used, but the texture will differ.
Get ready to savor a deliciously creamy Baked Mac and Cheese that will fill your home with warmth and joy!
Step‑by‑Step Instructions for Baked Mac and Cheese
Step 1: Preheat and Prepare the Dish
Begin by preheating your oven to 350°F (175°C). While it heats, grab a 9×13-inch baking dish and grease it with a bit of butter or cooking spray to ensure your cheesy creation doesn’t stick. This step is crucial as it sets the stage for the golden crust that will top your Baked Mac and Cheese.
Step 2: Cook the Pasta
Bring a large pot of salted water to a boil, then add the elbow macaroni. Cook the pasta according to the package instructions until it’s al dente, usually about 6-8 minutes. Once done, drain the macaroni and return it to the pot, allowing it to sit briefly while you prepare the cheese sauce. The pasta will soak up more flavor when mixed with the sauce.
Step 3: Make the Roux
In a large saucepan over medium heat, melt 4 tablespoons of unsalted butter. Once the butter is fully melted, add ¼ cup of all-purpose flour, whisking continually for about 1-2 minutes until it’s a light golden color. This roux will create a creamy base for your Baked Mac and Cheese, bringing warmth and flavor to the dish.
Step 4: Whisk in the Milk
Gradually pour in 3 cups of whole milk, whisking constantly to avoid lumps. Continue stirring for about 5 minutes until the mixture thickens and coats the back of a spoon. You’ll know it’s ready when it bubbles gently and feels velvety. This creamy sauce is the heart of your dish, promising a rich flavor with each bite.
Step 5: Add the Cheeses
Remove the saucepan from heat and stir in 2 cups of sharp cheddar, 1 cup of mozzarella, and ½ cup of Parmesan cheese. Keep stirring until the cheese melts completely into a smooth, creamy sauce. The combination of cheeses not only amps up the flavor but creates that ooey-gooey texture that makes Baked Mac and Cheese so beloved.
Step 6: Combine and Transfer
Now, carefully fold the cooked macaroni into the cheese sauce, ensuring every piece of pasta is coated luxuriously. Once combined, pour the mixture into the prepared baking dish, smoothing the top with a spatula for even cooking. This step ensures that you get perfect cheesy bites all the way through your Baked Mac and Cheese.
Step 7: Add the Topping
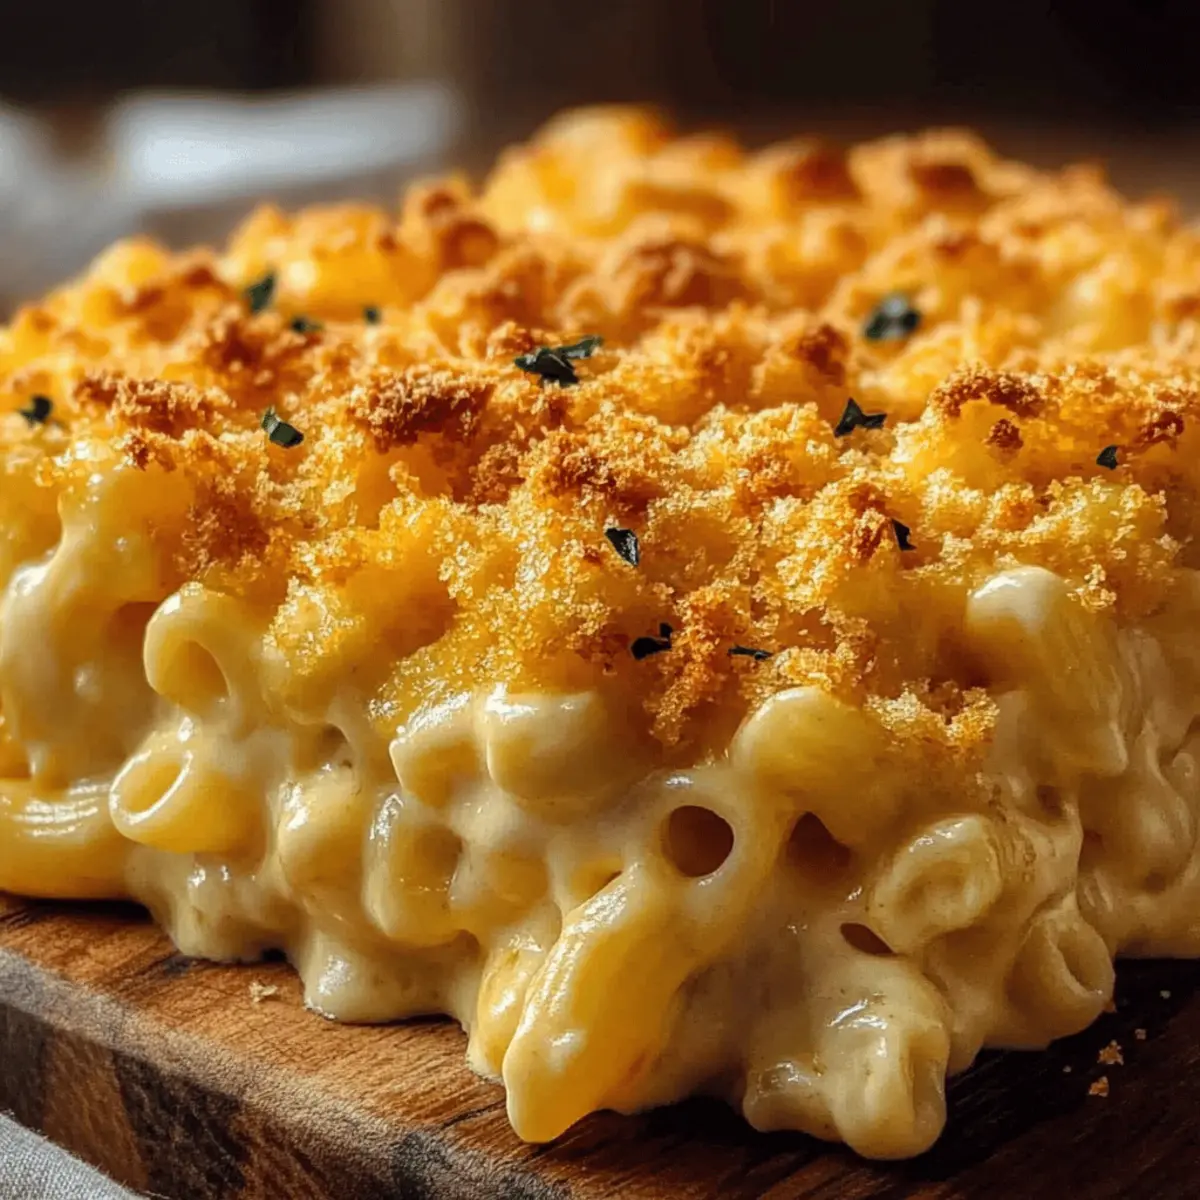
Sprinkle the remaining 1 cup of sharp cheddar cheese evenly over the top of the macaroni. Then, add 1 cup of panko breadcrumbs, creating a delightful crunchy topping. This will give your Baked Mac and Cheese that irresistible golden crust that contrasts beautifully with the creamy filling underneath.
Step 8: Bake to Perfection
Place the baking dish in the preheated oven and bake for 25-30 minutes. You’ll know it’s done when the top is golden brown and bubbly, a sign that the cheese has melted and the flavors have melded together beautifully. Your kitchen will fill with delightful aromas—get ready for a feast of comfort!
Step 9: Cool and Serve
Once baked, remove the dish from the oven and allow your Baked Mac and Cheese to cool for about 5 minutes. This resting time helps it set up, making it easier to serve and allowing the flavors to deepen. Dive into this comforting dish, and enjoy the warm, creamy goodness!
How to Store and Freeze Baked Mac and Cheese
Fridge: Store leftovers in an airtight container for up to 3 days. This will help maintain the creamy texture and cheesy goodness of the baked mac and cheese.
Freezer: Freeze portions in airtight containers for up to 3 months. To reheat, thaw overnight in the fridge, then bake at 350°F (175°C) until heated through.
Reheating: For best results, reheat in the oven covered with foil to prevent drying out. If using a microwave, heat in 30-second intervals, stirring in between for even warmth.
Tips: Always allow your baked mac and cheese to cool before storing, which enhances flavor and prevents excess moisture.
Baked Mac and Cheese Variations
Feel free to get creative with this classic dish and make it your own!
-
Vegetable Boost: Add cooked spinach, broccoli, or peas for a burst of color and nutrition. They not only enhance flavor but also pack in essential vitamins for a healthier profile.
-
Spicy Kick: For a zesty twist, fold in some jalapeños or mix in a few dashes of your favorite hot sauce. This will invigorate your mac and cheese with a fiery punch, making every bite exciting.
-
Cheese Lovers: Mix different cheeses like gouda, fontina, or even blue cheese for an adventurous palate experience. Each cheese brings a new layer of flavor, making the dish extra indulgent.
-
Smoky Flavor: Switch regular paprika for smoked paprika to deepen the flavor profile. This gives the baked mac a subtle smokiness that complements the creaminess beautifully.
-
Gluten-Free Option: Substitute elbow macaroni and all-purpose flour for gluten-free alternatives. Brands packed with taste and texture can ensure no one misses the original!
-
Creamy Delight: Instead of whole milk, use heavy cream or half-and-half for an ultra-luxurious and creamy texture. This will make every spoonful feel like a decadent treat.
-
Savory Crust: Mix in grated cheese into your panko topping for an extra cheesy crunch. It not only adds flavor but also a delightful layer of texture with that golden-brown topping.
For even more inspiration, try pairing this dish with our family-favorite Crockpot Cheese Tortellini or the delightful Pumpkin Cream Cheese Muffins for dessert!
Expert Tips for Baked Mac and Cheese
-
Perfect Pasta Texture: Ensure you cook the elbow macaroni al dente; overcooked pasta can lead to a mushy end result in your baked mac and cheese.
-
Creamy Sauce Consistency: Avoid lumps in your cheese sauce by whisking constantly when adding the milk and after incorporating the cheeses until fully melted and smooth.
-
Topping Secrets: For extra crunch, mix some grated cheese into the panko breadcrumbs before topping; this helps create a nicely browned crust while adding extra cheesy goodness.
-
Serving Warm: Let the baked mac and cheese cool for about 5 minutes before serving; this allows it to set, ensuring cleaner slices and optimal flavor distribution.
-
Experiment with Cheeses: Feel free to blend your favorite cheeses for the sauce; combinations like gouda and fontina can add unique flavors to your baked mac and cheese masterpiece!
Make Ahead Options
These Baked Mac and Cheese are perfect for meal prep enthusiasts! You can prepare the cheese sauce up to 24 hours in advance and refrigerate it in an airtight container to maintain its creamy texture. Additionally, you can cook the elbow macaroni and combine it with the prepared cheese sauce, storing them together in the fridge for up to 3 days. When you’re ready to enjoy your meal, simply transfer the mixture to your greased baking dish, top with cheese and breadcrumbs, and bake straight from the refrigerator. This way, you’ll have a comforting dish that tastes just as delicious with minimal effort on busy weeknights!
What to Serve with Cheesy & Creamy Baked Mac and Cheese
Picture a cozy dinner table set with warmth and laughter, where every bite complements the rich, cheesy indulgence of your dish.
-
Crisp Green Salad: The freshness of mixed greens with a zesty vinaigrette contrasts beautifully with the creamy mac, adding brightness to your meal. A salad with cherry tomatoes, cucumbers, and a touch of lemon elevates the whole experience—each bite feels refreshing.
-
Garlic Bread: Golden, buttery garlic bread offers a crunchy texture that pairs exceptionally well with the softness of baked mac and cheese. Dunk it into the cheesy goodness for a delightful blend of flavors.
-
Steamed Broccoli: Bright green broccoli brings freshness and a slight crunch to the table, balancing the richness of your mac and cheese. Toss it in a bit of olive oil and garlic for an added layer of flavor.
-
Grilled Chicken: Tender grilled chicken adds a savory element that complements the creamy pasta perfectly. Season it with herbs to enhance the overall taste of your meal.
-
Roasted Brussels Sprouts: These caramelized bites of goodness create a delectable contrast. Their earthy flavor and crispy edges make them a fantastic sidekick to your comfort food.
-
Sweet Peas: Simple yet effective, sweet peas introduce a pop of color and sweetness, enhancing the dish’s flavor profile. Their vibrant green offers a pleasant contrast against the mac and cheese.
-
Chardonnay: A chilled glass of Chardonnay rounds out the dinner experience with its crispness and hint of fruitiness, making each bite of cheesy goodness even more enjoyable.
-
Chocolate Chip Cookies: For dessert, classic warm chocolate chip cookies are a perfect sweet finish, bringing back memories of childhood and comfort—the ultimate treat after a hearty meal.
Baked Mac and Cheese Recipe FAQs
What type of pasta is best for Baked Mac and Cheese?
I recommend using elbow macaroni, as it holds the cheese sauce beautifully. If you’re looking for a gluten-free option, you can easily substitute it with gluten-free pasta, which works just as well in this creamy dish.
How should I store leftover Baked Mac and Cheese?
Store your leftovers in an airtight container in the refrigerator for up to 3 days. This helps preserve its creamy goodness. When you’re ready to enjoy it again, you can reheat it in the oven or microwave.
Can I freeze Baked Mac and Cheese?
Absolutely! To freeze, let the dish cool completely, then portion it in airtight containers or resealable freezer bags. Your Baked Mac and Cheese can be frozen for up to 3 months. When you’re ready to eat, thaw overnight in the fridge, and then bake at 350°F (175°C) until heated through.
What should I do if my cheese sauce is too thick?
If you find your cheese sauce has thickened too much, don’t worry! Simply whisk in a little more milk over low heat until you reach the desired creamy consistency. This should restore that luscious texture perfect for coating the macaroni.
Are there any dietary concerns I should consider?
For vegetarians, this Baked Mac and Cheese recipe is perfect as it contains no meat. However, if you’re making it for someone with lactose intolerance, you can substitute whole milk and cheeses with non-dairy alternatives like almond milk and vegan cheese. Just check labels to ensure they’re suitable for your dietary needs!
What are some add-ins I can use for a twist?
You can mix in cooked veggies like broccoli or spinach to add nutrition. If spicy is your thing, consider folding in some chopped jalapeños or adding a few dashes of hot sauce to the cheese sauce. The more, the merrier in this delightful dish!
Baked Mac and Cheese: A Creamy Comfort Food Classic
Ingredients
Equipment
Method
- Preheat your oven to 350°F (175°C) and grease a 9×13-inch baking dish.
- Bring a large pot of salted water to a boil, then add the elbow macaroni and cook until al dente.
- In a large saucepan, melt 4 tablespoons of unsalted butter, then whisk in ¼ cup of all-purpose flour for about 1-2 minutes.
- Gradually pour in 3 cups of whole milk while whisking to avoid lumps and cook until thickened.
- Remove from heat and stir in 2 cups of sharp cheddar, 1 cup of mozzarella, and ½ cup of Parmesan cheese.
- Fold the cooked macaroni into the cheese sauce, then pour the mixture into the prepared baking dish.
- Sprinkle remaining 1 cup of sharp cheddar cheese and 1 cup of panko breadcrumbs on top.
- Bake for 25-30 minutes until the top is golden brown and bubbly.
- Allow to cool for about 5 minutes before serving.
Leave a Reply