
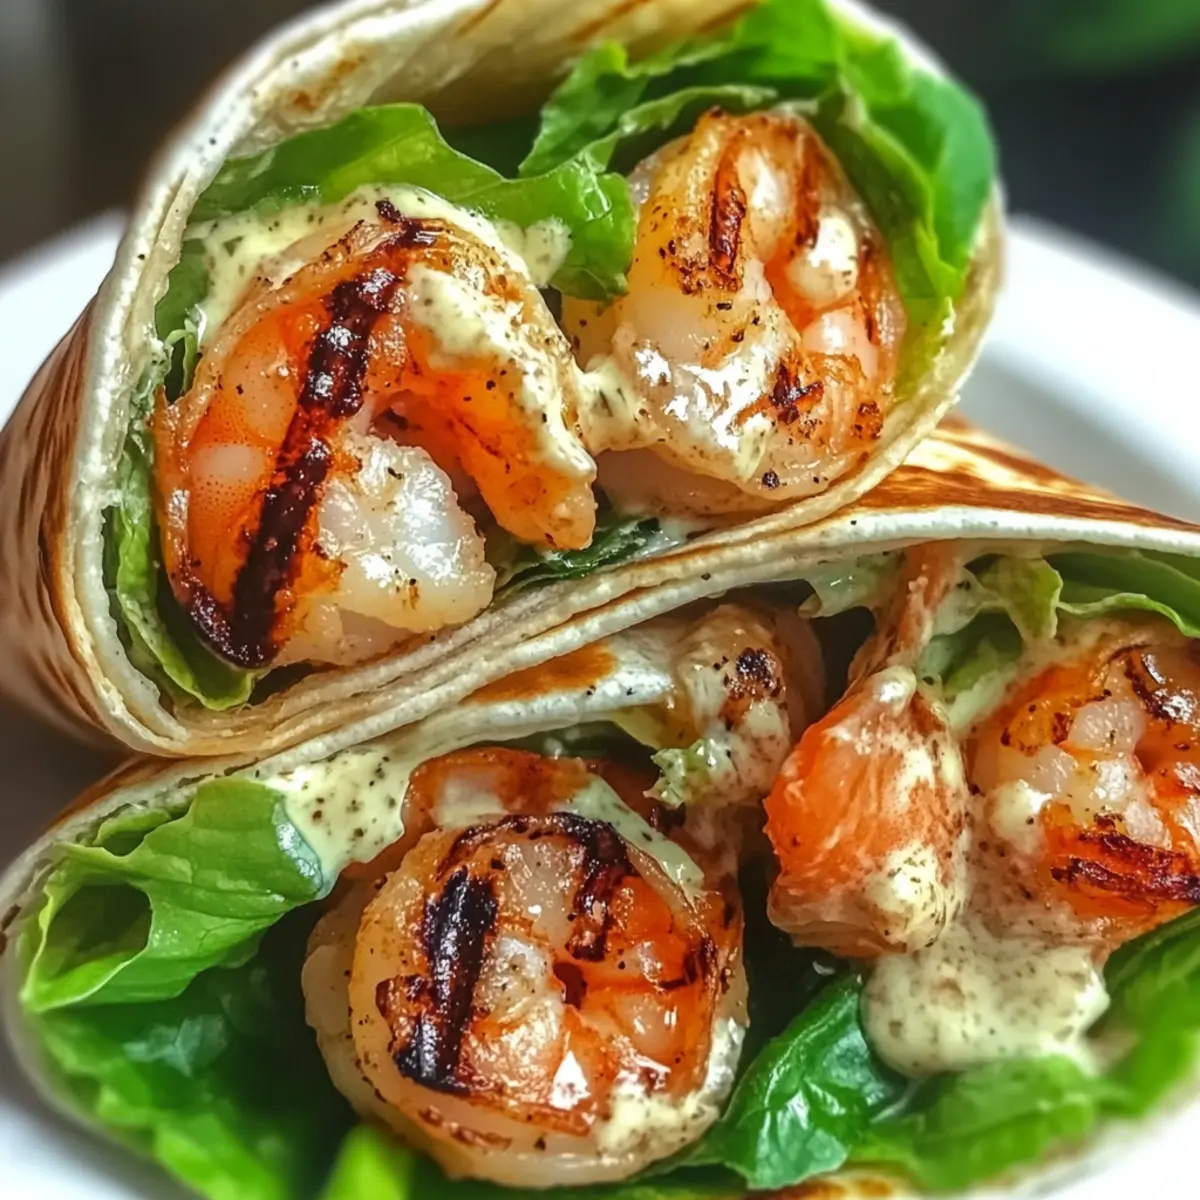
The aroma of smoky grilled shrimp wafting through the kitchen instantly transports me to sun-soaked summer barbecues. If you’re looking for a delicious, protein-rich dish that comes together in a flash, my Grilled Shrimp Caesar Wraps are just what you need! This recipe is not only quick to prepare, but it also delivers a satisfying crunch from fresh romaine lettuce and the rich creaminess of Caesar dressing, wrapped snugly in a warm tortilla. Perfect for lunch on busy weekdays or a light dinner, these wraps cater to anyone seeking a healthier alternative to fast food without sacrificing flavor. What’s your favorite twist to make a classic dish your own? Let’s dive into creating this delightful wrap together!
Why You’ll Love Grilled Shrimp Caesar Wraps
Quick and Easy: Whip this up in under 30 minutes, making weeknight dinners a breeze!
Protein-Packed: Delight in the health benefits of shrimp, providing a robust protein boost to fuel your day.
Flavor Fusion: Experience the wonderful combination of smoky grilled shrimp, fresh romaine, and zesty Caesar dressing, creating a taste sensation!
Customizable: Tailor your wrap with different veggies or dressings—try adding bell peppers or using a lighter dressing for a unique twist.
Perfect for Meal Prep: Make it ahead! These wraps are great for meal prepping; just store components separately and assemble when needed.
These Grilled Shrimp Caesar Wraps are a flavorful and fresh way to simplify your meals while keeping them health-conscious. If you’re interested in more delicious and quick ideas, check out my Garlic Chicken Wraps or the tasty Spicy Blackened Shrimp for something a bit different!
Grilled Shrimp Caesar Wraps Ingredients
• For the perfect wrap, gather your ingredients below!
For the Shrimp
• Shrimp – use fresh or frozen shrimp; marinate them for enhanced flavor.
• Olive Oil – helps to prevent sticking and adds richness to the shrimp.
• Spices – use garlic powder, paprika, or Cajun seasoning for an extra kick.
For the Salad
• Romaine Lettuce – crisp and refreshing; a fantastic base for your wrap.
• Caesar Dressing – opt for creamy or lighter versions based on dietary needs.
• Parmesan Cheese – adds a savory finish; nutritional yeast is a great dairy-free option.
For the Wrap
• Tortillas – use whole grain or gluten-free tortillas to suit your lifestyle.
• Bacon Bits or Croutons (optional) – add crunch; substitute with roasted chickpeas for a healthier touch.
With these fresh ingredients, your Grilled Shrimp Caesar Wraps are bound to be a hit! Enjoy the convenience of assembling a delicious meal in no time!
Step‑by‑Step Instructions for Grilled Shrimp Caesar Wraps
Step 1: Marinate the Shrimp
Begin by marinating the shrimp in a mixture of olive oil, garlic powder, and paprika for 10-15 minutes to infuse flavors. This allows the spices to soak in, enhancing the taste of your Grilled Shrimp Caesar Wraps. While the shrimp marinates, preheat your grill to medium-high heat, about 375°F to 400°F, preparing for that perfect char.
Step 2: Grill the Shrimp
Once marinated, thread the shrimp onto skewers for easy grilling, ensuring they’re evenly spaced. Grill the shrimp for about 3-4 minutes on each side, or until they are pink and opaque, with a slight char. Keep an eye on them to avoid overcooking, as shrimp can become rubbery quickly. Remove from the grill and let them rest briefly.
Step 3: Prepare Your Wraps
While the shrimp is resting, take your tortillas and lay them flat on a clean surface. Start layering with fresh romaine lettuce, creating a crisp base for your Grilled Shrimp Caesar Wraps. Next, add a generous drizzle of Caesar dressing over the lettuce, followed by the grilled shrimp, allowing the warm shrimp to mix with the cool ingredients for an enticing flavor contrast.
Step 4: Add Optional Ingredients
For extra texture and flavor, consider adding optional ingredients like bacon bits or crunchy croutons on top of the shrimp. If you prefer a healthier option, substitute with roasted chickpeas. These additions provide a delightful crunch that elevates your wraps to a new level of deliciousness.
Step 5: Roll Up the Wraps
To assemble your wraps, gently fold in the sides of the tortilla and roll it tightly away from you, securing all the delicious contents inside. Make sure it’s snug but not too tight, to avoid squeezing out the ingredients. With each roll, you’ll build anticipation for the flavorful bite that awaits.
Step 6: Serve and Enjoy
Lastly, slice your Grilled Shrimp Caesar Wraps in half to showcase the vibrant layers inside. Serve immediately for the best crunch and freshness. If meal prepping, store the components separately for maximum flavor retention. Enjoy the satisfying wrap right away or pack it for a delicious on-the-go meal!
Grilled Shrimp Caesar Wraps Variations & Substitutions
Feel free to get creative with these wraps and explore delightful twists that’ll make your taste buds sing!
- Spicy Kick: Add jalapeños or chili flakes for a fiery touch—this enhances the overall flavor and gives it a delicious punch.
- Dairy-Free Delight: Substitute Parmesan cheese with nutritional yeast for a cheesy flavor without the dairy—perfect for those with lactose intolerance.
- Veggie Boost: Incorporate sliced bell peppers or shredded carrots for extra crunch and sweetness, balancing out the rich dressing.
- Creamy Alternative: Try avocado dressing instead of Caesar for a luscious, creamy finish that complements the shrimp beautifully.
- Herbed Twist: Season shrimp with fresh herbs like cilantro or basil for a fragrant flavor profile—herbs add a fresh dimension to your wrap!
- Asian Flair: Swap the Caesar dressing for teriyaki sauce and add shredded cabbage for an Asian-inspired twist—serve it with a side of wasabi for an extra kick!
- Tortilla Swap: Use leafy greens like collard greens or lettuce as a wrap if you’re going for a low-carb option, allowing all flavors to shine through.
- Protein Swap: If shrimp isn’t your thing, grilled chicken or tofu makes a great alternative, providing protein while catering to different dietary preferences.
Feel free to explore these variations to make your Grilled Shrimp Caesar Wraps truly unique. If you’re inspired to keep the creativity flowing, check out my Garlic Chicken Wraps and Chili Pineapple Shrimp for even more delicious ideas!
Make Ahead Options
These Grilled Shrimp Caesar Wraps are perfect for busy weeknights when you need a quick meal that’s ready to go! You can marinate the shrimp up to 24 hours in advance, ensuring they soak up all those delicious flavors. Additionally, chop up the romaine lettuce and pre-portion the Caesar dressing to keep everything fresh—store them in airtight containers in the refrigerator for up to 3 days. When you’re ready to serve, simply grill the shrimp and assemble the wraps by layering the lettuce, dressing, and shrimp in the tortillas. This way, you’ll enjoy lovely, homemade wraps without the stress of last-minute prep!
Expert Tips for Grilled Shrimp Caesar Wraps
Avoid Rubberiness: Use a meat thermometer to ensure your shrimp reach an internal temperature of 120°F; overcooking can lead to a tough texture.
Choose Fresh Ingredients: Opt for fresh shrimp, crisp romaine, and quality dressing to elevate the flavors of your Grilled Shrimp Caesar Wraps.
Customize Your Wrap: Mix and match veggies or dressings to suit your taste—adding bell peppers or substituting yogurt-based dressing for a lighter option.
Prep Ahead: To streamline meal prep, store shrimp, lettuce, and dressing separately until you’re ready to assemble your wraps for maximum freshness.
Enjoy with a Side: Pair your wraps with a light salad or garlic bread for a complete meal that enhances the flavors of your Grilled Shrimp Caesar Wraps.
How to Store and Freeze Grilled Shrimp Caesar Wraps
Fridge: Store assembled wraps wrapped in plastic wrap or foil for up to 2 days, but keep the dressing separate to maintain crispness.
Freezer: For longer storage, freeze individual components—grilled shrimp and tortillas in airtight containers—for up to 3 months. Assemble fresh when ready to enjoy!
Reheating: Thaw shrimp in the fridge overnight, then reheat gently in a skillet over low heat until warmed through. Avoid reheating in the microwave to prevent rubbery shrimp.
Meal Prep Tip: Keep ingredients (shrimp, lettuce, tortillas) stored separately in the fridge to ensure your Grilled Shrimp Caesar Wraps taste fresh when you’re ready to eat!
What to Serve with Grilled Shrimp Caesar Wraps
The perfect accompaniment can elevate your Grilled Shrimp Caesar Wraps into a delightful feast that tantalizes your taste buds.
-
Garlic Butter Potatoes: Creamy and flavorful, these perfectly roasted potatoes add a touch of indulgence while balancing the freshness of your wraps.
-
Chilled Cucumber Salad: Crisp cucumbers dressed in tangy vinegar create a refreshing contrast that complements the rich flavors of Caesar dressing.
-
Sweet Potato Fries: Crispy, sweet fries offer a delightful crunch and a hint of sweetness, making for a satisfying side that pairs beautifully with shrimp.
-
Quinoa Salad: Nutty quinoa mixed with colorful vegetables provides a protein-packed, wholesome addition that enhances the nutrition of your meal.
-
Fruit Skewers: Bright, juicy fruit skewers add a burst of sweetness and color to your table, perfect for balancing the savory elements of your wrap.
-
Sparkling Lemonade: This fizzy, citrusy drink is a refreshing companion that cuts through the richness of the wrap, ensuring a delightful dining experience.
Grilled Shrimp Caesar Wraps Recipe FAQs
How do I choose the best shrimp for my wraps?
Absolutely! When selecting shrimp, look for fresh shrimp with a slight sea breeze scent and firm texture. If using frozen, ensure they’re well-frozen without any frost or ice crystals, indicating they were well-stored. Extra-large shrimp work best for grilling, as they’re juicy and flavorful!
How do I store leftover Grilled Shrimp Caesar Wraps?
Very good question! Store any assembled wraps wrapped tightly in plastic wrap or aluminum foil for up to 2 days in the refrigerator. To maintain the freshness and crunch of the lettuce, I recommend keeping the dressing stored separately until you’re ready to enjoy.
Can I freeze the components of Grilled Shrimp Caesar Wraps?
Definitely! To freeze, place the grilled shrimp and tortillas in airtight containers for up to 3 months. For optimal enjoyment, store romaine lettuce and dressing separately. When you’re ready to indulge, thaw the shrimp in the refrigerator overnight and assemble your wraps fresh!
What if my shrimp feels rubbery after grilling?
If your shrimp turns rubbery, it’s likely due to overcooking. To prevent this, always check the internal temperature; shrimp should reach 120°F. During grilling, keep a close eye on them and remove them from the heat once they’ve turned pink and opaque, usually just about 3-4 minutes per side.
Are Grilled Shrimp Caesar Wraps suitable for different dietary needs?
Absolutely! To cater to various diets, swap the shrimp for grilled chicken or tofu for a vegetarian option. For dairy-free alternatives, nutritional yeast can replace Parmesan cheese, and using gluten-free tortillas makes this wrap accessible for those avoiding gluten. There’s something for everyone!
Can I customize the veggies in my Grilled Shrimp Caesar Wraps?
Yes, indeed! The more the merrier! If you’re looking to add extra nutrition, consider incorporating sliced bell peppers, avocado, or even spinach in place of romaine. Mix and match according to your preferences to create a wrap that suits your taste buds perfectly!
Grilled Shrimp Caesar Wraps for a Fresh Flavor Boost
Ingredients
Equipment
Method
- Marinate the shrimp in a mixture of olive oil, garlic powder, and paprika for 10-15 minutes.
- Preheat your grill to medium-high heat, about 375°F to 400°F.
- Thread the marinated shrimp onto skewers and grill for 3-4 minutes on each side until pink and opaque.
- Remove the shrimp from the grill and let them rest briefly.
- Lay tortillas flat and layer with romaine lettuce, Caesar dressing, and grilled shrimp.
- Optionally, add bacon bits or croutons on top.
- Roll up the wraps tightly and slice in half before serving.
- Serve immediately, or store components separately if meal prepping.
Leave a Reply